There are few things more comforting and utterly delicious than a stack of warm, golden classic homemade waffles. That first bite – the delicate crispness of the exterior giving way to a soft, airy, fluffy interior – is pure breakfast heaven. But let’s be honest, achieving that perfect texture at home can sometimes feel like chasing a mythical creature. Have you ever whipped up a batch only to find them dense, heavy, or worse, turning soggy the moment they leave the waffle iron? I’ve been there!
For years, I tinkered, experimented, and yes, produced my fair share of less-than-perfect waffles. But through trial and error, I finally landed on a straightforward method and a balanced classic homemade waffle recipe that delivers consistently outstanding results. These aren’t just good waffles; they’re guaranteed fluffy on the inside and wonderfully crispy on the outside, every single time. And the best part? They’re surprisingly easy to make, coming together in just about 30 minutes from start to first bite!
Why You’ll Fall in Love with This Waffle Recipe
This isn’t just another waffle recipe; it’s the waffle recipe you’ll keep coming back to. Why? Because it consistently nails the two most important elements:
- Unbeatable Texture: Say goodbye to dense, rubbery waffles! This recipe focuses on techniques that ensure a light, airy, fluffy interior contrast beautifully with that essential, shatteringly crisp exterior.
- Simplicity: You don’t need fancy ingredients or complicated steps. This recipe uses pantry staples and a simple mixing method that’s easy for anyone to follow.
- Speed: With just 10 minutes of prep, you can be enjoying perfect homemade waffles in about half an hour. Ideal for lazy weekend mornings or even a quick weeknight treat.
- Versatility: These waffles are the perfect canvas for all your favorite toppings, from classic maple syrup and berries to more adventurous pairings.
Gathering Your Ingredients for Fluffy, Crisp Waffles
The magic of these classic homemade waffles lies in a simple combination of everyday ingredients, carefully balanced to achieve that sought-after fluffy and crispy texture. Think of these components as your building blocks, each playing a crucial role in the final outcome. Here’s what you’ll need:
- All-Purpose Flour (1 and 1/2 cups): The structural foundation of our waffles. Standard all-purpose flour works beautifully, providing just enough gluten development for structure without making the waffles tough, especially when combined with our specific mixing technique.
- Baking Powder (3 and 1/2 teaspoons): This is your primary leavening agent and perhaps the most critical ingredient for achieving that incredible fluffiness. The generous amount here reacts with the liquid and heat in the waffle iron, creating bubbles that lift the batter and make the waffles light and airy. Ensure your baking powder is fresh for maximum leavening power!
- White Sugar (1 tablespoon): Just a touch of sugar does more than add sweetness. It aids in browning and contributes to that lovely crispy exterior texture as the sugar caramelizes slightly on the hot iron.
- Salt (1/2 teaspoon): A little salt goes a long way in enhancing all the other flavors and balancing the sweetness. Don’t skip it!
- Milk (1 and 1/4 cups): Provides the necessary liquid to bring the batter together and activates the baking powder. Whole milk adds a touch more richness, but any milk variety you have on hand will work.
- Large Egg (1 large): Acts as a binder, holding the ingredients together, and also contributes to the richness and structure of the waffle. Using a large egg ensures the right balance in this recipe.
- Melted Unsalted Butter or Vegetable Oil (1/3 cup): Fat is essential for flavor, tenderness, and crucially, for achieving a truly crispy exterior. Melted butter offers a wonderful classic flavor, while vegetable oil can sometimes produce a slightly crisper result. The choice is yours! Using unsalted butter gives you control over the overall saltiness.
- Vanilla Extract (1 teaspoon): Adds a warm, aromatic depth of flavor that complements the simple ingredients beautifully. Don’t underestimate the power of good vanilla!
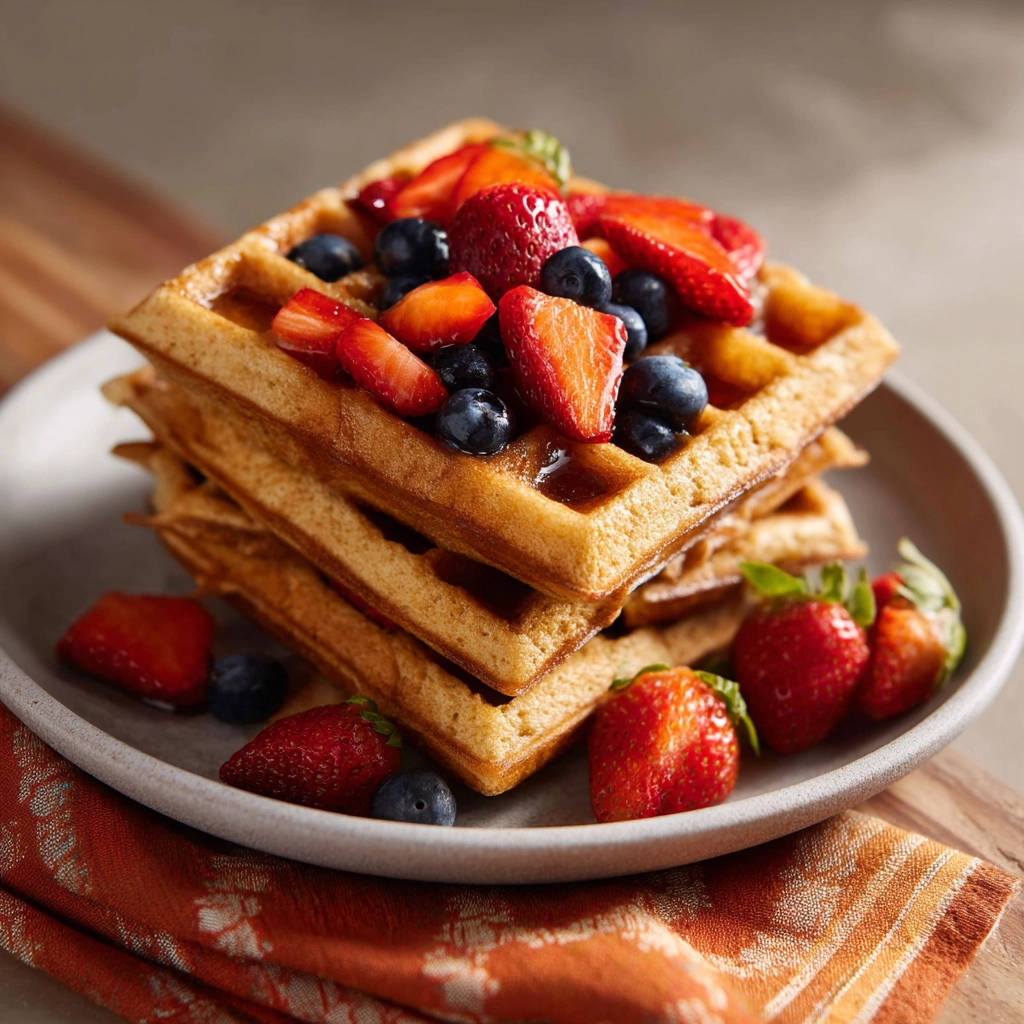
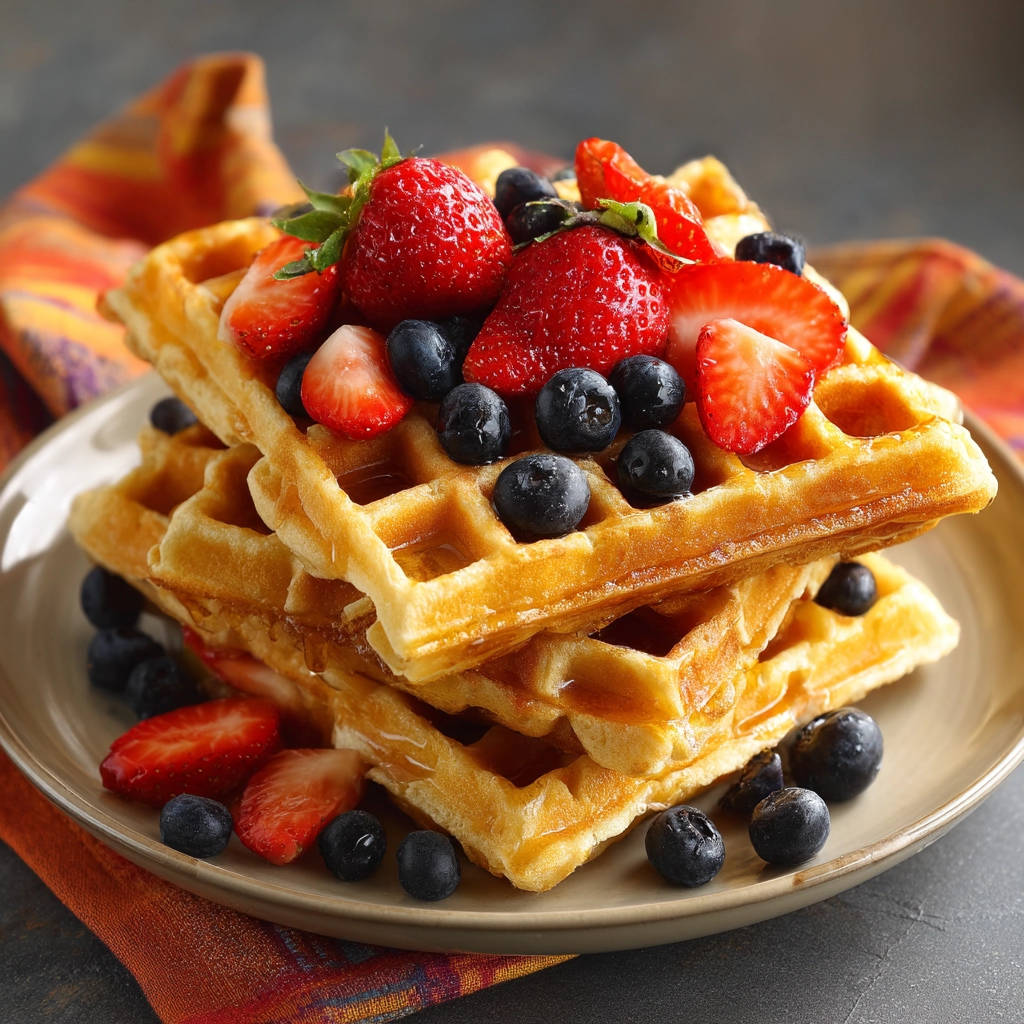
- Fresh Strawberries, sliced, for serving: One of the classic, fresh toppings that adds natural sweetness and a pop of color.
- Fresh Blueberries for serving: Another fantastic berry option, bringing their own burst of flavor.
- Maple Syrup for serving: The quintessential waffle topping. Use real maple syrup for the best flavor experience!
Crafting Your Fluffy & Crisp Waffles: Step-by-Step Mastery
Ready to make waffle magic happen? This process is designed for ease and maximum texture payoff. Follow these steps closely, paying attention to the little details, and you’ll be rewarded with waffles that are the envy of any breakfast table.
-
Ignite the Crispness (Preheat Your Waffle Iron): Before you even think about mixing batter, plug in and preheat your waffle iron. This is not a step to rush or skip! Refer to your manufacturer’s instructions for the specific setting and time needed. A properly hot waffle iron is absolutely crucial for two main reasons: it prevents the waffles from sticking to the plates, and it creates that immediate thermal shock needed to develop a crispy crust while the inside stays tender. You’ll often see a light or hear a beep when it’s ready.
-
Marry the Dry Ingredients: In a spacious large bowl, combine your dry powerhouses: the all-purpose flour, baking powder, sugar, and salt. Grab a whisk and give them a good whisking. This isn’t just about mixing; it helps to aerate the flour and ensures the baking powder and salt are evenly distributed throughout. Even distribution means even leavening and consistent flavor in every bite.
-
Unite the Wet Ingredients: Now, in a separate medium bowl, gather your liquids and flavorings. Whisk together the milk, the large egg, your choice of melted unsalted butter or vegetable oil, and the vanilla extract. Whisk until everything is well combined and the egg is fully incorporated into the liquids. This ensures the wet components are ready to be smoothly integrated with the dry.
-
The Gentle Marriage (Combining Wet and Dry): Here’s where the magic happens, and where many waffle dreams go awry. Pour the entire bowl of wet ingredients directly into the large bowl containing the dry ingredients. Now, take a whisk or a spatula and begin to stir. The key word here is gently. Stir just until the dry ingredients are just moistened and combined with the wet. It’s okay – in fact, it’s preferable – if you see a few small lumps of flour remaining. Resist the urge to whisk until the batter is perfectly smooth! Overmixing develops the gluten in the flour, leading to tough, chewy, and dense waffles instead of the light, fluffy ones we’re aiming for. Gentle mixing is the secret handshake to waffle heaven.
-
Prepare the Surface (Grease the Iron): Even if your waffle iron boasts a “non-stick” surface, a light application of grease is highly recommended, especially for the first waffle. You can use cooking spray or a brush dipped in melted butter or oil. This acts as insurance against sticking and, like the initial preheating, significantly contributes to achieving a beautiful golden-brown and crispy exterior. Make sure to grease it while it’s hot for best results.
-
Cook to Golden Perfection: Now for the main event! Open your preheated, lightly greased waffle iron. Pour the recommended amount of batter onto the center of the lower grid. The amount will vary depending on your specific waffle iron model – check your manual if unsure. Don’t overfill, as the batter will expand! Gently close the lid. Cook for the time suggested by your waffle iron manufacturer, or until the waffle is a deep golden brown and, importantly, steaming stops significantly or completely. The cessation of steam is a visual cue that much of the moisture has evaporated from the waffle, which is a key factor in getting that perfect crispness.
-
Carefully Retrieve and Repeat: Once cooked, use a non-metal utensil (like a silicone spatula) to carefully lift the finished waffle from the iron. Repeat the greasing step for each subsequent waffle if needed, and continue cooking the remaining batter until it’s all used up.
-
Serve Immediately for Peak Crispness: The absolute best way to enjoy a crispy waffle is the moment it comes off the iron. Stack them briefly if you must, but serve them while they are hot and their exteriors are at their crispiest peak. Pile on your desired toppings and dig in!
Pro Tips for Waffle Perfection Every Time
Making great waffles is straightforward with this recipe, but a few extra tips can elevate your results from great to truly exceptional. Master these pointers, and you’ll be a waffle whisperer in no time!
- Don’t Overmix! (It Bears Repeating): This is the most crucial tip. Lumpy batter is happy batter when it comes to waffles. Overmixing develops gluten, leading to tough, dense waffles. Stir just until the dry ingredients are incorporated. Seriously, stop stirring the moment you don’t see streaks of dry flour.
- Hot Iron is King: Ensure your waffle iron is fully preheated before adding any batter. A hot iron ensures immediate crisping on contact and prevents sticking. If your first waffle isn’t crispy, your iron might not have been hot enough. Give it another couple of minutes before the second one.
- Greasing Matters: Even top-of-the-line non-stick irons benefit from a light application of cooking spray or melted butter or oil before each waffle (or at least the first one). This insurance step guarantees easy release and promotes a beautiful golden crust.
- Listen and Look: Waffle irons often signal when they’re done (lights, beeps), but also pay attention to the steam. When the steam significantly reduces or stops, it’s a good indicator that the waffle is cooked through and has released sufficient moisture to be crispy. The color should be golden brown, not just pale yellow.
- Don’t Peek Too Early: Opening the waffle iron lid too soon can cause the waffle to split or stick. Let it cook undisturbed until the main cooking time is nearly up or your iron signals it’s ready.
- Crisping After Cooking (Optional): If you need to cook a batch and serve them all at once, you can keep cooked waffles warm and help maintain crispness by placing them directly on a wire rack set on a baking sheet in a preheated oven at a low temperature (around 200°F / 90°C). Avoid stacking them on a plate, which traps steam and makes them soggy.
- Ingredient Temperature: Using room temperature milk and egg can sometimes help create a slightly smoother batter and more even cooking, but it’s not strictly necessary for this recipe to be successful.
Perfect Pairings: What to Serve With Your Classic Waffles
These waffles are fantastic on their own, but they truly shine with the right accompaniments. While the recipe calls for fresh strawberries, fresh blueberries, and classic maple syrup, the possibilities are endless! Here are some ideas:
- More Fresh Fruit: Sliced bananas, raspberries, or a mixed berry compote.
- Creamy Delights: A dollop of whipped cream (homemade or store-bought) or a scoop of vanilla ice cream for a dessert-like treat.
- Nutty Crunch: Chopped nuts like pecans or walnuts add great texture.
- Sweet Sauces: Chocolate sauce, caramel sauce, or a fruit coulis.
- Savory Sides: If you’re feeling the sweet and savory vibe, waffles pair wonderfully with a side of bacon. For another breakfast favorite, you might consider making some Fluffy Homemade Biscuits alongside your waffles. Or, if you’re exploring different waffle ideas, you might be interested in our Savory Chili Waffles recipe for a different kind of meal entirely!
Your Classic Homemade Waffle Questions Answered (FAQ)
Let’s address some common questions you might have about making these delicious waffles.
Can I make the waffle batter ahead of time?
While you can make the batter ahead and store it in the refrigerator for a day or two, it’s generally best to make it just before cooking. Baking powder starts to react once it gets wet, so letting the batter sit too long will reduce its leavening power, potentially resulting in slightly less fluffy waffles. If you do make it ahead, give it a gentle stir (do not whisk vigorously) before using.
Why weren’t my waffles crispy?
There are a few potential culprits! The most common reasons are: the waffle iron wasn’t hot enough when you added the batter, you didn’t use enough fat (melted butter or oil) in the batter, or you didn’t cook them long enough (they should be golden brown and steaming should have significantly reduced). Also, stacking hot waffles traps steam and makes them soggy – make sure to serve immediately or place on a wire rack.
Why were my waffles dense or tough?
Almost always, dense or tough waffles are the result of overmixing the batter. Remember, a few lumps are okay! Stir gently until just combined. Overmixing develops gluten, leading to a chewy texture you don’t want in a fluffy waffle.
Can I substitute the milk for a dairy-free alternative?
Yes, you can typically substitute dairy milk with a non-dairy alternative like almond milk, soy milk, or oat milk in the same quantity. The results should be very similar in terms of texture and crispness.
Can I make these gluten-free?
This specific recipe is designed for all-purpose flour. Converting it to be gluten-free would require substituting the flour with a gluten-free all-purpose blend, likely adding a binder like xanthan gum, and potentially adjusting liquid slightly. Results may vary, and it would be a different recipe development process.
Can I use oil instead of butter?
Absolutely! The recipe provides this option. Melted unsalted butter adds a lovely richness and classic flavor, while vegetable oil can sometimes lead to a slightly crispier waffle exterior. Use whichever you prefer or have on hand.
Can I double or triple this recipe?
Yes, this recipe can easily be doubled or tripled to feed a larger crowd. Just make sure you have bowls large enough for mixing!
Enjoy Your Homemade Waffles!
There you have it – the simple secrets to crafting classic homemade waffles that are guaranteed to be perfectly fluffy on the inside and wonderfully crispy on the outside. Forget those disappointing, store-bought imposters. This recipe is your ticket to breakfast (or brinner!) bliss.
Whipping up a batch is a rewarding experience, filling your kitchen with that irresistible aroma. Whether you top them with the suggested berries and syrup or get creative with other toppings, these waffles are sure to become a family favorite. Don’t hesitate to experiment with different additions like chocolate chips or a sprinkle of cinnamon in the batter once you’ve mastered the basic technique!
Give this recipe a try this week! I’d love to hear how yours turn out and what your favorite toppings are. Leave a comment below and let me know!
Classic Homemade Waffles

Ingredients
- 1 and 1/2 cups all-purpose flour
- 3 and 1/2 teaspoons baking powder
- 1 tablespoon white sugar
- 1/2 teaspoon salt
- 1 and 1/4 cups milk
- 1 large egg
- 1/3 cup melted unsalted butter or vegetable oil
- 1 teaspoon vanilla extract
- Fresh strawberries, sliced, for serving
- Fresh blueberries for serving
- Maple syrup for serving
Directions
- Preheat your waffle iron according to the manufacturer’s instructions. This is key for crispness and preventing sticking.
- In a large bowl, whisk together the flour, baking powder, sugar, and salt.
- In a separate medium bowl, whisk together the milk, egg, melted butter or oil, and vanilla extract.
- Pour the wet ingredients into the dry ingredients. Stir together with a whisk or spatula until just combined. A FEW LUMPS ARE OKAY. Do not overmix the batter; overmixing develops gluten, which results in tough, dense waffles. This gentle mixing is crucial for a fluffy interior.
- Lightly grease the preheated waffle iron with cooking spray or melted butter, even if it’s non-stick. A properly greased and hot iron ensures they don’t stick and helps create that crispy exterior.
- Pour the recommended amount of batter onto the hot waffle iron. Close the lid and cook for the time specified by your waffle iron, or until golden brown and steaming stops. The steam indicates the moisture is leaving the waffle, contributing to crispness.
- Carefully remove the cooked waffle from the iron. Repeat with the remaining batter.
- Serve the waffles immediately while hot and crispy, topped with sliced strawberries, blueberries, and maple syrup as desired.