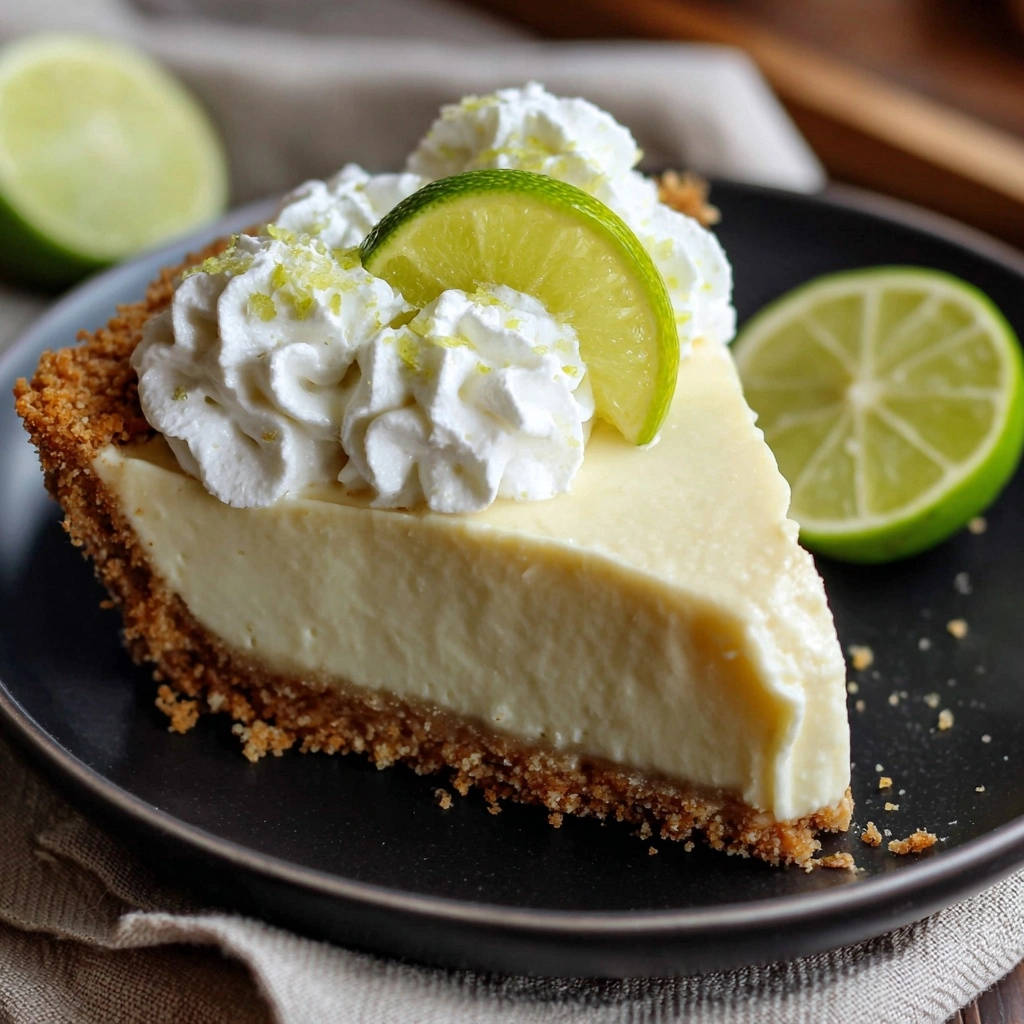
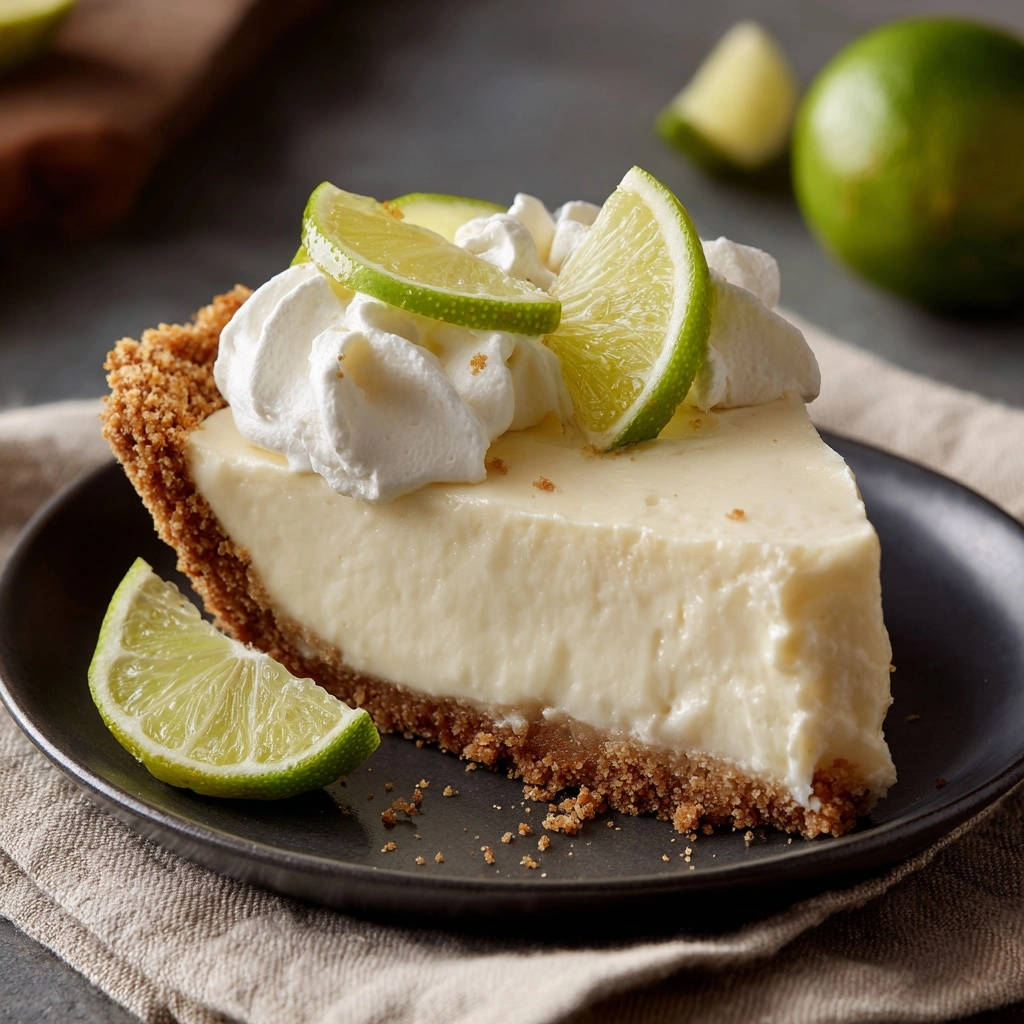
There is nothing more frustrating than slicing into a beautiful Classic Key Lime Pie only to watch the filling immediately slump and run across the plate. I spent years perfecting the technique to avoid that runny mess, and the solution lies in one simple, guaranteed firm-set secret.
This recipe provides that velvety texture and perfect structural integrity every time, ensuring you deliver a clean, crisp, and truly iconic slice that showcases that delightful balance of tartness and sweet creaminess.
Why This Classic Key Lime Pie Earns Rave Reviews
Solving the Runny Pie Problem Once and For All
The key to preventing a watery pie filling is creating a robust, structural base before baking.
Our method focuses on an aggressive whisking technique combined with the binding power of fresh egg yolks, ensuring the filling sets beautifully firm during the brief bake and subsequent chill.
Quick Prep, Maximum Impact
This dessert requires minimal hands-on time, making it an excellent choice for easy entertaining.
The entire filling bakes in just 15 minutes, allowing you to focus on the essential chilling period that locks in the creamy texture.
A Pure and Tangy Flavor Profile
The best key lime pies strike a perfect harmony between intense lime tartness and the luxurious sweetness of condensed milk.
We use fresh zest and juice to deliver that vibrant, authentic flavor that distinguishes this key lime dessert from all others.
Choosing the Right Ingredients for Authentic Flavor
The Foundation: Achieving the Perfect Graham Cracker Crust
A great crust starts with the right ratio: the melted butter must fully saturate all the graham cracker crumbs and sugar.
The most important part is firmly pressing the mixture into the pie plate-this compression prevents crumbling when slicing and creates a robust base.
Key Lime Juice vs. Regular Lime Juice: Does it Matter?
Fresh key limes offer a unique, highly aromatic tartness that is the signature of an authentic Classic Key Lime Pie.
However, if true key limes are unavailable, high-quality bottled key lime juice or fresh Persian (regular) lime juice works, though the flavor profile will be slightly sharper.
The Power of Egg Yolks and Condensed Milk
The foundation of a firm pie is the non-bake reaction between the acidic lime juice and the proteins in the dairy and egg yolks.
Aggressively whisking the condensed milk and yolks ensures maximum protein activation, providing the necessary structure before the acid is introduced and the brief bake stabilizes it.
The Secret Step: Achieving a Beautifully Firm, Sliceable Set
The Critical Three-Minute Whisk
Before adding the lime juice, you must combine the condensed milk and egg yolks and whisk vigorously for a full three minutes.
This mechanical action incorporates air and begins the structural development, changing the mixture from transparent yellow to an opaque, pale, slightly thickened cream.
Stabilizing the Set: The Essential Short Bake
The 15-minute bake is not for cooking the pie but for setting the edges.
This heat exposure locks the structural components created during the whisking phase, preventing runniness while ensuring the center remains creamy and finishes setting during the chill.
Step-by-Step: Your Guide to Key Lime Pie Perfection
-
Prepare the Pressed and Pre-Baked Crust:
Ensure the crust is tightly packed into the pie plate-this prevents crumbling when slicing. Baking for exactly 8 minutes helps set the structure and prevents a soggy bottom.
-
Create the Guaranteed Firm Base:
Combine the condensed milk and egg yolks. Set a timer and whisk aggressively for three full minutes. Stop when the mixture is noticeably pale and slightly airy.
-
Integrate the Acid and Zest:
Slowly fold in the fresh lime juice and zest. The mixture will instantly thicken as the acid reacts. Do not overmix this step; just mix until smooth.
-
Bake to Lock the Filling:
Pour the filling into the completely cooled crust. Bake for exactly 15 minutes. Check the center for a slight jiggle, indicating a perfect set.
-
Cooling and Mandatory Chill Time:
Cool on a rack for 60 minutes, then move to the refrigerator. Note that 3-4 hours is the minimum, but chilling overnight yields the absolute best, most sliceable texture.
Crafting the Perfect Whipped Cream Topping and Presentation
Stiff Peaks Every Time: Whipped Cream Essentials
Always ensure your bowl, whisk, and heavy cream are chilled before starting-cold equipment aids in better aeration and stabilization.
Use powdered sugar instead of granulated sugar, as the cornstarch content helps stabilize the final product and prevents weeping.
When to Add the Topping (Make-Ahead Strategy)
For the best presentation and texture, only add the whipped cream immediately before serving the Classic Key Lime Pie.
If whipped cream sits on the acidic filling for too long, it can start to break down and weep moisture, damaging the pie’s aesthetic.
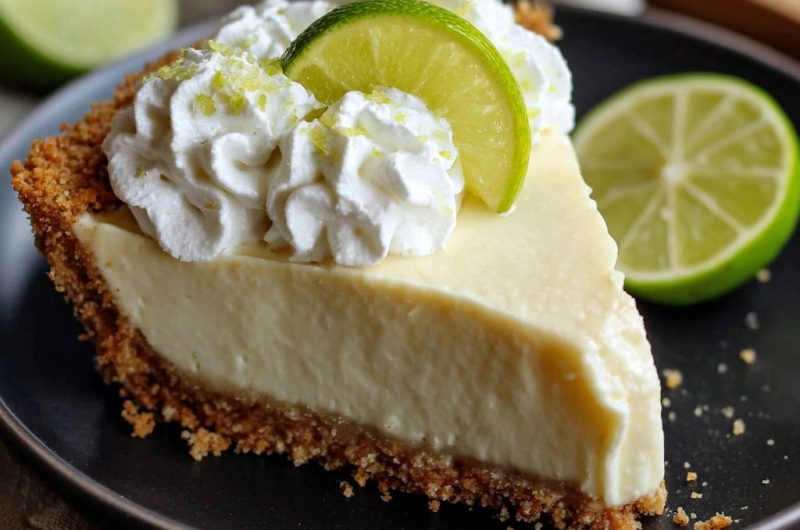
Final Garnishes for Visual Impact
A few key finishing touches elevate this dessert from good to gourmet.
Garnish generously with fresh lime zest, thin lime wheels, or consider making simple candied lime slices for an elegant touch.
Expert Tips and Troubleshooting for Flawless Results
Help! My Pie Filling is Still Runny After Chilling
This almost always indicates insufficient whisking time of the condensed milk and yolks (Step 2).
The chemical reaction that binds the pie filling requires both that structural base and ample time in the refrigerator (at least 4 hours) to fully lock the set.
The Case of the Cracked Filling
Cracking occurs when the pie cools too rapidly, causing the surface to contract quickly while the interior is still hot.
Avoid opening the oven door during baking and allow the pie to cool slowly on a wire rack at room temperature before refrigerating.
Pro Tip: The Water Bath Trick for Clean Slices
For bakery-quality slices, prepare a tall glass of hot water and a clean towel.
Dip your knife into the hot water, wipe it completely dry, and then make your slice. Repeat this process for every single cut to ensure perfectly clean edges.
Classic Key Lime Pie FAQs Answered
How Long Does Homemade Key Lime Pie Last?
Properly refrigerated, this pie remains delicious for 3 to 4 days.
Ensure it is covered loosely to prevent moisture condensation, especially if stored with the whipped cream topping already applied.
Can I Make This Pie Gluten-Free?
Absolutely. Simply substitute the traditional graham cracker crumbs with a gluten-free alternative.
Crushed gluten-free vanilla wafer cookies or a crust made from almond flour mixed with butter and sugar work wonderfully for this tangy dessert.
Can I Freeze Key Lime Pie?
Yes, key lime pie freezes very well, but only freeze the baked pie filling and crust-never the whipped cream topping.
Wrap the chilled pie tightly in plastic wrap, then foil, and freeze for up to one month. Thaw overnight in the refrigerator before adding the fresh topping.
Mastering the perfect Classic Key Lime Pie is now within your reach, thanks to this firm-set secret. The extra attention paid during the three-minute whisk and the brief, stabilizing bake guarantees a beautiful slice every time.
Share this recipe with friends who dread runny pie filling, and let me know in the comments how beautifully sliceable your final result was!
Classic Key Lime Pie
Course: DessertCuisine: American CuisineDifficulty: easy8
servings20
minutes15
minutes240
minutesAmerican Cuisine
Ingredients
For the Crust:
1 and 1/2 cups graham cracker crumbs
1/4 cup granulated sugar
6 tablespoons unsalted butter, melted
For the Filling:
1 (14 ounce) can sweetened condensed milk
3 large egg yolks
1/2 cup fresh key lime juice (or regular lime juice)
1 tablespoon lime zest
For the Topping:
1 cup heavy whipping cream
2 tablespoons powdered sugar
1/2 teaspoon vanilla extract
Directions
- Prepare the Crust: Preheat oven to 350 degrees F. In a medium bowl, combine the graham cracker crumbs and sugar. Pour in the melted butter and mix thoroughly until all crumbs are moistened. Press the mixture firmly into the bottom and up the sides of a 9-inch pie plate. Bake the crust for 8 minutes. Remove from oven and allow to cool completely while preparing the filling.
- Create the Guaranteed Firm Set Base: In a large bowl, whisk together the sweetened condensed milk and the egg yolks. It is absolutely crucial that you whisk this mixture aggressively for 3 full minutes until the mixture thickens slightly and turns pale yellow. This process creates the structural base that prevents the final filling from becoming runny.
- Integrate the Flavor: Slowly whisk in the lime juice and the lime zest until fully incorporated and smooth. The mixture will thicken noticeably due to the acidity reacting with the condensed milk and yolks. Do not overmix once the juice is added.
- Bake to Lock the Set: Pour the filling into the cooled crust. Place the pie in the 350 degree F oven and bake for exactly 15 minutes. The edges of the filling should look set, but the center should still have a slight jiggle. This brief bake is essential for stabilizing the set.
- Cool and Chill: Remove the pie from the oven and allow it to cool completely on a wire rack for about 1 hour. Once cool, cover the pie loosely with plastic wrap and refrigerate for a minimum of 3 to 4 hours, or preferably overnight, to completely lock in the firm texture before slicing.
- Finish and Serve: Before serving, prepare the topping. Beat the heavy cream, powdered sugar, and vanilla extract together until stiff peaks form. Top each slice generously with whipped cream and a sprinkle of extra lime zest or a lime slice.
Notes
- Ensure you whisk the condensed milk and yolks aggressively for 3 full minutes to guarantee a firm, non-runny set.