BrüMate Era 40 oz Tumbler with Handle and Straw | 100% Leakproof Insulated Water Bottle Tumbler with Lid and Straw | Made of Stainless Steel | Cup Holder Friendly | 40oz (Navy Polka Dots)
$47.99 (as of November 2, 2025 08:53 GMT +00:00 - More infoProduct prices and availability are accurate as of the date/time indicated and are subject to change. Any price and availability information displayed on [relevant Amazon Site(s), as applicable] at the time of purchase will apply to the purchase of this product.)
Socomi Thanksgiving Fall Table Runner Terracotta Cheesecloth Gauze Burnt Orange Boho Rustic Farmhouse 120 inch 10FT Cheese Cloth Runner for Wedding Party Baby Shower Home Decor Holiday Decorations
$7.99 (as of November 2, 2025 08:53 GMT +00:00 - More infoProduct prices and availability are accurate as of the date/time indicated and are subject to change. Any price and availability information displayed on [relevant Amazon Site(s), as applicable] at the time of purchase will apply to the purchase of this product.)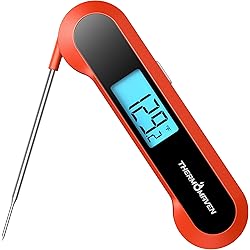
Professional 0.5 Sec Instant Read Meat Thermometer Digital, NIST Certified ±0.5℉ Accuracy, Auto Rotate Large LCD Display, 100% Waterproof Cooking Thermometer for Grill BBQ Smoker Oven Candy, Red
$15.99 (as of November 2, 2025 08:53 GMT +00:00 - More infoProduct prices and availability are accurate as of the date/time indicated and are subject to change. Any price and availability information displayed on [relevant Amazon Site(s), as applicable] at the time of purchase will apply to the purchase of this product.)
bella 2 Slice Slim Toaster, Fits-anywhere™ Kitchenware, 6 Setting Shade Control with Reheat & Cancel Buttons, Fits sourdough, 10” Long Slot, Anti Jam & Auto Shutoff, 900 Watt, Oatmilk
$24.99 (as of November 2, 2025 08:53 GMT +00:00 - More infoProduct prices and availability are accurate as of the date/time indicated and are subject to change. Any price and availability information displayed on [relevant Amazon Site(s), as applicable] at the time of purchase will apply to the purchase of this product.)
Astercook Sourdough Starter Kit with Round & Oval Banneton Bread Proofing Basket, Bread Sling, Starter Jar, Dough Whisk, Scrapers, Stencils, Cooling Rack & Bag Complete Sourdough Bread Baking Supplies
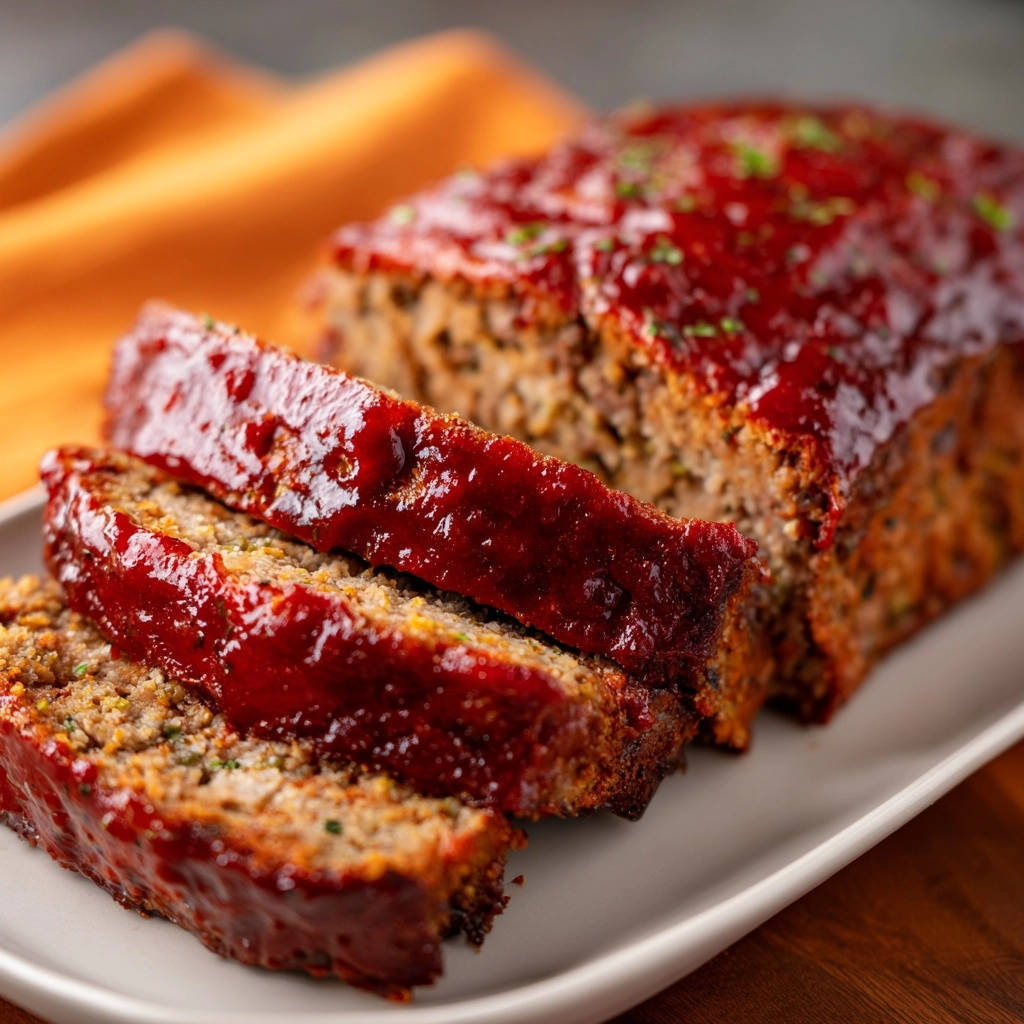
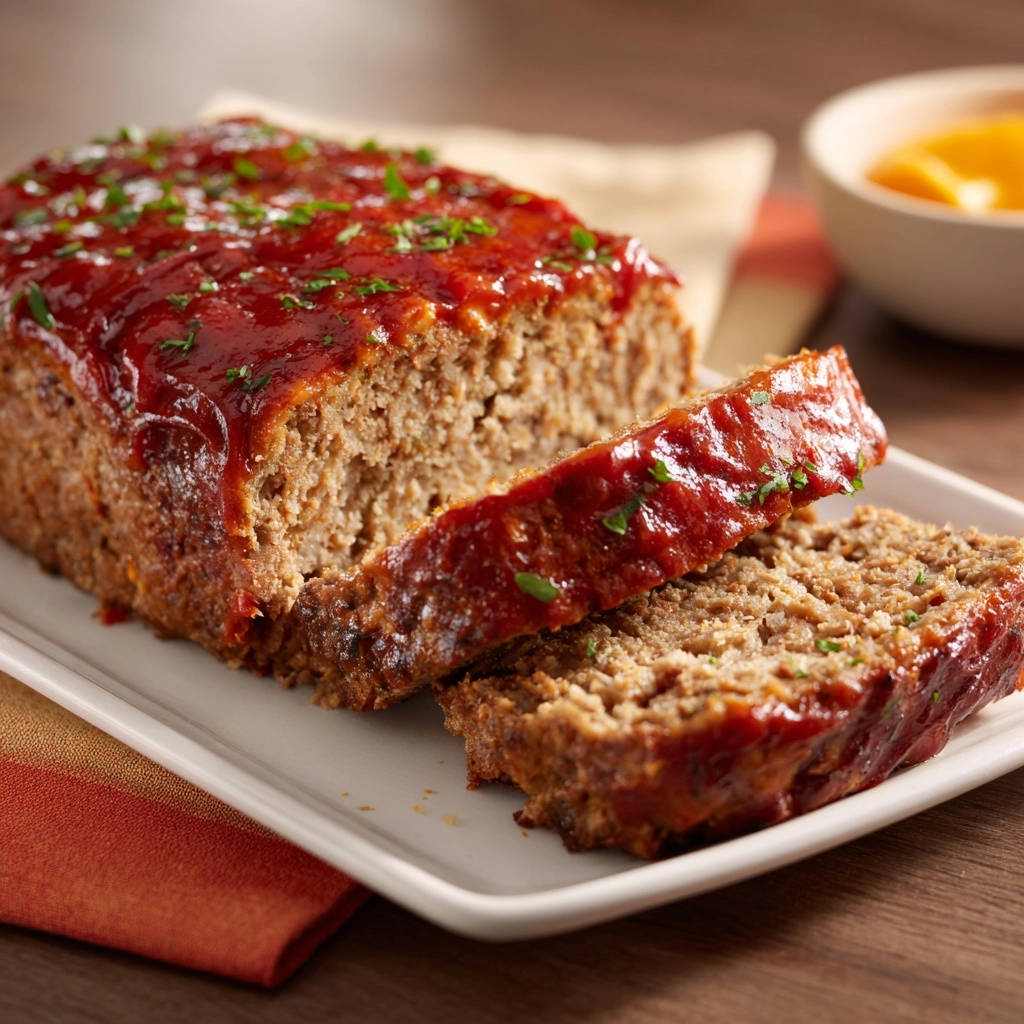
$39.99 (as of November 2, 2025 08:53 GMT +00:00 - More infoProduct prices and availability are accurate as of the date/time indicated and are subject to change. Any price and availability information displayed on [relevant Amazon Site(s), as applicable] at the time of purchase will apply to the purchase of this product.)For years, I chased that elusive, perfectly moist Classic Meatloaf, often ending up with a dry, crumbly disappointment. But I cracked the code! This recipe isn’t just another meatloaf; it’s a revelation that consistently delivers tender, juicy results, making it the ultimate comfort food for any family dinner.
Why This Classic Meatloaf Recipe Is Your New Go-To
Say Goodbye to Dry, Crumbly Meatloaf
Many traditional meatloaf recipes fall short, resulting in a bland and dry texture. This Classic Meatloaf specifically tackles those issues head-on, ensuring every bite is moist and flavorful.
We focus on techniques that lock in moisture and prevent the dreaded crumbly texture. You’ll never settle for a dry meatloaf again after experiencing this version.
The Moisture-Locking Magic: Our Secret Techniques Revealed
Our recipe hinges on a few simple, yet incredibly effective, techniques. These aren’t complicated, but they are crucial for a truly tender meatloaf.
The “panade” made with breadcrumbs and milk traps juices, while gentle mixing prevents toughness. Finally, a vital resting period ensures all those delicious flavors redistribute evenly throughout your homemade meatloaf.
Family-Friendly Comfort, Effortlessly Delicious
There’s a reason Classic Meatloaf holds a special place at the dinner table. It’s hearty, satisfying, and appeals to nearly everyone, from picky eaters to gourmet palates.
This recipe balances incredible flavor with straightforward preparation, making it an ideal choice for busy weeknights or a comforting Sunday meal. It truly embodies the spirit of a comforting family dinner recipe.
Gather Your Arsenal: Ingredients for Juicy Perfection
The Heart of the Loaf: Choosing Your Ground Beef
Using 1.5 pounds of lean ground beef is ideal for this juicy meatloaf. A lean-to-fat ratio of 85/15 or 80/20 works beautifully, providing enough flavor without excessive grease.
Avoid extremely lean ground beef like 93/7, as it can result in a drier loaf. Look for bright red, fresh-smelling beef at your butcher or grocery store.
The Panade Powerhouse: Breadcrumbs & Milk Unleashed
The combination of 1/2 cup plain breadcrumbs and 1/2 cup milk creates our secret panade. This mixture is a moisture-trapping marvel, key to preventing a dry meatloaf.
The breadcrumbs soak up the milk, forming a paste that swells and holds onto moisture as the meatloaf bakes. This ensures a tender meatloaf texture throughout.
Flavor Builders: Aromatics, Herbs, and Savory Seasonings
Finely diced yellow onion and minced garlic provide an aromatic foundation, deepening the overall flavor. Their sweetness mellows during baking.
Worcestershire sauce adds a crucial umami depth, while salt and black pepper balance the savory notes. Fresh chopped parsley brightens the flavor and adds a touch of color to this homemade meatloaf.
Glaze Essentials: The Sweet, Tangy Crown
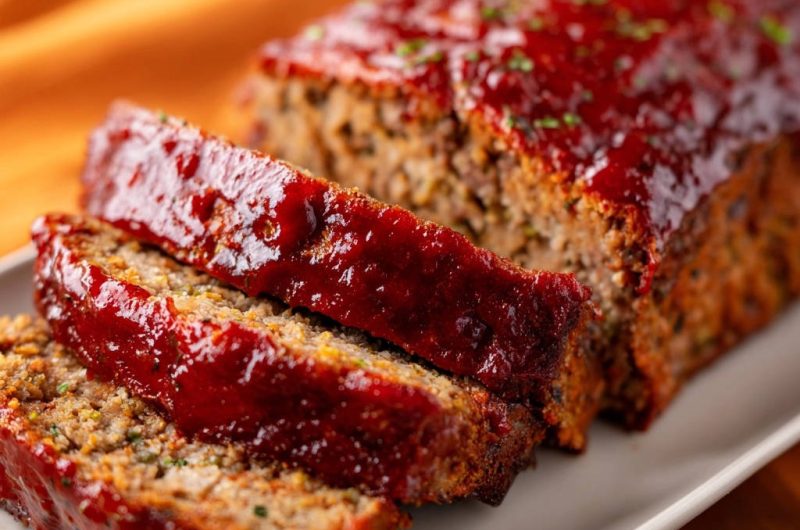
Our simple yet irresistible glaze combines 1/2 cup ketchup, 2 tablespoons brown sugar, and 1 teaspoon dry mustard. This trio creates a perfect sweet and tangy topping.
The glaze caramelizes beautifully in the oven, adding a vibrant finish and an extra layer of flavor to your Classic Meatloaf. It’s the perfect crown for your comfort food classic.
Essential Tools for Your Classic Meatloaf Adventure
Kitchen Gear for Seamless Preparation
You’ll need a large mixing bowl for combining the ingredients efficiently. Measuring cups and spoons are essential for accurate ingredient proportions, ensuring consistent results.
A standard loaf pan, typically 9×5 inches, is perfect for shaping. Alternatively, a baking sheet lined with parchment paper allows for a free-form meatloaf shape.
Why a Meat Thermometer is Your Best Friend
A reliable meat thermometer is absolutely non-negotiable for meatloaf perfection. It eliminates guesswork and guarantees your tender meatloaf is cooked to a safe temperature without being overdone.
Achieving an internal temperature of 160°F (71°C) ensures your meatloaf is both safe to eat and incredibly juicy. This single tool is your best defense against a dry result.
Crafting Your Classic Meatloaf: Step-by-Step Guide
-
Prepping for Success: Oven & Pan Setup
Start by preheating your oven to a steady 350°F (175°C). This ensures the meatloaf begins cooking evenly as soon as it enters the oven.
Lightly grease a 9×5-inch loaf pan or line a baking sheet with parchment paper if you prefer a free-form loaf. Proper preparation prevents sticking and makes cleanup easier.
-
The Panade: Our First Juicy Secret in Action
In a large mixing bowl, combine the 1/2 cup plain breadcrumbs and 1/2 cup milk. Stir them together briefly.
Let this mixture sit undisturbed for about 5 minutes. The breadcrumbs will fully absorb the milk, creating a thick, paste-like panade that is essential for trapping moisture in your homemade meatloaf.
-
Layering the Flavors: Adding Wet Ingredients
To the softened breadcrumb mixture, add the egg, finely diced onion, minced garlic, Worcestershire sauce, salt, pepper, and fresh chopped parsley.
Mix these ingredients thoroughly with a spoon or whisk until they are well combined. This ensures an even distribution of flavor throughout the entire loaf.
-
The Gentle Mix: Key to a Tender Classic Meatloaf
Add the 1.5 pounds of lean ground beef to the bowl with the breadcrumb mixture. Now, here’s a crucial step for a juicy meatloaf: use your hands to mix everything together.
Mix very gently, just until all ingredients are barely combined. Overworking the meat develops tough protein strands, leading to a dense, tough, and dry meatloaf. A light touch is paramount for tenderness.
-
Shaping Your Loaf: Pan or Free-Form
Transfer the mixed meatloaf mixture into your prepared loaf pan, gently pressing it in to form an even, compact loaf. Avoid compressing it too tightly.
If you’re opting for a free-form loaf on a baking sheet, shape the mixture into a neat loaf approximately 9×5 inches. Ensure uniform thickness for even cooking.
-
The First Glaze Application: Building Flavor
In a small separate bowl, whisk together the glaze ingredients: 1/2 cup ketchup, 2 tablespoons brown sugar, and 1 teaspoon dry mustard. Mix until smooth.
Spread about half of this delicious glaze evenly over the top of the formed meatloaf. This initial layer will bake in, starting to build that iconic sweet and tangy crust.
-
Initial Bake & The Second Glaze
Place the glazed meatloaf in the preheated oven and bake for 50 minutes. This allows the internal structure to set and flavors to meld.
After 50 minutes, carefully remove the meatloaf from the oven and spread the remaining glaze over the top. This second application creates a beautiful, caramelized finish.
-
Achieving Perfect Doneness: Internal Temperature is Key
Return the meatloaf to the oven and continue baking for another 20 to 25 minutes. The exact time will vary based on your oven and loaf thickness.
The ultimate test for a perfectly cooked and tender meatloaf is an internal temperature of 160°F (71°C) when measured with a meat thermometer. This prevents both undercooking and the dreaded overcooked dryness.
-
The Rest: The Ultimate Moisture Keeper Unveiled
Once your Classic Meatloaf reaches 160°F, remove it from the oven immediately. This next step is perhaps the most crucial for guaranteed juiciness.
Let the meatloaf rest in the pan for at least 10 minutes before slicing. This allows the internal juices to reabsorb and redistribute, ensuring every slice is incredibly moist and flavorful.
-
Slice, Garnish, and Savor
After resting, carefully slice your beautiful, juicy meatloaf into generous portions. It should hold together perfectly.
Serve hot, and if desired, garnish with a sprinkle of extra fresh chopped parsley for a pop of color and freshness. Enjoy your perfectly tender meatloaf!
Pro Tips & Expert Tricks for Meatloaf Perfection
Don’t Overmix – Seriously! A Crucial Reminder
I cannot stress this enough: gentle mixing is the cornerstone of a tender meatloaf. Overworking the ground beef develops the protein strands, making the final product tough and dense.
Mix just until the ingredients are combined; a few streaks of unmixed beef are better than a rubbery texture. Use a light hand and short, folding motions.
The Power of Resting: Unlocking Maximum Juiciness
The resting period is not optional; it’s a scientific necessity. As meat cooks, its fibers contract, pushing juices to the center.
When you let your Classic Meatloaf rest, these fibers relax, allowing the juices to flow back throughout the loaf. This step guarantees maximum moistness in every delicious slice.
Customizing Your Classic Meatloaf: Flavor Variations
Feel free to experiment with additional herbs like fresh thyme or rosemary for a different aromatic profile. A pinch of red pepper flakes can add a subtle kick.
For extra depth, try incorporating finely diced bell peppers or shredded carrots into the mixture. These additions enhance both flavor and texture in your homemade meatloaf.
Temperature Checks: Your Best Friend Against Dryness
A digital instant-read thermometer is the most reliable tool to ensure perfect doneness. Aim for 160°F (71°C) in the thickest part of the loaf.
Pulling the meatloaf out precisely at this temperature, followed by resting, prevents overcooking. This is your ultimate insurance policy against a dry, crumbly meatloaf.
Troubleshooting Common Meatloaf Mishaps
“Why is my Meatloaf Dry?”
Dryness is often caused by overcooking. Ensure you use a meat thermometer and pull the meatloaf at 160°F. Not resting the meatloaf can also lead to juices escaping, resulting in a drier texture.
Additionally, using extremely lean ground beef without enough fat for moisture, or overmixing the meat, can contribute to a dry result. Choose an 85/15 ratio and mix gently.
“My Meatloaf Crumbled!”
If your meatloaf crumbles, it might be due to a lack of proper binding. Ensure your breadcrumb and milk panade is fully absorbed and that the egg is well incorporated.
Slicing the meatloaf too soon before it has adequately rested can also cause it to fall apart. Allowing it to rest helps it firm up and hold its shape.
“The Glaze Burned!”
A burned glaze usually happens if it’s applied too early or the oven temperature is too high for too long. Our two-stage glazing method helps prevent this.
Ensure the second glaze application is during the final 20-25 minutes of baking. If you notice it browning too quickly, you can loosely tent the meatloaf with foil.
Serving Suggestions & Delightful Pairings
Classic Sides That Complement Every Bite
This juicy meatloaf pairs perfectly with creamy mashed potatoes, which are ideal for soaking up any extra glaze and savory juices. It’s a timeless combination.
Other fantastic sides include steamed green beans, buttered corn, or a simple crisp garden salad with a light vinaigrette. These additions create a balanced and satisfying comfort food classic meal.
Beyond Dinner: Creative Uses for Leftovers
Leftover Classic Meatloaf is incredibly versatile! Slice it thin for amazing meatloaf sandwiches, perhaps on toasted bread with a dollop of mayo or a slice of cheese.
You can also crumble it into a meatloaf hash with potatoes and onions for a hearty breakfast, or use it as a filling for tacos or quesadillas. Repurposing leftovers is a delicious way to extend the meal.
Storage & Make-Ahead Tips for Convenience
Storing Cooked Meatloaf Safely
Allow any leftover cooked Classic Meatloaf to cool completely before storing. Once cool, wrap it tightly in plastic wrap or aluminum foil, or place it in an airtight container.
Store your meatloaf in the refrigerator for up to 3-4 days. This ensures its freshness and prevents bacterial growth, keeping it safe for future enjoyment.
Freezing for Future Feasts
Cooked Classic Meatloaf freezes beautifully! Once completely cooled, wrap individual slices or the entire loaf tightly in plastic wrap, then an additional layer of aluminum foil.
Freeze for up to 3 months. To reheat, thaw overnight in the refrigerator, then warm in the oven at 300-325°F (150-160°C) until heated through, tented with foil to prevent drying.
Prepping Ahead of Time: Smart Meal Planning
Many components of this homemade meatloaf can be prepped in advance. Dice your onion and mince your garlic the day before and store them in the fridge.
You can also prepare the panade (breadcrumbs and milk) and the glaze ahead of time. Simply combine them when you’re ready to mix the meat. This streamlines your cooking process significantly.
Classic Meatloaf FAQs
Can I use ground turkey or chicken instead of beef?
Yes, you can substitute ground turkey or chicken, but be mindful of the fat content. Poultry tends to be leaner, so you might need to add a bit more moisture, like an extra tablespoon of milk, to prevent dryness.
Ensure you choose ground poultry with a higher fat percentage (e.g., 90/10) for the best results. The flavor profile will be lighter than a traditional beef Classic Meatloaf.
What’s the best way to prevent a greasy meatloaf?
To prevent a greasy meatloaf, start with lean ground beef (85/15 is excellent). This ratio provides flavor without excessive fat runoff.
Baking the meatloaf on a rack set inside a foil-lined baking sheet allows any excess fat to drip away. If using a loaf pan, you can carefully drain any accumulated grease about halfway through baking.
How do I know when my Classic Meatloaf is fully cooked without a thermometer?
While a meat thermometer is highly recommended for accuracy, visual cues can give you an indication. The glaze should be caramelized, and the exterior should be browned.
However, relying solely on visual cues risks overcooking or undercooking. The only way to truly guarantee a safe and juicy meatloaf is by checking its internal temperature.
Can I make this Classic Meatloaf recipe gluten-free?
Absolutely! To make this Classic Meatloaf gluten-free, simply substitute the plain breadcrumbs with a gluten-free alternative. Look for gluten-free breadcrumbs or use finely crushed gluten-free crackers.
Ensure all other ingredients, like Worcestershire sauce, are certified gluten-free, as some brands may contain hidden gluten. The panade method works just as effectively with GF options.
Ready to Impress? Share Your Juicy Classic Meatloaf!
You now possess the secrets to creating the most perfectly juicy and tender Classic Meatloaf, a true comfort food masterpiece. Gone are the days of dry, crumbly disappointments; welcome to a world of rich flavor and incredible texture.
Don’t just take my word for it-whip up this amazing meatloaf tonight and watch it become an instant family favorite. I can’t wait to hear how much you love it!
Classic Meatloaf
Course: Main CourseCuisine: American CuisineDifficulty: easy6
servings15
minutes1
hour60
minutesAmerican Cuisine
Ingredients
1.5 pounds lean ground beef
1/2 cup plain breadcrumbs
1/2 cup milk
1 large egg
1/2 cup finely diced yellow onion
2 cloves garlic, minced
1 tablespoon Worcestershire sauce
1/2 teaspoon salt
1/4 teaspoon black pepper
2 tablespoons fresh parsley, chopped (plus more for garnish)
For the Glaze:
1/2 cup ketchup
2 tablespoons brown sugar
1 teaspoon dry mustard
Directions
- Preheat your oven to 350 degrees F (175 C). Lightly grease a loaf pan or line a baking sheet with parchment paper if free-forming.
- This is the key to juiciness: In a large bowl, combine the breadcrumbs and milk. Let them sit for about 5 minutes until the breadcrumbs have fully absorbed the milk and softened into a paste. This creates a panade that traps moisture in the meatloaf.
- To the breadcrumb mixture, add the egg, finely diced onion, minced garlic, Worcestershire sauce, salt, pepper, and chopped parsley. Mix well to combine all ingredients evenly.
- Add the ground beef to the bowl. Now for the next juicy secret: Using your hands, gently mix all the ingredients together until just combined. Be careful not to overmix, as overworking the meat can lead to a dense, tough, and dry meatloaf. The lighter your touch, the juicier the result.
- Transfer the meat mixture to your prepared loaf pan, gently pressing it in to form an even loaf. If free-forming on a baking sheet, shape it into a loaf about 9×5 inches.
- In a small bowl, whisk together the glaze ingredients: ketchup, brown sugar, and dry mustard. Spread about half of the glaze evenly over the top of the meatloaf.
- Bake for 50 minutes. Remove the meatloaf from the oven and spread the remaining glaze over the top. Return to the oven and continue baking for another 20 to 25 minutes, or until an internal temperature of 160 degrees F (71 C) is reached. This is crucial for tenderness: Using a meat thermometer ensures it’s cooked through without being overcooked and dry.
- Once cooked, remove the meatloaf from the oven. The final touch for guaranteed juiciness: Let the meatloaf rest in the pan for at least 10 minutes before slicing. This allows the juices to redistribute throughout the loaf, keeping every slice incredibly moist and flavorful.
- Slice and serve hot, garnished with extra fresh parsley if desired.
Notes
- The panade (milk and breadcrumbs) and gentle mixing are key for juiciness. Don’t forget to rest the meatloaf before slicing!
Sok It CanSok Sleeve for Beer & Soda Insulated Neoprene Cover (Midnight Tropics, 12oz Slim Can Sleeve)
$3.50 (as of November 2, 2025 08:53 GMT +00:00 - More infoProduct prices and availability are accurate as of the date/time indicated and are subject to change. Any price and availability information displayed on [relevant Amazon Site(s), as applicable] at the time of purchase will apply to the purchase of this product.)
BOROHOUSE 10-Pack Glass Food Storage Containers with Tempered Lids – Borosilicate, Airtight, Oven-Safe (-4°F~950°F), BPA-Free, 4.4 & 1.6 Cup, Leak-Proof, Dishwasher Safe (Gray)
$55.99 (as of November 2, 2025 08:53 GMT +00:00 - More infoProduct prices and availability are accurate as of the date/time indicated and are subject to change. Any price and availability information displayed on [relevant Amazon Site(s), as applicable] at the time of purchase will apply to the purchase of this product.)
0.5 Sec Instant Read Meat Thermometer Digital with ±0.5℉ Precision, Food Thermometer for Cooking Kitchen Gadgets, Oven Grill Candy BBQ Essentials Accessories, Gifts for Him Dad Men Birthday, Red
$9.99 (as of November 2, 2025 08:53 GMT +00:00 - More infoProduct prices and availability are accurate as of the date/time indicated and are subject to change. Any price and availability information displayed on [relevant Amazon Site(s), as applicable] at the time of purchase will apply to the purchase of this product.)
YETI Rambler 14 oz Ceramic Lined Stackable Mug, Vacuum Insulated, Stainless Steel with MagSlider Lid, White
$35.00 (as of November 2, 2025 08:53 GMT +00:00 - More infoProduct prices and availability are accurate as of the date/time indicated and are subject to change. Any price and availability information displayed on [relevant Amazon Site(s), as applicable] at the time of purchase will apply to the purchase of this product.)
Lifewit Medium Lunch Bag Insulated Lunch Box Soft Cooler Cooling Tote for Adult Men Women, Black 12-Can (9L)
$7.99 (as of November 2, 2025 08:53 GMT +00:00 - More infoProduct prices and availability are accurate as of the date/time indicated and are subject to change. Any price and availability information displayed on [relevant Amazon Site(s), as applicable] at the time of purchase will apply to the purchase of this product.)
BrüMate Era 40 oz Tumbler with Handle and Straw | 100% Leakproof Insulated Water Bottle Tumbler with Lid and Straw | Made of Stainless Steel | Cup Holder Friendly | 40oz (Navy Polka Dots)
$47.99 (as of November 2, 2025 08:53 GMT +00:00 - More infoProduct prices and availability are accurate as of the date/time indicated and are subject to change. Any price and availability information displayed on [relevant Amazon Site(s), as applicable] at the time of purchase will apply to the purchase of this product.)
Tervis Ohio State Buckeyes Mascot Colossal Tumbler with Wrap and Red Lid 16oz, Clear
$17.36 (as of November 2, 2025 08:53 GMT +00:00 - More infoProduct prices and availability are accurate as of the date/time indicated and are subject to change. Any price and availability information displayed on [relevant Amazon Site(s), as applicable] at the time of purchase will apply to the purchase of this product.)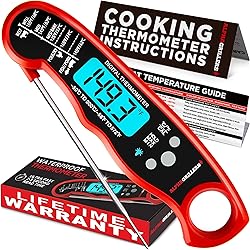
Alpha Grillers Meat Thermometer Digital - Instant Read Food Thermometer for Cooking and Grilling Stocking Stuffers for Men Christmas Gifts for Men
$13.94 (as of November 2, 2025 08:53 GMT +00:00 - More infoProduct prices and availability are accurate as of the date/time indicated and are subject to change. Any price and availability information displayed on [relevant Amazon Site(s), as applicable] at the time of purchase will apply to the purchase of this product.)
BOROHOUSE 10-Pack Glass Food Storage Containers with Tempered Lids – Borosilicate, Airtight, Oven-Safe (-4°F~950°F), BPA-Free, 4.4 & 1.6 Cup, Leak-Proof, Dishwasher Safe (Gray)
$55.99 (as of November 2, 2025 08:53 GMT +00:00 - More infoProduct prices and availability are accurate as of the date/time indicated and are subject to change. Any price and availability information displayed on [relevant Amazon Site(s), as applicable] at the time of purchase will apply to the purchase of this product.)
Tervis Pepperdine University Emblem Individual Water Bottle with Gray Lid, 24 oz, Clear -
(as of November 2, 2025 08:53 GMT +00:00 - More infoProduct prices and availability are accurate as of the date/time indicated and are subject to change. Any price and availability information displayed on [relevant Amazon Site(s), as applicable] at the time of purchase will apply to the purchase of this product.)
EUHOMY Countertop Ice Maker Machine with Handle, 26lbs in 24Hrs, 9 Ice Cubes Ready in 6 Mins, Auto-Cleaning Portable Ice Maker with Basket and Scoop, for Home/Kitchen/Camping/RV. (Black)
$79.91 (as of November 2, 2025 08:37 GMT +00:00 - More infoProduct prices and availability are accurate as of the date/time indicated and are subject to change. Any price and availability information displayed on [relevant Amazon Site(s), as applicable] at the time of purchase will apply to the purchase of this product.)
EUHOMY Nugget Ice Makers Countertop, Pebble Ice Maker Machine with 35lbs/24H Soft Ice, Self-Cleaning Sonic Ice Maker with Ice Scoop&Basket, Pellet Ice Maker for Home/Kitchen/Office(Stainless Steels)
$185.99 (as of November 2, 2025 08:37 GMT +00:00 - More infoProduct prices and availability are accurate as of the date/time indicated and are subject to change. Any price and availability information displayed on [relevant Amazon Site(s), as applicable] at the time of purchase will apply to the purchase of this product.)
Silonn Ice Maker Countertop, Portable Ice Machine with Carry Handle, Self-Cleaning Ice Makers with Basket and Scoop, 9 Cubes in 6 Mins, 26 lbs per Day, Ideal for Home, Kitchen, Camping, RV
$69.99 (as of November 2, 2025 08:37 GMT +00:00 - More infoProduct prices and availability are accurate as of the date/time indicated and are subject to change. Any price and availability information displayed on [relevant Amazon Site(s), as applicable] at the time of purchase will apply to the purchase of this product.)
Sweetcrispy Countertop Ice Maker Machine, Portable Self-Cleaning Ice Machine with Ice Scoop, Basket and Handle, 9 Cubes in 6 Mins, 26.5lbs/24Hrs, 2 Sizes of Bullet Ice for Home Kitchen, Coal Black
$49.94 (as of November 2, 2025 08:37 GMT +00:00 - More infoProduct prices and availability are accurate as of the date/time indicated and are subject to change. Any price and availability information displayed on [relevant Amazon Site(s), as applicable] at the time of purchase will apply to the purchase of this product.)