
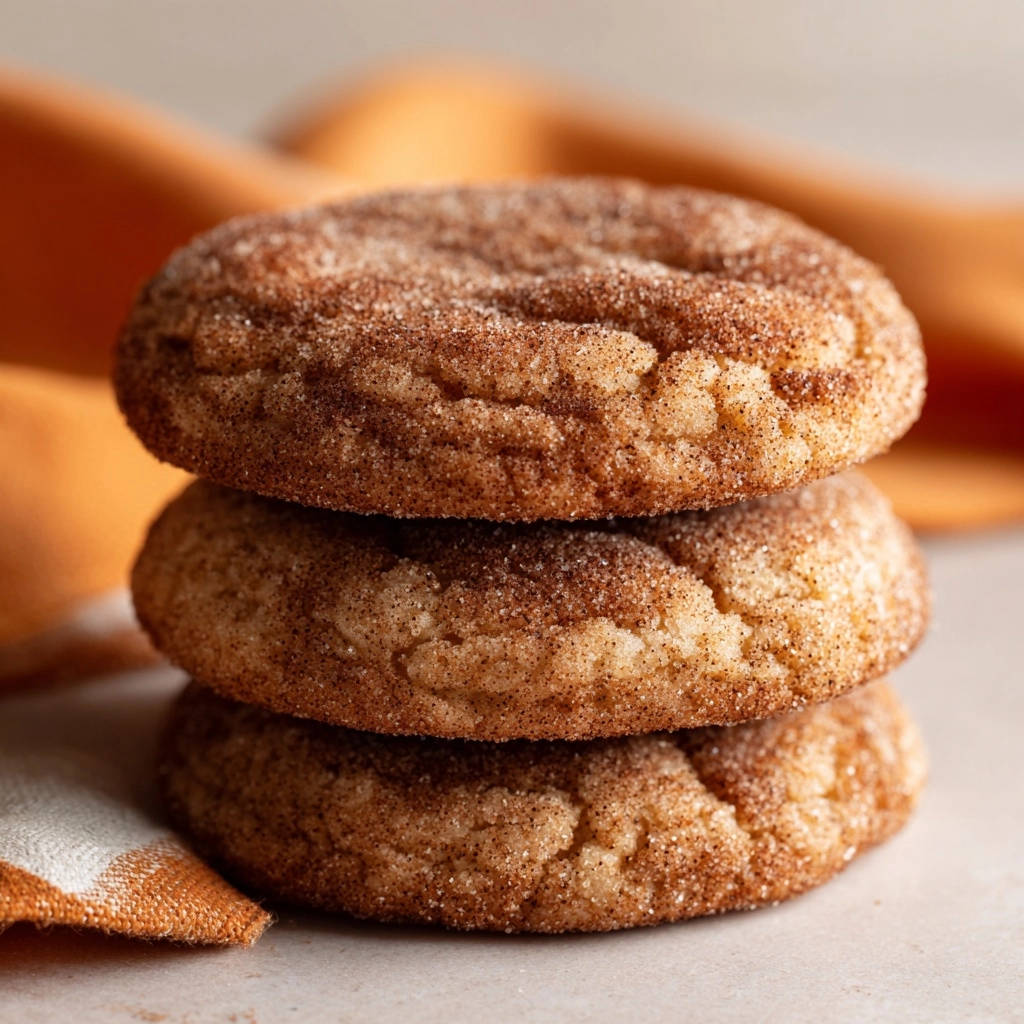
Who hasn’t bitten into a snickerdoodle, expecting that classic soft chew, only to find it’s gone hard and crumbly too fast? After years of refining, I’ve cracked the code to making the perfect Classic Snickerdoodles that stay melt-in-your-mouth tender for days.
This recipe delivers that coveted soft, chewy texture and the signature tangy-sweet cinnamon spice, making it your new go-to for truly exceptional homemade snickerdoodles.
Beyond Basic: Why This Classic Snickerdoodles Recipe Shines
Many snickerdoodle recipes promise tenderness but quickly yield cookies that become stale and crumbly. Our method specifically counters this common problem, ensuring your Classic Snickerdoodles remain wonderfully soft, even days after baking.
The secret lies in specific techniques and ingredient ratios, all designed to produce that “melt-in-your-mouth texture that lasts,” achieved with surprisingly straightforward steps.
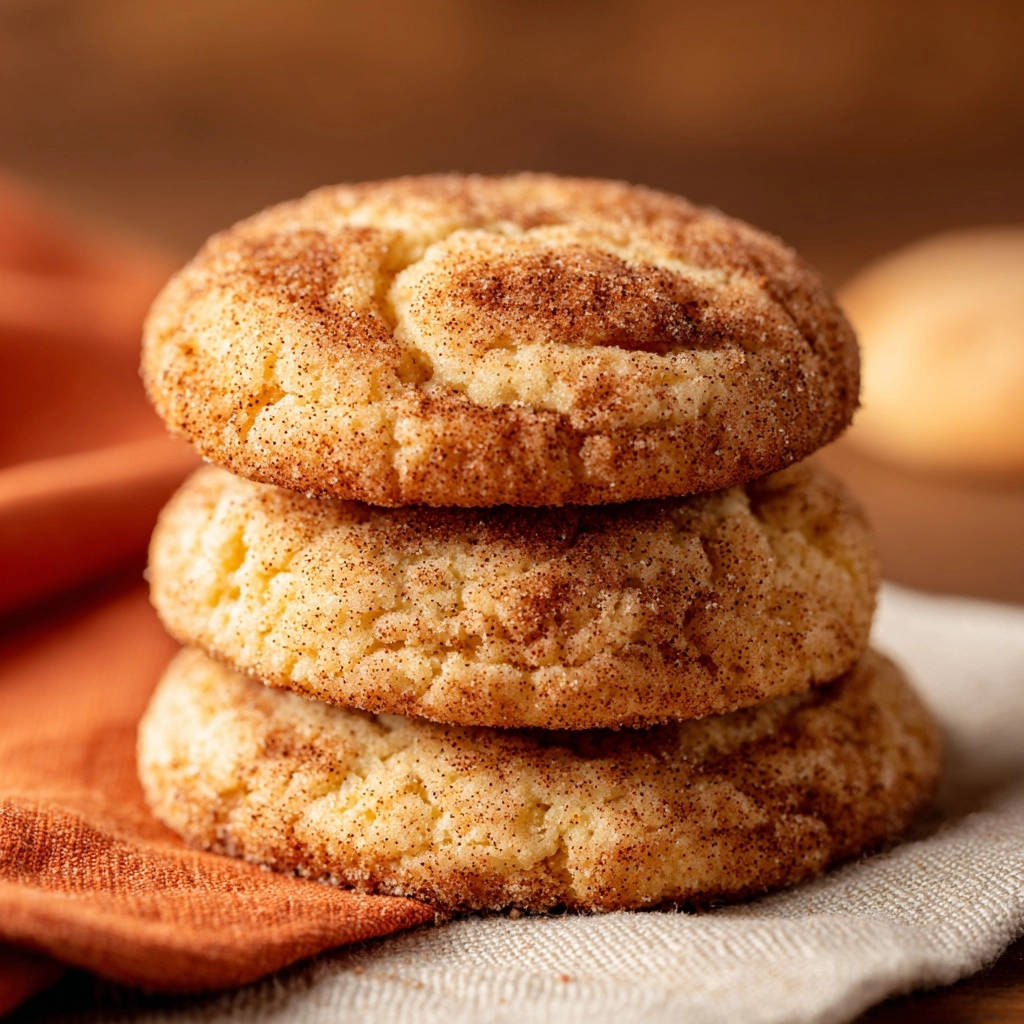
You’ll discover the perfect balance of warm cinnamon spice and that delightful, subtle tang characteristic of true Classic Snickerdoodles, making every bite a comforting experience.
With a mere 15 minutes of prep and 10 minutes of baking, this recipe is incredibly efficient, allowing you to enjoy fresh, chewy cookies with minimal time commitment.
The Essential Building Blocks for Tender, Chewy Snickerdoodles
Fats & Sweeteners: The Foundation of Flavor
Softened Unsalted Butter: This is critical for achieving a creamy base and effectively incorporating air during the creaming process, which directly contributes to the cookies’ light and tender texture.
Granulated Sugar: It provides essential sweetness and structure within the cookie dough. Crucially, a portion is reserved for the iconic cinnamon-sugar coating, giving these cinnamon sugar cookies their signature sparkle and flavor.
The Dry Goods: Structure, Lift, and That Signature Tang
All-Purpose Flour: The primary structural component, providing the cookie’s body and shape. Proper measurement is key to avoiding dense or dry cookies.
Cream of Tartar: This is the true magic ingredient for any Classic Snickerdoodles. It prevents sugar crystallization, ensuring a wonderfully chewy texture, and reacts with baking soda to create that distinctive tangy flavor and the beautifully crinkled top.
Baking Soda: A leavening agent that works in tandem with cream of tartar. This essential interaction provides the necessary lift, making your soft-baked cookies light and airy.
Salt: A small but mighty ingredient, salt enhances all the other flavors, balancing the sweetness and making the cinnamon notes more vibrant.
The Binding Agents & Aromatic Spice
Large Eggs: Acting as a powerful emulsifier, eggs bind all the ingredients together, adding richness, moisture, and helping to create a stable dough structure.
Ground Cinnamon: This warm spice is not just a flavor enhancer; it’s a starring player in the traditional coating, defining the classic snickerdoodle experience.
Essential Tools for Your Classic Snickerdoodles Journey
Electric Mixer (Stand or Handheld): Indispensable for creaming butter and sugar until light and fluffy, crucial for incorporating air and ensuring tender cookies.
Mixing Bowls (Large & Medium): Necessary for separating wet and dry ingredients and for combining the dough without crowding.
Baking Sheets & Parchment Paper: Ensures non-stick baking, promotes even heat distribution, and makes cleanup effortless. Essential for preventing sticking.
Cookie Scoop (Tablespoon Sized): Helps create uniformly sized cookies, which guarantees even baking and a professional appearance.
Wire Cooling Rack: Allows for proper air circulation around the cookies as they cool, preventing sogginess and maintaining their crisp edges and chewy centers.
Baking Success: A Step-by-Step Guide to Irresistibly Tender Classic Snickerdoodles
Preheat & Prepare: Preheat your oven to 375 degrees Fahrenheit (190°C). Line two large baking sheets with parchment paper. This preparation ensures your oven is at the correct temperature for immediate baking and prevents cookies from sticking.
Mix Your Signature Cinnamon-Sugar Coating: In a small, shallow bowl, combine 1/4 cup of the granulated sugar and the 2 tablespoons of ground cinnamon. Stir well until thoroughly blended. Set this mixture aside; it’s vital for the characteristic snickerdoodle flavor and appearance.
Cream Butter & Sugar Until Fluffy: In a large bowl, using an electric mixer on medium-high speed, cream together the softened unsalted butter and the remaining 1 1/4 cups of granulated sugar. Beat for 2-3 minutes until the mixture is visibly lightened in color and fluffy. This step is crucial for incorporating air, which directly contributes to tender cookies and a soft crumb.
Beat in Eggs Gradually: Add the large eggs to the creamed mixture, one at a time. Beat well after each addition, scraping down the sides of the bowl as needed, until each egg is fully incorporated and the mixture is smooth. Eggs add moisture and act as a binder.
Whisk Dry Ingredients Separately: In a separate medium bowl, whisk together the all-purpose flour, cream of tartar, baking soda, and salt. Thorough whisking ensures these leavening agents and seasonings are evenly distributed, leading to a consistent cookie texture.
Gently Combine Wet and Dry: Gradually add the whisked dry ingredients to the wet mixture, mixing on low speed. Mix just until combined. Be very careful not to overmix the dough, as overmixing develops gluten, which can lead to tougher, less tender cookies. Stop as soon as no dry streaks of flour are visible.
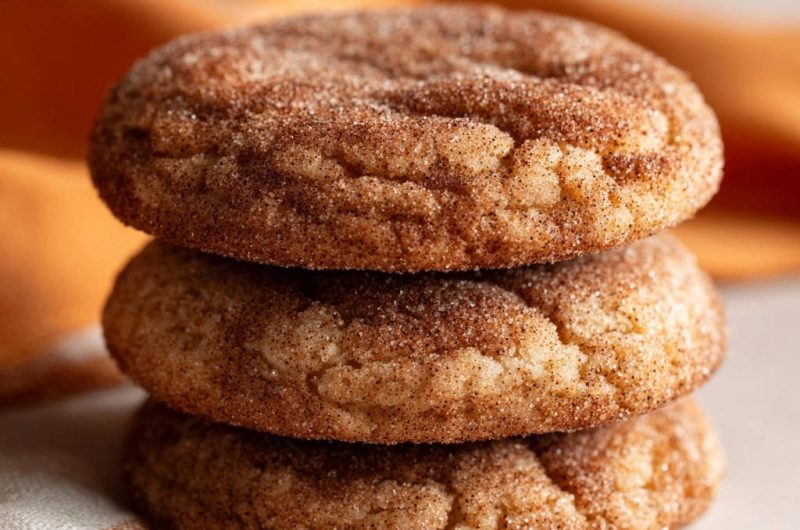
Scoop, Roll, and Coat: Scoop the dough into rounded tablespoon-sized balls. Roll each ball generously in the prepared cinnamon-sugar mixture until it’s fully and thickly coated on all sides. This generous coating not only provides flavor but is key to achieving that signature crinkly, soft exterior.
Space Evenly on Baking Sheets: Place the coated dough balls about 2 inches apart on the prepared baking sheets. Adequate spacing prevents cookies from merging together as they spread during baking and ensures even heat circulation.
Bake to a Soft Finish: Bake for 8 to 10 minutes, or until the edges are just set and lightly golden. The centers should still look slightly soft and puffy. The key to maintaining chewiness is to remove them from the oven while the centers are still somewhat underbaked, as they will continue to set on the warm pan.
Cool on Sheet, Then Rack: Let the cookies cool on the baking sheets for 5 minutes before carefully transferring them to a wire rack to cool completely. This initial cooling on the warm sheet allows the cookies to finish baking gently and set without drying out, locking in that desirable soft, chewy texture.
Chef’s Secrets: Elevate Your Snickerdoodles to Bakery-Quality
The Golden Rule: Don’t Overmix! Overmixing is the enemy of tender cookies. Once you add the dry ingredients, mix only until the flour streaks disappear. A few lumps are preferable to a tough cookie.
Butter Temperature Matters: Ensure your butter is truly softened (press your finger into it, and it should leave an indent without melting). Butter that is too cold won’t cream properly, and butter that is too warm (or melted) will lead to greasy, flat cookies.
Chill for Control (Optional but Smart): If your kitchen is warm or your dough seems too soft, a quick 30-minute chill in the refrigerator can help prevent excessive spreading and make the dough easier to handle.
Roll Generously and Completely: Don’t skimp on the cinnamon-sugar coating. A thick, even coat is essential for the classic crinkled appearance, spiced flavor, and the slightly crisp exterior that contrasts with the chewy interior.
Trust Your Eyes, Not Just the Timer: Ovens vary. Learn what “just set edges and slightly soft centers” looks like in your oven. It’s better to underbake slightly than overbake, especially for a chewy snickerdoodle.
Parchment Paper is Your Friend: While not strictly a tip about the dough, using parchment paper prevents sticking, ensures even baking, and makes transferring cookies (and cleanup) a breeze. Don’t skip it!
Troubleshooting Common Snickerdoodle Dilemmas
My Cookies Spread Too Much and Are Flat!
This often happens if your butter was too warm or melted, your oven temperature is too low, or the dough wasn’t chilled. Ensure your butter is softened, not liquid, verify your oven temperature, and consider chilling the dough for at least 30 minutes before baking.
The Snickerdoodles Are Hard, Dry, or Crumbly.
Overbaking is the primary culprit here. Remove the cookies from the oven when the edges are just set and the centers still appear slightly soft. Overmixing the dough can also contribute to a tough, dry texture by developing too much gluten.
I Don’t See Those Signature Crinkles on Top.
The crinkled top is a result of the cream of tartar interacting with baking soda, and the cinnamon-sugar coating. Ensure your cream of tartar and baking soda are fresh and that you’ve generously rolled the dough balls in the coating. Also, ensure you haven’t overmixed the dough, which can affect the chemistry.
Snickerdoodle FAQs: Your Baking Questions Answered
What if I don’t have cream of tartar? Are there substitutes?
While cream of tartar is essential for the classic snickerdoodle tang and chew, you can use a substitute. For every 1 teaspoon of cream of tartar, you can use 2 teaspoons of baking powder (and omit the separate baking soda if the recipe calls for it) OR 1 teaspoon of white vinegar or lemon juice. Be aware that the texture and flavor may vary slightly from the traditional recipe.
How long do Classic Snickerdoodles stay fresh, and what’s the best way to store them?
Store cooled snickerdoodles in an airtight container at room temperature for up to 3-5 days. To keep them extra soft, you can place a slice of plain white bread in the container; the cookies will absorb moisture from the bread.
Can I freeze snickerdoodle dough or baked cookies?
Absolutely! To freeze dough, roll balls, coat them in cinnamon sugar, and flash-freeze on a baking sheet until solid. Then transfer to a freezer-safe bag for up to 3 months. Bake from frozen, adding 2-3 minutes to the baking time. Baked cookies can also be frozen in an airtight container for 2-3 months; thaw at room temperature before serving.
Can I make these Classic Snickerdoodles gluten-free?
You can often substitute a 1:1 gluten-free all-purpose flour blend (one that contains xanthan gum) for regular flour in this recipe. However, be aware that baking times and the final texture might vary slightly, so monitor your cookies closely during baking.
Serving Suggestions & Creative Twists for Your Classic Snickerdoodles
Perfect Pairings
With a Warm Beverage: Enjoy your snickerdoodles with a classic cup of coffee, a soothing herbal tea, or a rich hot cocoa for the ultimate cozy treat.
Alongside Creamy Desserts: Serve slightly warm snickerdoodles with a scoop of vanilla bean ice cream, a dollop of whipped cream, or a warm apple crisp for an elevated dessert experience.
Inspiring Variations to Try
Pumpkin Spice Delight: Incorporate 1 teaspoon of pumpkin pie spice into the dough, and optionally add a pinch to the cinnamon-sugar coating, for a delightful fall-inspired twist.
Brown Butter Magic: Brown your butter before allowing it to cool and re-solidify to a softened state. This adds a wonderfully nutty, caramelized depth of flavor to your snickerdoodles.
Maple Glaze Finish: Drizzle cooled cookies with a simple glaze made from powdered sugar and maple syrup for an extra touch of sweetness and flavor.
Ready to Impress? Share Your Classic Snickerdoodles Masterpiece!
There’s immense satisfaction in baking a batch of perfectly tender, chewy, and irresistibly spiced Classic Snickerdoodles. This recipe guarantees that lasting, melt-in-your-mouth quality that makes them truly unforgettable.
Bake with confidence, knowing you’ll achieve bakery-quality results every time. Share your delicious creations with family and friends, or simply savor these delightful homemade snickerdoodles yourself!
Embrace the simple pleasure of baking and spreading joy through delicious food. Your kitchen is about to become everyone’s favorite place!
Classic Snickerdoodles
Course: DessertCuisine: American CuisineDifficulty: easy24
cookies15
minutes10
minutes25
minutesAmerican Cuisine
Ingredients
1/2 cup (1 stick) unsalted butter, softened
1 1/2 cups granulated sugar, divided
2 large eggs
2 1/4 cups all purpose flour
2 teaspoons cream of tartar
1 teaspoon baking soda
1/4 teaspoon salt
2 tablespoons ground cinnamon
Directions
- Preheat your oven to 375 degrees Fahrenheit. Line baking sheets with parchment paper.
- In a small bowl, combine 1/4 cup of the granulated sugar and the 2 tablespoons of ground cinnamon for your coating. Set aside.
- In a large bowl, using an electric mixer, cream together the softened butter and the remaining 1 1/4 cups of granulated sugar until light and fluffy. This step is crucial for incorporating air, which helps keep the cookies tender.
- Beat in the eggs one at a time, mixing well after each addition until fully combined.
- In a separate medium bowl, whisk together the flour, cream of tartar, baking soda, and salt.
- Gradually add the dry ingredients to the wet ingredients, mixing on low speed just until combined. Be very careful not to overmix the dough, as overmixing can develop gluten and lead to tougher cookies. Stop as soon as no dry streaks of flour are visible.
- Scoop the dough into rounded tablespoon sized balls. Roll each ball generously in the cinnamon sugar mixture until fully coated. This coating not only provides flavor but also helps create that signature crinkly, soft exterior.
- Place the coated dough balls about 2 inches apart on the prepared baking sheets.
- Bake for 8 to 10 minutes, or until the edges are just set and lightly golden but the centers still look slightly soft and puffy. The key to chewiness is to remove them from the oven while the centers are still somewhat underbaked.
- Let the cookies cool on the baking sheets for 5 minutes before transferring them to a wire rack to cool completely. Allowing them to cool on the warm baking sheet helps them set without drying out, locking in that soft, chewy texture.
Notes
- Tips for tenderness: Don’t overmix dough, remove from oven when centers are slightly soft, and cool on baking sheets to lock in chewiness.


