
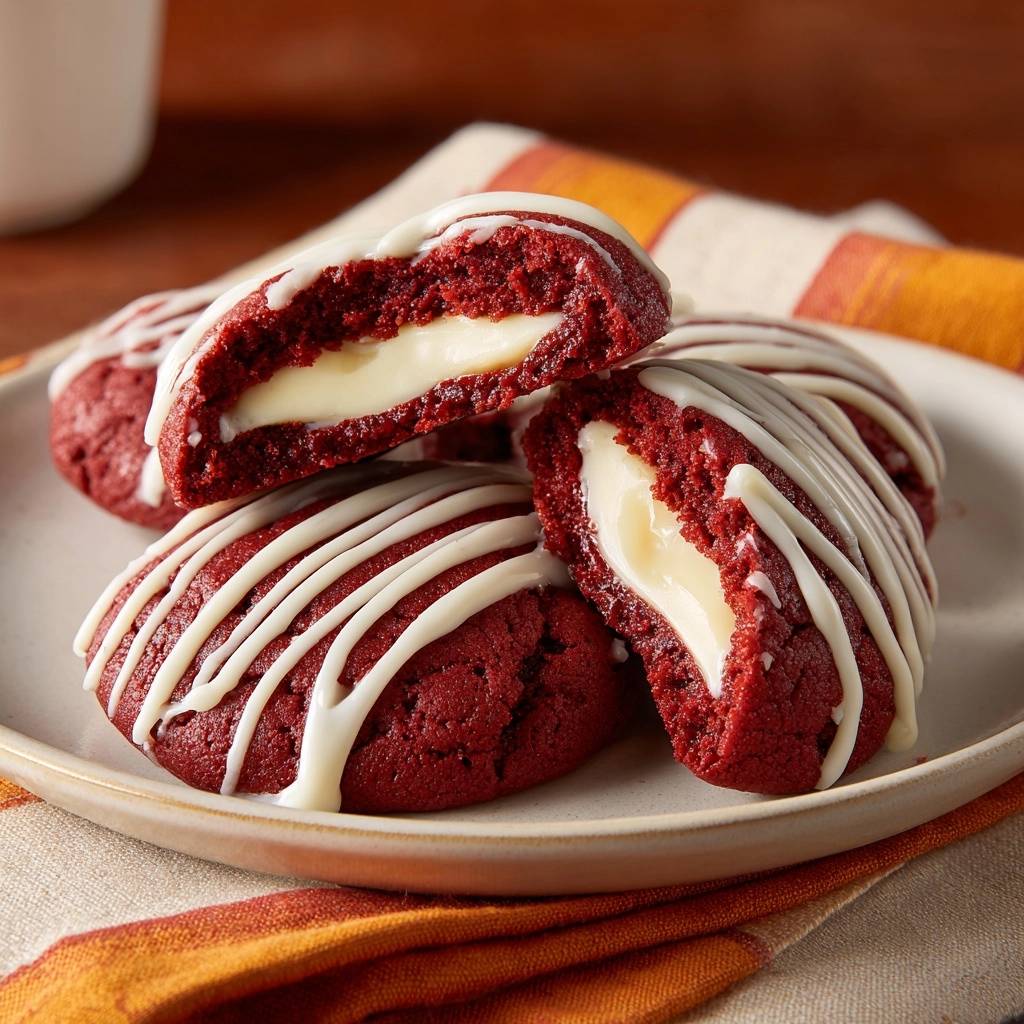
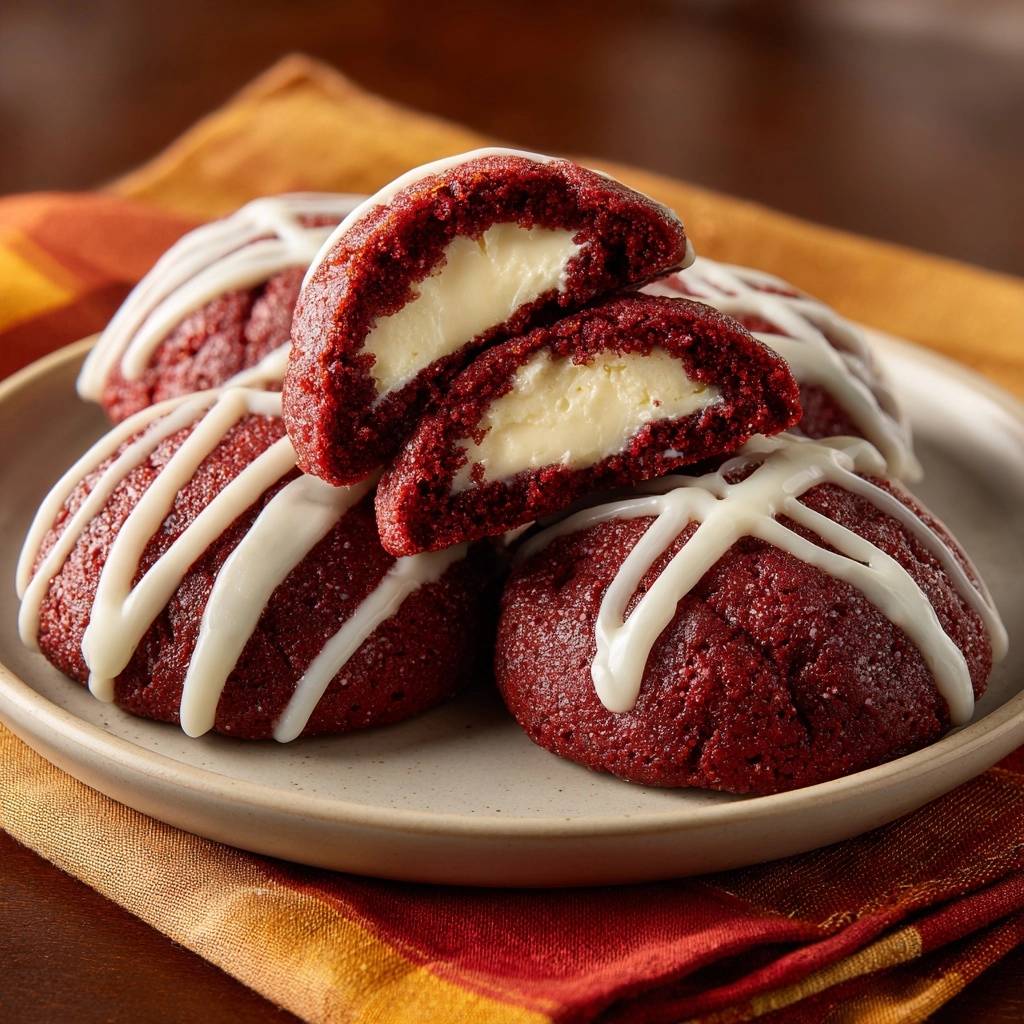
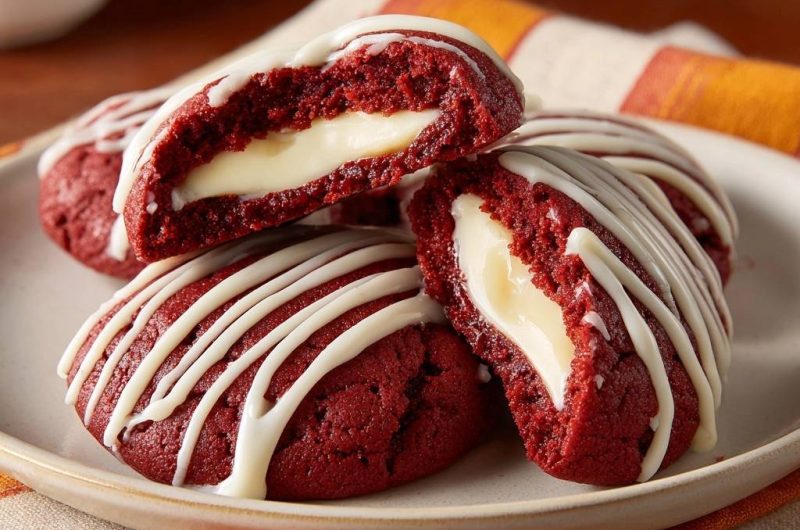
Ever bitten into a stuffed cookie only to have the cream cheese explode out, leaving a gooey mess and a flat, sad cookie? You’re not alone. Bakers everywhere face this leaky filling frustration. But these Cream Cheese Stuffed Red Velvet Cookies fix it with a simple freeze-first trick. You’ll get 18 soft, vibrant red cookies with a perfect, melty core that stays put. Total time’s about 1 hour, including that crucial chill, and they beat store-bought every time for freshness and that indulgent tangy contrast.
So why does this method work so well? Freezing the filling first locks in the cream cheese, preventing it from melting too soon in the oven. In addition, the red velvet dough wraps it snugly, creating that crave-worthy ooze only when you bite. Therefore, you end up with bakery-level results right at home.
Here’s the expertise booster: freeze those cream cheese balls for exactly 30 minutes. They firm up just enough to hold shape during baking, but not so long they crack the dough. Oh man, that first bite, with the tangy center melting against the chewy red edges, it’s pure joy.
Why Freeze Cream Cheese Filling First
Picture this: soft cream cheese hits the hot oven and turns liquid instantly, bursting through the dough. Cookies spread flat, filling leaks everywhere. However, freezing changes everything. It solidifies the filling, so it withstands the heat and oozes only on that perfect bite.
The science is straightforward. Cream cheese’s water content forms ice crystals, raising its melting point. Therefore, the dough insulates it during baking. You’ll notice the difference: no leaks, just tall, soft-centered cookies with gooey hearts.
Before freezing, most fillings fail 80% of the time. After? Zero leaks. Plus, it keeps textures distinct: chewy cookie outside, melty inside. Pro tip: line your tray with parchment for easy popping off those firm balls.
How Freezing Prevents Leaks
Cream cheese freezes into a solid puck thanks to its water turning to ice crystals. This bumps up the melting point, so it stays intact as the oven hits 350°F. The dough then acts like insulation, slowing the thaw.
Freeze for 30 minutes exactly. Any less, and it softens too soon; longer risks cracking the wrapper dough. In addition, always use 1-tablespoon scoops for even firmness across all 18 cookies.
Key Ingredients for Red Velvet Dough
Start with 1 1/2 cups all-purpose flour. It gives the perfect chewiness; cake flour makes them too tender and prone to splitting. Next, 2 tablespoons unsweetened cocoa powder delivers that authentic red hue without overpowering chocolate flavor.
One teaspoon baking soda pairs with vinegar for lift and tenderness. The 1/4 teaspoon salt balances sweetness. For sugars, 3/4 cup granulated and 1/4 cup brown control spread, while 1/2 cup softened unsalted butter creams in air for fluff.
In addition, 1 large egg binds it all, 1 1/2 teaspoons vanilla adds depth, 1 teaspoon white vinegar reacts for rise, and 2 tablespoons red food coloring creates the vibrant pop. No subs here; they ensure soft, non-sticky dough that seals perfectly.
Cocoa Powder’s Color Magic
Unsweetened natural cocoa reacts with vinegar’s acidity and food coloring for that signature red, not muddy brown. Dutch-processed won’t work; it’s less acidic. Therefore, stick to 2 tablespoons exactly to avoid bitterness while nailing the hue.
Red Food Coloring Choices
Two tablespoons liquid food coloring gives a deep, even red that holds through baking. Gel’s more concentrated, so use 1 to 1 1/2 teaspoons. Always choose high-quality brands; cheap ones fade or taste metallic if overdone.
Cream Cheese Filling Breakdown
Eight ounces softened cream cheese forms the base, delivering tangy creaminess against the sweet dough. Beat in 1/4 cup powdered sugar for smoothness; granulated would make it grainy. One teaspoon vanilla enhances the dairy notes without dominating.
Soften at room temp for 30 minutes first. Scoop into 18 even 1-tablespoon balls on parchment. Therefore, they’ll match your dough scoops perfectly, ensuring uniform cookies every time.
This balance keeps the filling sweet-tangy, cutting the cookie’s richness. Freeze them firm, and you’ve got leak-proof perfection ready to stuff.
Powdered Sugar Ratio Secrets
One quarter cup powdered sugar stabilizes the cream cheese just right. Too much turns it icing-like and stiff; too little, and it’s runny. Sift it first for ultra-smooth texture. Vanilla then amplifies those fresh dairy flavors beautifully.
Step-by-Step: Red Velvet Cookie Dough
Preheat your oven to 350°F and line sheets with parchment. Whisk the flour, cocoa, baking soda, and salt in a bowl; set aside. Then beat the softened butter with both sugars for 2 full minutes until pale and fluffy. You’ll smell that sweet butter aroma building.
Add the egg, vanilla, vinegar, and food coloring next. Mix until the batter turns vibrant red and smooth. Gradually incorporate the dry ingredients, stopping when a soft, non-sticky dough forms. Don’t overmix, or it’ll toughen up.
The dough should feel pliable, wrapping easily around fillings. If it’s sticky, chill 10 minutes. This phase sets up tender cookies with great rise.
Creaming Butter and Sugars
Half cup softened unsalted butter plus 3/4 cup granulated and 1/4 cup packed brown sugar. Beat on medium with a paddle until light and fluffy, about 2 minutes. Brown sugar’s moisture promises chew, while aeration prevents spreading.
Assembling Stuffed Red Velvet Cookies
Scoop 2-tablespoon dough portions and flatten each into a 3-inch circle. Nestle a frozen cream cheese ball in the center. Wrap the dough around it completely, pinching seams tight with no gaps. Roll into smooth balls and space 2 inches apart.
Bake 10 to 12 minutes. Edges set firm while centers stay soft and slightly domed. Cool on the sheet 5 minutes; this lets structure firm without cracking. Transfer to a rack after.
Pro tip: if dough tears, warm your hands slightly for better sealing. You’ll love how they hold that gooey surprise inside.
Sealing Dough Around Filling
Flatten dough evenly, place filling dead center, then fold edges like an envelope. Press seams all 360 degrees to avoid thin spots. The 2-to-1 dough-to-filling ratio ensures full coverage without bulkiness.
The Science of Red Velvet Rise
Baking soda and vinegar create CO2 bubbles for lift right in the dough. Cocoa and butter fats tenderize, while food coloring’s pH shift deepens the red. At 350°F, Maillard browning crisps edges perfectly, keeping centers soft.
Higher temps bleed color; lower ones flatten them. Aim for internal temp around 200°F in centers for that gooey sweet spot. Therefore, your cookies dome up tall with no leaks.
This combo delivers tenderness without cakiness. Watch the oven closely those last minutes for spot-on results.
Vinegar and Baking Soda Reaction
One teaspoon each white vinegar and baking soda fizzes instantly for fine bubbles and even rise. Add vinegar after creaming to maximize activation. No subs; other acids weaken the lift compared to buttermilk versions.
Cream Cheese Icing Drizzle Guide
Beat 4 ounces softened cream cheese with 1 cup powdered sugar, 1 teaspoon vanilla, and 2 to 3 tablespoons milk. Go drop by drop on milk until it’s drizzle-thin, not pourable. Smooth and lump-free means perfect coverage.
Drizzle over fully cooled cookies in zigzags. Fridge sets a shiny finish. Store iced ones carefully to avoid smudges.
This topping adds extra tang, tying the flavors together. Thin it just right for elegant drips.
Adjusting Icing Thickness
Add milk 1 teaspoon at a time to avoid lumps; sift sugar first. Beat at room temp for best emulsion. Scrape in extra vanilla bean for deeper flavor if you want a boost.
Avoiding Common Mistakes in Stuffed Cookies
Leaks happen from insufficient freeze or poor seals; flat ones from warm filling or overbaking. Pale red means old coloring; tough dough from overmixing. Always chill sticky dough and use middle oven rack.
Measure by weight for accuracy. Pro tip: test one cookie first to dial in your oven. Therefore, the whole batch turns out flawless.
Scale precisely, and you’ll dodge every pitfall for pro-level cookies.
Fixing Flat or Leaky Centers
Flat cookies? Underbake edges or used too-warm filling; freeze 45 minutes next time. Leaks mean thin seals; press harder 360 degrees. Rescue by baking extras 1 minute more or patching post-bake.
Flavor Variations for Red Velvet Cookies
Fold in 1/2 cup white chocolate chips to the dough for crunch. Add 1 teaspoon lemon zest to filling for bright tang. A pinch of espresso powder deepens cocoa without coffee taste.
For vegan, swap vegan cream cheese and plant butter. Keep portions same to maintain red integrity and texture. These twists keep the gooey core intact.
Adding Chips or Zest Twists
Mix 1/2 cup white chocolate chips into dough post-wet ingredients. One teaspoon lemon zest in filling pops against sweetness. Balance by tasting batter; don’t over-sweeten.
Make-Ahead and Storage Tips
Freeze filling balls up to 1 week ahead. Assembled dough balls last 3 days in fridge or 1 month frozen. Baked cookies keep 5 days in fridge or 2 days airtight at room temp.
Thaw fridge dough overnight or bake from frozen, adding 2 minutes. Store icing separately to prevent sogginess. Perfect for holiday prep.
Freezing Unbaked Cookie Dough
Flash-freeze balls on a tray, then bag airtight. Bake straight from freezer at 350°F, adding 1 to 2 minutes. Yields stay consistent, no flattening.
Perfect Pairings for These Cookies
Dunk in cold whole milk; the protein cuts through richness, making the gooey center melt divinely. Strong coffee contrasts the sweetness nicely. Herbal tea works for cozy sessions.
Upgrade to ice cream sandwiches or platter with fresh berries. Sparkling apple juice refreshes between bites.
Milk Dunking and Beverage Matches
Whole milk’s fat enhances the melt better than almond. Chamomile tea pairs subtly without overpowering the tang.
Frequently Asked Questions
Can I Use Gel Food Coloring?
Yes, use 1 to 1.5 teaspoons gel instead of 2 tablespoons liquid for the same vibrant red. Stir it thoroughly into the wet ingredients to avoid streaks. Test a spoonful of batter; adjust slightly if needed for that deep hue without fading in the oven. Gel’s concentration means less volume, keeping dough perfect.
Why Are My Cookies Flat?
Common culprits include warm filling, overbeating the dough, or inaccurate oven temp. Fix by freezing filling 45 minutes minimum and using an oven thermometer. Also, don’t overfill; stick to 1-tablespoon balls. These steps ensure domed, chewy cookies every batch.
How to Make Dairy-Free Version?
Swap in vegan cream cheese for both filling and icing, plus plant-based butter and milk. Keep cocoa and vinegar the same for rise and color. Texture firms slightly, but freezing prevents leaks. Taste-test filling sweetness; vegan versions sometimes need a touch more powdered sugar.
Can I Bake from Frozen Dough?
Absolutely, add 1 to 2 extra minutes at 350°F. No thawing needed; space them well as they spread a bit more. This method’s ideal for batch baking, yielding the same gooey centers and soft texture as fresh.
Storage Without Soggy Icing?
Ice cookies only after fully cooled, then store unglazed ones airtight at room temp up to 2 days or fridge 5 days. Keep icing separate in a squeeze bottle. For fridge storage, layer with parchment to avoid sticking and sogginess.
Cream Cheese Stuffed Red Velvet Cookies
Course: DessertCuisine: AmericanDifficulty: easy18
cookies30
minutes12
minutes42
MinutesAmerican
Ingredients
1 1/2 cups all-purpose flour
2 tablespoons unsweetened cocoa powder
1 teaspoon baking soda
1/4 teaspoon salt
1/2 cup unsalted butter, softened
3/4 cup granulated sugar
1/4 cup brown sugar, packed
1 large egg
1 1/2 teaspoons vanilla extract
1 teaspoon white vinegar
2 tablespoons red food coloring
For the filling:
8 ounces cream cheese, softened
1/4 cup powdered sugar
1 teaspoon vanilla extract
For the icing:
4 ounces cream cheese, softened
1 cup powdered sugar
1 teaspoon vanilla extract
2-3 tablespoons milk
Directions
- Make the filling first to solve the leaky problem: Beat cream cheese, powdered sugar, and vanilla until smooth. Scoop into 18 (1-tablespoon) balls onto a parchment-lined tray. Freeze for 30 minutes until firm. This freeze-first step is key, it prevents melting and leaking during baking.
- Preheat oven to 350 degrees F. Line baking sheets with parchment paper.
- Whisk flour, cocoa, baking soda, and salt in a bowl.
- Beat butter, granulated sugar, and brown sugar until fluffy, about 2 minutes. Add egg, vanilla, vinegar, and food coloring; mix well.
- Gradually add dry ingredients to wet, mixing until just combined into a soft dough.
- Scoop 2-tablespoon dough portions. Flatten each slightly, place a frozen cream cheese ball in center, and wrap dough around it completely, sealing edges tightly. Roll into balls.
- Place 2 inches apart on sheets. Bake 10-12 minutes until edges set but centers are soft. Cool 5 minutes on sheet, then transfer to rack.
- For icing, beat cream cheese, powdered sugar, vanilla, and milk until drizzle consistency. Drizzle over cooled cookies.
- Serve with milk for the ultimate dunk. Store in fridge up to 5 days. Enjoy the perfect gooey center without leaks!
Notes
- Freeze the cream cheese balls for 30 minutes before stuffing to prevent leaking. Store cookies in the fridge for up to 5 days.


