
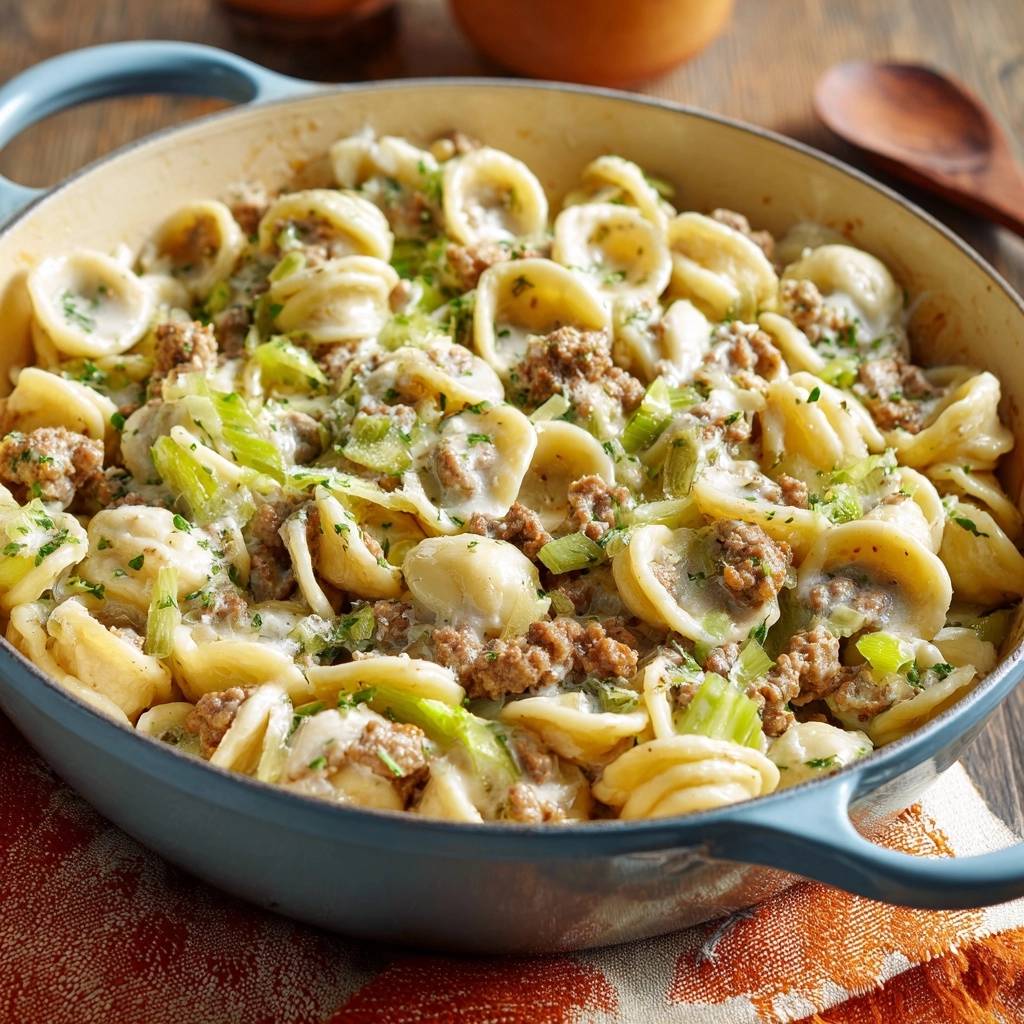
Ever bite into creamy pasta expecting that rich, clingy sauce only to get a watery mess? Celery’s the sneaky culprit, dumping its moisture right into your Creamy Beef Celery Shells. But this one-pot fix changes everything. You’ll have dinner on the table in under 30 minutes with sauce that coats every shell perfectly.
Here’s why it works so well. That pre-cook evaporation step for the celery drives off all the excess water first. In addition, it keeps your sauce thick and flavorful without any soupy separation.
The real secret? Cook the celery over medium-high heat for a full five minutes until the pan runs dry. No liquid left means no diluted sauce later. Trust me, this tip alone saves your Creamy Beef Celery Shells every time.
Why Celery Ruins Creamy Beef Shells
Water Content in Celery Explained
Celery packs about 95% water, like a sponge ready to squeeze itself into your sauce. In standard recipes, you toss it straight into the cream, and it thins everything out fast. However, this method pre-cooks it to evaporate that moisture, so your Creamy Beef Celery Shells stay luxuriously thick.
Picture chopping those stalks fine. They release their juices quickly under heat. Therefore, by the time you build the roux, you’re working with dry, softened celery that won’t sabotage the creaminess.
Benefits of Pre-Cooking Vegetables
Pre-cooking veggies like celery releases and evaporates their water before the sauce stage. This simple science prevents separation and ensures the sauce clings to your pasta shells. In addition, it concentrates the celery’s mild flavor for better balance in Creamy Beef Celery Shells.
Quick kitchen chemistry at play here. Heat breaks down cell walls, steaming off the liquid. Result? A velvety texture that holds up even after reheating.
Key Ingredients for Thick Creamy Beef Celery Shells
Pasta Shells and Beef Foundation
Grab 1 pound of medium pasta shells. Their shape traps sauce inside, way better than small pasta that lets it slip away. Meanwhile, 1 pound ground beef builds a savory base with rich umami.
Why medium shells? They hold more creamy goodness per bite. For the beef, drain excess fat if it’s not super lean. This keeps your Creamy Beef Celery Shells from getting greasy.
Celery and Dairy Roux Components
Four stalks of celery, finely chopped, maximize surface area for evaporation. That fine dice ensures every bit softens and dries out fast. Butter, flour, milk, and 2 cups shredded cheddar form the foolproof roux.
The 2 tablespoons each of butter and flour create a smooth base. Gradually add 2 cups milk for perfect thickness. Fresh parsley adds a bright finish, beats dried every time for that fresh pop in Creamy Beef Celery Shells.
Science of Evaporating Celery Water
Heat-Driven Moisture Release
At medium-high heat, celery cells break down in about five minutes, releasing water that boils off completely. No visible liquid means no watery sauce later. Pan size matters too; a large one lets steam escape efficiently for perfect Creamy Beef Celery Shells.
Stir vigorously here. You’ll smell the celery sweeten as it dries. This step transforms potential soup into clingy cream.
Roux Thickening After Evaporation
With celery dry, push it aside and make the roux. Butter and flour cook for one minute to banish lumps, then whisk in milk and pasta water. The starch from that reserved half-cup boosts thickness naturally.
Beef’s Maillard reactions add deep flavor that binds everything. Therefore, your Creamy Beef Celery Shells taste richer than ever.
Equipment for One-Pot Creamy Beef Celery Shells
Dutch Oven Advantages
A large Dutch oven shines for this. It browns beef evenly, evaporates celery without splashing, and saucs everything in one spot. Cast iron retains heat beautifully for consistent Creamy Beef Celery Shells.
Minimum 5-quart size prevents overcrowding. If you lack one, a deep skillet works, but watch for boil-over.
Essential Utensils Breakdown
Whisk the roux smooth, no lumps allowed. Wooden spoon breaks up beef and stirs celery dry. Reserve exactly half-cup pasta water; its starch is key for sauce cling in Creamy Beef Celery Shells.
No fancy gadgets needed. Your basic kitchen tools handle it all.
Step-by-Step: Browning Beef Base
Perfect Ground Beef Sear
Heat your Dutch oven to medium. Add the ground beef and break it up with a spoon. Cook about five minutes until no pink remains, stirring often for even browning.
Drain fat if needed for leaner results. Season now with salt and pepper. This builds maximum flavor into your Creamy Beef Celery Shells foundation.
Step-by-Step: Celery Evaporation Technique
Five-Minute Dry-Out Method
Add finely chopped celery to the browned beef. Crank heat to medium-high and stir frequently for five full minutes. Watch the water bubble off until the pan looks dry, no pools left.
Don’t shortcut this; undercooked celery means soupy sauce. You’ll see it soften and hear sizzling fade. Key to thick Creamy Beef Celery Shells right here.
Step-by-Step: Building Creamy Roux Sauce
One-Sided Pan Roux Mastery
Push beef and celery aside. Melt 2 tablespoons butter in the empty spot, whisk in flour, and cook one minute till bubbly. Gradually pour in milk and reserved pasta water, stirring constantly.
Simmer three minutes until it thickens to coat a spoon. Constant whisking prevents lumps every time.
Cheese Melt and Pasta Integration
Stir in 2 cups shredded cheddar until melted smooth. Fold in al dente shells and heat through for two minutes. Finish with chopped parsley for freshness in Creamy Beef Celery Shells.
Don’t overcook pasta here; it softens just enough to absorb sauce.
Avoiding Watery Creamy Beef Celery Shells
Skipping Evaporation Pitfalls
Skip the five-minute dry-out, and celery water dilutes your sauce into soup. Overcrowded pans trap steam too. Fix by using high heat and stirring nonstop.
Cold milk shocks the roux; warm it first if possible. These tweaks keep Creamy Beef Celery Shells perfectly thick.
Pasta Cooking Errors
Cook shells al dente, eight minutes max. Rinse them, and you lose starch for sauce cling. Always reserve that half-cup water.
Mushy pasta? Undercook next time. Easy fixes for flawless Creamy Beef Celery Shells.
Flavor Variations for Creamy Beef Celery Shells
Cheese and Herb Swaps
Swap cheddar for gouda or mozzarella for milder creaminess. Add garlic powder or thyme post-evaporation. Paprika brings gentle heat without overpowering.
Fresh parsley stays best, but dried works in a pinch. Customize your Creamy Beef Celery Shells easily.
Protein and Veggie Tweaks
Ground turkey lightens it up; evaporate celery the same way. Add carrots or leeks after for extra crunch. Vegan? Use plant milk and cheese, keeping the thick sauce principle.
Make-Ahead Guide for Creamy Beef Celery Shells
Storage and Reheating Tips
Store leftovers in an airtight container in the fridge for 3-4 days. Reheat on stovetop low with a splash of milk to restore creaminess. Freezes well up to 2 months; thaw overnight and stir well.
Sauce thickness holds great. Pro tip: portion before freezing for quick meals.
Pairing Sides with Creamy Beef Celery Shells
Crisp Vegetable Complements
A simple green salad cuts the richness perfectly. Roasted broccoli adds char contrast. Garlic bread soaks up every creamy bite.
Sparkling cranberry juice pairs bright and refreshing with Creamy Beef Celery Shells.
Troubleshooting Creamy Beef Celery Shells Issues
Sauce Not Thickening?
Recook roux one extra minute or whisk in a flour slurry. Grainy cheese means high heat; melt low and slow. Blot beef ahead if too greasy.
These fixes deliver perfect Creamy Beef Celery Shells every time.
Pasta Sticking or Dry?
Ensure full celery evaporation and enough pasta water. If sticky, add a milk splash. Stir gently to recover.
Common Questions on Creamy Beef Celery Shells
Can I Use Different Pasta Shapes?
Yes, rigatoni or penne work well for sauce holding. Adjust cook time to al dente. Shells remain best for trapping creaminess in Creamy Beef Celery Shells.
Gluten-Free Options Available?
Use gluten-free shells and 1:1 flour swap. Almond milk subs fine. Evaporation step stays the same for thick sauce.
How Many Servings Does This Make?
4-6 hearty servings. Scale celery evaporation time if adjusting. About 500 calories per serving with balanced macros.
Why No Onions or Garlic Here?
This highlights pure celery-beef creaminess. Add them post-evaporation if desired; keeps flavors clean and balanced.
Best Cheese for Maximum Creaminess?
Sharp cheddar melts smoothest. Blend with mozzarella for stretch. Choose low-moisture blocks over pre-shredded.
Creamy Beef Celery Shells
Course: Main CourseCuisine: AmericanDifficulty: easy4
servings15
minutes25
minutes40
Minutes650
kcalAmerican
Ingredients
1 pound medium pasta shells
1 pound ground beef
4 stalks celery, finely chopped
2 tablespoons butter
2 tablespoons all-purpose flour
2 cups milk
2 cups shredded cheddar cheese
Salt and pepper to taste
2 tablespoons fresh parsley, chopped
Directions
- Cook pasta shells in boiling salted water until just al dente, about 8 minutes. Drain, reserving 1/2 cup pasta water, and set aside.
- In a large Dutch oven over medium heat, brown ground beef, breaking it up with a spoon, until no pink remains, about 5 minutes. Drain excess fat if needed.
- Add chopped celery to the beef. Stir frequently over medium-high heat for 5 full minutes until celery softens completely and any released water evaporates dry. This is the key step: no liquid left means no watery sauce later. Season with salt and pepper.
- Push beef and celery to one side. Melt butter in the empty side, whisk in flour, and cook 1 minute to make a smooth roux. Gradually whisk in milk and reserved pasta water. Cook, stirring constantly, until thickened, 3 minutes.
- Stir in cheddar cheese until fully melted and sauce is creamy. Fold in cooked pasta shells until evenly coated and heated through, 2 minutes.
- Remove from heat, sprinkle with parsley, and serve hot. Sauce stays thick and perfect!
Notes
- Key step: Cook celery over medium-high heat for 5 full minutes until completely dry with no liquid left to prevent watery sauce.


