Ah, homemade veggie chips. We’ve all been there, right? You envision a beautiful batch of perfectly golden, wonderfully crunchy crisps, only to pull them from the oven and find a sad collection of chewy, slightly burnt, mostly-not-crispy discs. It’s the kitchen equivalent of a deflated balloon! Making genuinely crispy carrot chips can feel like chasing a culinary unicorn.
But what if I told you there’s a simple secret? One easy, often overlooked step that dramatically increases your chances of crispy success every single time? This isn’t just about thinly slicing; it’s about tackling the very enemy of crispness head-on. Once you master this one trick, you’ll be churning out batches of satisfyingly crunchy carrot chips that might just make you say goodbye to the store-bought kind forever.
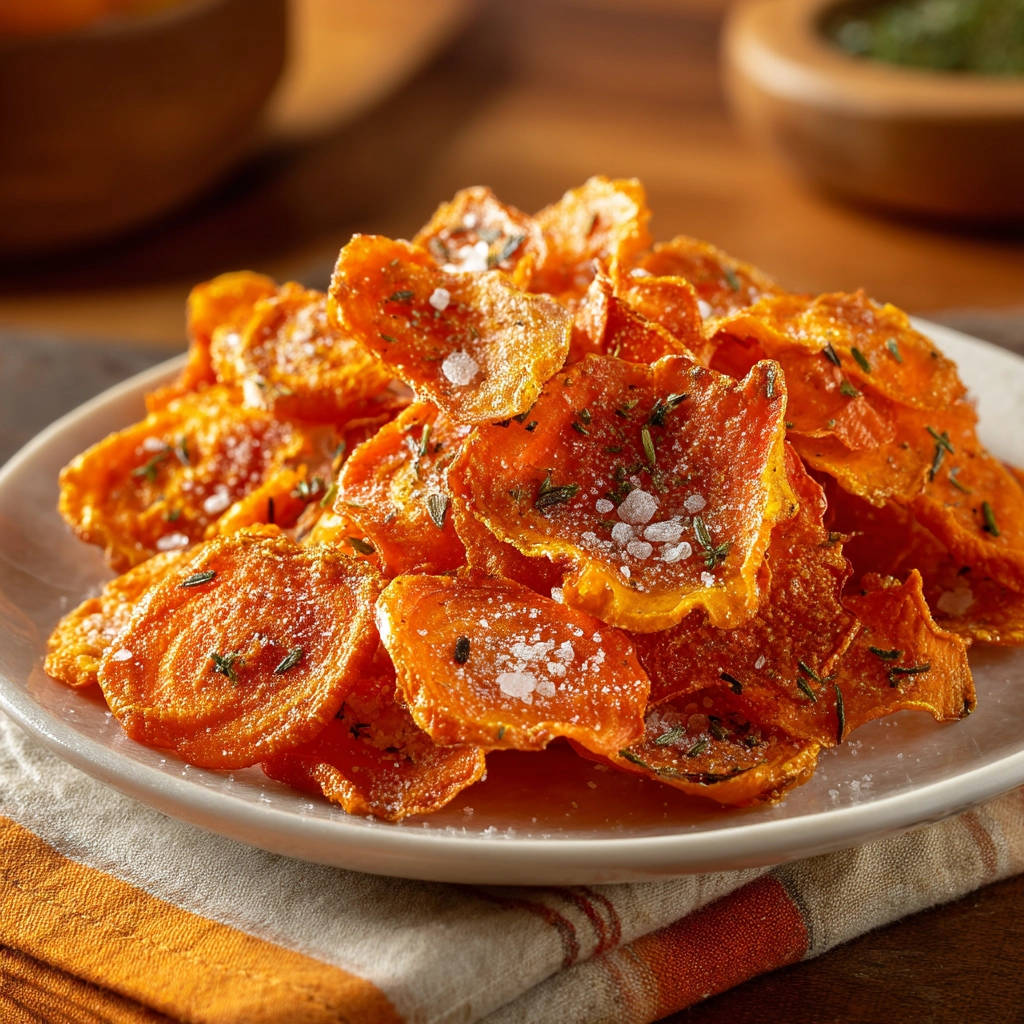
Carrots are naturally sweet and earthy, making them a fantastic base for a savory snack. When baked to perfection, they transform into surprisingly delightful chips. Let’s dive into how to make these crispy delights!
Why You’ll Fall in Love with These Crispy Carrot Chips
Beyond finally conquering the chewy chip curse, there are so many reasons to make these carrot chips a regular part of your snack rotation:
- Healthy & Wholesome: They’re made with just carrots, a little oil, salt, and herbs. A much lighter alternative to many packaged snacks.
- Satisfyingly Crunchy: That glorious crunch you crave? Achieved! They offer a texture that surprisingly mimics traditional potato chips.
- Easy to Customize: The basic recipe is a perfect canvas for your favorite seasonings.
- Naturally Sweet & Savory: The inherent sweetness of the carrot balances beautifully with the added salt and herbs.
- Simple Ingredients: You likely have everything you need in your pantry and fridge right now.
Gathering Your Ingredients for Crispy Carrot Chips
Creating these addictive little snacks requires just a handful of humble ingredients. Quality definitely matters here, especially when you’re working with so few components. Choosing fresh, firm carrots and good quality seasonings will elevate your chips from good to truly great.
- Carrots: You’ll need about 3 to 4 large carrots. Look for carrots that are firm and vibrant in color. Larger carrots often yield wider, more chip-like rounds, but any size will work as long as they are fresh. Wash and peel them thoroughly to remove any dirt and the outer layer.
- Neutral Oil: About 2 tablespoons of a neutral-flavored oil are needed. Avocado oil or vegetable oil are excellent choices because they have a high smoke point, which is important for oven roasting at a slightly higher temperature, and they don’t impart their own strong flavor, allowing the sweet carrot taste to shine. Olive oil can be used, but choose a light variety so the flavor isn’t overwhelming.
- Salt: 1 teaspoon of sea salt or flaky salt is perfect. Sea salt provides a clean salty flavor, while flaky salt adds little pockets of intense saltiness and a lovely textural contrast. Don’t underestimate the power of salt; it enhances the sweetness of the carrots and is essential for that classic chip experience.
- Dried Herbs: We’re using about 1/2 teaspoon of dried thyme or other dried herbs. Thyme adds a wonderful savory, slightly earthy note that pairs exceptionally well with carrots. You could also consider dried rosemary, oregano, or even a pinch of garlic powder or smoked paprika depending on the flavor profile you desire. The herbs from the image in the original recipe serve as inspiration, so feel free to get creative!
That’s it! A short and sweet list for a remarkably satisfying snack. Now, let’s get to the process, paying special attention to that game-changing step.

Crafting Your Crispy Carrot Chips: Step-by-Step
Making these crispy carrot chips isn’t complicated, but it does require attention to detail, particularly during the prep phase. Follow these steps, and you’ll be well on your way to crunchy perfection:
-
Prepare Your Baking Environment: Start by getting your oven ready. Preheat it to 375°F (190°C). Using two large baking sheets is crucial to ensure you can spread the carrot slices out adequately (more on that in a bit!). Line both sheets generously with parchment paper. This prevents sticking and makes cleanup a breeze. A properly preheated oven ensures the carrots start drying out and crisping immediately upon hitting the hot surface.
-
Slice, Slice, Slice! (And Make Them Uniform): Wash and peel your carrots. The next step is slicing them into rounds. The key here is THINNESS and UNIFORMITY. Aim for slices as thin as you can get them, ideally no more than 1/16th of an inch thick. A mandoline slicer is truly your best friend for this step, as it ensures consistent thickness, which is vital for even baking. If you don’t have a mandoline, use your sharpest knife and take your time to slice as consistently as possible. Thinner slices mean less moisture, and less moisture means crispier chips!
-
The Game-Changing Moisture Removal Step: This is IT – the secret weapon against chewy carrot chips! After slicing, spread the carrot rounds in a single layer across a clean, absorbent kitchen towel. Place a second clean towel over the top. Now, press down firmly, using your hands or even another flat object, to press out as much moisture as you possibly can. Don’t be shy! You might need to do this in batches depending on how many carrots you’re using and the size of your towels. Excess water turns to steam in the oven, and steam prevents crisping. Getting rid of it upfront is the most critical factor for success.
-
Season and Coat Evenly: Transfer the thoroughly dried carrot slices to a medium bowl. Drizzle the 2 tablespoons of neutral oil over them. Sprinkle the teaspoon of sea salt or flaky salt and the 1/2 teaspoon of dried herbs (like thyme) over the top. Gently toss everything together using your hands or a spoon until every single carrot slice is lightly and evenly coated in the oil, salt, and herbs. The oil helps conduct heat for crisping and ensures the seasonings stick.
-
Arrange on Baking Sheets (Single Layer Only!): This is another crucial technique. Arrange the seasoned carrot slices on your prepared baking sheets in a single layer. Make sure there is space between each chip. Do NOT overlap them. If the chips are too close together or overlapping, they will steam each other instead of roasting and crisping. This is why using two baking sheets is often necessary, especially with 3-4 carrots. Give them room to breathe!
-
Bake Until Curly and Browned: Place the baking sheets in your preheated oven. Bake for approximately 15-25 minutes. The exact baking time will vary significantly based on how thin your slices are, the amount of moisture you removed, and the quirks of your specific oven. It is absolutely essential to rotate the baking sheets halfway through the baking time (swap positions and maybe turn them around) to ensure even cooking and browning. Start checking on them around the 15-minute mark. You’re looking for the edges of the chips to start curling up and turning a light golden brown. They can go from perfectly done to burnt in seconds, so watch them like a hawk during the final minutes!
-
Cooling is Non-Negotiable for Crispness: Once they look ready – curled and lightly browned – remove the baking sheets from the oven. This step is just as important as drying them! Let the carrot chips cool COMPLETELY on the baking sheets. As they cool, the remaining moisture evaporates, and they will firm up and become wonderfully crispy. Tasting one straight from the oven might trick you into thinking they aren’t crispy enough; patience is key here!
-
Serve and Enjoy Fresh: Once cooled and crispy, gently transfer the chips to a serving plate or bowl. For the absolute best texture and crunch, enjoy your homemade crispy carrot chips immediately. There’s nothing quite like a fresh batch!
Tips for Perfect Crispy Carrot Chips Every Time
Even with the key steps, a few extra tips can ensure your carrot chip success:
- Mandoline Mastery: Seriously, a mandoline makes all the difference for achieving uniform thinness. Invest in one if you make veggie chips often. Always use the guard for safety!
- Pat Dry, Then Press Dry: Don’t just pat. PRESS. Use firm pressure with those towels to extract every possible drop of moisture. It’s the number one factor.
- Listen to Your Oven: Oven temperatures can vary. Trust your eyes and nose towards the end of the baking time. If they smell slightly toasty or look curled and browned, they’re likely ready.
- Seasoning Variations: Get creative! Try adding a pinch of garlic powder, onion powder, smoked paprika, a dash of cayenne for heat, or even some nutritional yeast for a cheesy flavor. For a sweeter take (though less traditional chip-like), a tiny sprinkle of cinnamon and nutmeg after baking could be nice.
- Batch Baking: If you have a lot of carrots, work in batches to avoid overcrowding the baking sheets.
- Storage: Store cooled chips in an airtight container at room temperature. They are best enjoyed fresh, as moisture can soften them over time.
- Re-crisping: If they do soften slightly, you can spread them back on a baking sheet and bake at a lower temperature (around 300°F or 150°C) for a few minutes until crisp again.
Serving Suggestions for Crispy Carrot Chips
These crispy carrot chips are delightful on their own, perfect for mindless snacking. But they also make a fantastic accompaniment to various meals or dips. Serve them alongside sandwiches or wraps instead of traditional potato chips. They’re a great addition to a snack board or charcuterie plate.
Pair them with your favorite dips! They work beautifully with creamy ranch, a simple guacamole, or even a whipped feta dip. Their subtle sweetness is a lovely contrast to savory or tangy dips. You could also crumble them over salads for a unique crunchy topping, similar to croutons. They add a vibrant color and satisfying texture to simple greens or grain bowls.
Your Crispy Carrot Chip Questions Answered (FAQ)
Let’s address some common questions you might have about making homemade carrot chips.
What kind of carrots are best for making chips?
Any type of standard large carrot will work well. Look for fresh, firm carrots that aren’t bendy, as they will be easier to slice thinly. Organic carrots can sometimes have a richer flavor, but it’s not essential for success.
Why are my carrot chips still chewy even after baking?
Chewy chips are almost always a result of too much moisture remaining in the carrot slices before baking, or the slices being too thick or uneven. The critical step of thoroughly drying the slices with a towel is the most common fix. Also, ensure you are slicing them as thinly and uniformly as possible, and that you are not overcrowding the baking sheets during baking.
Can I make crispy carrot chips without a mandoline slicer?
Yes, you absolutely can! A very sharp knife is essential. Take your time and focus on making each slice consistently thin. It might take a little longer and require more patience, but it’s definitely achievable. Consistency is key, however you achieve it.
How thin should I slice the carrots for maximum crispiness?
Aim for 1/16th of an inch thickness or even thinner if you can manage it safely. Think potato chip thinness! The thinner they are, the less moisture they contain, and the faster and crispier they will become in the oven.
Can I make these in an air fryer?
Yes, you can! Air fryers are excellent for making crispy veggie chips. You’ll follow the same steps for washing, peeling, slicing, and crucially, drying the carrots. Then, toss them with oil, salt, and herbs. Arrange them in a single layer in your air fryer basket (you’ll likely need to work in smaller batches than in the oven). Air fry typically at around 350°F (175°C) for 8-15 minutes, shaking the basket halfway through, until they are crispy and browned. Keep a close eye on them as air fryers cook very quickly!
How long do homemade carrot chips last?
For the best texture, homemade carrot chips are ideal when enjoyed immediately after cooling. You can store them in an airtight container at room temperature for 2-3 days, but they may soften slightly. Re-crisping them in a low oven is a good way to revive their crunch.
Can I use different spices besides thyme?
Absolutely! Feel free to experiment with different flavor combinations. Smoked paprika, cumin, curry powder, chili powder, garlic powder, onion powder, or even a blend like Italian seasoning would work well. Just make sure to use dried herbs and spices, as fresh ones can burn at the baking temperature.
Enjoy Your Homemade Crispy Carrot Chips!
There you have it! The secret to truly crispy carrot chips unlocked. That simple act of removing excess moisture before baking is a game-changer that will rescue you from a world of chewy, disappointing attempts. These chips are a testament to how a few simple ingredients and a little technique can create something truly satisfying and delicious.
Give this recipe a try and experience the crunch for yourself. Whether you enjoy them as a guilt-free snack, a side dish, or paired with your favorite dip, these homemade crispy carrot chips are sure to become a new favorite. Let me know in the comments below how your batch turned out and what seasonings you used!
Crispy Carrot Chips

Ingredients
- 3-4 large carrots
- 2 tablespoons neutral oil (like avocado or vegetable)
- 1 teaspoon sea salt or flaky salt
- 1/2 teaspoon dried thyme or other dried herbs from image
Directions
- Preheat oven to 375°F (190°C). Line two large baking sheets with parchment paper.
- Wash and peel the carrots. Use a mandoline slicer or a very sharp knife to slice the carrots into rounds as thinly as possible, aiming for uniform thickness. Thinness is key to crispiness!
- This is the critical step: Spread the sliced carrots in a single layer on a clean kitchen towel. Lay another towel over the top and press firmly to remove as much moisture as possible. Excess water is the enemy of crispy chips!
- In a medium bowl, toss the dried carrot slices with the oil, salt, and dried herbs until evenly coated.
- Arrange the seasoned carrot slices in a single layer on the prepared baking sheets. Do not overcrowd the pan; leave space between chips.
- Bake for 15-25 minutes, rotating the sheets halfway through, until the edges of the chips are curled and slightly browned. Keep a close eye on them as they can go from done to burnt very quickly. Baking time will vary greatly depending on how thin your slices are and your oven.
- Let the chips cool completely on the baking sheets. They will crisp up significantly as they cool.
- Once cool and crispy, transfer to a serving plate and enjoy immediately for the best texture.