

Oh, hello there, fellow food lover! Have you ever experienced that moment of pure anticipation, biting into what you expect to be a perfectly crispy fried pickle, only to be met with disappointing sogginess? Ugh, I know, it’s the worst! For ages, I chased that elusive, restaurant-quality crunch at home, and honestly, there were a few floppy, greasy batches along the way. It was frustrating, to say the least.
But guess what? I cracked the code! After countless experiments and a few culinary revelations, I discovered the absolute key to achieving crispy fried pickles that boast a stunning golden-brown coating and deliver that utterly satisfying CRUNCH with every single bite. The secret isn’t some fancy ingredient or complicated technique; it’s surprisingly simple, yet often overlooked. Once you unlock this one crucial step, you’ll be making crispy fried pickles like a seasoned pro, impressing everyone who tries them!
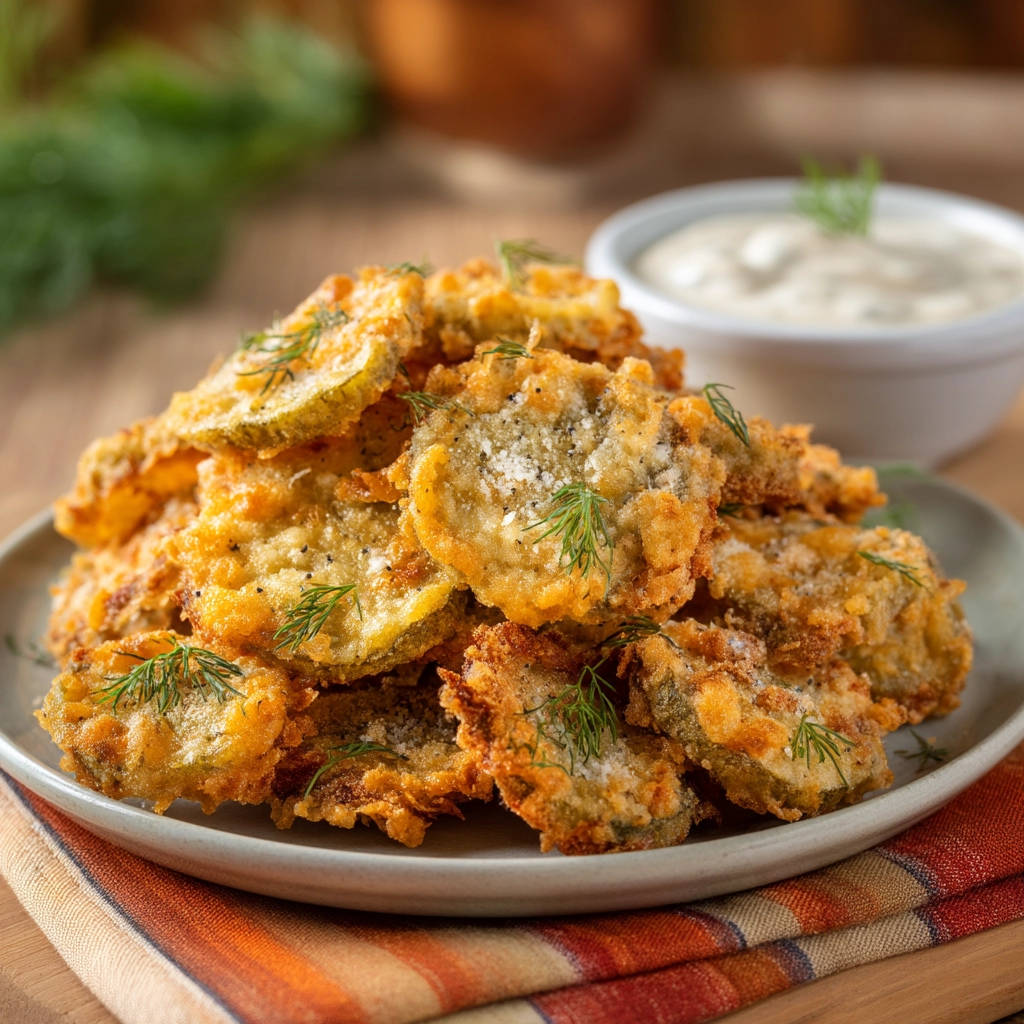
Get ready to say goodbye to soggy struggles and hello to perfectly crunchy bliss. Let’s dive into how you can finally make the best crispy fried pickles right in your own kitchen.
Why You’ll Fall in Love with This Crispy Fried Pickle Recipe
Beyond just the irresistible crunch, this recipe for crispy fried pickles offers so many reasons to make it your go-to. It’s a crowd-pleaser that disappears fast at gatherings, a fun snack for movie night, and a perfect appetizer to kick off any meal. Here’s why it stands out:
- Unmatched Crispiness: Seriously, the method here ensures a crackling exterior that holds up beautifully. No more sad, limp coatings!
- Fantastic Flavor: You get that signature tangy pickle bite perfectly complemented by the savory, seasoned breading. It’s a flavor explosion!
- Simple Ingredients: You likely have most of these pantry staples on hand already. The star ingredient, of course, is just a jar of dill pickles!
- Easy to Follow: While there’s a crucial technique involved, the steps are straightforward and achievable for home cooks of all levels.
- Versatile Snack or Appetizer: These are fantastic on their own with dip, but they also make a fun addition to a burger night or a casual get-together.
Gathering Your Ingredients for Crispy Fried Pickles
Making truly delicious crispy fried pickles starts with selecting the right components. While the list might look familiar, paying a little attention to the type and quality of each ingredient makes a big difference in achieving that sought-after texture and flavor. Let’s talk about what you’ll need and why.
For the heart of our crispy creations, we need pickles! You’ll want a good-quality jar of dill pickle chips or spears. If using spears, you’ll need to slice them yourself into rounds about 1/4 inch thick. This consistent thickness is important for even frying. Choose pickles that are firm, not overly soft, as softer pickles will release more moisture and be harder to get crispy.
Next up is our breading foundation, and this recipe uses a classic three-part station. First, we have all-purpose flour. This acts as a crucial first layer, helping the egg adhere evenly to the surface of the pickle slices.
The second component is large eggs, beaten. Think of the eggs as the glue that binds the dry ingredients to the pickle. Beating them well ensures a smooth, consistent dip.
Finally, the star of our crispy coating: panko breadcrumbs. This is where the magic happens! Panko breadcrumbs are coarser and flakier than standard breadcrumbs, which allows them to fry up incredibly light and crispy without absorbing too much oil. They are absolutely essential for that shatteringly crisp texture we’re after.
To season our panko breadcrumbs and give our crispy fried pickles extra depth of flavor, we’ll mix in salt and freshly ground black pepper. You also have the delicious options of adding garlic powder for an extra savory kick and finely chopped fresh dill. Adding fresh dill to the breading boosts that wonderful dill flavor that pairs so perfectly with fried pickles.
For frying, you’ll need a good amount of cooking oil. Vegetable oil or canola oil are great choices because they have a high smoke point and neutral flavor, allowing the taste of the pickles and breading to shine through. Ensure you have enough to fill your pot with about 2 inches of oil.
And, of course, you can’t have crispy fried pickles without something to dip them in! Have your favorite ranch or preferred dipping sauce ready for serving.
Here’s a quick list of everything you’ll need handy:
- 1 jar dill pickle chips or spears, sliced into 1/4 inch rounds
- 1 cup all-purpose flour
- 2 large eggs, beaten
- 1 1/2 cups panko breadcrumbs
- 1 teaspoon salt
- 1/2 teaspoon black pepper
- 1/2 teaspoon garlic powder (optional)
- 1/4 cup finely chopped fresh dill (optional, for breading)
- Vegetable oil or canola oil, for frying
- Ranch or preferred dipping sauce, for serving
Crafting Your Crispy Fried Pickles: Step-by-Step
Ready to transform those tangy pickles into golden, crispy perfection? Follow these detailed steps, paying close attention to the ‘why’ behind each action. This is where we build that incredible crunch!
The Absolute Most Crucial Step: Drain and Dry Those Pickles! This cannot be stressed enough. Excess moisture is the enemy of crispiness when frying. You need to get as much liquid out of the pickles as possible. Start by draining the entire jar very well in a colander. Then, spread the pickle slices out in a single layer over several layers of paper towels. Blot the tops thoroughly with more paper towels. Let them sit there for at least 10-15 minutes, allowing more moisture to wick out. Blot them again before breading. The drier the pickles, the crispier your result will be. This step is the core secret to finally crispy fried pickles!
Set Up Your Breading Assembly Line: To make the breading process smooth and efficient, set up three shallow dishes side-by-side. In the first dish, place your all-purpose flour. In the second dish, pour your whisked eggs. In the third dish, combine the panko breadcrumbs, salt, pepper, garlic powder (if using), and fresh dill (if using). Give the ingredients in the third dish a quick stir to ensure everything is evenly distributed. Having this station ready makes the breading process quick and clean.
Get Your Frying Oil Ready: Heat about 2 inches of vegetable or canola oil in a large, heavy-bottomed pot or a Dutch oven over medium-high heat. Using a heavy pot helps maintain a consistent oil temperature, which is vital for preventing greasy fried pickles. Attach a deep-fry thermometer to the side of the pot and heat the oil until it reaches between 350 degrees F and 375 degrees F (175 degrees C to 190 degrees C). This temperature range is critical – too cool and the pickles will absorb too much oil and be greasy; too hot and the outside will burn before the inside is ready. Monitor the temperature throughout the frying process.
Time to Bread the Pickles: Working with a few pickle slices at a time (don’t add too many wet pickles to the flour at once, as it can make it clumpy), dredge each dried pickle slice first in the flour, ensuring it’s fully coated, then gently shake off any excess flour. Next, dip the floured pickle slice into the beaten egg, allowing any excess egg to drip back into the dish. Finally, transfer the eggy pickle to the panko mixture. Coat it generously with the seasoned panko, pressing gently with your fingers to help the breadcrumbs adhere firmly to the surface. You want a thick, even coating.
Carefully Fry in Batches: Once the oil is at the correct temperature, carefully add the breaded pickle slices to the hot oil. Add them one by one, using tongs or a slotted spoon, laying them away from you to avoid splashes. It’s absolutely crucial not to overcrowd the pot. Frying too many at once will drop the oil temperature significantly, leading to greasy, less crispy results. Fry for about 2 to 3 minutes per side, using a slotted spoon or tongs to turn them halfway through, until they are beautifully golden brown and look wonderfully crispy.
Drain on a Wire Rack: As each batch finishes frying, remove the crispy fried pickles from the oil using a slotted spoon and immediately transfer them to a wire rack set over a baking sheet. This allows excess oil to drain away and, more importantly, allows air to circulate around the pickles. This prevents steam from getting trapped underneath, which would make them soggy. Resist the urge to drain them on paper towels directly, as this traps steam!
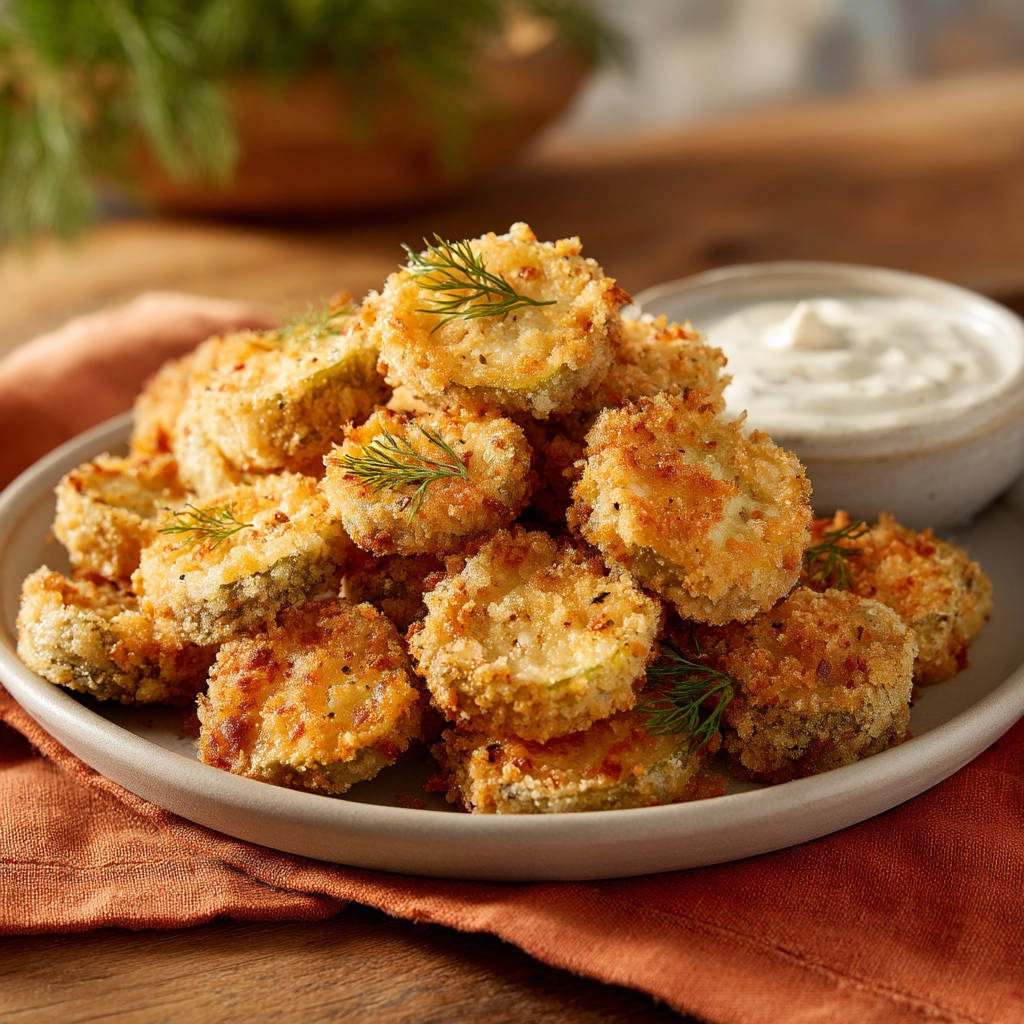
Repeat and Serve Hot: Continue breading and frying the remaining pickle slices in batches, making sure the oil returns to the correct temperature between batches. As each batch is ready, transfer them to the wire rack. Serve the crispy fried pickles hot, straight from the rack, with your favorite dipping sauce, like classic ranch. The crunch is best enjoyed immediately!
Tips for Perfect Crispy Fried Pickles Every Time
Achieving that consistently perfect crunch requires a few key techniques and considerations. Here are my top tips to ensure your crispy fried pickles are always a resounding success:
- Master the Drying: I know I’ve said it before, but seriously, this is the game changer. Spend the extra time blotting and letting the pickles air dry slightly on paper towels. You’ll be amazed at how much moisture comes out, and that moisture is what stands between you and ultimate crispiness.
- Oil Temperature is King: Invest in a thermometer if you don’t have one. Maintaining the oil between 350°F and 375°F (175°C to 190°C) is non-negotiable for crispy, non-greasy results. If the oil is too cool, the breading absorbs it like a sponge. Too hot, and the outside burns before the pickle is warm.
- Don’t Overcrowd: This is the second most important tip. Fry in small batches. Give those pickles space! Overcrowding cools the oil and leads to uneven cooking and sogginess. Patience here pays off.
- Panko Power: Don’t substitute standard breadcrumbs for panko if you can help it. Panko’s unique texture is specifically designed for maximum crispiness and minimal oil absorption in deep frying.
- Season Your Breading: Tasting the breading mixture before you use it (a tiny pinch!) helps ensure it’s seasoned to your liking. Adjust the salt, pepper, and optional garlic powder or dill.
- Test a Sample: Before frying a whole batch, drop just one or two breaded pickles into the hot oil. Watch how quickly they brown and adjust the heat if needed. This saves you from potentially ruining an entire batch.
- Drain Smart: Always use a wire rack over a baking sheet for draining. Paper towels trap steam and make the bottom soggy almost instantly.
- Serving Temperature Matters: Fried pickles are at their absolute peak crispiness when served hot, right after frying. While they are still tasty cooled down, the initial crunch fades over time.
- Reheating Leftovers: If you do have leftovers (a rare occurrence!), the best way to reheat them and revive some crispiness is in an air fryer or toaster oven at around 350°F (175°C) for a few minutes until heated through and crispy again. Avoid the microwave!
What to Serve With Your Crispy Fried Pickles
While a side of ranch dressing is the classic and utterly perfect companion for crispy fried pickles, there’s a whole world of dipping sauces and accompaniments that can take your snack experience to the next level. Think creamy, spicy, or tangy dips to complement that savory crunch.
Beyond ranch, consider a spicy mayo (mayonnaise mixed with a little sriracha or your favorite hot sauce), comeback sauce, honey mustard, or even a tangy remoulade. A cool, creamy blue cheese dressing also offers a delightful contrast to the salty pickle.
Crispy fried pickles make a fantastic standalone appetizer for parties or game day. Serve them piled high on a platter with an assortment of dips. They also pair wonderfully as a side dish to casual meals. Imagine them next to a juicy burger, or maybe even alongside some Grilled Chicken Rice Bowl for a fun textural contrast. For other great snack or side ideas perfect for sharing, you might also enjoy our Crispy Roasted Brussels Sprouts or even some Crispy Potato Coins!
Don’t forget about drinks! A cold soda, iced tea, or even a sparkling lemonade would be a refreshing pairing.
Your Crispy Fried Pickle Questions Answered (FAQ)
Got questions about making the best crispy fried pickles? Here are some common ones people ask:
Why are my fried pickles soggy?
The number one culprit for soggy fried pickles is excess moisture from the pickles themselves. They MUST be thoroughly drained and blotted dry. Other factors include oil that isn’t hot enough (it should be between 350°F and 375°F or 175°C to 190°C), overcrowding the frying pot (which lowers the oil temperature), or draining them directly on paper towels (which traps steam and makes them soft). Make sure to use a wire rack for draining!
Can I bake crispy fried pickles instead of frying?
While you can certainly bake or air fry breaded pickles as a lighter alternative, the texture will not be the same as traditional deep-fried crispy fried pickles. Baking tends to yield a crunch that is drier and more uniform, lacking the same airy, shatteringly crisp exterior that hot oil provides. Air frying gets closer, but deep frying remains the gold standard for this particular dish.
What kind of pickles are best for frying?
Firm dill pickles, either chips or spears that you slice yourself, work best. Avoid pickles that seem soft or mushy right out of the jar, as they will be more challenging to get truly crispy. The standard dill flavor is perfect for this application.
Can I make the breaded pickles ahead of time?
You can prepare the breading station and slice the pickles ahead of time, but for the absolute best results and crispiness, it is ideal to bread and fry the pickles immediately before serving. Breading them too far in advance can cause the breadcrumbs to become soggy from the pickle moisture.
How do I store and reheat leftover crispy fried pickles?
Store any leftovers in an airtight container in the refrigerator for 1-2 days. To reheat and try to restore some crispiness, the best methods are using an air fryer or a toaster oven. Reheat at around 350°F (175°C) for a few minutes until hot and crisped up. Microwaving will make them rubbery and soggy.
Can I add other seasonings to the breading?
Absolutely! This recipe provides a great base, but feel free to get creative. A pinch of cayenne pepper or paprika can add a little heat. Onion powder, a dash of dried mustard, or even some seasoned salt can also be mixed into the panko for different flavor profiles. Just be mindful of the salt content if using seasoned salt.
Enjoy Your Homemade Crispy Fried Pickles!
See? Achieving perfectly crispy fried pickles at home isn’t a culinary myth! By focusing on draining the pickles thoroughly, using panko breadcrumbs, maintaining the correct oil temperature, and draining on a wire rack, you too can create these irresistible bites that rival your favorite restaurant version.
There’s something incredibly satisfying about the tangy pop of the pickle followed by the perfect, golden crunch of the coating. They are truly addictive and guaranteed to disappear quickly!
Give this recipe a try the next time you’re craving a fun, flavorful snack or appetizer. I promise, the effort is minimal for the crispy reward!
Did you try this recipe? How did your crispy fried pickles turn out? What’s your favorite dipping sauce? Let me know in the comments below – I love hearing from you!
Fried Pickles
Ingredients
- 1 jar dill pickle chips or spears, sliced into 1/4 inch rounds
- 1 cup all-purpose flour
- 2 large eggs, beaten
- 1 1/2 cups panko breadcrumbs
- 1 teaspoon salt
- 1/2 teaspoon black pepper
- 1/2 teaspoon garlic powder (optional)
- 1/4 cup finely chopped fresh dill (optional, for breading)
- Vegetable oil or canola oil, for frying
- Ranch or preferred dipping sauce, for serving
Directions
- Drain the pickles very well. This is the most critical step for crispiness. Spread the pickle slices in a single layer on paper towels and blot the tops thoroughly with more paper towels. Let them sit for at least 10-15 minutes, blotting again if needed, to remove as much moisture as possible.
- Set up your breading station. Place the flour in a shallow dish. In a second shallow dish, whisk the eggs. In a third shallow dish, combine the panko breadcrumbs, salt, pepper, garlic powder if using, and chopped fresh dill if using.
- Heat about 2 inches of oil in a large heavy-bottomed pot or Dutch oven over medium-high heat until it reaches 350 degrees F to 375 degrees F (175 degrees C to 190 degrees C). Use a thermometer to check the temperature. Maintaining the correct oil temperature is essential for crispiness without being greasy.
- Working in batches, dredge each dried pickle slice first in the flour, shaking off any excess. Then dip it into the beaten egg, letting excess drip off. Finally, coat generously with the panko mixture, pressing gently to help the breadcrumbs adhere.
- Carefully add the breaded pickle slices to the hot oil, ensuring not to overcrowd the pot. Fry for 2 to 3 minutes per side, or until golden brown and crispy. Use a slotted spoon to turn them as needed.
- Remove the fried pickles from the oil and place them on a wire rack set over a baking sheet to drain. Avoid draining on paper towels, as this can trap steam and make them less crispy.
- Repeat with the remaining pickle slices. Serve hot with ranch or your favorite dipping sauce.


