Stop settling for breaded chicken that turns into a mushy mess the second the sauce hits the pan. Most recipes fail because they crowd the chicken in a skillet, which creates steam and turns that beautiful crust into a soggy layer of wet dough. It’s a frustrating waste of good ingredients when you’re expecting a crunch but get a sponge instead.
This sheet pan method changes the game by using a high-heat pre-searing technique and a specific layering order. You’ll get chicken that stays shatteringly crisp on top while the bottom soaks up just enough of that bright, buttery lemon and caper sauce. It’s the perfect balance of a golden-brown exterior and a silky, decadent finish that usually requires a professional chef’s touch.
The secret to this success is the “screaming-hot” tray method. By preheating your baking sheet in a 425°F oven before the chicken ever touches it, you create an instant sear that locks the breading onto the meat. This thermal shock prevents the juices from leaking out and softening the crust, ensuring your Crispy Sheet Pan Chicken Piccata lives up to its name every single time.
The Physics of High-Heat Sheet Pan Searing
Cooking is often more about physics than just following a list of steps. When you use a heavy-duty rimmed baking sheet, you’re working with a significant amount of thermal mass. By letting that metal get hot in the oven, it acts like a giant frying pan that hits the chicken from below the moment you lay it down.
This immediate contact triggers the Maillard reaction, which is the chemical process that creates those deep, savory flavors and that gorgeous brown color. If you put breaded chicken onto a cold tray, the meat and the metal have to heat up together. During that slow climb in temperature, the chicken releases moisture that gets trapped under the breading, leading to the dreaded “soggy bottom.”
Furthermore, the wide surface area of a sheet pan allows for better air circulation than a high-walled skillet. In a crowded pan, the moisture evaporating from the chicken stays trapped around the meat, effectively steaming it. In the oven, the dry, hot air moves freely around each piece, wicking away moisture and allowing the Panko to crisp up into a delicate, glass-like texture.
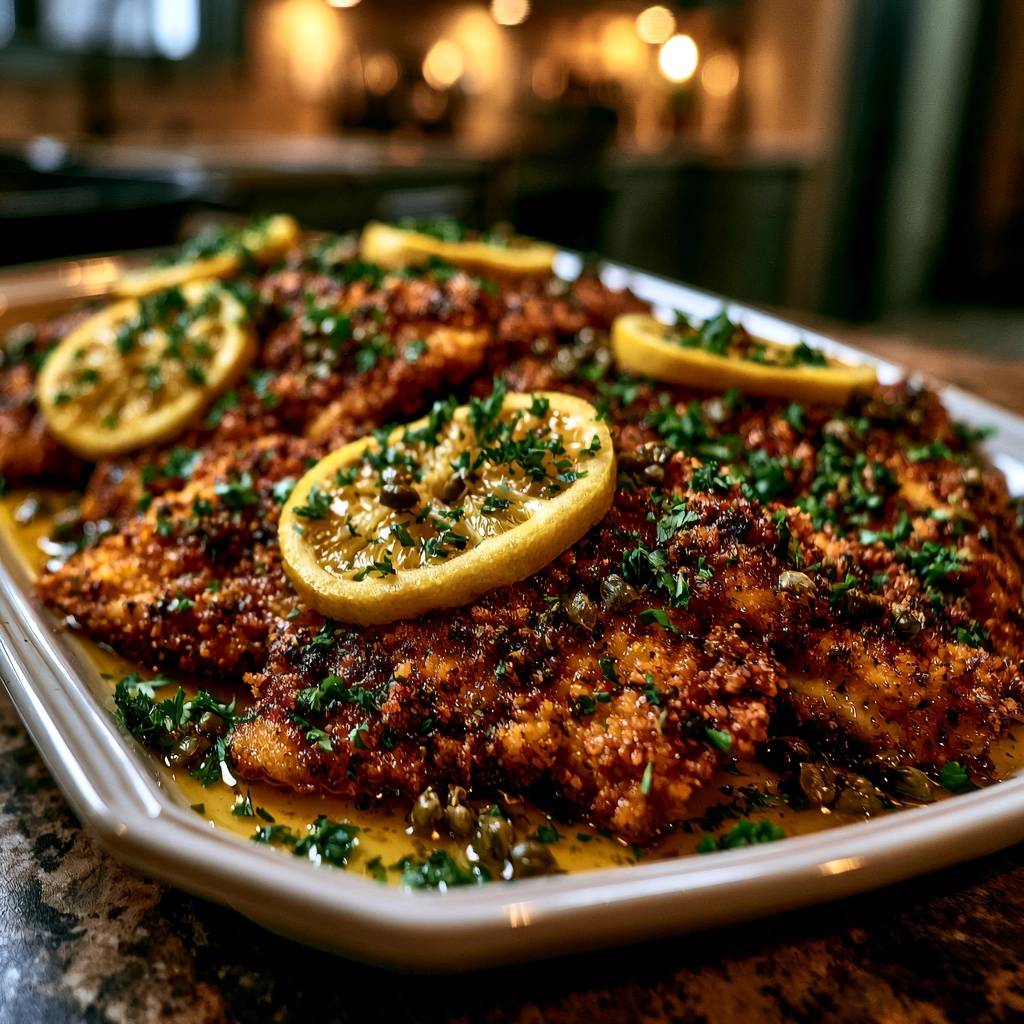
Essential Components for Crispy Sheet Pan Chicken Piccata
The ingredients for this dish are simple, but their roles are specific. Panko breadcrumbs are the MVP here because they are larger and airier than standard breadcrumbs. They don’t pack down tightly, which means they create more surface area for the heat to hit, resulting in a much louder crunch.
Freshly grated Parmesan cheese isn’t just for flavor; it acts as a structural binder. As the cheese melts in the oven, it fuses with the Panko, creating a lacy, savory web that grips the chicken. Always use a block of Parmesan and grate it yourself if possible, as pre-shredded versions often contain anti-caking agents that prevent them from melting smoothly.
Capers provide the essential briny “pop” that defines a piccata. These little flower buds are salt-cured, so they bring a sharp contrast to the rich butter sauce. If you find them too salty, give them a quick rinse under cold water before scattering them onto the tray. This allows the lemon’s brightness to shine through without being overshadowed by salt.
Selecting and Preparing the Poultry
Uniformity is your best friend when roasting chicken at high heat. If one side of your chicken breast is an inch thick and the other is a half-inch, the thin side will dry out before the thick side is safe to eat. Use a meat mallet or a heavy rolling pin to pound the chicken to a consistent 1/2-inch thickness.
Before you even think about the flour, take a paper towel and pat the chicken completely dry. Any surface moisture will turn the flour into a gummy paste, which eventually causes the breading to slide right off the meat. A dry surface ensures the flour sticks, which ensures the egg sticks, which ensures the Panko stays put.
The Liquid Gold: Lemon, Butter, and Capers
The sauce is a delicate emulsion of melted butter, chicken broth, and fresh lemon juice. I always recommend unsalted butter for this recipe. Between the Parmesan, the capers, and the chicken broth, there is already plenty of salt in the mix, and using unsalted butter gives you total control over the final seasoning.
Fresh lemon juice is non-negotiable. Bottled juice often has a metallic aftertaste and lacks the volatile oils found in fresh citrus that provide that signature “zing.” The acidity in the fresh juice is what cuts through the fat of the butter and cheese, making the whole dish feel light rather than heavy.
The Three-Stage Dredging Station Protocol
To keep your kitchen from becoming a sticky mess, use the “dry hand/wet hand” technique. Use your left hand for the dry flour and Panko, and your right hand for the wet egg wash. This prevents your fingers from becoming breaded along with the chicken, which saves ingredients and cleanup time.
Start with a light dusting of seasoned flour; shake off every bit of excess so only a fine veil remains. Next, dip the chicken into the beaten eggs, ensuring every nook and cranny is coated. The egg acts as the glue for the final and most important layer.
When you move the chicken to the Panko and Parmesan mixture, don’t just toss it in. Use the heel of your hand to firmly press the crumbs into the meat. You want a thick, even coating that feels like it’s part of the chicken. This physical pressure is what prevents the crust from flaking off when you flip the meat or pour the sauce.
Step-by-Step: Executing the Perfect Sheet Pan Roast
Success with this recipe depends on timing and temperature. Once that oven hits 425°F, you need to move with purpose. Have all your components ready on the counter before you pull the tray out, as every second the oven door is open, you’re losing the heat you worked so hard to build.
Phase 1: The Screaming-Hot Tray Transfer
Carefully slide the preheated baking sheet out of the oven and place it on a heat-safe surface. Drizzle the olive oil across the metal; it should shimmer and move like water almost instantly. When you lay the breaded chicken down, you should hear a loud, aggressive sizzle.
This sizzle is the sound of the bottom crust frying. If you don’t hear it, your tray wasn’t hot enough. This initial contact sears the Panko into a rigid structure, which is the primary defense against the sauce we’re about to add. Work quickly so the tray stays hot for all four pieces of chicken.
Phase 2: Strategic Sauce Placement
This is the most critical part of the “Anti-Soggy” method. Whisk your butter, broth, and lemon juice together until combined. Instead of pouring this over the chicken, carefully pour it into the open spaces of the baking sheet. The liquid should surround the chicken, not submerge it.
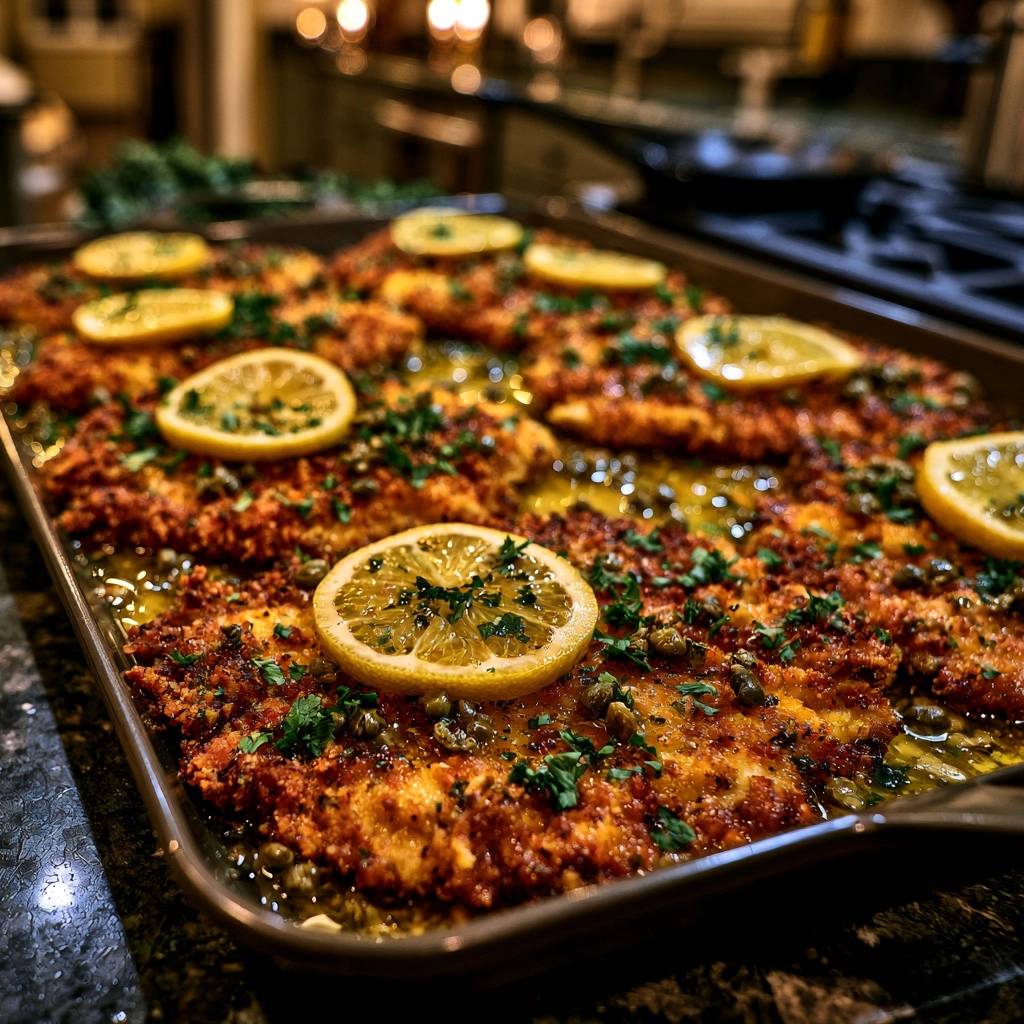
By doing this, the bottom of the chicken “poaches” in the flavorful butter and broth, while the top half remains exposed to the dry heat of the oven. This creates a dual texture: a succulent, sauce-infused bottom and a dry, crunchy top. Scatter the capers into the liquid and place your lemon slices on the meat to infuse it with citrus oils as it roasts.
Phase 3: The Broiler Finish for Maximum Crunch
After about 15 minutes, the chicken should be cooked through, but we want that “shatteringly crisp” finish. Switch your oven to the broil setting for the last two minutes. Keep the oven light on and watch through the glass like a hawk.
You’re looking for the peaks of the Panko to turn a deep, golden brown and the butter sauce to bubble vigorously. The lemon slices will start to caramelize at the edges, which intensifies their sweetness. Remove the tray the second the crust looks toasted; even thirty extra seconds under the broiler can turn “crispy” into “burnt.”
Troubleshooting Common Texture Issues
If your breading is falling off, it’s usually because the chicken was too wet before dredging or you didn’t press the Panko in firmly enough. Next time, try letting the breaded chicken sit on a wire rack for 5 minutes before cooking. This helps the breading “set” and adhere better to the meat.
If your sauce looks “broken” or greasy, it might be because the oven was too hot or the broth evaporated too quickly. You can easily fix this by whisking in a tablespoon of warm water or extra chicken broth right on the tray before serving. This helps re-emulsify the butter and lemon juice into a creamy sauce.
Flavor Variations and Ingredient Swaps
While Panko is the gold standard for crunch, you can use crushed buttery crackers for a richer, more old-school flavor. For those avoiding gluten, crushed cheese crisps or a gluten-free Panko substitute work surprisingly well with this high-heat method. The technique remains exactly the same.
If you want to add more depth to the sauce, replace half of the chicken broth with a splash of white grape juice mixed with a teaspoon of white wine vinegar. This mimics the acidity and complexity of a traditional grape juice-based piccata sauce without using any alcohol. Adding fresh thyme or rosemary to the Panko mix can also provide a lovely earthy aroma.
Optimal Pairings for Lemon-Caper Chicken
Since this chicken is the star of the show, keep your sides simple. A bed of creamy polenta or mashed potatoes is excellent for soaking up the extra lemon-butter sauce from the tray. The softness of the potatoes provides a wonderful contrast to the crunch of the chicken.
For something lighter, try an arugula salad with a very simple lemon and olive oil dressing. The peppery bite of the greens cuts through the richness of the Parmesan crust. Garlic-rubbed green beans or roasted asparagus also work well, as they can often be cooked on a second sheet pan at the same time as the chicken.
Expert Tips for Storage and Reheating
Leftover chicken piccata can be stored in an airtight container in the fridge for up to three days. However, the microwave is the absolute enemy of this dish. It will turn the crispy Panko into a rubbery mess in seconds. To revive the crunch, use an air fryer or a toaster oven.
Reheat the chicken at 350°F for about 5 to 7 minutes. This high, dry heat will reactivate the fats in the breading and crisp it back up. If you have extra sauce, store it separately and drizzle it over the chicken after it has been reheated to keep the crust as dry as possible during the process.
Frequently Asked Questions
Can I use chicken thighs instead of breasts?
Yes, you can use boneless, skinless chicken thighs. However, thighs have a higher fat content and take longer to cook. You should pound them to an even thickness just like the breasts, but expect the cooking time to increase by about 5 to 8 minutes. The extra fat actually helps the breading get even crispier!
Why is my piccata sauce too salty?
The saltiness usually comes from the capers or the chicken broth. To prevent this, always rinse your capers in a fine-mesh strainer before adding them to the pan. Additionally, use a low-sodium chicken broth so you can control the salt levels yourself with a final pinch of sea salt at the end.
How do I prevent the garlic powder in the breading from burning?
Garlic powder can burn at 425°F if it’s on the very surface. By mixing the garlic powder thoroughly into the Panko and Parmesan, the cheese and breadcrumbs actually insulate the spice. If you find it’s still browning too fast, try using granulated garlic, which has a larger grain size and is more heat-resistant.
Can I make this dish dairy-free?
You can substitute the butter with a high-quality plant-based butter stick or even extra virgin olive oil. For the Parmesan, use a vegan Parmesan alternative or nutritional yeast mixed with a bit of almond flour. The texture will be slightly different, but the high-heat sheet pan method will still produce a great crunch.
What if I don’t have a heavy-duty baking sheet?
If your baking sheet is thin, it might warp or “pop” at 425°F. It also won’t hold heat as well. In this case, you can use a large cast-iron skillet or a glass 9×13 baking dish. Just keep in mind that glass takes longer to heat up, so you may need to preheat it for a full 15 minutes before adding the oil and chicken.
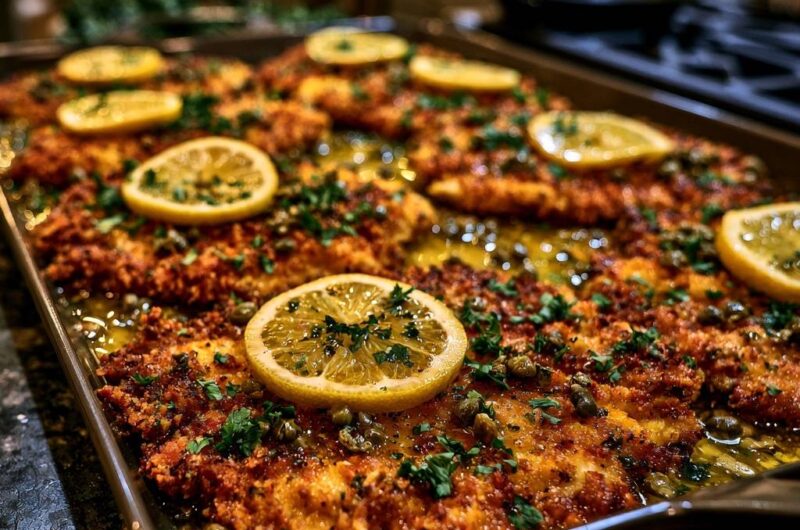
Crispy Sheet Pan Chicken Piccata
Course: Main CourseCuisine: Italian-AmericanDifficulty: easy4
servings15
minutes20
minutes35
Minutes460
kcalItalian-American
Ingredients
4 large chicken breasts, pounded to 1/2-inch thickness
1.5 cups Panko breadcrumbs
1/2 cup grated Parmesan cheese
2 large eggs, beaten
1/2 cup all-purpose flour
1/2 cup unsalted butter, melted
1/4 cup extra virgin olive oil
3 tablespoons capers, drained
2 lemons (one juiced, one thinly sliced into rounds)
1/2 cup chicken broth
1/4 cup fresh parsley, chopped
1 teaspoon garlic powder
1/2 teaspoon onion powder
1/2 teaspoon paprika (for color)
Salt and black pepper to taste
Directions
- Preheat your oven to 425°F (220°C). Place a large, rimmed heavy-duty baking sheet inside the oven while it heats. This preheating step is the secret to searing the bottom crust instantly so it never gets soggy.
- Set up three shallow bowls. Put flour mixed with salt, pepper, and paprika in the first; beaten eggs in the second; and a mix of Panko, Parmesan, garlic powder, and onion powder in the third.
- Dredge each chicken piece in flour, dip in egg, and press firmly into the Panko mixture until heavily coated on both sides.
- Carefully remove the screaming-hot baking sheet from the oven. Drizzle 2 tablespoons of olive oil over the surface. Place the breaded chicken onto the hot tray. You should hear a loud sizzle.
- In a small bowl, whisk together the melted butter, chicken broth, lemon juice, and remaining olive oil.
- Pour the butter and broth mixture onto the tray around the chicken pieces, not directly over the top of them. This allows the bottom of the chicken to “fry” in the sauce while the top stays dry and crispy.
- Scatter the capers into the sauce around the chicken. Place the lemon slices directly on top of each chicken breast.
- Bake for 15 to 20 minutes. For a deep golden crust like the image, switch to the Broil setting for the final 2 minutes, watching closely to prevent burning.
- Remove from the oven when the chicken reaches an internal temperature of 165°F. Garnish with fresh parsley and serve immediately while the crust is at peak crunch.
Notes
- The secret to the crunch is preheating the baking sheet and pouring the sauce around the chicken rather than over it. Use the broil setting for the final 2 minutes for a deep golden color.