Is there anything more frustrating than craving that perfect bite of fried chicken, only to be met with a dry, tough piece of meat lurking beneath a promisingly golden crust? You want that satisfying crunch, the kind that echoes just slightly, followed immediately by succulent, juicy chicken inside. It feels like a culinary unicorn sometimes, doesn’t it?
For years, achieving that ideal balance of crispy exterior and incredibly moist interior felt elusive. I tried countless methods, battling dry chicken or a soggy coating. But after much experimentation and learning a simple, yet powerful secret, I finally cracked the code. Now, these crispy fried chicken bites turn out perfectly juicy every single time.
Forget everything you thought you knew about finicky frying. This recipe simplifies the process and guarantees results that will have everyone asking for your secret. Spoiler alert: it involves a humble ingredient and a precise temperature.
Why You’ll Absolutely Love These Crispy Bites
These aren’t just any fried chicken bites; they are engineered for maximum enjoyment. Here’s why they’re destined to become a favorite:
- Unbeatable Texture: That shatteringly crispy exterior gives way to incredibly tender, juicy chicken. It’s the contrast you crave.
- Simple Secret to Juiciness: A quick soak in buttermilk works wonders, tenderizing the meat and ensuring it stays moist during frying.
- Flavorful Coating: The simple seasoning blend adds fantastic flavor to every crunch.
- Perfect for Any Occasion: Whether it’s a party appetizer, a casual dinner, or snack time, these bites are always a hit.
- Faster Than Full Pieces: Cutting the chicken into bite-sized pieces means quicker, more even cooking.
Gathering Your Ingredients for Perfect Bites
One of the best things about this recipe is that it uses pantry staples you likely already have on hand, plus fresh chicken. The magic really lies in the simple combination and technique.
Let’s break down the key players:
- Chicken: We call for 1.5 pounds of boneless, skinless chicken thighs or breasts, cut into about 1-inch pieces. While breasts are popular, chicken thighs are naturally higher in fat and moisture, making them incredibly forgiving and often resulting in juicier bites. If using breasts, be extra careful not to overcook.
- Buttermilk: This is our not-so-secret weapon for juiciness! About 1 cup of buttermilk contains enzymes and acids that help tenderize the chicken before it even hits the fryer. It also provides a perfect surface for our dry coating to adhere to.
- All Purpose Flour: 2 cups of standard all-purpose flour form the base of our crispy coating. It’s simple, readily available, and gets the job done beautifully.
- Seasoning Blend: To infuse flavor into that crispy crust, we mix in 2 teaspoons of salt (essential for flavor), 1 teaspoon of black pepper (for a bit of warmth and bite), 1 teaspoon of paprika (adds color and a touch of sweet earthiness), and 1 teaspoon of garlic powder (because garlic makes everything better, right?). You can adjust these spices to your preference or add a pinch of cayenne for heat.
- Oil for Frying: You’ll need enough oil to submerge the chicken pieces – aim for at least 2 inches deep in your pot. Vegetable, canola, or peanut oil are all excellent choices due to their high smoke points, which is crucial for frying at the necessary temperature without burning the oil. Peanut oil often imparts a classic fried flavor if you don’t have allergy concerns.
Crafting Perfect Crispy Bites: Step-by-Step
Ready to achieve fried chicken bite perfection? Follow these steps closely, paying attention to the little details that make all the difference between dry disappointment and juicy delight.
-
Prepare the Chicken and Begin the Buttermilk Soak: Start by cutting your chicken (thighs or breasts) into roughly 1-inch cubes. Try to keep the pieces relatively uniform in size so they cook at the same rate. Place these chicken pieces into a medium-sized bowl. Pour the full cup of buttermilk over the chicken, ensuring every piece is well coated. The buttermilk needs time to work its magic, so cover the bowl and place it in the refrigerator. A minimum of 30 minutes is needed to start the tenderizing process, but for maximum juiciness, letting it marinate for up to 4 hours is ideal. Don’t go much longer than 4 hours, as the acid can start to break down the chicken too much.
-
Whisk Together the Flavorful Coating: While the chicken is soaking in the fridge, prepare your dry dredging mixture. In a separate shallow dish or a wide plate (something easy to work with for coating the chicken), whisk together the 2 cups of all-purpose flour with your seasonings: salt, black pepper, paprika, and garlic powder. Make sure everything is evenly distributed so every bite gets that consistent flavor.
-
Coat the Chicken for Maximum Crunch: Take the chicken out of the buttermilk. Lift each piece individually, letting any significant excess buttermilk drip back into the bowl, but don’t worry about getting every drop off – you want some to help the flour stick. Place each piece into the seasoned flour mixture. Dredge it thoroughly, using your fingers to gently press the flour onto the chicken, ensuring it’s completely covered. Once coated, gently shake off any loose, excess flour. Too much flour can lead to a thick, pasty crust, while just enough creates that ideal crispy coating.
-
Heat the Frying Oil to the Perfect Temperature: This is perhaps the most critical step for guaranteed crispiness and juiciness. Pour your chosen frying oil into a large, heavy-bottomed pot or Dutch oven. Ensure you have at least 2 inches of oil depth, enough for the chicken pieces to be mostly submerged. Place the pot over medium-high heat. You absolutely MUST use a thermometer (a deep-fry thermometer or instant-read works well) to monitor the oil temperature. Heat the oil until it reaches precisely 350 degrees F (about 175 degrees C). This specific temperature is key – it’s hot enough to quickly crisp the exterior coating while allowing the inside to cook through before it dries out.
-
Carefully Fry in Batches (Do Not Overcrowd!): Once the oil is at 350°F, it’s time to fry! Carefully add the coated chicken pieces to the hot oil. This is where patience is key: fry in batches! DO NOT overcrowd the pot. Adding too many pieces at once dramatically lowers the oil temperature, which results in greasy, soggy, and unevenly cooked chicken. Cook only enough pieces that fit comfortably in a single layer in the pot, with space around each piece. They should sizzle immediately upon entering the oil.
-
Fry Until Golden and Cooked Through: Let each batch fry for approximately 4-6 minutes. You’ll need to turn the pieces occasionally with a slotted spoon or tongs to ensure even browning on all sides. You’re looking for a beautiful golden brown color. To be sure they are cooked through and safe to eat, the internal temperature of the chicken should reach 165 degrees F (74 degrees C). Frying at 350°F for this short duration is designed to achieve that perfect internal temperature just as the coating reaches peak crispiness, keeping the chicken inside wonderfully moist.
-
Drain Off Excess Oil: Using a slotted spoon, carefully remove the fried chicken bites from the hot oil. Transfer them to a plate or wire rack lined with paper towels. This allows any excess oil to drain off, ensuring the bites stay crispy and aren’t greasy.
-
Maintain Oil Temperature Between Batches: Before adding the next batch of chicken, check your oil thermometer again. The temperature will likely have dropped slightly after adding the chicken. Allow the oil to heat back up to 350 degrees F before frying the next batch. This step is crucial for consistent results across all your chicken bites.
-
Serve and Enjoy Immediately: Once all the batches are fried and drained, they are ready to be devoured! Serve your perfectly juicy, crispy fried chicken bites immediately while they are hot and at their absolute best.
Tips for Success with Your Crispy Fried Chicken Bites
Achieving that restaurant-quality crunch and juiciness at home is totally doable! Here are a few extra tips to ensure your crispy fried chicken bites are a resounding success every time:
- Temperature is Everything: We can’t stress this enough – oil temperature is the single most important factor. Investing in a good cooking thermometer is key. If the oil is too cool, the coating will be greasy; too hot, and the outside burns before the inside cooks.
- Don’t Rush the Soak: While 30 minutes is a minimum for the buttermilk, aiming for closer to the 4-hour mark really maximizes the tenderizing effect. Plan ahead slightly if you can!
- Coat Well, Shake Off Excess: Ensure the chicken is fully coated in the flour mixture, pressing it on firmly. But shaking off the excess prevents a heavy, doughy crust.
- The Power of Batches: Resist the urge to cram too much chicken into the pot. Smaller batches maintain oil temperature and allow the pieces to fry properly without steaming.
- Use the Right Pot: A heavy-bottomed pot like a Dutch oven holds heat more consistently, which is vital for stable oil temperature.
- Draining Matters: Always drain on paper towels or a wire rack set over a baking sheet. This airflow helps keep the bottoms from getting soggy.
Variations and Serving Suggestions
These crispy fried chicken bites are fantastic on their own, but they are also incredibly versatile. Here are some ideas to mix things up or build a full meal:
Flavor Variations
- Spicy Kick: Add a pinch or two of cayenne pepper to the flour mixture for a bit of heat.
- Herbaceous Notes: Mix in some dried herbs like thyme, oregano, or rosemary into the flour blend.
- Smoked Paprika: Substitute regular paprika with smoked paprika for a deeper, smokier flavor profile.
Serving Ideas
- Dipping Sauces: Serve with classic options like ranch, honey mustard, barbecue sauce, or buffalo sauce. Get creative with a spicy aioli or a sweet chili dip!
- As an Appetizer: Arrange on a platter with toothpicks and a selection of dips for easy snacking.
- Main Course: Pair with your favorite sides. They’re delicious with mashed potatoes, coleslaw, or mac and cheese.
- In Other Dishes: Use them as the protein in a grain bowl, on top of a salad, or even in sliders.
- Crispy Companions: These bites go wonderfully with other crispy sides. Why not try serving them alongside crispy roasted brussels sprouts or some easy crispy roasted potatoes? They’re also great paired with a fresh side salad like an easy kale salad to balance the richness.
Your Crispy Fried Chicken Bites Questions Answered (FAQ)
Let’s tackle some common questions you might have when making these delicious bites.
Can I use chicken breasts instead of thighs?
Absolutely! The recipe provides instructions for both. Chicken thighs are recommended because their higher fat content makes them more forgiving and inherently juicier when fried. If you use breasts, just be extra mindful of the cooking time (4-6 minutes is usually spot on for 1-inch pieces) to avoid drying them out. Cutting the pieces uniformly is even more important with breast meat.
Why is buttermilk important for this recipe?
Buttermilk does double duty here. First, its mild acidity helps to tenderize the chicken proteins, resulting in softer, juicier meat. Second, its slightly thick consistency helps the flour coating stick better to the chicken pieces, creating a more substantial and crispy crust.
Can I make the seasoned flour mixture ahead of time?
Yes, you can definitely whisk the flour and seasonings together in advance and store it in an airtight container. Just give it another quick whisk before using it.
How long should I marinate the chicken in buttermilk?
The recipe suggests a minimum of 30 minutes. This is enough to start the tenderizing process. However, for truly juicy results, aim for at least 2 hours, or even up to the recommended 4 hours. Marinating much longer than 4 hours isn’t necessary and could potentially make the chicken a bit mushy due to the acid.
What’s the best way to check the oil temperature?
A deep-fry thermometer that clips to the side of your pot is ideal for continuous monitoring. An instant-read thermometer can also work; just be sure to check the temperature frequently between batches, as it will drop when cold chicken is added.
My coating isn’t staying on the chicken. What am I doing wrong?
Ensure you let the initial excess buttermilk drip off the chicken slightly, but don’t pat it dry. The buttermilk is needed to help the flour adhere. Also, make sure you press the flour firmly onto each piece of chicken during the dredging step. Shake off only the very loose flour.
How do I store and reheat leftovers?
Store any leftover fried chicken bites in an airtight container in the refrigerator for up to 3-4 days. To reheat and retain crispiness, avoid the microwave. The best methods are reheating in a preheated oven at around 375°F (190°C) for 10-15 minutes, or in an air fryer at 375°F (190°C) for 5-8 minutes, until heated through and crispy again.
Enjoy Your Homemade Crispy Fried Chicken Bites!
There you have it – the simple secret to achieving those coveted crispy fried chicken bites that are perfectly juicy on the inside. It’s a recipe that delivers on its promise and is guaranteed to bring smiles to faces around your table.
Give these a try and prepare to be amazed by the perfect crunch and tender chicken. They’re fantastic on their own, dipped in your favorite sauce, or served alongside some delicious sides. Happy frying!
If you make this recipe, we’d love to hear about it! Leave a comment below and let us know how they turned out and your favorite way to serve them.
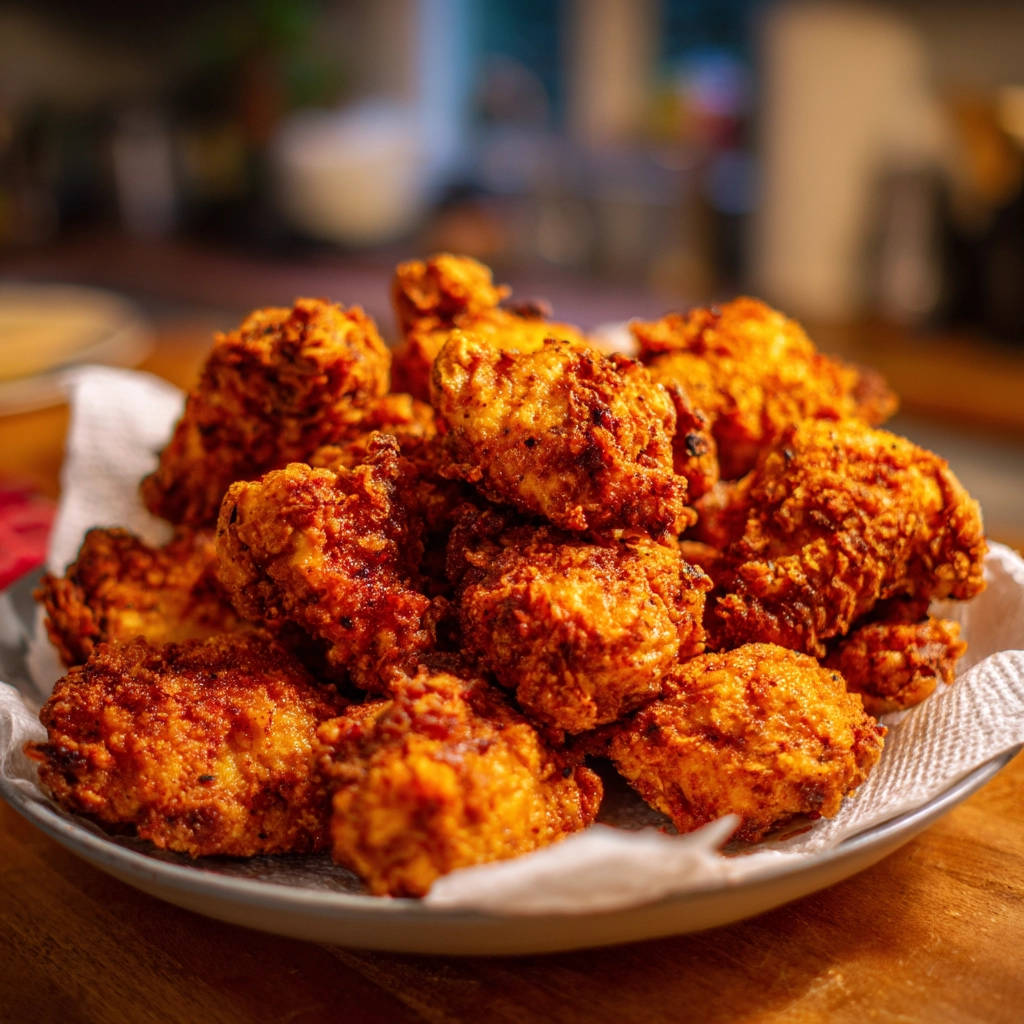
Crispy Fried Chicken Bites

Ingredients
- 1.5 pounds boneless, skinless chicken thighs or breasts, cut into 1-inch pieces
- 1 cup buttermilk
- 2 cups all purpose flour
- 2 teaspoons salt
- 1 teaspoon black pepper
- 1 teaspoon paprika
- 1 teaspoon garlic powder
- Oil for frying (vegetable, canola, or peanut oil), at least 2 inches deep
Directions
- Place the cut chicken pieces in a bowl. Pour the buttermilk over the chicken, making sure all pieces are coated. Cover and refrigerate for at least 30 minutes, or up to 4 hours, to help tenderize the chicken and keep it juicy.
- In a separate shallow dish or plate, whisk together the flour, salt, pepper, paprika, and garlic powder.
- Remove the chicken from the buttermilk, letting excess drip off. Dredge each piece thoroughly in the seasoned flour mixture, pressing gently to ensure the coating sticks. Shake off any excess flour.
- Heat the oil in a large, heavy-bottomed pot or Dutch oven over medium-high heat until it reaches 350 degrees F. This precise temperature is key to cooking the outside quickly while the inside stays juicy. Use a thermometer to check.
- Carefully add chicken pieces to the hot oil in batches. DO NOT overcrowd the pot. Overcrowding lowers the oil temperature and leads to greasy, unevenly cooked chicken. Cook only enough pieces that fit comfortably in a single layer with space between them.
- Fry for 4-6 minutes per batch, turning occasionally, until the chicken is golden brown and cooked through. The internal temperature should reach 165 degrees F. Frying at 350 F for this short time ensures the coating crisps while the chicken inside stays moist.
- Using a slotted spoon, remove the fried chicken from the oil and place it on a plate lined with paper towels to drain excess oil.
- Allow the oil temperature to return to 350 degrees F between batches before adding more chicken.
- Serve immediately and enjoy your perfectly juicy, crispy fried chicken bites.