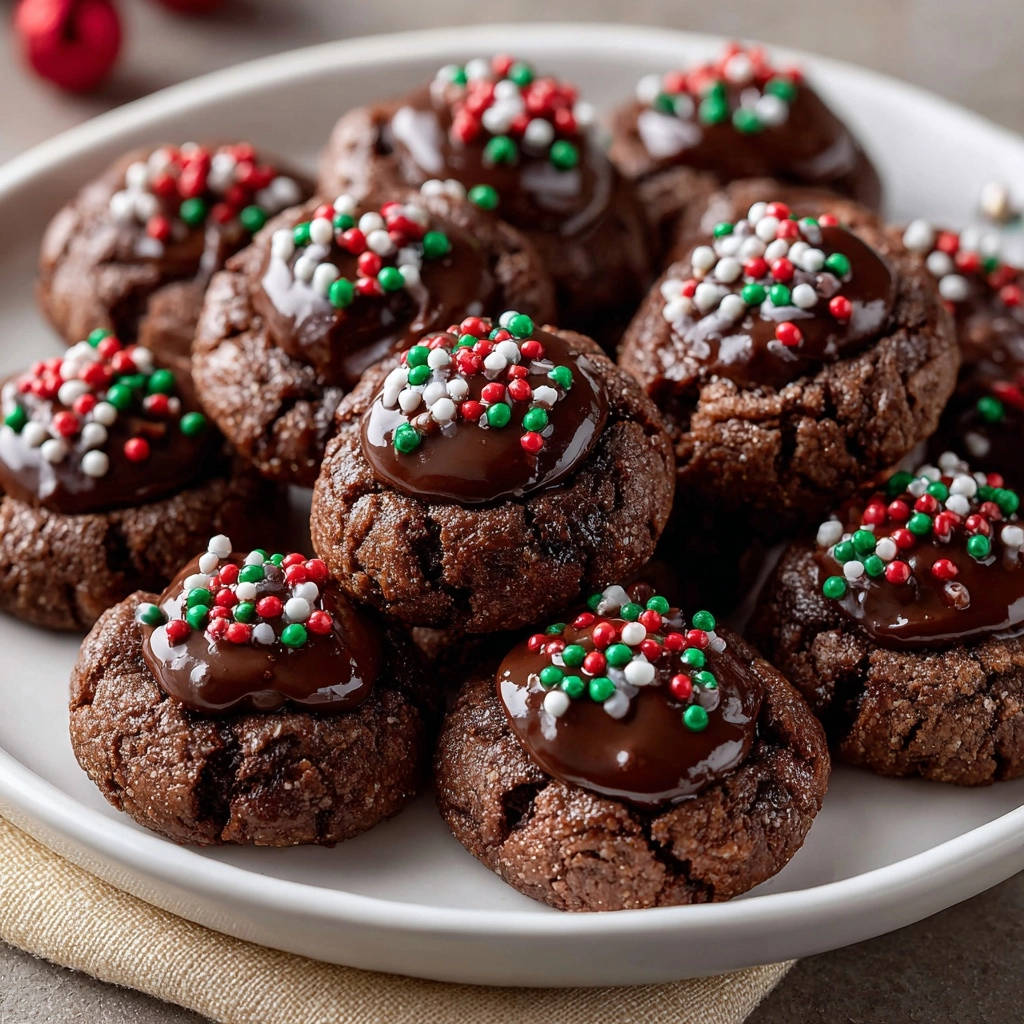
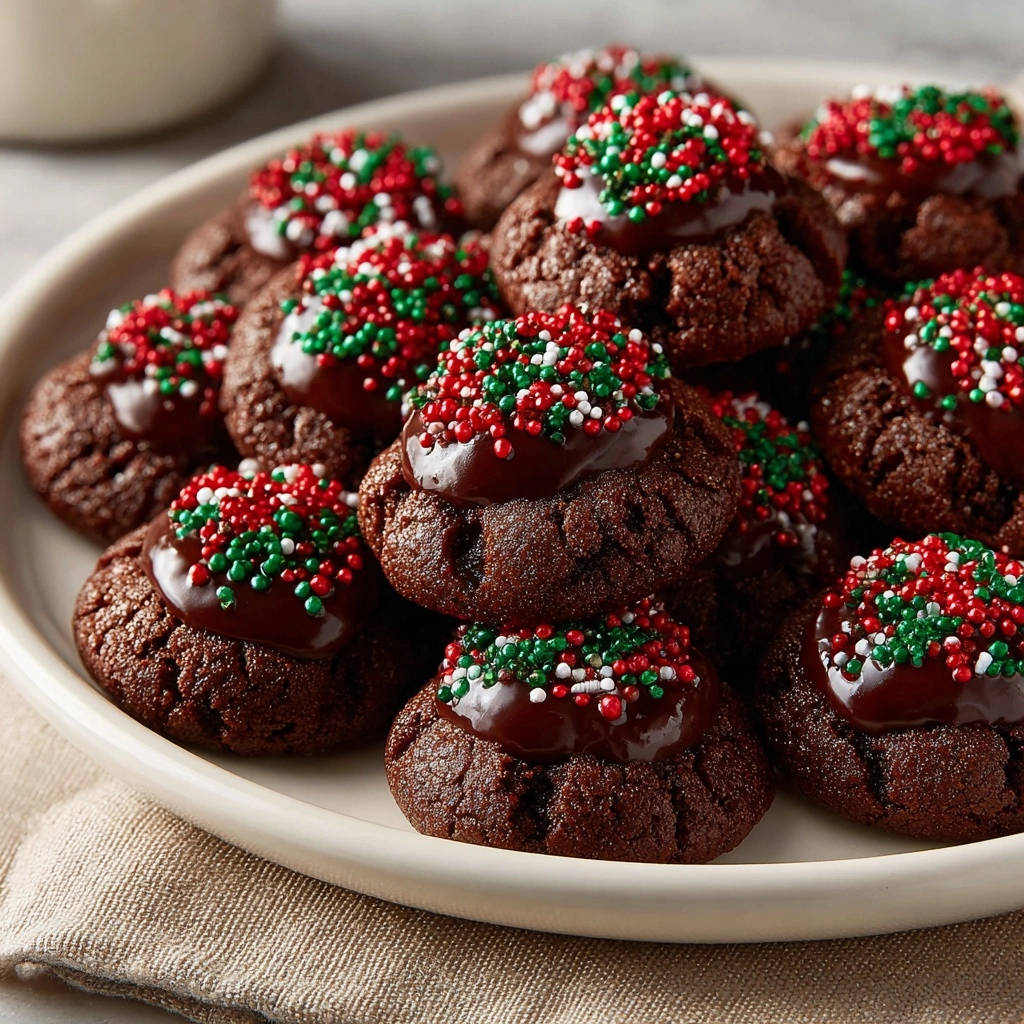
There’s nothing more frustrating than biting into a chocolate cookie only to find it dry and crumbly. For years, I perfected holiday baking, and these Festive Chocolate Thumbprint Cookies became my go-to for their reliably moist, tender texture and rich chocolate flavor.
This recipe ensures a perfectly chewy bite every single time, making it the ideal centerpiece for your holiday dessert table or a delightful homemade gift.
The Secret to Unfailingly Moist & Chewy Festive Chocolate Thumbprint Cookies
Achieving that melt-in-your-mouth texture in a chocolate cookie often comes down to a few critical, yet simple, techniques. We’re avoiding dry, crumbly cookies entirely with this method.
The first secret lies in the precise balance of fats and sugars, ensuring a rich foundation for the dough. Creaming them properly incorporates air, which is vital for a light, tender crumb.
Secondly, the chilling time is non-negotiable. It firms up the dough, preventing excessive spreading in the oven, and ensures a superior, chewy texture rather than a flat, brittle one.
Finally, the two-stage baking process, coupled with careful monitoring, is key. This method allows for perfect indentation without cracking, and it prevents overbaking, which is the nemesis of any truly chewy cookie.
Gathering Your Festive Chocolate Thumbprint Cookie Arsenal: Key Ingredients
Every ingredient plays a vital role in the success of these delightful cookies, contributing to their flavor, texture, and festive appeal.
The Dough Foundation: Achieving That Tender Texture
Unsalted Butter, Softened: Using unsalted butter gives you control over the salt content. Softened butter creams beautifully with sugar, incorporating air for a light, tender cookie.
Granulated and Light Brown Sugar: The combination of both sugars is crucial. Granulated sugar provides crispness and spread, while light brown sugar adds moisture, chewiness, and a subtle caramel note, essential for the signature chewy texture of these Festive Chocolate Thumbprint Cookies.
Large Egg: The egg acts as a binder, adding structure and richness, while also contributing to the moistness of the cookie.
Vanilla Extract: Pure vanilla extract enhances the overall chocolate flavor, adding a warm, aromatic depth that’s comforting and familiar.
All-Purpose Flour: The backbone of our cookie, providing structure. Measuring flour correctly (lightly spooned into the cup and leveled) prevents a dense, dry cookie.
Unsweetened Cocoa Powder: For a deep chocolate flavor, choose a good quality unsweetened cocoa powder. Dutch-processed cocoa will give a darker color and milder flavor, while natural cocoa is fruitier.
Baking Soda: This leavening agent works with the acidic cocoa powder to help the cookies rise slightly and achieve a softer texture.
Salt: A pinch of salt balances the sweetness and elevates all the other flavors, particularly the rich chocolate.
Crafting the Luxurious Chocolate Ganache
Chocolate Chips (Semi-Sweet or Dark): High-quality chocolate chips melt smoothly and provide the rich, gooey center. Semi-sweet is classic, but dark chocolate offers a more intense flavor contrast.
Heavy Cream: The cream combines with the chocolate to create a silky-smooth, pourable ganache that sets beautifully. Do not substitute with milk for the best results.
The Finishing Touch: Festive Decorations
Holiday Sprinkles: Red, green, and white nonpareils instantly transform these into charming Christmas cookies. Get creative with other festive sprinkles, too!
Your Essential Baking Toolkit for Festive Chocolate Thumbprint Cookies
Having the right tools makes the baking process smoother and more enjoyable, ensuring consistent results for your Festive Chocolate Thumbprint Cookies.
Electric Mixer (Stand or Handheld): Essential for thoroughly creaming butter and sugar until light and fluffy, which is vital for cookie texture.
Large and Medium Mixing Bowls: For separating wet and dry ingredients, and then combining them efficiently.
Whisk: To perfectly combine dry ingredients, ensuring even distribution of cocoa and leavening.
Rubber Spatula: For scraping down the bowl sides, ensuring all ingredients are incorporated without overmixing.
Plastic Wrap: Crucial for chilling the dough effectively, preventing it from drying out.
Baking Sheets: At least one, but two make the process faster. Look for light-colored sheets for even baking.
Parchment Paper: Prevents sticking and makes cleanup a breeze, ensuring your thumbprint cookies don’t stick.
Measuring Spoons (especially 1/2 or 1 teaspoon): Essential for creating the perfect indentation in the warm cookies.
Wire Rack: For cooling the cookies completely, allowing air circulation to prevent sogginess.
Small Saucepan or Microwave-Safe Bowl: For heating the heavy cream for the ganache.
Step-by-Step Guide: Crafting Your Perfect Festive Chocolate Thumbprint Cookies
Follow these steps closely to ensure your Festive Chocolate Thumbprint Cookies turn out perfectly chewy and delicious.
- Creaming the Fats & Sugars:
Start by creaming softened unsalted butter with granulated and light brown sugars in a large bowl, using an electric mixer until the mixture is light and fluffy. This typically takes 2-3 minutes.
This step incorporates essential air, contributing significantly to the cookies’ tender and chewy crumb.
- Incorporating Wet Ingredients:
Beat in the large egg and vanilla extract until they are well combined. Remember to scrape down the sides of the bowl as needed to ensure everything is evenly mixed.
- Combining Dry Ingredients:
In a separate medium bowl, whisk together the all-purpose flour, unsweetened cocoa powder, baking soda, and salt. This pre-mixing ensures an even distribution of leavening agents and rich chocolate flavor throughout your cookie dough.
- Gently Mixing Wet and Dry:
Gradually add the whisked dry ingredients to the wet mixture, mixing on low speed just until combined. Stop as soon as no streaks of flour are visible.
CRITICAL TIP: Do not overmix! Overmixing develops gluten, which is the primary cause of tough, dry cookies. Stop mixing the moment the ingredients are just incorporated to maintain tenderness.
- The Crucial Chilling Stage:
Cover the dough bowl with plastic wrap and chill it in the refrigerator for at least 30 minutes. This essential chilling step helps the dough firm up, making it significantly easier to handle and roll.
Chilling also prevents excessive spreading during baking, which is key to maintaining a superior texture and the classic thumbprint shape for your Festive Chocolate Thumbprint Cookies.
- Prepare for Baking:
Preheat your oven to 350°F (175°C). Line a baking sheet with parchment paper to prevent sticking and ensure even baking across the bottom of the cookies.
- Shaping the Cookies:
Roll the chilled dough into uniform 1-inch balls using your hands. Place them about 2 inches apart on the prepared baking sheet. Consistent size ensures even baking and a cohesive look.
- First Bake & Indentation Perfection:
Bake for 8 minutes. Gently remove the baking sheet from the oven. While the cookies are still warm and soft, use the back of a measuring spoon (like a 1/2 or 1 teaspoon) or your thumb to gently press an indentation into the center of each cookie.
This specific timing is key to creating a perfect well for the ganache without cracking the delicate warm cookies too much, ensuring a neat finish.
- Finishing the Bake:
Return the baking sheet to the oven and bake for another 2-4 minutes, or until the edges are just set and the centers still look slightly soft. The cookies will continue to set as they cool on the hot baking sheet.
Key to Chewy: Avoid overbaking! The slight softness in the center is your perfect indicator for a perfectly chewy result, not a dry one.
- Cooling the Cookies:
Let the cookies cool on the baking sheet for 5 minutes before carefully transferring them to a wire rack to cool completely. Cooling on the sheet initially helps them firm up enough before moving, preventing breakage.
- Preparing the Velvety Ganache:
While the cookies cool, prepare the ganache. Place the chocolate chips in a heatproof bowl. In a small saucepan or microwave-safe bowl, heat the heavy cream until it just begins to simmer or gets hot, but importantly, not boiling. Pour the hot cream over the chocolate chips.
Let it sit undisturbed for 2-3 minutes to allow the chocolate to melt completely, then stir gently with a spoon or whisk until it becomes a completely smooth, shiny, and luscious ganache.
- Filling & Decorating:
Once the cookies are completely cool, spoon about 1/2 teaspoon of ganache into the center of each thumbprint. Immediately sprinkle with your favorite holiday sprinkles before the ganache begins to set.
Allow the ganache to set completely before serving or storing to ensure neatness and prevent any smudging or mess.
Chef’s Secrets & Pro Tips for Your Best Festive Chocolate Thumbprint Cookies
Elevate your Festive Chocolate Thumbprint Cookies from good to absolutely unforgettable with these expert tips.
Achieving the Perfect Cookie Texture
Room Temperature Ingredients: Ensure butter and egg are at true room temperature. This allows them to cream together properly, creating a smooth emulsion that traps air for a tender crumb. Cold ingredients will result in a denser cookie.
Don’t Skip the Chill: Chilling the dough isn’t just about ease of handling; it allows the fats to firm up, preventing excessive spreading during baking, which contributes to a thicker, chewier cookie.
Use a Kitchen Scale for Flour: For ultimate precision, weigh your flour (1 1/4 cups is approximately 150g). Too much flour is a common cause of dry, tough cookies.
Underbake Slightly: Cookies continue to bake from residual heat once removed from the oven. Pull them when the edges are just set and the centers still look a tiny bit soft for guaranteed chewiness.
Mastering Your Ganache
Quality Chocolate Matters: The better the quality of your chocolate chips, the better your ganache will taste and the smoother it will be. Use a brand you enjoy eating on its own.
Don’t Stir Too Soon: When pouring hot cream over chocolate, resist the urge to stir immediately. Letting it sit allows the heat to evenly melt the chocolate, leading to a smoother ganache with less risk of seizing.
Adjusting Consistency: If your ganache is too thick, add a tiny bit more hot cream (1 tsp at a time) and stir until smooth. If too thin, let it cool at room temperature for 10-15 minutes, stirring occasionally, until it thickens to a spoonable consistency.
Creative Twists & Personalization
Peppermint Perfection: Add 1/4 teaspoon of peppermint extract to the ganache for a delightful chocolate-peppermint twist, perfect for the holidays. For more simple yet elegant dessert ideas, consider making simple peppermint cookies.
Nutty Rim: Before baking, roll the dough balls in finely chopped pecans or walnuts for an added layer of flavor and texture, complementing the rich chocolate.
Citrus Zest Brightness: For a sophisticated twist, add 1 teaspoon of orange zest to the cookie dough along with the vanilla. Orange and chocolate are a classic pairing that adds festive brightness.
Troubleshooting Common Festive Chocolate Thumbprint Cookie Challenges
Even experienced bakers face challenges. Here’s how to tackle common issues with your Festive Chocolate Thumbprint Cookies.
Why Are My Cookies Dry or Crumbly?
The most common culprit is overmixing the dough. Too much mixing develops gluten, leading to a tough, dry texture. Mix only until the flour streaks disappear.
Another factor could be overbaking. Pull the cookies from the oven when their edges are just set and the centers are still slightly soft. They will continue to firm up as they cool.
My Cookies Spread Too Much! What Went Wrong?
Insufficient chilling time is usually the reason for excessive spreading. The butter in the dough needs to be firm to prevent it from melting too quickly in the oven.
Additionally, ensure your oven temperature is accurate. If it’s too low, the cookies will spread before they set. Also, avoid using greased baking sheets; parchment paper is best for controlled spread.
The Ganache Isn’t Smooth (or it’s Too Thick/Thin)
If your ganache is grainy, it often means the chocolate didn’t fully melt before you started stirring, or it was overheated. Let the hot cream sit on the chocolate for a full 2-3 minutes before stirring gently.
If it’s too thick, add more warm cream, a teaspoon at a time, until it reaches the desired consistency. If it’s too thin, allow it to cool at room temperature, stirring occasionally, until it thickens to a spoonable consistency.
Storing Your Festive Chocolate Thumbprint Cookies & Make-Ahead Tips
Proper storage ensures your Festive Chocolate Thumbprint Cookies remain fresh and delicious, and smart prep saves you time.
Keeping Your Cookies Fresh
Store completely cooled cookies in an airtight container at room temperature for up to 5 days. For longer storage, they can be kept in the refrigerator for up to 1 week.
You can also freeze baked, unfilled cookies in an airtight container for up to 2 months. Thaw at room temperature before filling with ganache and decorating.
Can I Make the Dough Ahead?
Absolutely! The cookie dough can be made up to 2-3 days in advance. Store it tightly wrapped in plastic wrap in the refrigerator. This allows the flavors to meld and ensures a perfect texture when baked.
You can also roll the dough into balls, place them on a parchment-lined baking sheet, and freeze until solid. Transfer frozen dough balls to a freezer-safe bag and bake from frozen, adding a minute or two to the baking time.
Delightful Ways to Serve Your Festive Chocolate Thumbprint Cookies
These Festive Chocolate Thumbprint Cookies are already a showstopper, but here are some delightful ways to serve and enjoy them.
Serve them alongside a steaming mug of hot cocoa or a festive spiced cider for the ultimate cozy treat. Their rich chocolate flavor pairs beautifully with warm beverages.
Arrange them on a holiday platter with other classic Christmas cookies like perfect sugar cookies or shortbread for a stunning dessert spread.
They make excellent edible gifts! Stack them in decorative tins or cellophane bags for friends, family, or neighbors. These homemade treats always bring a smile.
Festive Chocolate Thumbprint Cookies: Your Top Questions Answered
Can I Use Different Kinds of Chocolate for the Ganache?
Yes, absolutely! While semi-sweet is traditional, you can use milk chocolate for a sweeter ganache or dark chocolate (70% or higher) for a more intense, less sweet filling. Adjust cream quantity slightly if needed, as chocolate types melt differently.
Are These Cookies Gluten-Free or Dairy-Free Adaptable?
For a gluten-free version, you can substitute a 1:1 gluten-free baking flour blend. Ensure your blend contains xanthan gum for structure. For dairy-free, use a high-quality plant-based butter alternative and full-fat canned coconut milk (refrigerated, use the thick cream on top) instead of heavy cream for the ganache.
How Can I Make These Even More Festive?
Beyond traditional sprinkles, consider drizzling with melted white chocolate, a dusting of edible glitter, or a tiny candied cherry or candied orange peel in the center of the ganache. You could also tint the ganache green or red with food coloring for extra holiday cheer.
Ready to Impress? Share Your Festive Chocolate Thumbprint Cookies Masterpiece!
Now that you’re equipped with all the secrets and tips, it’s time to create your own batch of these truly exceptional Festive Chocolate Thumbprint Cookies. They are guaranteed to be a hit, bringing cheer and deliciousness to any occasion.
Don’t hesitate to experiment with the flavors and decorations to make them uniquely yours. We can’t wait to see your delightful creations!

Festive Chocolate Thumbprint Cookies
Course: DessertCuisine: American CuisineDifficulty: easy4
30 cookies25
minutes10
minutes37
minutesAmerican Cuisine
Ingredients
For the Cookies:
1/2 cup (1 stick) unsalted butter, softened
1/2 cup granulated sugar
1/4 cup packed light brown sugar
1 large egg
1 teaspoon vanilla extract
1 1/4 cups all-purpose flour
1/2 cup unsweetened cocoa powder
1/2 teaspoon baking soda
1/4 teaspoon salt
For the Ganache:
1/2 cup chocolate chips (semi-sweet or dark)
1/4 cup heavy cream
For Decoration:
Holiday sprinkles (red, green, and white nonpareils)
Directions
- In a large bowl, cream together the softened butter, granulated sugar, and brown sugar with an electric mixer until light and fluffy. This usually takes about 2-3 minutes.
- Beat in the egg and vanilla extract until well combined. Scrape down the sides of the bowl as needed.
- In a separate medium bowl, whisk together the flour, cocoa powder, baking soda, and salt.
- Gradually add the dry ingredients to the wet ingredients, mixing on low speed just until combined. Be careful not to overmix; overmixing develops gluten which can lead to tough, dry cookies. Stop as soon as no streaks of flour are visible.
- Cover the dough bowl with plastic wrap and chill in the refrigerator for at least 30 minutes. This chilling step helps the dough firm up, making it easier to handle and preventing excessive spreading during baking, which maintains a better texture.
- Preheat your oven to 350°F (175°C). Line a baking sheet with parchment paper.
- Roll the chilled dough into 1-inch balls and place them about 2 inches apart on the prepared baking sheet.
- Bake for 8 minutes. Gently remove the baking sheet from the oven. Using the back of a measuring spoon (like a 1/2 teaspoon or 1 teaspoon) or your thumb, gently press an indentation into the center of each warm cookie. The cookies will still be soft and this is the perfect time to create the well without cracking them too much.
- Return the baking sheet to the oven and bake for another 2-4 minutes, or until the edges are just set and the centers still look slightly soft. The key to a chewy cookie is to not overbake. They will continue to set as they cool.
- Let the cookies cool on the baking sheet for 5 minutes before transferring them to a wire rack to cool completely.
- While the cookies cool, prepare the ganache. Place the chocolate chips in a heatproof bowl. In a small saucepan or microwave-safe bowl, heat the heavy cream until it just begins to simmer or gets hot but not boiling. Pour the hot cream over the chocolate chips. Let it sit for 2-3 minutes to allow the chocolate to melt, then stir gently with a spoon or whisk until smooth and shiny.
- Once the cookies are completely cool, spoon about 1/2 teaspoon of ganache into the center of each thumbprint.
- Immediately sprinkle with your favorite holiday sprinkles before the ganache sets. Let the ganache set completely before serving or storing.
Notes
- Requires chilling time for the dough.