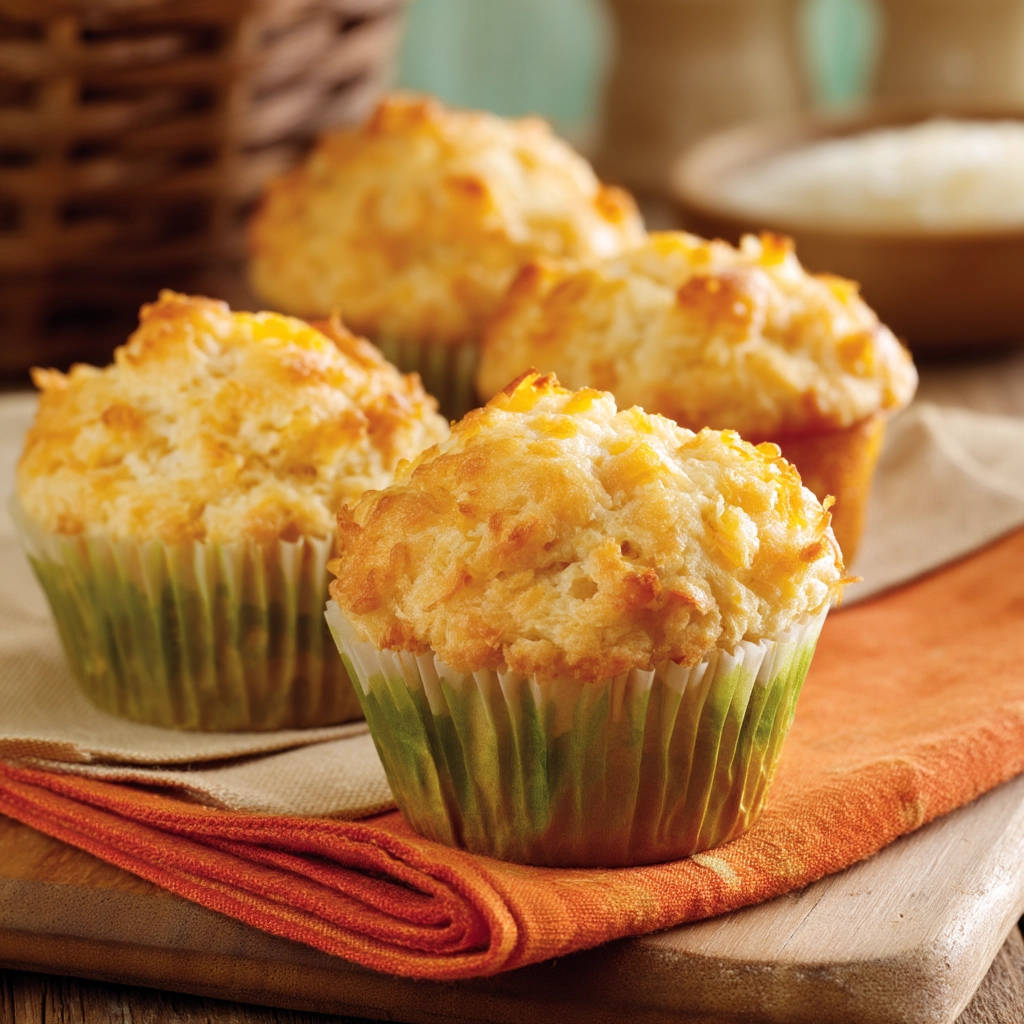
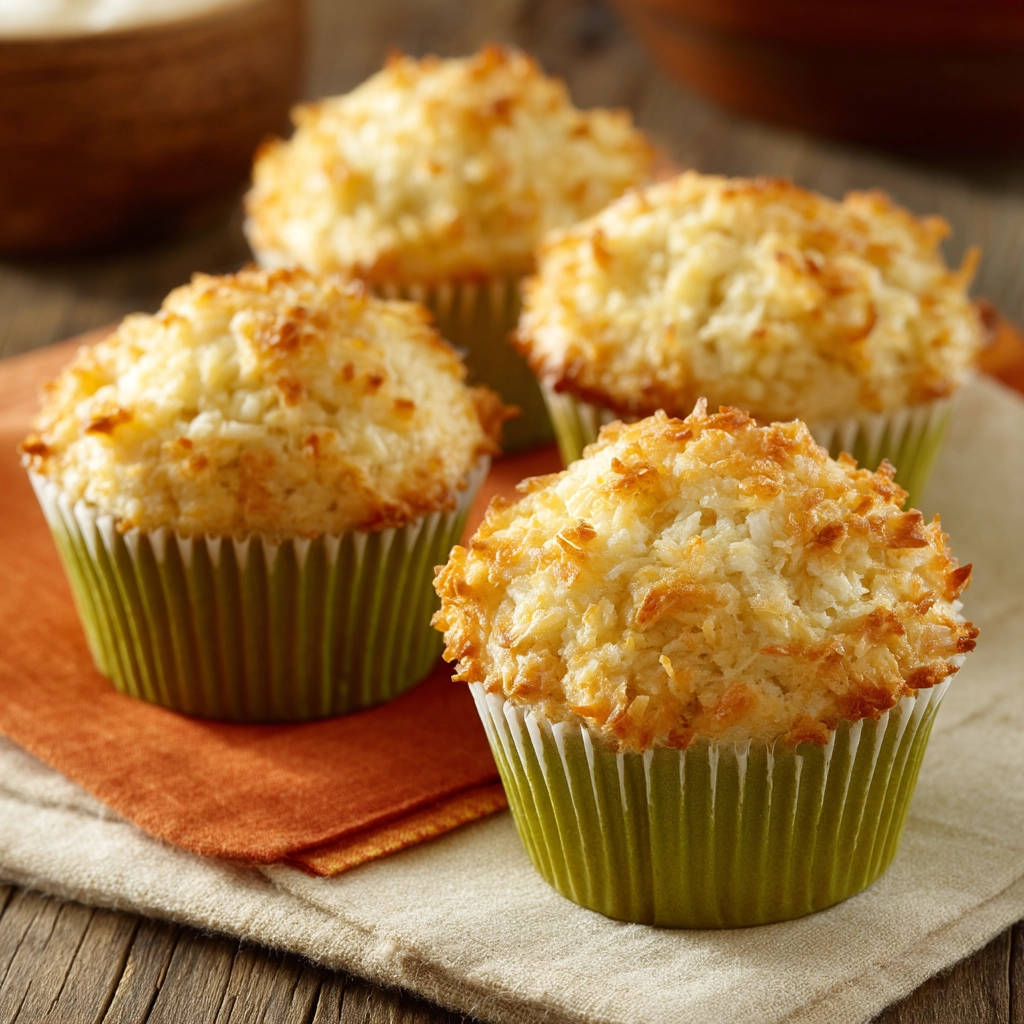
There’s nothing quite like a warm corn muffin, split open, and maybe spread with a little butter. It’s comfort food at its finest! But if you’ve ever embarked on a muffin-making adventure only to pull sad, dense, hockey-puck-like lumps from the oven, you know the disappointment. I’ve been there! It feels like a culinary betrayal. Corn muffins, with their rustic charm and sweet-savory appeal, should be light, tender, and airy, not heavy and dry.
For years, I tinkered, trying different ratios and temperatures, but still occasionally ended up with less-than-perfect results. That was until I discovered a simple, yet absolutely crucial, technique that guarantees fluffy corn muffins every single time. It’s not about a secret ingredient or a complicated process; it’s all in how you handle the batter. Get ready to say goodbye to dense muffins forever and hello to batches that are consistently tender, moist, and everything a perfect corn muffin should be.
This recipe is quick, easy, and relies on pantry staples you likely already have on hand. Whether you’re making them for a weekend breakfast, a side dish for chili, or just a simple snack, these fluffy corn muffins will become your new go-to recipe.
Why These Fluffy Corn Muffins Are Different (The Secret Revealed!)
So, what’s the magic trick behind these guaranteed fluffy corn muffins? It boils down to one key principle: do not overmix the batter. This is the single most common culprit behind dense muffins, whether they’re corn, blueberry, or chocolate chip.
When you combine wet and dry ingredients, gluten begins to develop in the flour. Gluten provides structure, which is great for chewy bread, but not ideal for tender muffins. The more you mix, the more gluten you develop, leading to a tough, heavy texture. This recipe emphasizes mixing just until the ingredients are combined, leaving plenty of lovely lumps. Those lumps are a sign you’ve done it right! They’ll disappear during baking, leaving you with a wonderfully light and airy crumb.
What You’ll Need for Your Delicious Muffins
One of the best things about making corn muffins is that they don’t require any fancy ingredients. You probably have most of these items in your kitchen right now! The combination of pantry staples creates that classic, comforting flavor profile.
Let’s talk about the key players:
- All-Purpose Flour: This provides the main structure for our muffins. Using standard all-purpose flour is easy and reliable. The amount used here, 1 and 1/2 cups, balances perfectly with the cornmeal to ensure tenderness.
- Yellow Cornmeal: This is where the signature corn flavor and slightly gritty, yet tender, texture comes from. I prefer yellow cornmeal for its slightly richer color, but white cornmeal will work too. Just make sure it’s finely or medium ground, not coarse, for the best texture. You’ll need 1 cup.
- Granulated Sugar: Just enough (1/2 cup) to add a touch of sweetness that complements the corn flavor without making them overly dessert-like. It also helps with browning and moisture.
- Baking Powder & Salt: Our leavening agent (2 teaspoons baking powder) is crucial for lift and creating that coveted fluffiness. The salt (1/2 teaspoon) balances the sweetness and enhances all the other flavors.
- Large Egg: Acts as a binder, helping to hold the muffins together, and also contributes to richness and tenderness. We’re using 1 large egg.
- Milk: Provides necessary liquid to hydrate the dry ingredients. Any milk will work here, whether it’s whole, 2%, or even a non-dairy alternative. You’ll need 1 cup.
- Vegetable Oil: Using oil instead of melted butter contributes to a moister, more tender muffin because oil stays liquid at room temperature. It’s a simple swap that makes a big difference in texture. You’ll need 1/2 cup.
- Corn Kernels: These little bursts of sweetness add fantastic texture and reinforce the corn flavor. Fresh kernels are wonderful when corn is in season, but frozen (thawed and drained) or canned (drained very well) work perfectly fine any time of year. You’ll need 1 cup.
Making Magic: How to Get Fluffy Corn Muffins
Ready to make some muffin magic? This process is straightforward and moves quickly, which is perfect for avoiding that dreaded overmixing!
- Preheat & Prep: First things first, get your oven ready. We’re baking these at a relatively high temperature, 400 degrees F (200 degrees C). This initial burst of heat helps the muffins rise quickly and form a nice dome. While the oven heats, prepare your muffin tin. You can either line a standard 12-cup tin with paper liners – a convenient option for easy cleanup and serving – or grease the cups really well with butter or baking spray. Making sure the tin is ready before you mix prevents the batter from sitting too long, which can affect the final texture.
- Combine the Dry Ingredients: In a large mixing bowl – the kind you’ll eventually add the wet ingredients to – measure out your all-purpose flour, yellow cornmeal, granulated sugar, baking powder, and salt. Use a whisk to gently combine these dry ingredients. The goal here is to evenly distribute the leavening (baking powder) and salt throughout the flour and cornmeal. Whisk until everything looks uniform and there are no visible clumps of baking powder or flour hiding.
- Whisk Together the Wet Ingredients: Now, grab a separate, medium-sized bowl. Crack in your large egg, pour in the milk, and add the vegetable oil. Grab that whisk again and whisk these ingredients together until they are smoothly combined. You want the egg yolk and white fully incorporated with the milk and oil.
- Bring it All Together (The Crucial Step!): Pour the wet ingredients from the medium bowl into the large bowl with your prepared dry ingredients. This is also the moment to add your corn kernels. Gently fold them into the mixture along with the wet ingredients.
- Mix Just Until Combined: This is it – the step that determines the fate of your muffins! Using a spoon or spatula, begin stirring everything together. Your mission is simple: mix only until the dry ingredients are just moistened by the wet. The batter will be thick and definitely look lumpy. Do NOT try to make it smooth. Seriously, stop mixing as soon as you no longer see pockets of dry flour. A few stirs, maybe 10-15 gentle folds at most, should do it. The lumps are your friends! Overmixing develops the gluten in the flour, resulting in tough, dense muffins. Just hydrate the flour, add the corn, and step away from the bowl!
- Portion the Batter: Divide the wonderfully lumpy batter evenly among the 12 prepared muffin cups. You’ll want to fill each cup about two-thirds full. This amount allows room for the muffins to rise nicely without overflowing the tin. An ice cream scoop or two spoons can be helpful for this step to ensure even distribution.
- Bake Until Golden: Slide the muffin tin into your preheated 400°F (200°C) oven. Bake for 18 to 22 minutes. The exact time will depend on your oven, so start checking around 18 minutes. You’ll know they’re done when the tops are golden brown and look nicely domed, and when you insert a toothpick into the center of a muffin, it comes out clean (no wet batter attached).
- Cool & Enjoy: Once baked, remove the muffin tin from the oven. Let the muffins sit in the tin for just a few minutes – about 5 is usually enough. This helps them set up slightly before you move them. Then, carefully transfer the muffins to a wire rack to cool completely. Or, if you’re like me, snag one while it’s still warm!
Tips & Tricks for the Ultimate Fluffy Muffins
Even with the core technique mastered, a few extra tips can help ensure your Fluffy Corn Muffins are absolutely perfect every time:
- Use Room Temperature Ingredients: Egg and milk at room temperature incorporate more smoothly into the batter than cold ingredients. This helps prevent overmixing and ensures even baking.
- Measure Flour Correctly: Spoon flour into your measuring cup and level it off with a straight edge. Scooping directly from the bag can compact the flour, resulting in too much flour and a drier, denser muffin.
- Don’t Skip the Rest (briefly!): While you don’t want the batter to sit for ages, letting it rest in the muffin tin for the few minutes before transferring to the wire rack helps the steam redistribute, contributing to a more tender muffin.
- Sweet vs. Savory: This recipe leans slightly sweet, which is my preference for a classic corn muffin. If you prefer a more savory muffin, you can reduce the sugar to 1/4 cup.
- Additions and Variations: Corn muffins are a fantastic base for additions!
- Cheesy Corn Muffins: Fold in 1/2 cup of shredded cheddar cheese with the corn kernels.
- Jalapeño Cheddar: Add chopped pickled jalapeños (about 1-2 tablespoons, drained well) along with the cheese for a spicy kick.
- Herbs: A tablespoon of chopped fresh chives or rosemary can add lovely savory notes.
- Bacon: For a savory treat, try folding in 1/4 cup of cooked and crumbled bacon. Just make sure to drain any excess fat before adding. If you enjoy savory breakfast items, you might also like our recipe for Sausage and Potato Hash or even something quick like Avocado Toast with Egg and Bacon.
- Storage: Store cooled muffins in an airtight container at room temperature for up to 3 days. For longer storage, freeze them for up to 3 months. Thaw at room temperature or gently reheat in a microwave or oven.
What to Serve With Fluffy Corn Muffins
Fluffy corn muffins are incredibly versatile! They can be a breakfast treat, a snack, or a perfect accompaniment to a variety of meals.
For a cozy dinner, they’re a classic pairing for soups and stews. Imagine these alongside a hearty bowl of Beef Chili or a comforting Hearty Vegetable Barley Soup. The slightly sweet and tender muffins are wonderful for soaking up savory broth.
They also work beautifully with barbecued or roasted meats, like Grilled Lemon Herb Chicken or Amazing Glazed Ribs. The sweetness provides a nice contrast to the savory main course.
Don’t forget breakfast or brunch! Serve them warm with butter and honey, or alongside other breakfast favorites like eggs and bacon. If you’re hosting brunch, pairing them with something like Baked Berry French Toast Casserole offers a lovely sweet and savory spread.
Your Fluffy Corn Muffins Questions Answered (FAQ)
Got questions about making the perfect corn muffins? Here are some common ones:
Can I use self-rising flour instead of all-purpose flour and baking powder?
No, this recipe relies on the specific ratio of all-purpose flour to baking powder. Self-rising flour contains added salt and leavening, and substituting it directly would likely result in muffins that rise too much or have an off-flavor due to the incorrect balance of ingredients.
My muffins came out dense even though I think I didn’t overmix. What else could it be?
Double-check your baking powder’s freshness! Baking powder loses its effectiveness over time. To test if it’s still good, put a teaspoon in a bowl and pour about 1/4 cup of hot water over it. If it fizzes vigorously, it’s still active. If not, it’s time to replace it. Also, ensure your oven temperature is accurate; an oven that’s too cool won’t give the muffins the initial lift they need.
Can I use frozen corn kernels?
Absolutely! Just make sure they are thawed and drained well before adding them to the batter. Excess water can affect the batter consistency and lead to a less tender muffin.
How full should I fill the muffin cups?
Filling the cups about two-thirds full is usually the sweet spot for most muffin recipes, including this one. This allows the batter enough room to rise nicely and form a pleasant dome without spilling over the sides.
Can I make these muffins gluten-free?
While you might be able to adapt this recipe using a gluten-free flour blend, the texture may be different. Gluten-free flours often require different liquid ratios and binders. This recipe specifically relies on the gluten development principle to avoid overmixing for fluffiness with standard wheat flour. Adapting it would likely require significant testing and adjustments.
How long do these Fluffy Corn Muffins last?
When stored properly in an airtight container at room temperature, they are best enjoyed within 2-3 days. They tend to dry out after that. Freezing is a great option for longer storage.
Enjoy Your Homemade Fluffy Corn Muffins!
Armed with the simple secret of gentle mixing, you are now ready to bake the best Fluffy Corn Muffins of your life! They are incredibly easy to whip up, taking minimal time from pantry to plate.
Whether you enjoy them plain, with butter, or as a side for a hearty meal, I know you’re going to love their tender crumb and delightful corn flavor. Give this recipe a try and let me know what you think! Did the ‘no overmix’ trick work wonders for you? Leave a comment below and share your experience!
Fluffy Corn Muffins

Ingredients
- 1 and 1/2 cups all-purpose flour
- 1 cup yellow cornmeal
- 1/2 cup granulated sugar
- 2 teaspoons baking powder
- 1/2 teaspoon salt
- 1 large egg
- 1 cup milk
- 1/2 cup vegetable oil
- 1 cup corn kernels (fresh, frozen, or canned, drained)
Directions
- Preheat your oven to 400 degrees F (200 degrees C). Line a 12-cup muffin tin with paper liners or grease the cups well.
- In a large bowl, whisk together the flour, cornmeal, sugar, baking powder, and salt until well combined. Make sure there are no lumps.
- In a separate medium bowl, whisk together the egg, milk, and vegetable oil until smooth.
- Pour the wet ingredients into the bowl with the dry ingredients. Add the corn kernels.
- This is the key to fluffiness: Stir everything together just until combined. A few lumps are perfectly fine, and the batter should look slightly rough. Do NOT overmix the batter; overmixing develops the gluten too much and leads to dense muffins. Stirring only enough to hydrate the flour is essential for a tender crumb.
- Divide the batter evenly among the prepared muffin cups, filling each about two-thirds full.
- Bake for 18 to 22 minutes, or until a toothpick inserted into the center of a muffin comes out clean and the tops are golden brown.
- Let the muffins cool in the tin for a few minutes before transferring them to a wire rack to cool completely.