
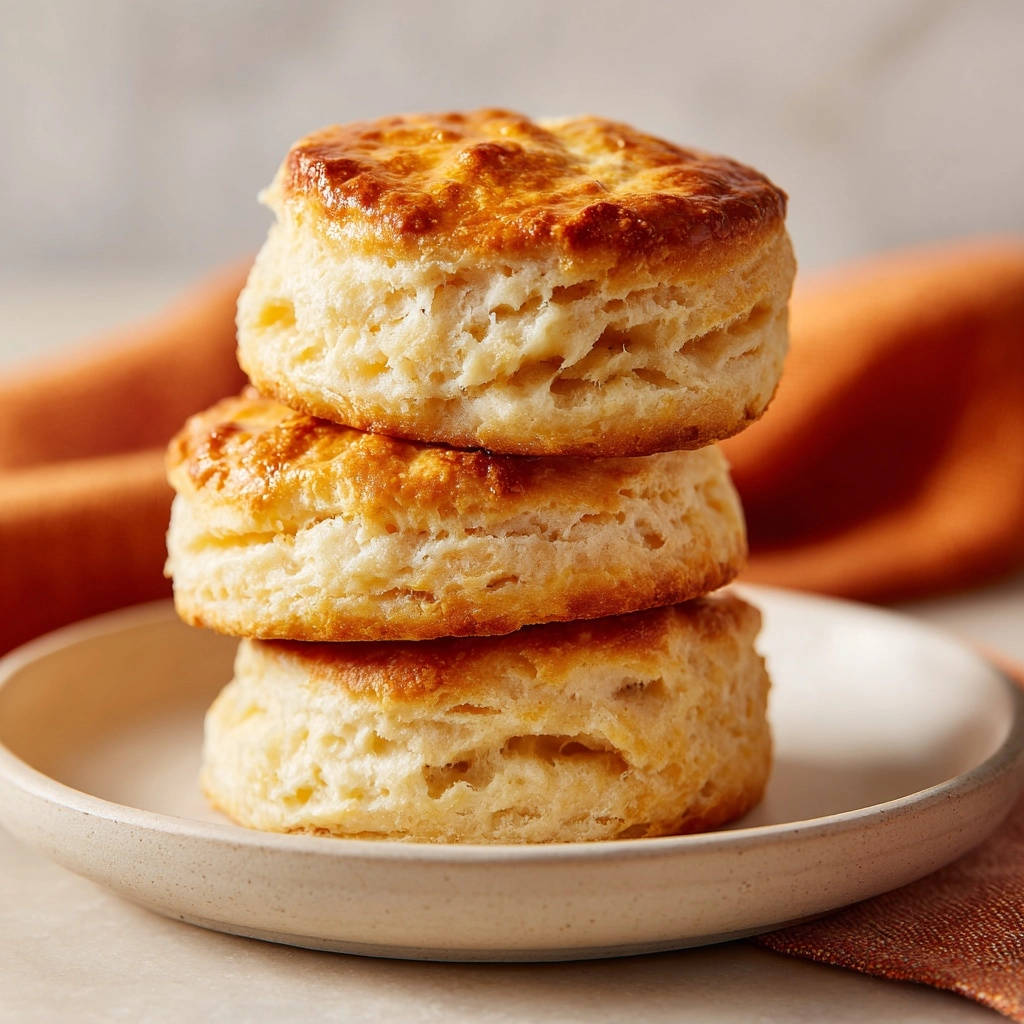
I know the struggle of trying to achieve truly Fluffy Layered Biscuits, only to end up with dense, uninspired pucks. After years of perfecting my technique, I’ve finally cracked the code to consistently create biscuits that boast an incredible sky-high rise and an irresistible flaky texture.
This recipe isn’t just about ingredients; it’s about a simple, reliable method that guarantees light, airy layers every single time, making you a biscuit baking champion.
The Magic Behind Our Fluffy Layered Biscuits: Why This Recipe Works
Say Goodbye to Dense Biscuits: Achieve Unbeatable Lightness
Many recipes result in heavy biscuits, but ours prioritizes delicate handling and precise ingredient temperatures.
We avoid overmixing the dough, a common culprit, to prevent gluten from overdeveloping, ensuring a tender, light crumb that practically melts in your mouth.
The Secret to Sky-High Rise and Flaky Layers
The secret to these exceptional Fluffy Layered Biscuits lies in two critical techniques: using very cold butter and employing a specific folding method known as lamination.
Tiny pockets of cold butter trapped within the dough create steam as they bake, pushing the layers apart to form that coveted sky-high rise and distinct, flaky texture.
Simple Steps, Consistent Results: Perfect Every Time
Despite the impressive results, this recipe for Fluffy Layered Biscuits is surprisingly straightforward.
Each step is designed to be clear and manageable, ensuring that even novice bakers can achieve perfectly golden, beautifully risen biscuits with confidence.
Essential Ingredients for Your Fluffy Layered Biscuits Masterpiece
Flour Power: The Foundation of Fluff
All-purpose flour provides the essential structure for our biscuits, creating a tender crumb when handled correctly.
For an even lighter result, consider sifting your flour; it helps incorporate air and prevents lumps, contributing to a truly fluffy texture.
The Leavening Trio: Baking Powder, Baking Soda, and Salt
Baking powder and baking soda are the dynamic duo responsible for the remarkable lift and airy pockets.
The baking soda reacts with the buttermilk’s acidity, while baking powder provides additional leavening, both crucial for a uniform, impressive rise.
Salt balances the flavors and enhances the overall taste, a critical component in any balanced baked good.
The Chill Factor: Very Cold Butter is Non-Negotiable
Very cold, cubed unsalted butter is perhaps the most crucial ingredient for achieving those desirable flaky layers.
The small pieces of cold fat create steam pockets as they melt slowly in the hot oven, which physically separates the dough into its characteristic delicate layers.
Buttermilk’s Tangy Touch: For Tenderness and Flavor
Cold buttermilk adds a subtle tang and contributes significantly to the tender texture of the biscuits.
Its acidity reacts with the baking soda, boosting the rise and helping to break down gluten for an incredibly soft, melt-in-your-mouth bite.
A Hint of Sweetness (Optional Granulated Sugar)
A tablespoon of granulated sugar is an optional addition, offering a delicate hint of sweetness.
It also plays a role in promoting a beautiful golden-brown crust, enhancing the visual appeal of your Fluffy Layered Biscuits.
Tools for Biscuit Brilliance: What You’ll Need
Large Mixing Bowl: For combining ingredients with ease, providing ample space for proper mixing without mess.
Pastry Cutter or Two Knives: Crucial for efficiently incorporating cold butter into the flour without warming it up with your hands.
Rolling Pin (or Your Hands): For gently patting and shaping the dough to the correct thickness, essential for successful layering.
2-inch Biscuit Cutter (or a Drinking Glass): Essential for clean, even cuts and ensuring your biscuits rise properly without sealed edges.
Baking Sheet and Parchment Paper: For non-stick baking, easy cleanup, and promoting even heat distribution for consistently golden biscuits.
Whisk and Rubber Spatula: Standard tools for efficiently mixing dry ingredients and gently folding in wet ones to prevent overmixing.
Your Step-by-Step Guide to Fluffy Layered Biscuits Perfection
- Prepare Your Oven and Pan:
Preheat your oven to a robust 425°F (220°C). This high heat is essential for a quick, impactful rise in your biscuits.
Line a baking sheet with parchment paper. This simple step ensures easy release, prevents sticking, and makes cleanup a breeze.
- Whisk Dry Ingredients:
In a large bowl, whisk together the all-purpose flour, baking powder, baking soda, salt, and optional granulated sugar.
Thorough whisking is crucial here; it evenly distributes the leavening agents, ensuring every biscuit gets a consistent, beautiful rise.
- Cut in the Cold Butter:
Add the very cold, small-cubed unsalted butter directly into the dry ingredients.
Using a pastry cutter, two knives, or your fingertips, quickly work the butter into the flour until the mixture resembles coarse meal with some pea-sized pieces of butter still visible.
This step is where the magic begins: the colder the butter, the more steam it will produce in the oven, directly translating to an incredible sky-high rise and an unbeatable flaky texture.
- Gently Add Buttermilk:
Pour in the cold buttermilk. With a fork or rubber spatula, stir gently and briefly, just until the dry ingredients are moistened and a shaggy dough forms.
This is a critical moment: avoid the temptation to overmix. Overworking the dough develops gluten, leading to tough biscuits instead of the desired tender, fluffy ones.
- The Layering Technique: Your Key to Fluff!
Turn the shaggy dough out onto a lightly floured surface. Gently pat the dough into a rough rectangle, aiming for about 1/2 inch thickness.
Now, perform the essential ‘letter fold’: fold one-third of the dough over the middle, then fold the remaining third over that, creating three distinct layers.
Rotate the dough 90 degrees and gently pat it out again into another rough rectangle, maintaining the 1/2 inch thickness.
Repeat this folding and patting process two more times, for a total of three folds. This unique layering technique, often called lamination, is your secret weapon; it traps tiny pockets of butter between the dough sheets, which will then create steam and separate into those glorious, visible flaky layers as the biscuits bake.
- Final Dough Thickness:
After your third and final fold, gently pat the dough to an even thickness of approximately 1 inch.
This uniform thickness is key for ensuring all your Fluffy Layered Biscuits bake evenly and achieve a consistent, impressive height.
- Cut Your Biscuits:
Using a 2-inch biscuit cutter (or a clean drinking glass), firmly press straight down through the dough to cut out your biscuits.
Crucially, do not twist the cutter. Twisting seals the edges of the dough, which can prevent those wonderful layers from separating and rising properly.
Gently gather any dough scraps, lightly pat them together once, and cut additional biscuits. Avoid overworking these scraps, as they will yield tougher biscuits.
- Arrange for Baking:
Carefully transfer the cut biscuits onto your prepared baking sheet.
For biscuits with softer sides and a more tender crumb, place them relatively close together so they are just touching. If you prefer crispier, golden-brown sides, space them about 1 inch apart.
- Bake to Golden Perfection:
Bake for 12-15 minutes in your preheated 425°F (220°C) oven.
The biscuits are ready when their tops are a beautiful golden brown and they have risen magnificently, showcasing their incredible layers.
Serve these perfect Fluffy Layered Biscuits warm with your favorite toppings for an unforgettable treat.
Chef’s Secrets for Unbeatable Fluffy Layered Biscuits
Embrace the Cold: Always use very cold butter and cold buttermilk. This is the cornerstone of flaky layers, as cold fat melts slowly in the oven, creating steam pockets that lift the dough and create separation.
Don’t Overmix the Dough: Gentle handling is key. Overmixing develops gluten, which leads to tough, chewy biscuits instead of tender, flaky ones. Stir just until combined and the dough barely comes together.
The Strategic Fold: The folding technique (laminating) is your secret weapon for those distinct, beautiful layers. Don’t skip it, and always handle the dough lightly to maintain its delicate structure.
Press, Don’t Twist: When cutting biscuits, press your cutter straight down and pull it up. Twisting seals the dough’s edges, preventing the layers from expanding and rising properly during baking.
Mind the Scraps: Reroll dough scraps only once, and handle them minimally. Overworking these scraps will inevitably make those particular biscuits tougher and less flaky than the first batch.
Temperature Matters: Bake at a high temperature (425°F/220°C). The initial blast of heat rapidly activates the leavening agents and quickly sets the biscuit structure, leading to a superior, rapid rise and golden crust.
Common Biscuit Blunders (and How to Fix Them!)
Problem: Biscuits are Dense and Heavy
Solution: This usually means you’ve overmixed the dough, developing too much gluten. Next time, mix just until the dry ingredients are moistened and avoid excessive handling after the buttermilk is added.
Also, ensure your butter is very cold and that you cut it into the flour quickly, without allowing it to soften prematurely.
Problem: Biscuits Didn’t Rise Properly
Solution: Several factors can cause this: expired leavening agents (baking powder or baking soda), twisting the biscuit cutter (which seals layers), or the butter not being cold enough to create steam.
Always double-check your ingredients’ freshness before baking, and remember to press straight down with your cutter, never twisting.
Problem: Biscuits are Dry and Crumbly
Solution: This often happens from too much flour or not enough liquid. Ensure you’re measuring accurately, ideally by weight for flour, to avoid an imbalanced ratio.
If your dough still feels very dry and isn’t coming together after adding the specified buttermilk, add another tablespoon or two, mixing gently, until it just forms a cohesive shaggy mass.
Serving Suggestions & Storing Your Fluffy Layered Biscuits
Perfect Pairings: What to Serve with Your Biscuits
Fluffy Layered Biscuits are incredibly versatile! Enjoy them warm with classic butter and your favorite fruit jam, or a generous drizzle of honey.
For a truly satisfying savory treat, serve them alongside rich sausage gravy, crispy fried chicken, or as a perfect accompaniment to a comforting meal like a hearty white bean chicken stew.
They also make an excellent base for any breakfast sandwich, holding up beautifully to eggs, cheese, and your choice of protein.
Keeping Them Fresh: Storage Tips
Store leftover biscuits in an airtight container at room temperature for up to 2-3 days, ensuring they retain their tender texture and freshness.
For longer storage, these biscuits freeze beautifully for up to 2-3 months. Simply place them in a freezer-safe bag or container.
To reheat, warm gently in a moderate oven (around 300°F/150°C) until heated through, or briefly in the microwave for a quicker option.
Make-Ahead Magic: Prepare Dough in Advance
You can prepare the biscuit dough (up to step 7, cutting the biscuits) in advance for ultimate convenience, perfect for busy mornings.
Place the unbaked cut biscuits on a baking sheet and freeze until solid, then transfer them to a freezer bag or container.
Bake from frozen whenever a craving strikes, simply adding a few extra minutes to the baking time, for fresh, warm Fluffy Layered Biscuits anytime!
Your Top Questions About Fluffy Layered Biscuits, Answered!
Can I Use Regular Milk Instead of Buttermilk?
While buttermilk is preferred for its acidity, which reacts with baking soda for an optimal rise and unparalleled tenderness, you can create a simple substitute.
Combine 3/4 cup of regular milk with 1 tablespoon of lemon juice or white vinegar, then let it sit for 5-10 minutes until it slightly curdles. Use this ‘soured milk’ exactly as directed for buttermilk in the recipe.
Can I Make These Biscuits Gluten-Free?
Yes, you can often substitute a high-quality 1:1 gluten-free all-purpose flour blend for the regular flour.
Be aware that the texture might be slightly different, potentially a bit denser, and you may need a tiny bit more liquid to achieve the right dough consistency.
Ensure your chosen blend contains xanthan gum for structure, or add about 1/2 teaspoon per cup of flour if it doesn’t.
Why Do I Need to Cut the Butter so Cold?
Very cold butter is absolutely crucial for achieving those signature flaky layers that define great biscuits.
When cold butter pieces hit the hot oven, they melt slowly, creating steam that pushes the layers of dough apart, resulting in that incredibly airy, flaky texture.
If the butter is too warm, it melts into the flour prematurely during mixing, which prevents the formation of distinct layers and leads to dense, less appealing biscuits.
Can I Add Herbs or Cheese to the Dough?
Absolutely! Fluffy Layered Biscuits are wonderfully adaptable to savory additions, making them a versatile side dish or snack.
Fold in about 1/4 cup of finely chopped fresh herbs (such as chives, dill, or rosemary) or 1/2 cup of shredded cheddar or Parmesan cheese after adding the buttermilk, just before you begin the layering step.
Adjust the salt content slightly if you’re adding salty cheese, and enjoy your personalized, savory treats! For more inspiration on other delightful baked goods, you might enjoy trying our recipe for classic blueberry scones that are never dry.
Ready to Bake Your Best Fluffy Layered Biscuits Yet?
With these detailed steps and insider tips, you’re now fully equipped to master the art of creating perfect Fluffy Layered Biscuits.
Get ready to impress your family and friends with a batch of beautifully golden, impossibly sky-high, and irresistibly flaky biscuits that are sure to become a cherished staple in your kitchen.
We’d absolutely love to see your baking triumphs! Tag us on social media or leave a comment below sharing your experience and any delicious variations you’ve tried. Happy baking!

Fluffy Layered Biscuits
Course: BreadCuisine: American CuisineDifficulty: easy6
servings15
minutes12
minutes27
minutesAmerican Cuisine
Ingredients
2 cups all-purpose flour, plus more for dusting
1 tablespoon baking powder
1/2 teaspoon baking soda
1 teaspoon salt
1 tablespoon granulated sugar (optional, for sweetness and browning)
1/2 cup (1 stick) unsalted butter, very cold and cut into small cubes
3/4 cup cold buttermilk, plus more if needed
Directions
- Preheat your oven to 425F degrees. Line a baking sheet with parchment paper.
- In a large bowl, whisk together the flour, baking powder, baking soda, salt, and sugar (if using).
- Add the very cold, cubed butter to the dry ingredients. Use a pastry cutter, two knives, or your fingertips to cut the butter into the flour until the mixture resembles coarse meal with some pea-sized pieces of butter remaining. The colder the butter, the better the rise.
- Pour in the cold buttermilk. Stir gently with a fork or rubber spatula just until the dry ingredients are moistened and a shaggy dough forms. Do not overmix.
- Turn the dough out onto a lightly floured surface. Here’s the secret to those incredible layers and the sky-high rise: Gently pat the dough into a rough rectangle, about 1/2 inch thick. Fold the dough into thirds, like a letter. Rotate the dough 90 degrees and gently pat it out again into a rectangle. Repeat this folding and patting process two more times. This layering technique traps butter between the folds, which creates steam in the oven and pushes the biscuit upwards.
- After the final fold, gently pat the dough to an even thickness of about 1 inch.
- Using a 2-inch biscuit cutter (or a drinking glass), press straight down through the dough to cut out the biscuits. Do not twist the cutter, as this can seal the edges and prevent them from rising properly. Gently reroll any scraps once and cut additional biscuits.
- Place the cut biscuits onto the prepared baking sheet. For a softer side, place them close together so they touch. For crispier sides, space them about 1 inch apart.
- Bake for 12-15 minutes, or until the tops are golden brown and the biscuits have risen beautifully. Serve warm with your favorite toppings!
Notes
- Serve warm with your favorite toppings!


