
There’s nothing quite like the promise of a warm, comforting pot pie, especially on a chilly evening. But who hasn’t been disappointed by a dry, lackluster filling after all that effort? I’ve been there, but after years of testing, I’ve perfected this incredible Golden Crust Chicken Pot Pie recipe that guarantees a rich, creamy filling every single time, crowned with the most exquisite flaky crust.
This isn’t just another recipe; it’s a foolproof guide to a family favorite that consistently delivers on its promise of tender chicken, vibrant vegetables, and a luscious sauce, all beneath a perfectly golden, buttery puff pastry lid.
Unlocking the Secret to a Never-Dry, Always-Creamy Pot Pie
Beyond the Bake: The Joy of a Truly Moist Filling
This recipe’s triumph lies in its consistently moist and flavorful filling, thanks to a meticulously crafted roux. By slowly whisking in liquids, we create a velvety sauce that perfectly coats every ingredient, preventing any dryness and ensuring rich flavor in every bite, much like you’d find in a perfectly executed creamy gravy.
Effortless Elegance: Achieving That Perfect Golden Crust
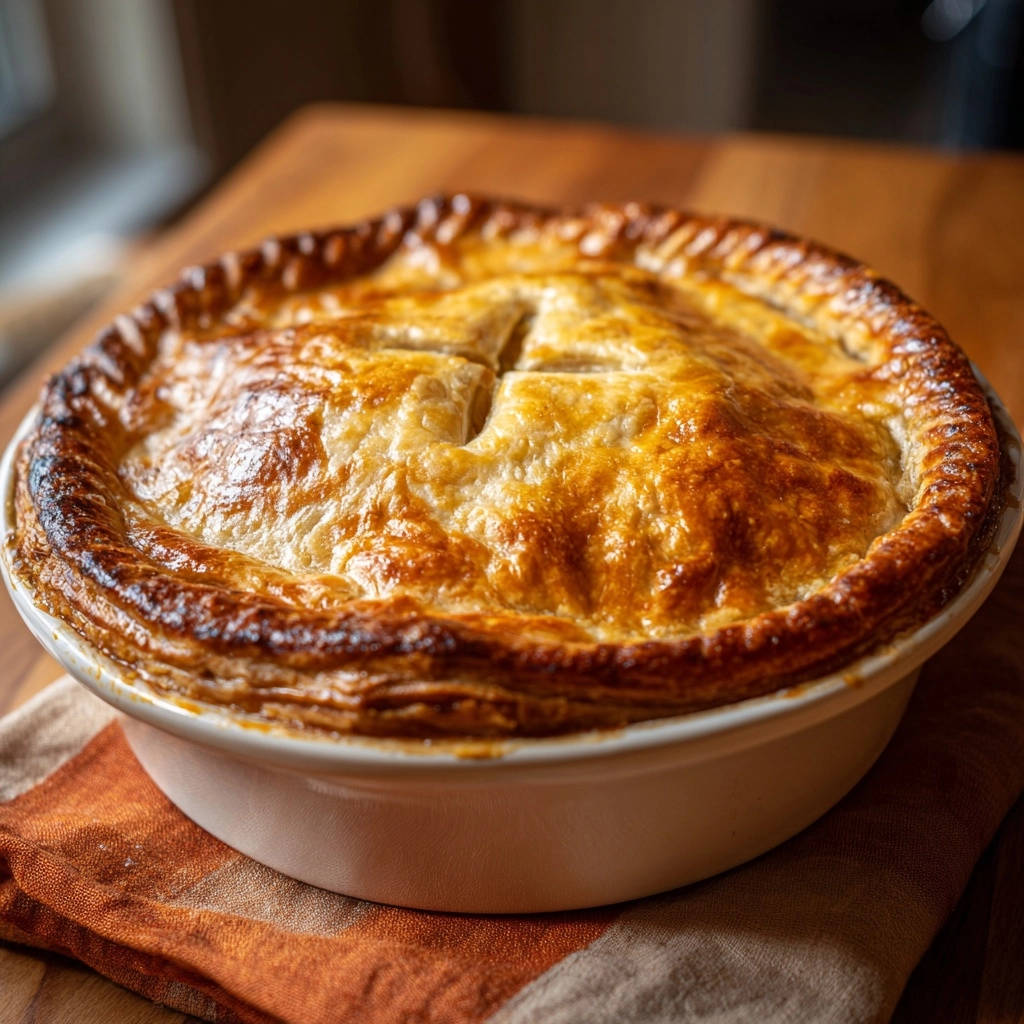
Gone are the days of struggling with homemade pie crusts. We embrace the simplicity and guaranteed success of puff pastry, which effortlessly bakes into a stunningly golden, flaky, and impossibly light topping.
It provides that satisfying crunch and beautiful presentation with minimal fuss, making this pot pie truly special.
Comfort in Every Spoonful: A Family Favorite Made Simple
Despite its gourmet appearance and rich flavors, this Golden Crust Chicken Pot Pie is surprisingly straightforward to prepare. It’s the ultimate comforting meal, perfect for bringing warmth and joy to any family dinner, even on a busy weeknight.
Gather Your Essentials: The Building Blocks of Flavor
Fresh Vegetables: The Aromatic Foundation
Onions, carrots, and celery form the classic “mirepoix,” the aromatic base that infuses the entire pot pie with savory depth. Freshly diced potatoes add satisfying body and a tender texture to the filling.
The Creamy Core: Chicken, Broth & Dairy
Pre-cooked chicken, whether shredded or diced, ensures a tender bite without drying out in the oven. Rich chicken broth and whole milk combine to create the luscious, savory liquid that binds all the ingredients together, making the filling incredibly creamy.
Our Secret Weapon: The Flaky Puff Pastry
Store-bought puff pastry is a game-changer, delivering an exquisitely flaky and buttery crust with minimal effort. Ensure it’s thawed completely but still cold enough to handle easily before unrolling.
Spice Rack Staples: Herbs for Depth
Dried thyme and rosemary are the perfect aromatic partners, lending an earthy, comforting fragrance and flavor that is synonymous with classic pot pies. These herbs elevate the savory notes of the chicken and vegetables beautifully.
Tools for the Task: Essential Kitchen Companions
Your Perfect Pot: Oven-Safe & Spacious
A large, heavy-bottomed Dutch oven or an oven-safe pot is ideal for making the filling. Its even heat distribution ensures vegetables soften perfectly and the roux develops without scorching.
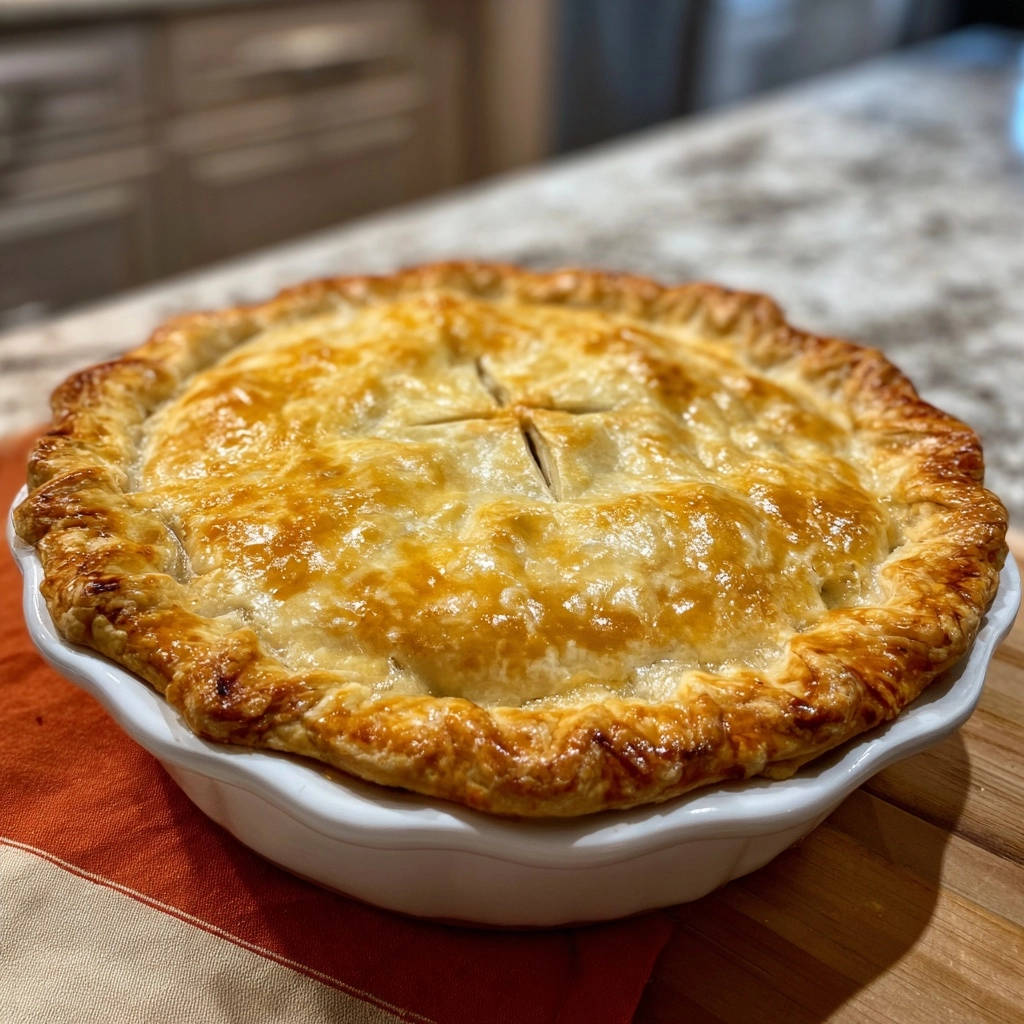
The Right Dish: For a Beautiful Presentation
A 9-inch pie dish or a similar oven-safe casserole dish works perfectly. Glass or ceramic dishes are excellent choices for even baking and a lovely table presentation.
Whisking Wonders & Basic Utensils
You’ll need a sturdy whisk for creating a smooth, lump-free roux, along with a sharp knife and cutting board for vegetable prep. Basic measuring cups and spoons complete your essential toolkit.
Mastering Your Golden Crust Chicken Pot Pie: Step-by-Step
- Preparation is Key: Setting the Stage
Preheat your oven to 400°F (200°C) to ensure it’s ready when your pie is assembled. Have all your ingredients pre-measured and prepped for a smooth cooking process, often referred to as “mise en place.”
- Sautéing Aromatics: Building the Flavor Base
In a large oven-safe pot or Dutch oven, melt the unsalted butter over medium heat. Add the chopped onion, diced carrots, and diced celery.
Cook for 5-7 minutes, stirring occasionally, until the vegetables begin to soften and release their sweet, aromatic essence. This step is crucial for developing the foundational flavors of your pot pie.
- Introducing the Potatoes & Herbs
Stir in the small-diced potatoes, dried thyme, and dried rosemary. Continue to cook for another 3-4 minutes, allowing the potatoes to soften slightly and the herbs to become fragrant with the vegetables.
- The Roux Revelation: Thickening to Perfection
Sprinkle the all-purpose flour evenly over the softened vegetables. Stir constantly for 1 minute, ensuring the flour cooks into the butter and vegetable juices to form a smooth roux.
This cooked flour paste is essential for thickening your sauce and prevents a raw flour taste in the finished pot pie.
- The “Juicy Filling” Secret: Whisking in Liquids
Gradually whisk in the chicken broth, a little at a time, making sure to incorporate it fully before adding more to prevent lumps. Once smooth, slowly whisk in the milk.
Bring the mixture to a gentle simmer, stirring frequently, until the sauce visibly thickens to a rich, creamy consistency that coats the back of a spoon. This careful process is the key to a juicy, never-dry filling.
- Fold in the Goodness: Chicken & Peas
Remove the pot from the heat and gently fold in the cooked, shredded or diced chicken and the frozen peas. The residual heat will warm the peas perfectly.
Taste the filling and season generously with salt and black pepper. Adjust seasoning as needed, ensuring a perfectly balanced flavor before proceeding.
- The Grand Assembly: Filling Your Pot Pie
Pour the luscious, creamy filling mixture into your prepared 9-inch pie dish or casserole, spreading it evenly. This prepares the stage for its golden, flaky crown.
- Puff Pastry Perfection: Capping Your Creation
Carefully unroll the thawed puff pastry sheet and place it directly over the filling. Trim any excess dough, leaving about a 1/2-inch overhang, and then crimp the edges firmly to seal the pastry to the dish.
Using a sharp knife, cut several small slits or a decorative pattern into the top of the pastry. These vents are crucial for allowing steam to escape during baking, which prevents a soggy crust and ensures flakiness.
- Golden Finish: The Egg Wash
Brush the entire top surface of the puff pastry evenly with the beaten egg wash. This simple step is what gives your pot pie that irresistible, deep golden-brown sheen and adds to its crisp texture.
- Baking to Golden Glory: The Final Touch
Bake the pot pie in your preheated oven for 30-35 minutes, or until the pastry is beautifully golden brown, flaky, and the filling is visibly bubbly around the edges.
If you notice the crust browning too quickly before the filling is fully heated, loosely tent the pie with a piece of aluminum foil to protect it for the remainder of the baking time.
- The Golden Rule: Resting for Optimum Flavor
Once baked, remove the pot pie from the oven and allow it to rest for 5-10 minutes before serving. This critical resting period allows the hot filling to set slightly, making it much easier to scoop and ensuring every bite is perfectly moist and flavorful.
Chef’s Secrets: Elevating Your Pot Pie to Culinary Heights
Roasted Chicken for Deeper Flavor: Instead of boiled or rotisserie chicken, consider using leftover roasted chicken. The caramelized notes from roasting add an incredible depth and richness to your pot pie filling that simple cooked chicken can’t quite match.
The Art of the Perfect Roux (No Lumps Allowed!): For an exceptionally smooth and lump-free sauce, ensure your butter and flour mixture cooks for at least one minute, creating a nutty aroma. When adding liquids, pour in a very thin stream while whisking continuously and vigorously, especially during the initial additions. This technique helps emulsify the fat and liquid slowly, preventing any clumping.
Smart Vegetable Prep for Even Cooking: Consistency is key. Dice your vegetables-onions, carrots, celery, and potatoes-into uniform, small pieces. This ensures they cook evenly in the filling, preventing any undercooked hard bits and contributing to a harmonious texture throughout the pot pie.
Customizing Your Filling: Beyond Chicken: While this recipe shines with chicken, don’t hesitate to personalize it! Swap chicken for leftover turkey, or even explore another comforting meal idea like our hearty white bean chicken stew. You can also use a delightful mix of sautéed mushrooms, sweet potatoes, and other root vegetables for a vegetarian twist. Remember to adjust seasoning and cooking times accordingly for different proteins or vegetables.
Crust Control: Preventing Over-Browning: If your beautiful puff pastry starts to darken too rapidly during baking, a simple fix is to create a loose “tent” over the pie with aluminum foil. This shields the crust from direct heat, allowing the filling to continue bubbling and cooking without scorching the top.
The Importance of Resting Time: Resisting the urge to immediately cut into a freshly baked pot pie is hard, but vital. The 5-10 minute rest allows the super-hot filling to thicken and set, preventing it from being runny when served and ensuring each portion holds its shape beautifully.
Solving Common Pot Pie Predicaments
My Filling is Too Thin/Thick!
If your filling is too thin after simmering, return it to the stove over very low heat. Create a slurry with a teaspoon of cornstarch mixed with cold water, then gradually whisk it into the simmering filling, stirring until it thickens. If the filling is too thick, gradually whisk in a tablespoon or two of extra chicken broth or milk until it reaches your desired, spoonable consistency.
Soggy Bottom Crust Blues
To prevent a soggy bottom, ensure your filling is not overly watery before adding the pastry. Also, baking the pot pie on the lowest oven rack for the first 15-20 minutes can help ensure the bottom crust gets direct heat and crisps up more effectively.
Crust Browning Too Quickly
Should your puff pastry reach your desired golden hue before the filling is thoroughly hot and bubbly, simply place a sheet of aluminum foil loosely over the top of the pie. This will protect the crust from further browning while the filling finishes cooking.
Filling is Dry (Even with the “Trick”!)
A dry filling usually indicates that the initial roux wasn’t thick enough, or too much liquid evaporated during the simmering phase. Double-check your measurements, ensure the sauce reaches a coating consistency before adding the chicken and peas, and avoid overcooking the filling prior to baking.
Enjoying Your Creation: Serving, Storage, and Beyond
Delicious Pairings: What to Serve Alongside
While a Golden Crust Chicken Pot Pie is wonderfully satisfying on its own, it pairs beautifully with light, fresh sides. A crisp green salad with a zesty vinaigrette provides a refreshing contrast, or consider a bright and refreshing creamy cucumber salad to complement its richness.
Make-Ahead Magic: Prep Now, Bake Later
The filling for your pot pie can be prepared up to two days in advance and stored in an airtight container in the refrigerator. When ready to bake, simply pour the chilled filling into your pie dish, top with fresh puff pastry, and proceed with the baking instructions.
You can also fully assemble the unbaked pie, cover it tightly with plastic wrap, and refrigerate for up to 24 hours. Just add about 5-10 minutes to the baking time if starting from cold.
Storing Leftovers: Keeping the Goodness Fresh
Allow any leftover pot pie to cool completely to room temperature before transferring it to an airtight container. It will keep well in the refrigerator for up to 3-4 days, ready for another comforting meal.
Reheating for Revival: A Second Life for Your Pot Pie
For the best texture, reheat individual slices in a preheated oven at 300°F (150°C) for 15-20 minutes, or until the filling is warmed through and the crust regains its crispness. While a microwave is quicker, it may result in a softer crust.
Your Pot Pie Questions Answered: FAQs
Can I use a different type of crust?
Absolutely! While puff pastry offers unparalleled flakiness, a traditional double pie crust works wonderfully for a more classic feel. You could even top it with flaky biscuit dough for a different, equally delicious, texture. Adjust baking times as recommended for your chosen crust.
Can I make this dairy-free or gluten-free?
Yes, with a few simple swaps. For a dairy-free version, use an unsweetened plant-based milk (such as oat or almond milk) and a dairy-free butter alternative. To make it gluten-free, substitute the all-purpose flour with a 1:1 gluten-free flour blend for the roux, and ensure your chosen puff pastry is certified gluten-free.
What’s the best way to shred chicken?
For quick and easy shredding, place your cooked chicken breasts (still warm) into the bowl of a stand mixer fitted with the paddle attachment. Mix on low speed for about 30-60 seconds, and you’ll have perfectly shredded chicken. Alternatively, two forks work just as well for a more manual approach.
Can I freeze the assembled pot pie?
You certainly can! Assemble the entire unbaked pot pie in a freezer-safe dish (an aluminum foil pan is ideal for this purpose). Cover it tightly first with plastic wrap, then with aluminum foil, and freeze for up to 3 months. When ready to bake, simply bake from frozen at 375°F (190°C) for 60-75 minutes, covering with foil if the crust browns too quickly, until golden and bubbly.
Your Next Family Favorite Awaits: Share Your Golden Crust Masterpiece!
With this recipe, you’re not just making a meal; you’re crafting a truly memorable experience. The satisfaction of slicing into that perfectly golden crust, revealing the rich, creamy, and never-dry filling, is unparalleled. We encourage you to try this Golden Crust Chicken Pot Pie and make it a staple in your home.
We’d love to see your creations! Share your photos and tag us on social media, or leave a comment below with your experience or any delicious variations you discover. Happy cooking!
Golden Crust Chicken Pot Pie
Course: Main CourseCuisine: American CuisineDifficulty: easy6
servings25
minutes35
minutes60
minutesAmerican Cuisine
Ingredients
2 tablespoons unsalted butter
1 small yellow onion, chopped
2 carrots, peeled and diced
2 stalks celery, diced
1 cup diced potatoes (small dice, about 1 medium potato)
1/2 teaspoon dried thyme
1/2 teaspoon dried rosemary
1/4 cup all-purpose flour
2 cups chicken broth
1 cup milk (whole or 2%)
2 cups cooked chicken, shredded or diced
1 cup frozen peas
Salt to taste
Black pepper to taste
1 sheet puff pastry, thawed
1 large egg, beaten (for egg wash)
Directions
- Preheat your oven to 400 degrees F (200 degrees C).
- In a large oven-safe pot or Dutch oven, melt the butter over medium heat. Add the chopped onion, carrots, and celery. Cook for 5-7 minutes, stirring occasionally, until the vegetables begin to soften.
- Stir in the diced potatoes, dried thyme, and dried rosemary. Cook for another 3-4 minutes.
- Sprinkle the flour over the vegetables and stir constantly for 1 minute. This creates a roux, which is essential for thickening the sauce.
- This is the key to a juicy filling: Gradually whisk in the chicken broth, a little at a time, ensuring no lumps form. Then, slowly whisk in the milk. Bring the mixture to a gentle simmer, stirring frequently, until the sauce thickens to your desired consistency. It should be rich and creamy, coating the back of a spoon. This generous, properly thickened sauce is what prevents your filling from drying out.
- Remove the pot from the heat. Stir in the cooked chicken and frozen peas. Taste and season generously with salt and black pepper. The chicken should be gently folded into the luscious sauce, ensuring every piece is coated and remains tender.
- Pour the filling mixture into a 9-inch pie dish or similar oven-safe casserole.
- Unroll the thawed puff pastry sheet and place it over the filling. Trim any excess dough, leaving about a 1/2-inch overhang. Crimp the edges of the pastry to seal it to the dish. Cut several small slits in the top of the pastry to allow steam to escape during baking.
- Brush the top of the puff pastry with the beaten egg wash.
- Bake for 30-35 minutes, or until the pastry is golden brown and flaky, and the filling is bubbly. If the crust starts to brown too quickly, you can loosely tent it with foil.
- Let the pot pie rest for 5-10 minutes before serving. This allows the filling to set slightly, ensuring every scoop is perfectly moist and flavorful.
Notes
- The key to a juicy filling is gradually whisking in broth and milk for a rich, creamy sauce. Don’t forget to let it rest before serving for best results!


