Ever found yourself craving the simple comfort of a warm, homemade griddle cake? You picture that golden exterior, dusted with powdered sugar, promising a soft, fluffy interior. But then, reality hits – you take a bite, and there it is: that dreaded, disappointing raw center. If that sounds familiar, you are absolutely not alone! It’s a common frustration with these delightful little cakes that are cooked right on your stovetop.
I used to struggle with this exact problem for ages. My griddle cakes would look beautiful on the outside, perfectly browned and inviting, but the inside would be dense, uncooked, and just… sad. I tried different batter consistencies, different flippin’ times, everything I could think of!
But after much trial and error (and let’s be honest, some less-than-perfect batches), I stumbled upon a simple, yet game-changing technique. It’s not about magic ingredients or fancy equipment; it’s about one crucial adjustment to the cooking method. And once you know it, I guarantee you’ll be making perfectly cooked Golden Griddle Cakes every single time. Say goodbye to raw centers and hello to pure griddle cake bliss!
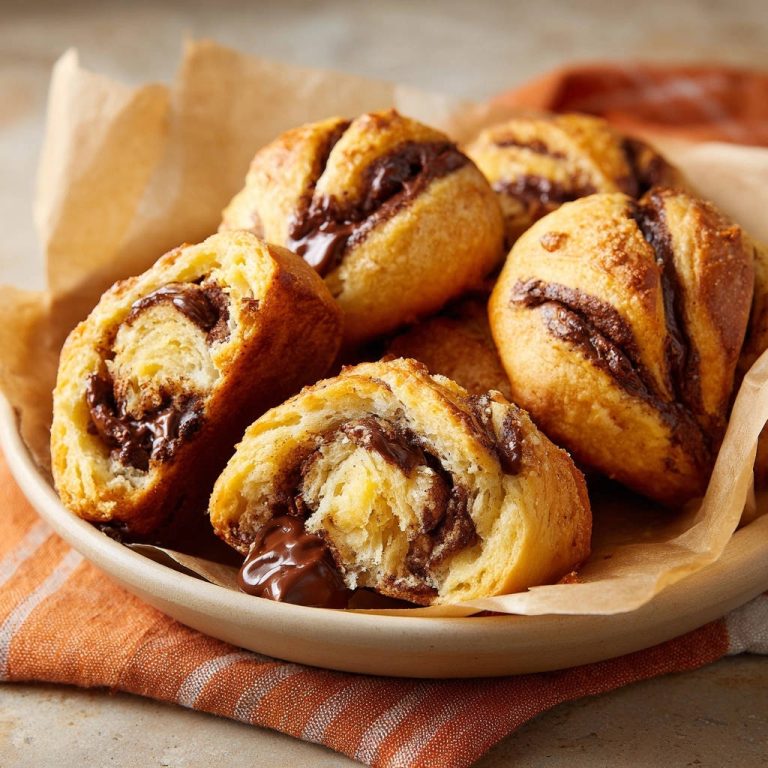
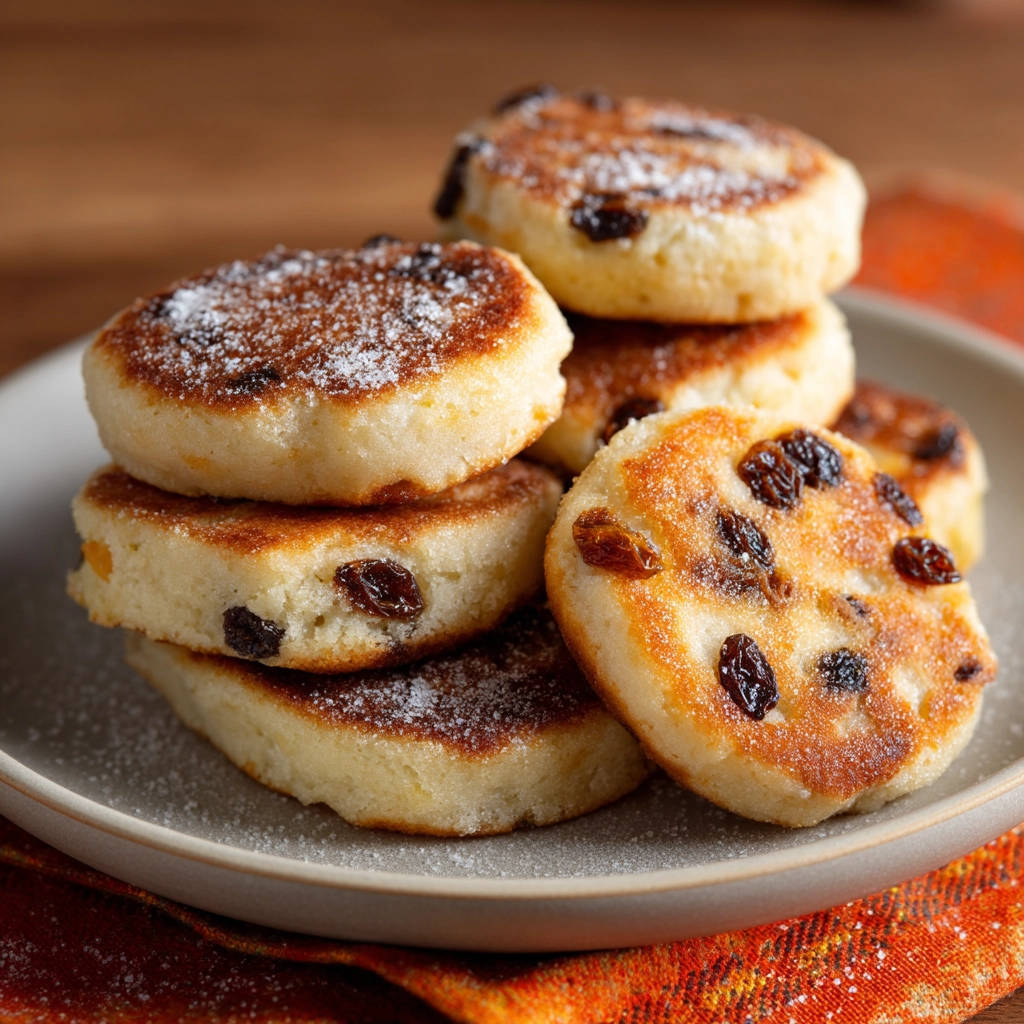
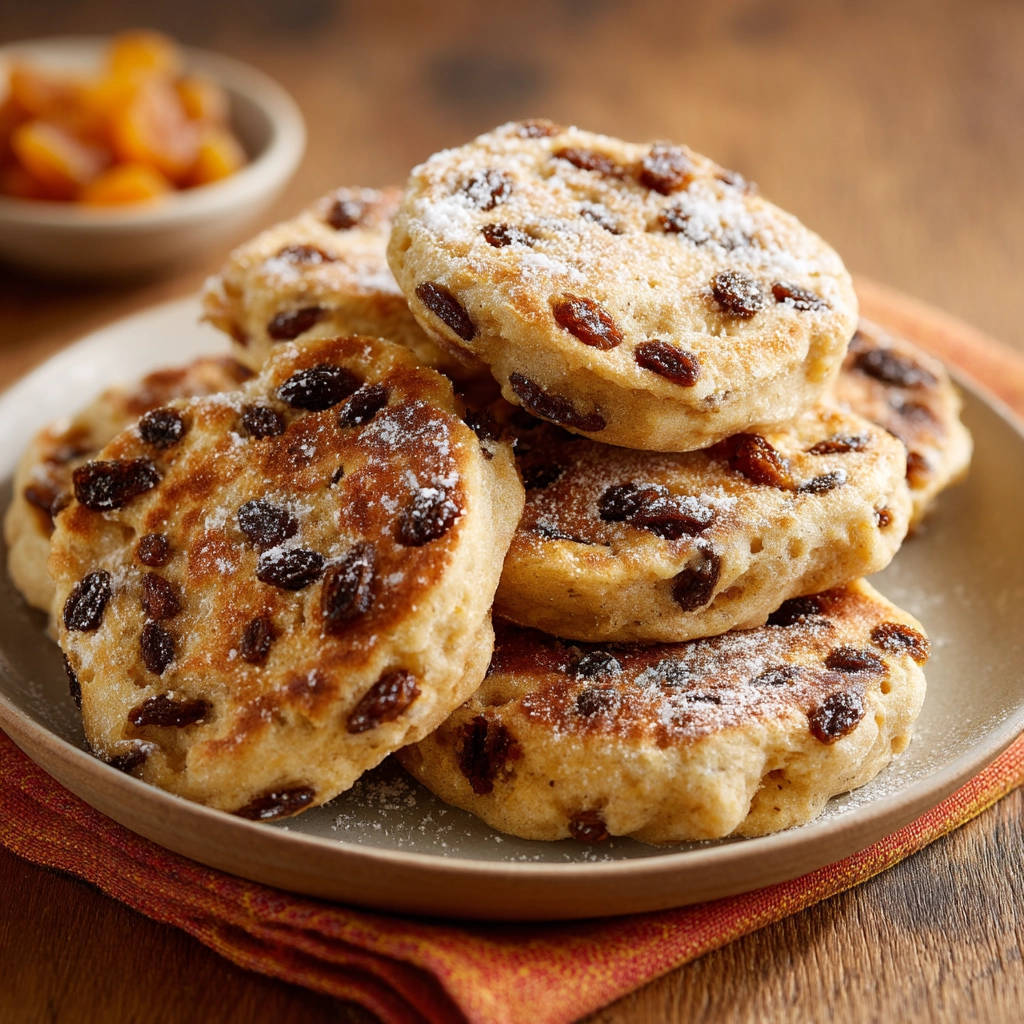
These aren’t your typical thin, floppy pancakes. Think of them more like a delightful cross between a scone and a pancake – slightly richer, a little denser, but still wonderfully tender. The addition of sweet raisins and a hint of nutmeg gives them a classic, comforting flavor that’s simply irresistible, especially on a lazy weekend morning or for a cozy afternoon treat. Ready to master the secret? Let’s get cooking!
Why You’ll Fall in Love with This Golden Griddle Cakes Recipe
Aside from finally conquering the raw center dilemma, there are so many reasons why these particular Golden Griddle Cakes will become a staple in your recipe collection.
-
Guaranteed Success: The primary draw here is the foolproof method for ensuring they are cooked all the way through. No more guesswork or disappointment!
-
Simple Ingredients: You likely have most, if not all, of the necessary ingredients in your pantry right now. Nothing fancy needed!
-
Quick to Make: From start to finish, you’re looking at about 25-30 minutes. Perfect for when a craving strikes without a lot of time.
-
Delicious Flavor: The combination of buttery richness, sweet raisins, and warm nutmeg creates a truly comforting taste experience.
-
Versatile Treat: While perfect for breakfast or brunch, these also make a fantastic tea-time snack or a simple dessert.
They offer a lovely texture contrast – a slightly crisp edge gives way to that tender, perfectly cooked crumb within. It’s the kind of simple, honest baking that just feels good to make and even better to eat. These Golden Griddle Cakes are truly a keeper.
Ingredients for Golden Griddle Cakes: More Than Just a List
Creating these delightful griddle cakes starts with a few pantry staples, each playing an important role in achieving that perfect golden color, tender texture, and sweet, spiced flavor. Understanding what each ingredient contributes helps you appreciate the simplicity and effectiveness of this recipe.
For the dry base, we start with all-purpose flour. This provides the main structure for our cakes. Next, granulated sugar adds sweetness, of course, but also helps with tenderness and that beautiful golden browning as they cook. Baking powder is our leavening agent, crucial for giving the cakes a bit of lift and helping them cook evenly. A touch of ground nutmeg introduces a warm, aromatic spice that pairs wonderfully with the raisins, adding a layer of classic comfort flavor. Finally, a little salt balances the sweetness and enhances all the other flavors.
Now, for the richness and texture. We use cold unsalted butter, cut into small cubes. Keeping the butter cold is key! When you cut it into the dry ingredients, it creates small pockets that melt as the cakes cook, resulting in a wonderfully tender interior. Raisins are stirred in, providing bursts of chewy sweetness throughout the cakes. You can use regular raisins or even golden raisins for a slightly different flavor.
To bring it all together, we need a liquid element. A large egg adds richness, binding, and helps with structure and color. It’s whisked together with milk, which provides the necessary moisture to form a soft dough. The fat content in whole milk contributes to a richer taste and tender crumb, but other milk types can work too.
Finally, a generous dusting of powdered sugar is the perfect finishing touch, adding a delicate sweetness and classic griddle cake appearance. You can use as much or as little as you like!
Here’s the full list to make sure you have everything ready:
- 2 cups all-purpose flour
- 1/3 cup granulated sugar
- 2 teaspoons baking powder
- 1/2 teaspoon ground nutmeg
- 1/4 teaspoon salt
- 1/2 cup cold unsalted butter, cut into small cubes
- 1/2 cup raisins
- 1 large egg
- 1/4 cup milk
- Powdered sugar, for dusting
Having your ingredients prepped and measured before you start makes the process smooth and enjoyable. It’s a small step that saves time and potential mistakes down the line.
Crafting Your Golden Griddle Cakes: Step-by-Step
Now for the fun part – bringing these simple ingredients together to create your perfect Golden Griddle Cakes! The process is straightforward, but paying attention to a few key techniques will ensure that guaranteed cooked-through result we’re aiming for.
-
Start by getting your dry ingredients ready. In a spacious mixing bowl, measure out your all-purpose flour, granulated sugar, baking powder, fragrant ground nutmeg, and a pinch of salt. Give them a good whisk together. This step ensures that the baking powder and other dry ingredients are evenly distributed throughout the flour, which is important for consistent leavening and flavor.
-
Next, we add the chilled unsalted butter. Using your fingertips or a pastry blender, work the cold butter into the dry ingredients. The goal here is to break the butter into smaller pieces and coat them with flour. Keep going until the mixture resembles coarse crumbs, almost like fine gravel. This technique, often used in scones and biscuits, is what creates tenderness and a slightly flaky texture in the finished griddle cakes.
-
Once the butter is cut in, stir in your raisins. Distribute them evenly throughout the crumb mixture so you get delightful little pockets of sweetness in every bite.
-
In a separate, smaller bowl, gently whisk together the large egg and the milk. This combines the wet ingredients thoroughly before adding them to the dry.
-
Now, pour the wet ingredients into the bowl with your dry mixture. The key at this stage is gentle handling. Use a fork or a spoon to mix until the ingredients are just combined. You’ll see the dough start to come together, and it will be quite soft and slightly shaggy. Lumps are okay! Overmixing develops the gluten in the flour, which can lead to tough, dense griddle cakes instead of tender ones. Stop mixing as soon as you don’t see any dry pockets of flour.
-
Lightly flour a clean work surface. Gently turn the soft dough out onto the floured surface. Don’t knead it! Just use your hands to gently bring the dough together into a cohesive mass. Then, either use a rolling pin or simply pat the dough out with your hands until it’s about 1/2 inch thick. Aim for an even thickness so your cakes cook uniformly.
-
Grab a round cookie cutter, ideally around 2 to 2.5 inches in diameter. Cut out as many circles as you can from the dough. Carefully lift the cut circles. Gently gather the dough scraps together. You can quickly re-roll or pat them out one time to cut out a few more cakes. Avoid re-working the scraps too much, as this can make those later cakes tougher.
-
Now for the absolute secret weapon to perfectly cooked griddle cakes: heat control! Heat a heavy griddle or a thick-bottomed frying pan over medium-low heat. This is crucial. High heat will quickly brown the outside of the cakes before the heat has a chance to penetrate all the way to the center, resulting in that raw middle. Medium-low heat allows the cakes to cook slower and more evenly all the way through as the exterior turns golden.
-
If your griddle or pan isn’t non-stick, lightly grease it with a little butter or oil. Place the cut cakes onto the heated griddle, making sure to leave some space between them. Don’t overcrowd the pan; cook in batches if necessary.
-
Let the cakes cook undisturbed for about 4-6 minutes on the first side. You’re looking for the bottom to be a lovely golden brown. The edges might start to look slightly set, and you might see a tiny bit of puffing. Once golden on the bottom, carefully flip each cake. Cook for another 4-6 minutes on the second side, until they are also golden brown and, more importantly, feel firm to the touch in the center when gently pressed. The slower cooking time ensures the inside is fully cooked by the time the outside is perfectly golden.
-
Once cooked through and golden on both sides, remove the griddle cakes from the pan. Place them on a wire rack set over a baking sheet. This allows air to circulate around them, preventing the bottoms from getting soggy as they cool slightly.
-
Serve them warm! Just before serving, give them a generous dusting of powdered sugar using a fine-mesh sieve. It adds a beautiful finish and a touch of sweetness.
And there you have it! Perfectly cooked Golden Griddle Cakes, ready to be enjoyed. The aroma filling your kitchen is just a bonus!
Pro Tips for Your Golden Griddle Cakes
Mastering these Golden Griddle Cakes is all about paying attention to a few key details. Here are some extra tips to ensure your success and help you make the best cakes possible:
-
Keep Ingredients Cold: This is especially important for the butter and milk. Cold ingredients help create a tender crumb structure. The cold butter creates steam pockets as it melts during cooking, contributing to the light texture.
-
Don’t Overmix: We touched on this in the steps, but it bears repeating! Mix the wet and dry ingredients until just combined. A few dry spots or lumps are better than a tough dough.
-
Handle Dough Gently: Once you turn the dough out, handle it as little as possible. Just bring it together and pat or roll to thickness. Overworking develops gluten and makes the cakes tough.
-
Use Medium-Low Heat – Be Patient!: This is the absolute non-negotiable secret. Resist the urge to crank up the heat to speed things along. Lower and slower is the path to a perfectly cooked interior without a burnt exterior. If they are browning too fast, your heat is still too high.
-
Test for Doneness: Besides visual cues (golden brown, slightly puffed) and touch (firm center), you can also gently insert a toothpick into the thickest part of a cake. If it comes out clean (no wet batter), they are done.
-
Use a Heavy Pan: A cast iron griddle or a heavy-bottomed frying pan distributes heat more evenly, which helps prevent hot spots and ensures consistent cooking.
Serving Suggestions
While simply dusted with powdered sugar is classic perfection, you can certainly elevate your Golden Griddle Cakes experience with a few additions!
A drizzle of warm maple syrup is, of course, a heavenly pairing. Fresh berries like strawberries, blueberries, or raspberries add brightness and a touch of tartness that cuts through the richness. A dollop of whipped cream or a scoop of vanilla ice cream turns these into an instant dessert!
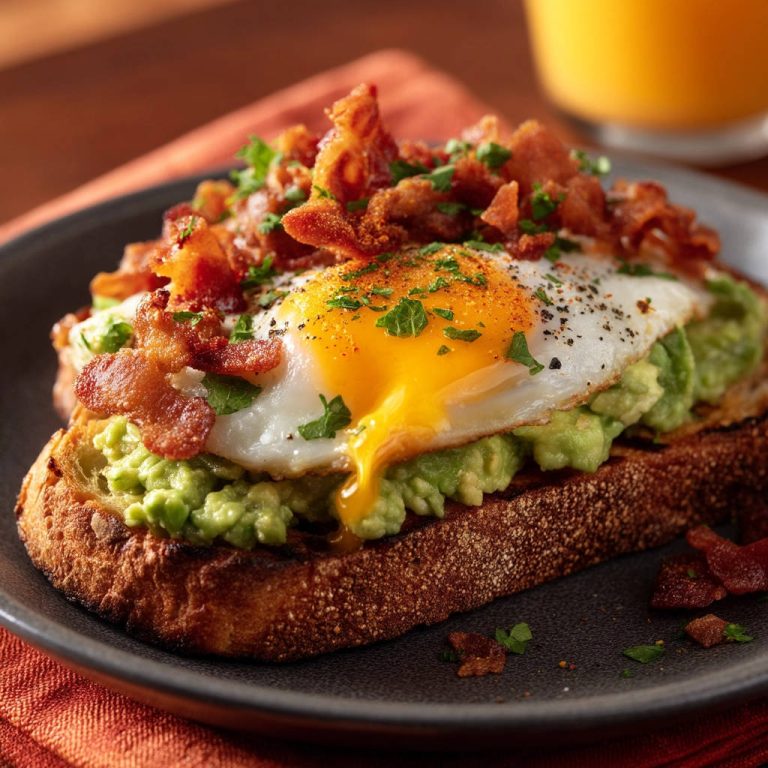
For a more savory contrast, consider serving them alongside some crispy bacon or a simple sausage patty. Or, for a fuller breakfast spread, they’d be lovely with a side of scrambled eggs or even something heartier like our popular Avocado Toast with Egg and Bacon.
These cakes are also sturdy enough to split and spread with butter or jam, much like a scone. Get creative and see what combinations you love best!
Your Golden Griddle Cakes Questions Answered (FAQ)
Making something new always brings up questions! Here are some common queries about making Golden Griddle Cakes:
Can I make these Golden Griddle Cakes ahead of time?
The dough is best cooked relatively soon after mixing for optimal leavening. However, you can mix the dry ingredients the night before. Keep the cut, cold butter separate in the fridge. In the morning, quickly cut in the butter, add raisins, mix in the wet ingredients, cut out the cakes, and cook. Cooked cakes can be stored, but they are truly best fresh off the griddle.
How do I store leftover Golden Griddle Cakes?
Allow any leftover griddle cakes to cool completely on a wire rack. Store them in an airtight container at room temperature for a day or two, or in the refrigerator for up to 4-5 days. For longer storage, you can freeze them. Once cool, place them in a single layer on a baking sheet and freeze until solid. Then, transfer to a freezer-safe bag or container for up to 2-3 months.
What’s the best way to reheat Golden Griddle Cakes?
Reheating gently is key to maintaining texture. You can reheat them in a toaster oven or oven at a low temperature (around 300°F or 150°C) until warmed through. A microwave works for speed, but can sometimes make them a little dense. If reheating from frozen, you can usually pop them directly into a toaster oven or oven from frozen, adding a few extra minutes to the reheating time.
Why are my Golden Griddle Cakes raw in the middle even though the outside is golden?
This is the problem this recipe solves! The most common culprit is cooking them over heat that is too high. The outside browns rapidly before the inside has a chance to cook through. Ensure you are using medium-low heat and giving them sufficient time (4-6 minutes per side) to cook slowly and evenly. Using a heavy-bottomed pan also helps distribute the heat more effectively.
Can I substitute the raisins?
Absolutely! While raisins are traditional and delicious in this recipe, feel free to swap them out. Dried cranberries, chopped dried apricots, or even chocolate chips (use a good quality kind that holds its shape) would make lovely additions. Use about the same quantity.
Can I add other spices?
Yes, nutmeg is wonderful, but you could also add a pinch of cinnamon, a tiny amount of ground ginger, or even a touch of cardamom for a different flavor profile. Start with 1/4 teaspoon and adjust to your preference.
What if I don’t have a cookie cutter?
No problem! You can use the rim of a glass or even a clean can to cut out circles. Or, for a more rustic look, you can simply pat the dough into a rectangle or square and cut it into squares or triangles using a knife or pizza cutter. The shape doesn’t affect the taste!
Enjoy Your Homemade Golden Griddle Cakes!
There’s something incredibly satisfying about mastering a classic recipe and finally getting it just right. These Golden Griddle Cakes are more than just a simple baked good; they’re a taste of comfort, a perfect partner to a warm beverage, and a testament to the power of getting the basics right – especially that all-important low and slow cook time!
Whether you’re making them for a special brunch, a quiet morning, or just because you deserve a treat, I truly hope you enjoy making and eating these as much as I do. No more raw centers, just pure, golden, delicious success.
Give this recipe a try and let me know what you think in the comments below! Did the medium-low heat trick solve your raw-center woes? What do you love to serve with your griddle cakes? Happy baking!
Golden Griddle Cakes

Ingredients
- 2 cups all-purpose flour
- 1/3 cup granulated sugar
- 2 teaspoons baking powder
- 1/2 teaspoon ground nutmeg
- 1/4 teaspoon salt
- 1/2 cup cold unsalted butter, cut into small cubes
- 1/2 cup raisins
- 1 large egg
- 1/4 cup milk
- Powdered sugar, for dusting
Directions
- In a large bowl, whisk together the flour, granulated sugar, baking powder, nutmeg, and salt.
- Cut in the cold butter using your fingertips or a pastry blender until the mixture resembles coarse crumbs.
- Stir in the raisins.
- In a separate small bowl, whisk together the egg and milk.
- Pour the wet ingredients into the dry ingredients. Mix with a fork or spoon until just combined. The dough will be soft. Do not overmix.
- Lightly flour a surface and turn the dough out. Gently bring it together. Roll or pat the dough to about 1/2 inch thickness.
- Cut out circles using a round cookie cutter (about 2-2.5 inches). Gently gather scraps, re-roll once, and cut more.
- Heat a heavy griddle or frying pan over medium-low heat. This is your secret weapon for perfectly cooked griddle cakes. High heat burns the outside before the center cooks. Medium-low allows the heat to penetrate evenly.
- Lightly grease the griddle if needed. Place the cakes on the griddle, leaving some space.
- Cook for 4-6 minutes per side, or until golden brown on both sides and firm in the center. They should look slightly puffed. Cooking them slower on medium-low heat ensures the inside is fully cooked when the outside is golden.
- Remove from the griddle and place on a wire rack.
- Dust generously with powdered sugar before serving warm.