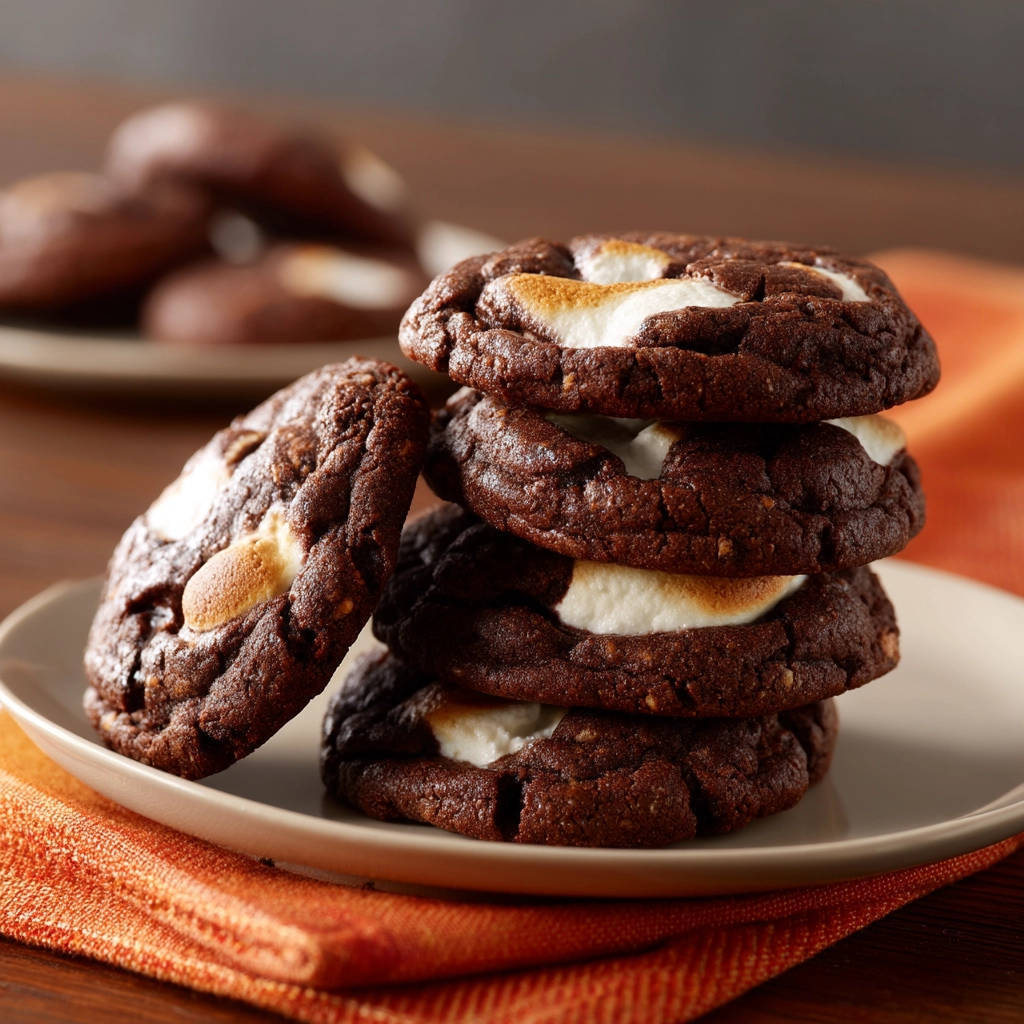
S’mores: the iconic campfire treat. But what if you could enjoy that same gooey, chocolatey, marshmallowy goodness in a convenient, delicious cookie? These Gooey S’mores Cookies deliver everything you love about s’mores, without the need for a campfire. The best part? We’ve got a foolproof method to prevent those pesky marshmallows from burning to a crisp. Get ready for s’mores perfection in every bite!
Why You’ll Love These S’mores Cookies
These aren’t just any cookies; they’re a taste of nostalgia and pure comfort. Here’s why you’ll be hooked:
- Perfect S’mores Flavor: All the classic elements – chocolate, graham cracker (implied through the flavor!), and gooey marshmallows – come together harmoniously.
- No-Burn Marshmallow Trick: Our secret ensures perfectly toasted, never burnt, marshmallows every single time.
- Easy to Make: With simple ingredients and straightforward instructions, these cookies are a breeze to whip up.
- Crowd-Pleasing: Perfect for parties, bake sales, or just a fun treat for the family.
- Portable S’mores: Enjoy the taste of camping without having to start a fire.
Gathering Your Ingredients for Gooey S’mores Cookies
Before we dive into baking, let’s gather our ingredients. The magic of these Gooey S’mores Cookies lies in the interplay of flavors and textures: rich chocolate, sweet marshmallows, and a cookie base that hints at that graham cracker flavor we all love in s’mores. Selecting quality ingredients will make a big difference in the final result. Here’s what you’ll need:
- 1 cup all-purpose flour: This forms the structure of our cookies. Ensure it’s fresh for the best rise and texture.
- 1/2 cup unsweetened cocoa powder: This provides the rich chocolate flavor. Opt for a high-quality cocoa powder for a deeper, more intense chocolate taste.
- 1/2 teaspoon baking soda: This leavening agent helps the cookies rise and gives them a soft, chewy texture.
- 1/4 teaspoon salt: Salt enhances the sweetness and balances the flavors in the cookies.
- 1/2 cup (1 stick) unsalted butter, softened: Softened butter is crucial for creaming properly with the sugars, creating a light and fluffy dough. Make sure it’s softened, not melted.
- 1/2 cup granulated sugar: This adds sweetness and contributes to the cookies’ crisp edges.
- 1/4 cup packed light brown sugar: The molasses in brown sugar adds moisture, chewiness, and a caramel-like flavor to the cookies. Packing it ensures you get the right amount.
- 1 large egg: The egg binds the ingredients together and adds richness and moisture.
- 1 teaspoon vanilla extract: A touch of vanilla extract enhances the other flavors and adds a warm, comforting note.
- 1 cup chocolate chips: These add bursts of chocolatey goodness throughout the cookies. You can use milk chocolate, dark chocolate, or a combination.
- 1 1/2 cups mini marshmallows: These are the stars of the show! Mini marshmallows melt beautifully and create that signature s’mores gooiness.
Crafting Your Gooey S’mores Cookies: Step-by-Step
Ready to bake? Don’t be intimidated! These cookies are surprisingly simple to make. The key to success is understanding the purpose of each step. Pay special attention to the marshmallow timing, as that’s where the “no-burn” magic happens!
- Preheat oven to 350°F (175°C). Getting the oven to the right temperature is vital for even baking. An oven thermometer can help ensure accuracy.
- In a medium bowl, whisk together the flour, cocoa powder, baking soda, and salt. Whisking ensures that the dry ingredients are evenly distributed. This prevents pockets of baking soda or cocoa powder in your cookies, which can affect their taste and texture.
- In a large bowl, cream together the softened butter, granulated sugar, and brown sugar until light and fluffy. This is a crucial step for creating a tender cookie. Creaming incorporates air into the butter and sugar mixture, which contributes to a light and airy texture. Use an electric mixer for best results, and cream for several minutes until the mixture is noticeably lighter in color and texture.
- Beat in the egg and vanilla extract until well combined. Add the egg and vanilla extract to the creamed butter and sugar mixture, and beat until everything is smoothly incorporated. Avoid overmixing at this stage.
- Gradually add the dry ingredients to the wet ingredients, mixing until just combined. Adding the dry ingredients gradually prevents overmixing, which can lead to tough cookies. Mix until just combined; a few streaks of flour are okay.
- Stir in the chocolate chips. Gently fold in the chocolate chips until they are evenly distributed throughout the dough.
- Roll the dough into 1-inch balls and place them on an ungreased baking sheet, leaving space between each cookie. Rolling the dough into uniform balls ensures that the cookies bake evenly. Placing them on an ungreased baking sheet allows for slightly crispier edges. Space them apart to prevent them from merging together as they bake.
- Bake for 8 minutes. This initial baking period sets the cookie dough and prepares it for the marshmallows.
- Remove from the oven and immediately press 5-6 mini marshmallows into the top of each cookie. This is where our “no-burn” trick comes into play! By adding the marshmallows partway through baking, we prevent them from scorching. Press them gently into the partially baked cookies so they adhere well.
- Return to the oven and bake for an additional 2-3 minutes, or until the marshmallows are puffed and lightly golden. Crucially, watch them closely during this final step. Start checking after 1 minute. Ovens vary, and you want them gooey, not burned. This final baking period is all about the marshmallows. Keep a close eye on them, as they can go from perfectly toasted to burnt very quickly. Start checking after 1 minute, and remove the cookies from the oven as soon as the marshmallows are puffed and lightly golden.
- Let cool on the baking sheet for a few minutes before transferring to a wire rack to cool completely. Allowing the cookies to cool slightly on the baking sheet before transferring them to a wire rack prevents them from breaking. They will firm up as they cool.
Tips for Perfect Gooey S’mores Cookies Every Time
Want to ensure your Gooey S’mores Cookies are a hit every time? Here are a few pro tips to keep in mind:
- Don’t Overmix: Overmixing the dough develops the gluten in the flour, resulting in tough cookies. Mix until just combined.
- Chill the Dough (Optional): For thicker cookies, chill the dough for 30 minutes before rolling. This also helps prevent spreading.
- Use a Cookie Scoop: A cookie scoop ensures that all your cookies are the same size, which promotes even baking.
- Watch the Marshmallows: Keep a close eye on the marshmallows during the final baking period. They can burn quickly!
- Storage: Store leftover cookies in an airtight container at room temperature for up to 3 days.
What to Serve With Gooey S’mores Cookies
These cookies are fantastic on their own, but if you’re looking to create a complete dessert experience, consider these serving suggestions:
- Ice Cream: Serve warm cookies with a scoop of vanilla or chocolate ice cream for an extra indulgent treat.
- Hot Chocolate: Pair them with a steaming mug of hot chocolate for the ultimate cozy combination.
- Milk: A glass of cold milk is a classic pairing for cookies.
- Fruit: Fresh berries or sliced bananas add a refreshing contrast to the richness of the cookies. You can even try our chocolate-covered apple dessert cups for a fun, fruity twist!
Your Gooey S’mores Cookies Questions Answered (FAQ)
Can I use different types of chocolate chips?
Absolutely! Milk chocolate chips will create a sweeter cookie, while dark chocolate chips will add a more intense chocolate flavor. You can even use a combination of both.
Can I make these cookies gluten-free?
Yes! Substitute the all-purpose flour with a gluten-free all-purpose flour blend. Be sure to choose a blend that contains xanthan gum for the best texture. You can also consider adding an extra egg yolk for added moisture and binding. Remember that gluten-free flours can sometimes behave differently, so keep an eye on the cookies as they bake and adjust the baking time if needed. For other gluten-free treat ideas, you may enjoy our golden cottage cheese fritters, which are naturally gluten-free!
Why are my marshmallows burning?
The most common reason for burnt marshmallows is that they are baked for too long or at too high a temperature. Our recipe addresses this by adding the marshmallows towards the end of the baking process. Make sure to watch the cookies closely during the final baking period and remove them from the oven as soon as the marshmallows are puffed and lightly golden.
Can I make the dough ahead of time?
Yes, you can make the dough ahead of time and store it in the refrigerator for up to 2 days. Wrap the dough tightly in plastic wrap to prevent it from drying out. When ready to bake, let the dough sit at room temperature for about 30 minutes to soften slightly before rolling into balls.
Can I freeze the cookies?
Yes, you can freeze baked cookies for up to 2 months. Let the cookies cool completely before freezing. Wrap them individually in plastic wrap or place them in an airtight container. To thaw, let the cookies sit at room temperature for about 30 minutes.
Enjoy Your Homemade Gooey S’mores Cookies!
There you have it – a simple, delicious, and foolproof recipe for Gooey S’mores Cookies that are sure to impress. With our secret “no-burn” marshmallow trick, you can enjoy perfectly toasted marshmallows in every bite. So gather your ingredients, preheat your oven, and get ready to bake up a batch of these irresistible treats. Don’t forget to leave a comment below and let us know how your cookies turned out! We love hearing from you.
Gooey S’mores Cookies (Stops Marshmallows Burning!)

Ingredients
- 1 cup all-purpose flour
- 1/2 cup unsweetened cocoa powder
- 1/2 teaspoon baking soda
- 1/4 teaspoon salt
- 1/2 cup (1 stick) unsalted butter, softened
- 1/2 cup granulated sugar
- 1/4 cup packed light brown sugar
- 1 large egg
- 1 teaspoon vanilla extract
- 1 cup chocolate chips
- 1 1/2 cups mini marshmallows
Directions
- Preheat oven to 350°F (175°C).
- In a medium bowl, whisk together the flour, cocoa powder, baking soda, and salt.
- In a large bowl, cream together the softened butter, granulated sugar, and brown sugar until light and fluffy.
- Beat in the egg and vanilla extract until well combined.
- Gradually add the dry ingredients to the wet ingredients, mixing until just combined.
- Stir in the chocolate chips.
- Roll the dough into 1-inch balls and place them on an ungreased baking sheet, leaving space between each cookie.
- Bake for 8 minutes.
- Remove from the oven and immediately press 5-6 mini marshmallows into the top of each cookie.
- Return to the oven and bake for an additional 2-3 minutes, or until the marshmallows are puffed and lightly golden. **Crucially, watch them closely during this final step.** Start checking after 1 minute. Ovens vary, and you want them gooey, not burned.
- Let cool on the baking sheet for a few minutes before transferring to a wire rack to cool completely.