There’s a special kind of joy that comes with a slice of perfectly moist coconut cake. That delicate crumb, the rich, tropical flavor, and that dreamy frosting… pure bliss! But let’s be honest, we’ve all experienced the heartbreak of a dry, crumbly coconut cake. It’s the kind of culinary disappointment that makes you want to give up on baking altogether.
Well, I’m here to tell you that those days are over! I’ve tinkered and tested, and finally landed on a simple yet brilliant technique that guarantees an incredibly moist classic coconut cake every single time. It’s not complicated, it doesn’t require fancy ingredients, and it delivers a cake so tender and delicious, you’ll be making it for every special occasion (and maybe just because it’s Tuesday!). Get ready to bake the best homemade coconut cake you’ve ever had!
Why You’ll Fall in Love with This Coconut Cake Recipe
So, what makes this particular classic coconut cake stand out? It’s more than just a recipe; it’s a promise of cake perfection. Here are a few reasons why this will become your go-to:
- Unbeatable Moisture: The secret soaking step (which I’ll reveal in the instructions!) is a game-changer, infusing the cake layers with extra liquid and preventing dryness.
- Incredible Flavor: A combination of coconut milk and optional coconut extract delivers a pure, authentic coconut taste throughout the cake and frosting.
- Perfect Texture: Using egg whites helps create a tender, fluffy crumb that pairs beautifully with the rich frosting.
- Easy to Follow: Despite its impressive results, this recipe is designed for home bakers of all skill levels.
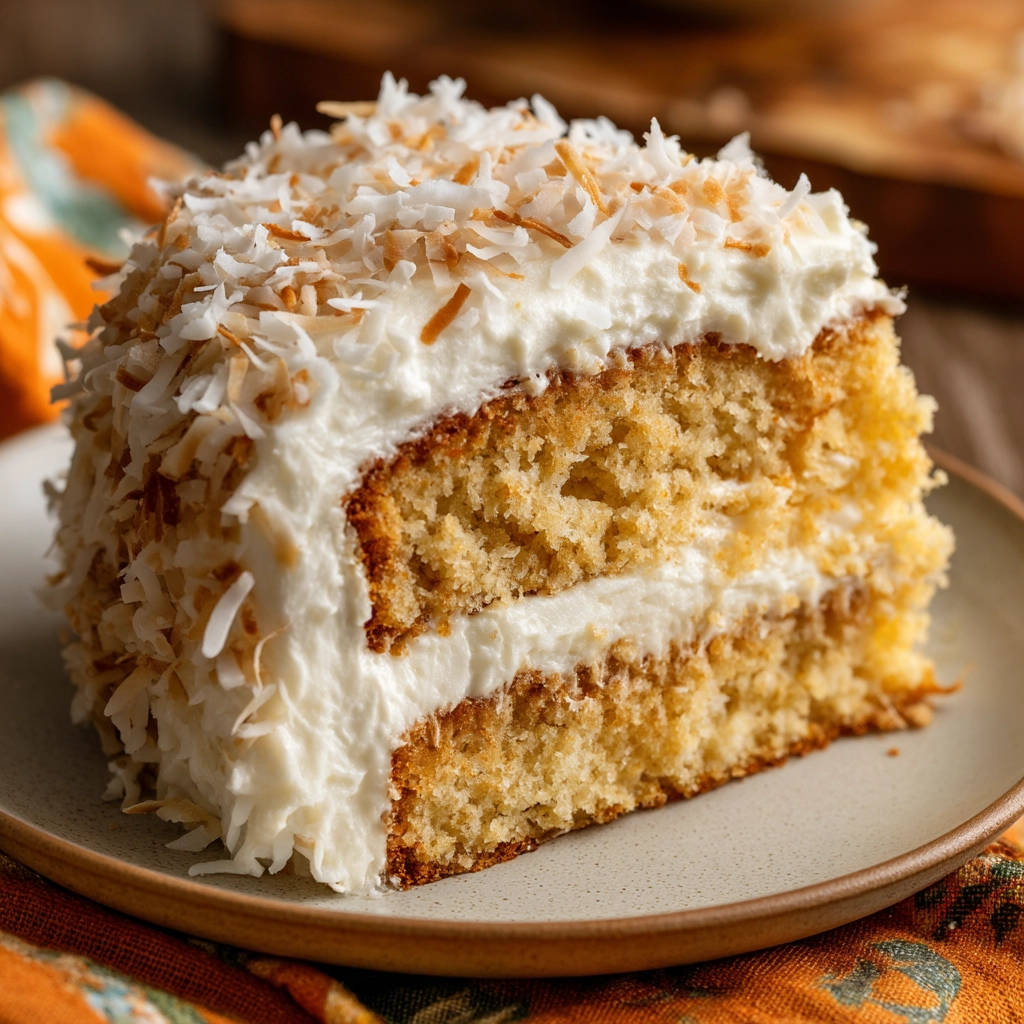
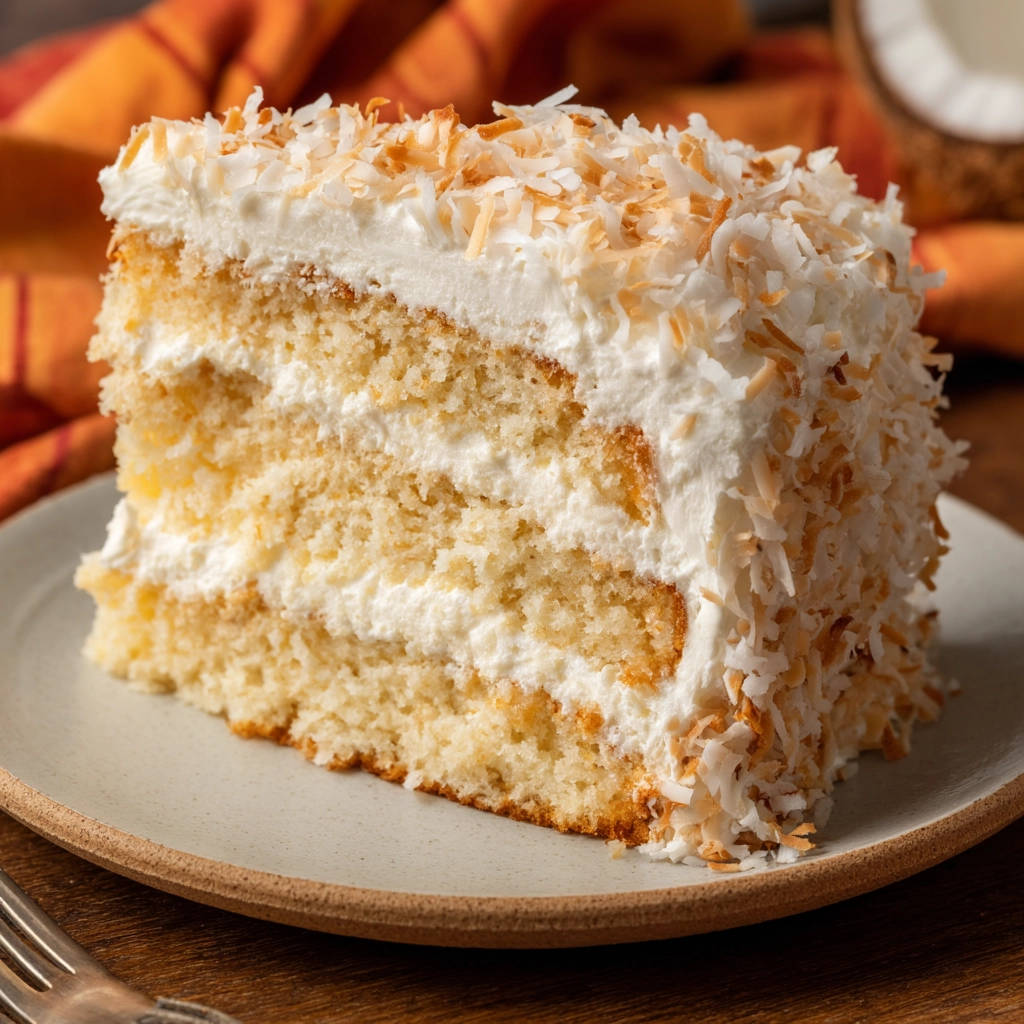
- Showstopper Appearance: Toasted coconut pressed into the frosting adds a gorgeous finish and another layer of irresistible flavor and texture.
Essential Ingredients for Your Classic Coconut Cake
Building a magnificent coconut cake starts with gathering the right components. While the list might look standard at first glance, the combination and the method are what make all the difference in achieving that guaranteed moist classic coconut cake. We’ll use pantry staples alongside key coconut elements to build layers of flavor and tender texture.
For the cake layers, you’ll need:
- All-Purpose Flour: The structural base of our cake. Using standard AP flour keeps the recipe accessible and reliable.
- Granulated Sugar: Provides sweetness and also contributes significantly to moisture by attracting and holding onto liquid.
- Baking Powder & Salt: Our leavening agent (baking powder) gives the cake its lift and airy texture, while salt balances the sweetness and enhances all the flavors.
- Unsalted Butter, Softened: Creaming softened butter with sugar incorporates air, which is crucial for a tender cake crumb. Ensure it’s truly softened, not melted.
- Large Egg Whites: Using only egg whites helps create a lighter, whiter cake crumb, allowing the coconut flavor to shine through without the richness of yolks.
- Full-Fat Unsweetened Coconut Milk (from a can): This is where much of our coconut flavor and initial moisture comes from. Using full-fat milk provides richness.
- Vegetable Oil: A liquid fat like vegetable oil contributes moisture that stays liquid at room temperature, helping keep the cake soft and tender over time, complementing the butter.
- Vanilla Extract & Optional Coconut Extract: Vanilla is a classic cake flavor enhancer. Coconut extract boosts the coconut flavor profile, making it more pronounced. Use it if you want a truly intense coconut experience.
And for the magic soaking liquid and the luscious frosting, you’ll need:
- Unsweetened Coconut Milk (additional for soaking): This is the secret ingredient for maximum moisture! It’s poured over the warm cake layers, soaking deep into the crumb.
- Unsalted Butter, Softened (for frosting): The base of our rich, creamy buttercream frosting. Again, ensure it’s properly softened for a smooth consistency.
- Powdered Sugar: The sweetener for the frosting. Its fine texture dissolves easily, creating a smooth, fluffy frosting.
- Milk or Cream: Used to achieve the perfect consistency for the frosting. Cream will make it richer.
- Vanilla Extract (for frosting): Adds a touch of classic flavor to the sweet frosting.
- Shredded Sweetened Coconut, Toasted: This adds fantastic flavor, texture, and visual appeal. Toasting it in a dry pan or oven until golden brown intensifies its nutty, tropical notes.
Crafting Your Classic Coconut Cake: Step-by-Step Guide
Ready to bake a cake that defies dryness? Follow these steps carefully, paying attention to the little details that contribute to the moist, delicious outcome. Remember, the magic trick happens after baking!
- Prepare for Baking: Start by preheating your oven to 350 degrees Fahrenheit (175 degrees Celsius). Cake baking relies on consistent oven temperature, so preheating is essential. Take your two 8-inch round cake pans and grease them thoroughly. You can use baking spray or butter and flour. Greasing and flouring ensures your beautiful cake layers release cleanly from the pan after baking.
- Combine the Dry Foundation: In a large mixing bowl, whisk together your dry ingredients: the measured all-purpose flour, granulated sugar, baking powder, and salt. Whisking helps to aerate the flour and evenly distribute the leavening and salt, preventing pockets of unincorporated ingredients.
- Incorporate the Butter (The Reverse Creaming Method Start): Add the softened unsalted butter directly into the dry ingredients. Using an electric mixer, beat this mixture on a low speed. The goal here isn’t to cream the butter and sugar first, but to coat the flour particles with fat. Continue mixing until the mixture resembles coarse crumbs, almost like wet sand. This technique helps inhibit gluten development, leading to a more tender cake.
- Whisk Together the Wet Ingredients: In a separate medium bowl, whisk together the liquid components for the cake batter: the 1 cup of full-fat unsweetened coconut milk, vegetable oil, egg whites, vanilla extract, and the optional coconut extract if you’re using it. Make sure everything is well combined.
- Combine Wet and Dry Gently: With your electric mixer on medium speed, gradually add the wet ingredients from step 4 to the dry crumb mixture from step 3. Mix only until the ingredients are just combined and no streaks of dry flour are visible. Avoid overmixing! Overmixing develops gluten, which can lead to a tough, dry cake. Stop the mixer as soon as the batter is smooth.
- Divide and Bake: Carefully divide the prepared cake batter evenly between your two greased and floured 8-inch pans. You can eyeball it or use a kitchen scale for precision. Place the pans in the preheated oven. Bake for 28 to 32 minutes. The cake is done when a wooden skewer or toothpick inserted into the very center comes out clean, with no wet batter attached.
- Initial Cooling: Once baked, remove the cakes from the oven. Let them cool in their pans on a wire rack for about 10 minutes. This allows the cake structure to set slightly before you attempt to move them.
- The Moisture Secret – Soak While Warm: This is the absolute key to a guaranteed moist coconut cake! While the cakes are still warm (but out of their pans!), gently pierce the tops all over. You can use a wooden skewer, a toothpick, or even a fork. Make lots of small holes. Then, slowly and evenly pour the remaining 1/2 cup of unsweetened coconut milk over the top of each warm cake layer. Let the milk soak in completely. The warmth of the cake helps it absorb the liquid beautifully. Allow the cakes to cool fully on the wire rack before you even think about frosting them.
- Prepare the Fluffy Frosting: While the cakes cool, make your frosting. In a large bowl, beat the softened butter with an electric mixer until it’s light and creamy. Gradually add the powdered sugar, alternating with the milk or cream (start and end with powdered sugar). Beat on a low speed initially to avoid a cloud of sugar dust, then increase speed and beat until the frosting is smooth, fluffy, and spreadable. Stir in the vanilla extract until just combined. If the frosting is too thick, add a tiny bit more milk or cream; if too thin, add a little more powdered sugar.
- Assemble the Cake: Place one completely cooled cake layer onto your serving plate or cake stand. Spread a generous, thick layer of your homemade coconut frosting evenly over the top surface of this first layer.
- Frost the Whole Cake: Carefully place the second cake layer on top of the frosted first layer. Use the remaining frosting to cover the top and sides of the entire cake smoothly or with decorative swirls, as you prefer.
- Add Toasted Coconut: Gently press the toasted shredded sweetened coconut onto the sides and top of the frosted cake. The toasted coconut adds a wonderful textural contrast and a deeper coconut flavor that complements the creamy frosting and moist cake.
- Chill Before Slicing: For the cleanest slices and best presentation, refrigerate the finished cake for at least 30 minutes before cutting and serving. This allows the frosting to firm up slightly.
Pro Tips for the Perfect Coconut Cake
Now that you have the core steps down, here are a few extra pointers to ensure your classic coconut cake is a soaring success:
- Room Temperature Ingredients Matter: Ensure your butter and egg whites are at true room temperature (they should indent easily when pressed). This helps them emulsify properly and create a smoother batter and frosting.
- Measure Flour Correctly: Too much flour is a common culprit for dry cakes. Spoon the flour lightly into your measuring cup and level it off with a straight edge. Don’t scoop directly from the bag, as this compacts the flour.
- Don’t Skip the Soak: Seriously, this is the secret! Soaking the warm cakes with coconut milk is the key to the guaranteed moist classic coconut cake. The warm cake absorbs the liquid beautifully.
- Toasting Coconut: Toasted coconut elevates the flavor significantly. Spread the shredded coconut in a single layer on a baking sheet and bake at 300-325°F (150-160°C) for 5-10 minutes, stirring occasionally, until golden brown and fragrant. Watch it closely as it can burn quickly!
- Storing Leftovers: Store any leftover coconut cake in an airtight container at room temperature for 2-3 days, or in the refrigerator for up to 5 days. The soaking step helps it stay moist longer.
- Make it Ahead: You can bake the cake layers a day in advance, perform the soaking step, let them cool completely, wrap them tightly in plastic wrap, and store them at room temperature. Frost the cake the next day.
Recipe Variations
Want to change things up? Here are a few ideas (remembering no alcohol or pork!):
- Add Citrus Zest: A little lemon or lime zest in the cake batter can add a bright contrast to the rich coconut flavor.
- Tropical Twist: Add a layer of pineapple curd or passion fruit filling between the cake layers for an extra burst of tropical flavor.
- Coconut Cream Cheese Frosting: Swap the buttercream for a cream cheese frosting for a slightly tangy complement to the sweet cake. Just be sure to use good quality cream cheese for structure.
- Chocolate Pairing: If you’re a fan of chocolate and coconut together, you might enjoy our recipe for Toasted Coconut Chocolate Cake, which offers a delicious combination. Or explore other creamy desserts like our Coconut Dream Cheesecake for a different kind of indulgence. For something less traditional but still tropical-themed, consider our Crispy Coconut Pineapple Bites.
What to Serve With Your Coconut Cake
This classic coconut cake is a dessert star on its own, but a few simple accompaniments can make it even more special. Consider serving it with a scoop of vanilla bean ice cream, a dollop of fresh whipped cream, or a scattering of fresh berries like raspberries or blueberries. A simple cup of coffee or tea is also a perfect pairing.
Your Coconut Cake Questions Answered (FAQ)
Curious about common issues or looking for specific tips? Here are answers to some frequently asked questions about making a moist classic coconut cake.
Why is my coconut cake always dry?
The most common reasons for dry cake are overmixing the batter (which develops tough gluten), overbaking, or not adding enough moisture. This recipe specifically addresses the moisture issue with the soaking step after baking, which helps counteract potential dryness from other factors.
Can I use light coconut milk?
While you could technically use light coconut milk, using full-fat canned coconut milk for both the batter and the soaking step is highly recommended. The higher fat content contributes significantly to the cake’s richness and moisture level.
Do I have to use egg whites only?
This recipe calls for egg whites to achieve a specific light, fluffy, and bright white crumb that pairs well with coconut flavor. Using whole eggs would still result in a good cake, but the texture and color would be different – richer and slightly more yellow.
Is the coconut extract necessary?
No, it’s listed as optional. Using just the canned coconut milk provides lovely coconut flavor. However, if you want a really pronounced, intense coconut taste, the extract gives it a significant boost.
Why do I pierce the cake while it’s warm?
Piercing the warm cake creates channels for the liquid to penetrate deep into the crumb. Warm cake absorbs liquid more effectively than cold cake, ensuring the moisture is distributed throughout the layers.
How long does homemade coconut cake last?
Properly stored in an airtight container, this moist coconut cake will stay fresh at room temperature for about 2-3 days, or in the refrigerator for up to 5 days. The moisture secret helps it maintain its delicious texture longer.
Can I freeze coconut cake?
Yes! Cake layers (before frosting) or frosted cake can be frozen. Wrap cooled, unfrosted layers tightly in plastic wrap, then foil. For frosted cake, freeze uncovered for about an hour until the frosting is firm, then wrap tightly in plastic wrap and foil. Thaw in the refrigerator overnight.
Enjoy Your Homemade Coconut Creation!
Baking this guaranteed moist classic coconut cake is a truly rewarding experience. From mixing the batter to watching that coconut milk soak in, you’ll feel the magic happening. The result is a beautiful, incredibly moist, and flavorful cake that’s perfect for celebrations, holidays, or simply treating yourself to a slice of paradise.
Give this recipe a try and see (and taste!) the difference the soaking step makes. I promise, you won’t go back to dry coconut cake ever again. Let me know in the comments below how yours turned out! Happy baking!
Classic Coconut Cake

Ingredients
- 2 1/4 cups all purpose flour
- 1 3/4 cups granulated sugar
- 1 tablespoon baking powder
- 1/2 teaspoon salt
- 1/2 cup unsalted butter softened
- 4 large egg whites
- 1 cup unsweetened coconut milk from a can, full fat
- 1/4 cup vegetable oil
- 1 teaspoon vanilla extract
- 1 teaspoon coconut extract optional
- 1/2 cup unsweetened coconut milk for soaking
- 1 cup unsalted butter softened
- 4 cups powdered sugar
- 4 tablespoons milk or cream
- 1 teaspoon vanilla extract
- 2 cups shredded sweetened coconut toasted
Directions
- Preheat oven to 350 degrees F. Grease and flour two 8 inch round cake pans.
- In a large bowl whisk together flour sugar baking powder and salt.
- Add the softened butter and mix with an electric mixer until the mixture resembles coarse crumbs.
- In a separate medium bowl whisk together the 1 cup coconut milk oil egg whites vanilla extract and coconut extract if using.
- Gradually add the wet ingredients to the dry ingredients mixing on medium speed until just combined. Do not overmix.
- Divide the batter evenly between the prepared pans. Bake for 28-32 minutes or until a wooden skewer inserted into the center comes out clean.
- Let the cakes cool in the pans for 10 minutes then invert them onto a wire rack to cool completely.
- This is the key to moisture While the cakes are still warm but out of the pans gently pierce the tops all over with a wooden skewer or fork. Slowly and evenly pour the 1/2 cup of unsweetened coconut milk over the top of each warm cake layer allowing it to soak in completely. Let the cakes cool fully before frosting.
- To make the frosting beat the softened butter until creamy. Gradually add the powdered sugar alternating with the milk or cream mixing until smooth and fluffy. Add vanilla extract and beat until combined.
- Place one cake layer on a serving plate. Spread a thick layer of frosting over the top. Place the second cake layer on top.
- Frost the top and sides of the cake with the remaining frosting.
- Gently press the toasted shredded coconut onto the sides and top of the cake. Refrigerate for at least 30 minutes before slicing for easier cutting.