
Ever found yourself wanting that perfect, airy bite of homemade fried dough, only to end up with a heavy, greasy mess? It’s a common frustration, but I’ve finally cracked the code to making irresistible Homemade Marshmallow Fritters that are perfectly golden, wonderfully light, and truly never greasy. This recipe is a game-changer, delivering that delightful texture you’ve always craved, promising a truly enjoyable treat.
Cracked the Code: Why Our Homemade Marshmallow Fritters Won’t Let You Down
This recipe isn’t just another fried dough; it’s a meticulously developed guide to achieving perfection. We tackle the common pitfalls head-on, ensuring your efforts result in pure dessert bliss.
The “Never Greasy” Secret Unveiled
The frustration of biting into an oil-logged fritter is real. Our method directly addresses this by focusing on precise oil temperature control and proper draining techniques, guaranteeing a light, non-greasy finish every single time.
Achieving That Perfect Light, Airy Bite
The secret to their incredible fluffiness lies in a perfectly proofed yeast dough and careful handling. We guide you through each step to develop the ideal texture, avoiding the density that often plagues homemade fritters.
Quick Prep, Quicker Delight: Ready in Under an Hour
Despite their impressive taste and texture, these delightful Homemade Marshmallow Fritters are surprisingly quick to make. With just 25 minutes of prep and 15 minutes of cooking, you can enjoy these warm treats in just 40 minutes.
Gathering Your Frying Essentials: Ingredients for Dreamy Fritters
Quality ingredients are the starting point for truly exceptional Homemade Marshmallow Fritters. Each component plays a vital role in achieving that perfect taste and texture.
The Dough’s Foundation: Flour, Yeast, and More
All-purpose flour provides the essential structure for our fritters, while active dry yeast is crucial for developing that wonderfully light and airy rise. For a truly fluffy result, ensuring your yeast is active is paramount.
Warm milk, granulated sugar, a large room-temperature egg, melted unsalted butter, vanilla extract, and salt work in harmony to create a rich, flavorful dough with a tender crumb. Each contributes to the overall texture and depth of flavor.
The Frying Medium: Oil Choice and Quantity
Vegetable oil is our preferred choice for frying due to its neutral flavor and high smoke point, which ensures the fritters cook beautifully without imparting unwanted tastes. It’s important to use enough oil, about 3 inches deep, to allow the fritters to float and cook evenly.
Sweet Finishes: Toppings and Garnishes for Homemade Marshmallow Fritters
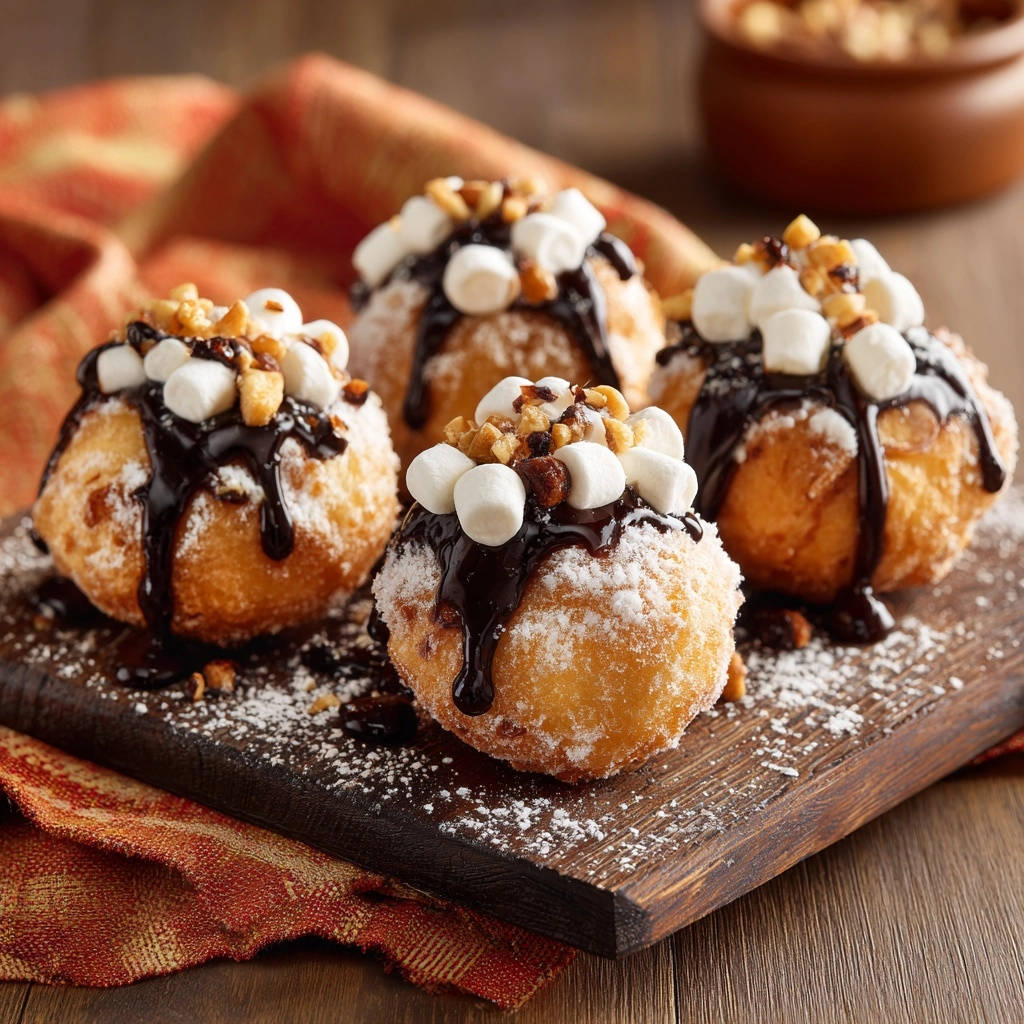
Powdered sugar provides a delicate, classic sweetness that adheres perfectly to the warm fritters. A generous drizzle of chocolate syrup adds a luscious, decadent touch, while mini marshmallows melt slightly, creating pockets of gooey delight.
Chopped nuts, such as peanuts or walnuts, provide a pleasant textural contrast and nutty flavor, completing the irresistible appeal of these delightful treats.
Gearing Up: Essential Tools for Fritter Frying Success
Having the right equipment makes the frying process smoother and ensures consistently perfect results. These tools are indispensable for achieving light, non-greasy Homemade Marshmallow Fritters.
Must-Have Kitchen Gadgets
Deep-Fry Thermometer: This is your most crucial tool for preventing greasy fritters. Maintaining a precise oil temperature of 350°F (175°C) is the key to perfectly cooked, non-oily results.
Heavy-Bottomed Pot or Dutch Oven: A sturdy, heavy pot ensures stable and even heat distribution, preventing hot spots and maintaining a consistent frying temperature.
Slotted Spoon or Spider: Essential for safely turning the fritters in hot oil and carefully removing them without damaging their delicate structure.
Wire Rack with Paper Towels: Immediately draining fried fritters on a wire rack over paper towels is critical. This allows excess oil to drip away, ensuring a crispy, non-greasy exterior.
Your Step-by-Step Guide to Irresistible Homemade Marshmallow Fritters
- Activate the Yeast:
In a large bowl, combine 1 cup warm milk (105-115°F), 2¼ teaspoons active dry yeast, and ¼ cup granulated sugar. The warmth of the milk is essential to awaken the yeast, and the sugar provides food. Let this mixture sit for 5-10 minutes; you’ll see it become wonderfully foamy, confirming your yeast is active and ready to make your dough rise beautifully.
- Wet Ingredients Whisk:
Once your yeast is bubbling, whisk in 1 large room-temperature egg, 2 tablespoons melted and cooled unsalted butter, 1 teaspoon vanilla extract, and ½ teaspoon salt. Ensuring the egg and butter are not too cold helps them incorporate smoothly into the mixture, contributing to a cohesive and flavorful dough.
- Form the Dough:
Gradually add 3 cups of all-purpose flour, one cup at a time, mixing until a soft, sticky dough forms. Avoid the temptation to add all the flour at once; incorporating it slowly allows the dough to come together properly. The dough should still be slightly sticky to the touch, which indicates it will be light and tender once fried.
- Knead to Elasticity:
Turn the dough out onto a lightly floured surface and knead for 5-7 minutes. This develops the gluten, crucial for the dough’s elasticity and the fritters’ chewy, yet airy texture. Your goal is a smooth, elastic dough that springs back when gently poked. If it feels too sticky, add just a tiny pinch more flour, but be cautious not to overdo it, as too much flour can lead to dry, dense fritters.
- First Rise:
Lightly oil a clean bowl, place the dough inside, and turn it once to coat. Cover the bowl tightly with plastic wrap or a clean kitchen towel. Let it rise in a warm place for 60-90 minutes, or until it has visibly doubled in size. A warm, draft-free spot encourages optimal yeast activity, resulting in a beautiful, airy rise.
- Punch Down & Divide:
Once doubled, gently punch down the dough to release the accumulated gases. This redistributes the yeast and helps create a finer crumb. Turn the dough onto a lightly floured surface and divide it into 12 equal pieces. Roll each piece into a smooth, uniform ball; consistent sizes ensure even cooking in the hot oil.
- Heat the Frying Oil:
In a large, heavy-bottomed pot or Dutch oven, pour 4 cups of vegetable oil to a depth of about 3 inches. Attach a deep-fry thermometer to the side. Heat the oil over medium heat until it reaches a precise 350°F (175°C). This exact temperature is the absolute secret to non-greasy fritters: if the oil is too cool, the dough will absorb too much oil; if it’s too hot, the exterior will burn before the inside cooks through.
- Fry in Batches:
Carefully place 3-4 dough balls into the hot oil, ensuring not to overcrowd the pot. Overcrowding significantly drops the oil temperature, leading to uneven cooking and potentially greasy fritters. Maintain the oil temperature as close to 350°F as possible throughout the frying process, adjusting the heat as needed.
- Golden Brown Perfection:
Fry for 2-3 minutes per side, or until the fritters are a beautiful golden brown and cooked through. Use a slotted spoon or spider to carefully turn them, ensuring even browning. You’ll notice them puffing up and developing a lovely, crisp crust.
- Drain Properly:
Remove the fried fritters and immediately transfer them to a wire rack set over paper towels. This setup is crucial! Proper draining immediately after frying is paramount to prevent greasiness, allowing any excess oil to drip away while the fritters cool slightly.
- Repeat & Regulate:
Continue frying the remaining dough balls in batches, always remembering to adjust the heat as needed to keep the oil consistently at 350°F. Patience and temperature monitoring are your best friends here.
- Dust with Powdered Sugar:
While still warm (but not piping hot), generously dust the fritters with ½ cup powdered sugar. The warmth helps the sugar adhere beautifully, creating a sweet, snowy coating. This timing is key for the best aesthetic and taste.
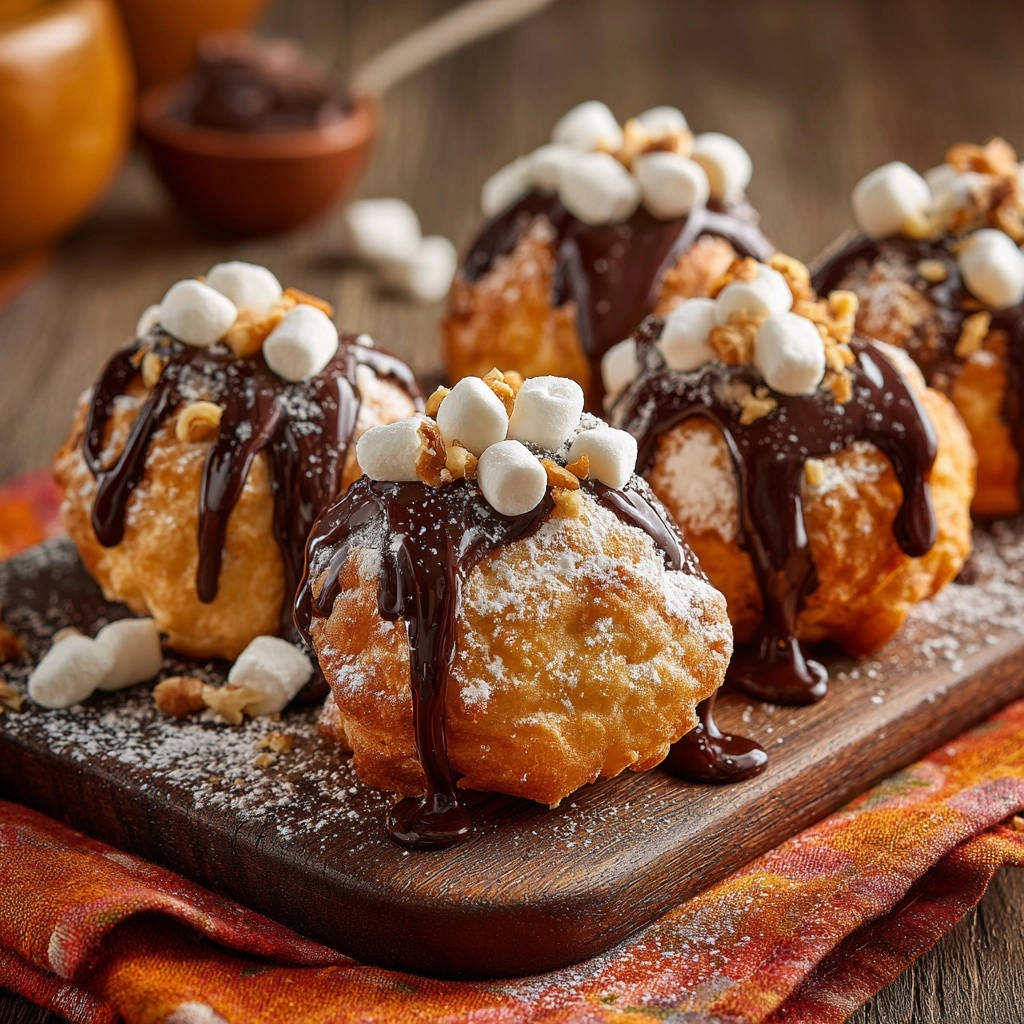
- Garnish and Serve:
Arrange the fritters on a serving platter. Drizzle generously with ¼ cup chocolate syrup, sprinkle with ½ cup mini marshmallows, and top with ¼ cup chopped nuts. Serve immediately to enjoy their optimal warmth, tenderness, and gooey marshmallow goodness.
The Golden Rule of Frying: Achieve “Never Greasy” Homemade Marshmallow Fritters
Mastering the art of frying is simpler than you think when you understand a few key principles. These tips are the foundation for truly spectacular, non-greasy Homemade Marshmallow Fritters.
Temperature Precision: Your Frying Partner
Maintaining the oil temperature at precisely 350°F (175°C) is non-negotiable for perfectly cooked fritters. If the oil is too cool, the dough absorbs excess oil, resulting in a soggy, greasy texture. Conversely, oil that is too hot will quickly burn the exterior before the inside has a chance to cook through, leaving you with raw centers.
Don’t Crowd the Pot: Space for Even Cooking
It’s tempting to fry as many fritters as possible at once, but overcrowding is detrimental. When too many cold dough balls enter the hot oil, the temperature drops drastically. This prevents even, crispy frying and can lead to a greasy finish. Fry in small batches to ensure consistent oil temperature and beautifully cooked fritters.
Immediate Drain: Wicking Away Excess Oil
The moment fritters come out of the oil, they need to drain. Transferring them directly to a wire rack set over paper towels allows air circulation and encourages immediate oil runoff. This crucial step prevents the fritters from sitting in oil and reabsorbing it, ensuring they remain light and crispy.
Beyond the Recipe: Expert Tips for Fritter Perfection
Elevate your Homemade Marshmallow Fritters with these expert tips, ensuring every batch is a triumph.
Optimizing Your Dough’s Rise
The Warm Place Advantage: Yeast loves warmth! A prime spot for dough to rise is a slightly warm oven (turned off, with just the pilot light on if gas, or briefly warmed and then off for electric), or a sunny windowsill. This consistent warmth ensures maximum yeast activity and a beautiful, airy dough structure.
Visual Cues for Doubling: Don’t rely solely on time. A perfectly risen dough will have visibly doubled in volume and a gentle poke with a floured finger will leave a slight indentation that slowly springs back. This indicates it’s full of air and ready for the next step.
Handling Sticky Dough with Ease
Flouring Your Surface (and Hands): Lightly flour your work surface and dust your hands, rather than adding excessive flour to the dough itself. The goal is to prevent sticking without altering the dough’s intended moist consistency. A bench scraper can also be invaluable for handling sticky dough.
The Gentle Touch: Once your dough has risen, handle it as little and as gently as possible. Pushing out too much air or overworking it can lead to dense fritters, undoing all the yeast’s hard work.
Flavor Boosters and Topping Twists
Citrus Zest: For a bright, aromatic twist, add 1-2 teaspoons of finely grated orange or lemon zest to the dough along with the vanilla extract. It adds a subtle, refreshing note that beautifully complements the sweetness.
Spice It Up: Enhance the warmth by adding ½ teaspoon of ground cinnamon or a pinch of nutmeg to the flour mixture. You can also mix cinnamon into the powdered sugar for a spiced dusting.
Alternative Garnishes: Get creative with toppings! Consider a drizzle of caramel sauce, melted white chocolate, colorful sprinkles, toasted coconut flakes, or different chopped nuts like pecans or almonds. For more delightful fried dough options, check out our recipe for easy fluffy glazed fried dough bites.
Common Fritter Fixes: Troubleshooting Your Way to Success
Even seasoned bakers encounter hiccups. Here are solutions to common issues you might face when making Homemade Marshmallow Fritters.
My Homemade Marshmallow Fritters are Dense or Heavy
Density often stems from inactive yeast, which fails to create enough gas to lighten the dough, or adding too much flour, making the dough stiff. Insufficient kneading can also leave the gluten underdeveloped, resulting in a less elastic, heavy texture.
Ensure your yeast is fresh and your milk is at the correct temperature for activation. If your dough feels too stiff after kneading, try letting it rise for an extended period in a very warm environment, or for future batches, slightly reduce the initial flour quantity to keep it soft and pliable.
Why Are My Fritters Greasy?
The primary culprits for greasy fritters are oil temperature being too low, overcrowding the pot, or neglecting immediate draining. When the oil isn’t hot enough, the dough acts like a sponge, soaking up the oil instead of forming a crisp crust.
Always use a deep-fry thermometer and maintain 350°F (175°C). Fry in small batches to prevent temperature drops. Immediately after frying, transfer fritters to a wire rack over paper towels to allow excess oil to drain efficiently, preventing them from becoming oily.
My Dough Isn’t Rising
If your dough isn’t rising, first check the expiration date of your yeast; old yeast loses its potency. Water that’s too hot can kill the yeast, while water that’s too cold won’t activate it. A cold environment can also significantly slow or halt the rising process.
Ensure milk temperature is between 105-115°F. If your kitchen is cool, find a warmer spot (like a proofing drawer or a slightly warmed, then turned off, oven) for the dough to rise. If the yeast doesn’t foam in the initial step, it’s best to start with a new packet of yeast.
Serving Suggestions & Smart Storage for Your Homemade Marshmallow Fritters
These warm, pillowy treats are best enjoyed immediately, but proper storage ensures any leftovers remain delightful.
Best Ways to Enjoy Warm Fritters
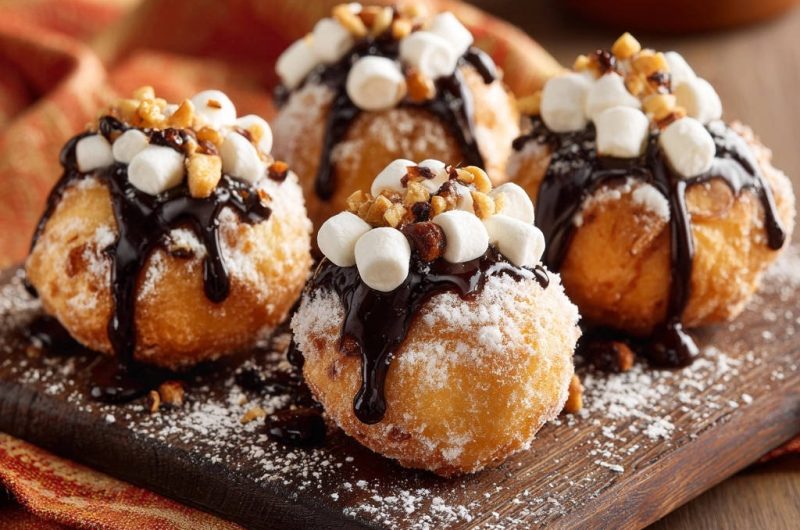
For the ultimate experience, serve your Homemade Marshmallow Fritters fresh off the rack, while they’re still warm and the marshmallows are slightly gooey. They are heavenly on their own, but also pair beautifully with a scoop of vanilla bean ice cream or a dollop of fresh whipped cream.
Keeping Leftovers Fresh and Delicious
Store any leftover fritters in an airtight container at room temperature for up to 2 days. While they are best fresh, they will retain much of their flavor. To revive some of their warmth and crispness, you can gently reheat them in a toaster oven or a warm oven (300°F/150°C) for a few minutes until heated through.
Your Homemade Marshmallow Fritters Questions Answered
Have more questions? We’ve got you covered with these frequently asked questions about making the best Homemade Marshmallow Fritters.
Can I make the dough ahead of time?
Yes, you can prepare the dough up to the first rise. After it has risen, gently punch it down, cover the bowl tightly with plastic wrap, and refrigerate overnight. On frying day, allow the dough to come to room temperature for 30-60 minutes before proceeding with dividing, rolling, and frying.
What if I don’t have a deep-fry thermometer?
While a thermometer is highly recommended for precision, you can test the oil temperature using a small piece of dough (about ½ inch). Drop it into the hot oil; if it immediately sizzles and turns golden within 30-60 seconds, the oil is ready. If it browns too quickly, the oil is too hot; if it doesn’t sizzle vigorously, it’s too cool.
Are there gluten-free options for this recipe?
Yes, you can experiment with a 1:1 gluten-free all-purpose flour blend. Be aware that the texture may vary slightly, often being a bit denser. You might need to adjust the liquid slightly or increase kneading time (if the blend contains xanthan gum) to achieve a workable dough consistency.
Can I bake these fritters instead of frying?
While traditionally fried for their signature light and crispy texture, you can bake them for a healthier alternative. Bake at 375°F (190°C) for 10-15 minutes, or until golden brown. However, expect a texture closer to a baked donut or bun, rather than the classic fried fritter crispness.
Ready to Impress? Share Your Fritter Creation!
Now that you’ve mastered the art of creating light, fluffy, and never-greasy Homemade Marshmallow Fritters, it’s time to share the joy! These delightful treats are perfect for brunches, dessert spreads, or simply a cozy afternoon indulgence.
Don’t forget to snap a picture of your golden creations and tag us on social media. We love seeing your culinary triumphs! Explore more of our delectable fried dough recipes for endless inspiration.
Homemade Marshmallow Fritters
Course: DessertCuisine: American CuisineDifficulty: easy6
servings25
minutes15
minutes40
minutesAmerican Cuisine
Ingredients
1 cup warm milk (around 105-115°F)
2 and 1/4 teaspoons active dry yeast (one standard packet)
1/4 cup granulated sugar
1 large egg, room temperature
2 tablespoons unsalted butter, melted and cooled
1 teaspoon vanilla extract
1/2 teaspoon salt
3 cups all-purpose flour, plus more for dusting
4 cups vegetable oil, for frying
1/2 cup powdered sugar, for dusting
1/4 cup chocolate syrup
1/2 cup mini marshmallows
1/4 cup chopped nuts (like peanuts or walnuts)
Directions
- In a large bowl, combine the warm milk, yeast, and granulated sugar. Let it sit for 5-10 minutes until foamy, indicating the yeast is active.
- Whisk in the egg, melted butter, vanilla extract, and salt into the yeast mixture.
- Gradually add the all-purpose flour, one cup at a time, mixing until a soft, sticky dough forms.
- Turn the dough out onto a lightly floured surface and knead for 5-7 minutes until it’s smooth and elastic. If it’s too sticky, add a tiny bit more flour, but be careful not to make it dry.
- Place the dough in a lightly oiled bowl, turning once to coat. Cover the bowl with plastic wrap or a clean kitchen towel and let it rise in a warm place for 60-90 minutes, or until doubled in size.
- Once risen, gently punch down the dough. Divide it into 12 equal pieces and roll each piece into a smooth ball.
- In a large, heavy-bottomed pot or Dutch oven, pour the vegetable oil to a depth of about 3 inches. Attach a deep-fry thermometer to the side of the pot. Heat the oil over medium heat until it reaches a consistent temperature of 350°F (175°C). This precise temperature is the secret to non-greasy fritters: too cool and they soak up oil, too hot and they burn outside before cooking inside.
- Carefully place 3-4 dough balls into the hot oil, ensuring not to overcrowd the pot. Maintain the oil temperature as close to 350°F as possible throughout the frying process.
- Fry for 2-3 minutes per side, or until the fritters are golden brown and cooked through. Use a slotted spoon or spider to carefully turn them.
- Remove the fried fritters and place them on a wire rack set over paper towels to drain any excess oil. Proper draining immediately after frying is crucial to prevent greasiness.
- Repeat with the remaining dough balls, adjusting the heat as needed to keep the oil at 350°F.
- While still warm, dust the fritters generously with powdered sugar.
- Arrange the fritters on a serving platter. Drizzle generously with chocolate syrup, sprinkle with mini marshmallows, and top with chopped nuts. Serve immediately and enjoy!


