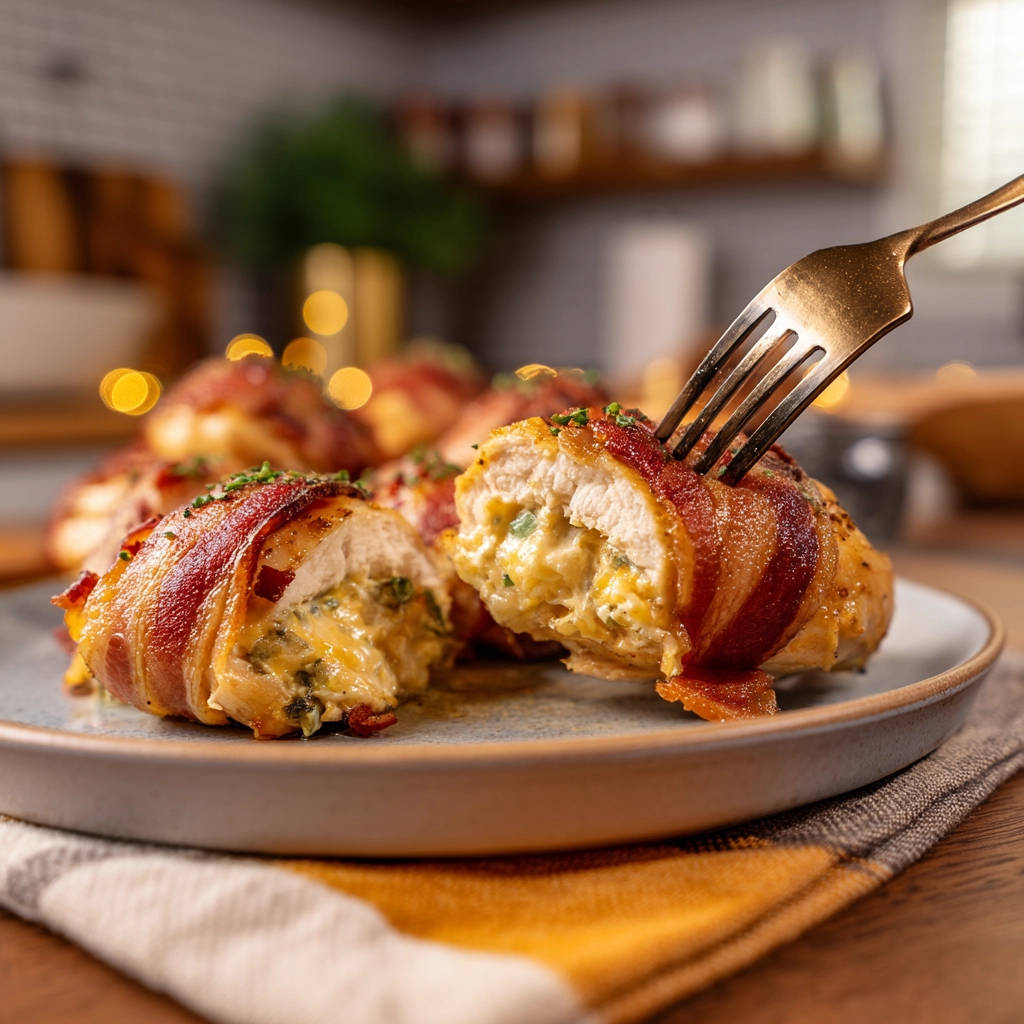
Tired of dry, bland chicken breasts? You’re not alone! It’s one of the most common kitchen frustrations. You start with the best intentions, maybe even adding a delicious filling, only to end up with meat that’s tough and disappointing. But what if I told you there’s a way to make Jalapeno Popper Stuffed Chicken that’s incredibly juicy, packed with creamy, spicy flavor, and wrapped in crispy bacon, every single time? It’s true! I’ve finally cracked the code, and it involves a few simple techniques that make all the difference. Get ready to experience stuffed chicken like never before.
Why You’ll Fall in Love with This Stuffed Chicken Recipe
This isn’t just any stuffed chicken; it’s a flavor explosion inspired by everyone’s favorite spicy appetizer. Here’s why this recipe will become a go-to in your kitchen:
- Guaranteed Juiciness: We employ specific steps designed to keep the chicken breast moist, eliminating that dreaded dryness.
- Irresistible Flavor Combo: Creamy, cheesy filling with a kick of jalapeno, all wrapped in savory bacon? It’s a match made in culinary heaven.
- Impressive Yet Easy: It looks fancy enough for a special occasion, but the steps are straightforward and totally manageable for a weeknight meal.
- Adaptable Heat Level: You control the spice by how you handle the jalapenos, making it perfect for mild spice lovers or those who crave the heat.
Gathering Your Ingredients for Spicy Cheesy Stuffed Chicken
Creating this delightful dish starts with selecting the right components. Each ingredient plays a vital role, from the creamy filling to the crispy exterior and, of course, the star protein. Let’s break down what you’ll need and why.
- Boneless, Skinless Chicken Breasts: We use four standard-sized breasts for this recipe. Look for pieces that are relatively uniform in thickness if possible, as this helps them cook evenly. Trim off any excess fat. Their mild flavor is the perfect canvas for the bold jalapeno popper filling. If you’re looking for other ways to enjoy chicken, you might like our Grilled Chicken Satay or Crispy Baked Chicken Tacos.
- Cream Cheese: One 8-ounce block, softened. This is the base of our creamy filling. Make sure it’s properly softened at room temperature so it mixes smoothly with the other ingredients, creating that signature gooey center.
- Shredded Cheddar Cheese: One cup of shredded cheddar. Cheddar adds that essential sharp, cheesy flavor that complements the cream cheese and jalapenos beautifully. You can use pre-shredded or shred your own from a block for potentially better meltability.
- Jalapenos: You’ll need 1 to 2 fresh jalapenos, finely diced. This is where the “popper” element comes in! The quantity depends entirely on your spice preference. For a milder heat, remove all the seeds and membranes (the white pith inside), as this is where most of the capsaicin resides. For more heat, leave some or all of the seeds and membranes in. Always wear gloves when handling peppers to avoid irritating your skin or eyes.
- Bacon: Eight slices. Two slices are used to wrap each chicken breast. The bacon serves multiple purposes: it adds incredible flavor, helps to keep the chicken moist as it cooks, and crisps up into a delightful savory shell.
- Salt and Black Pepper: To taste. Simple seasonings are all you need to enhance the natural flavors of the chicken and bacon and season the creamy filling.
Crafting Your Jalapeno Popper Stuffed Chicken: Step-by-Step Guide
Now that you have your ingredients ready, let’s walk through the process of assembling and cooking this incredible stuffed chicken breast. Don’t worry, each step is designed for success!
- Get the Oven Ready: First things first, preheat your oven to 400 degrees Fahrenheit (200 degrees Celsius). Getting the oven to the correct temperature before you put the chicken in is crucial for even cooking and ensures the bacon starts crisping properly right away.
- Prepare the Chicken (The Moisture Secret #1): Take your boneless, skinless chicken breasts and pat them completely dry using paper towels. This step is often overlooked but is incredibly important! Drying the surface allows the chicken to sear effectively later. A wet surface will steam the chicken, preventing that nice crust and contributing to a less desirable texture. Once dry, trim away any excess fat.
- Create the Pocket: Carefully use a sharp knife to slice a pocket into the thickest side of each chicken breast. Hold the chicken flat on a cutting board with one hand and slice horizontally with the other, being careful not to cut all the way through to the other side. You want to create a space large enough to generously hold the filling without bursting.
- Mix the Creamy Filling: In a small bowl, combine your softened cream cheese, shredded cheddar cheese, and the finely diced jalapenos. Stir everything together until it’s well combined and looks like a smooth, cheesy mixture. Season this filling with a pinch of salt and black pepper to enhance the flavors.
- Stuff the Chicken (Be Generous, But Careful!): Now, it’s time to fill those pockets! Use a spoon to scoop the cream cheese and jalapeno mixture into the opening of each chicken breast. Be generous, but avoid overstuffing. If you put too much filling in, it will likely ooze out during cooking. Gently press the edges of the chicken breast together to help seal the filling inside. Some might still escape, and that’s okay – extra cheesy bits are never a bad thing!
- Wrap with Bacon: Take two slices of bacon for each stuffed chicken breast. Wrap the bacon around the chicken, covering as much of the surface as possible, particularly trying to cover the opening of the pocket. You can slightly stretch the bacon to help it adhere. If needed, use one or two wooden toothpicks to secure the ends of the bacon so they don’t unravel as they cook. Season the outside of the bacon-wrapped chicken with a little more salt and pepper.
- Initial Sear (The Moisture Secret #2 & Bacon Crisping!): Heat a large, oven-safe skillet over medium-high heat. If your skillet isn’t non-stick, add just a tiny amount of oil. Place the bacon-wrapped chicken breasts into the hot skillet, ideally seam-side down first to help the bacon ends seal. Sear the chicken for about 2-3 minutes per side. You’re looking for the bacon to start browning and crisping slightly. This crucial searing step not only gives the bacon a head start on becoming deliciously crispy but also helps create a barrier on the chicken’s surface, locking in those precious juices during the oven bake.
- Oven Bake (The Moisture Secret #3 – Temperature Matters!): Carefully transfer the entire oven-safe skillet with the seared chicken directly into your preheated 400°F (200°C) oven. Bake for 20-25 minutes. The MOST important step here is to check the internal temperature of the chicken. Use a meat thermometer and insert it into the thickest part of the chicken breast, avoiding the filling pocket. The chicken is cooked through and perfectly juicy when it reaches an internal temperature of 165 degrees Fahrenheit (74 degrees Celsius). Cooking to temperature, not just time, is the absolute best way to avoid overcooking and ensure moist results.
- Resting Period (The Moisture Secret #4): Once the chicken reaches the target internal temperature, carefully remove the skillet from the oven. Let the chicken rest right there in the skillet for 5-10 minutes before you slice or serve it. Resting allows the juices within the chicken to redistribute throughout the meat. If you cut into it immediately, all those lovely juices will run out, leaving you with drier chicken. Don’t forget to remove any toothpicks before serving!
Tips for Perfect Jalapeno Popper Stuffed Chicken Every Time
Making this recipe consistently delicious is easy with a few extra pointers:
- Don’t Skip the Resting Time: Seriously, this is one of the biggest secrets to juicy chicken, not just for this recipe but any cooked meat. Patience is a virtue here!
- Invest in a Meat Thermometer: It’s the single most valuable tool for cooking meat perfectly. Guessing leads to dry chicken or undercooked food. An instant-read thermometer is quick and accurate.
- Adjust the Spice: If you love heat, add an extra jalapeno or leave more seeds in. If you prefer it milder, use fewer jalapenos or even substitute a small amount of finely diced bell pepper for some crunch without the heat.
- Cheese Variations: While cheddar is classic, feel free to experiment with other cheeses. Monterey Jack, Colby Jack, or even a smoked cheddar could add interesting twists to the filling.
- Cream Cheese Temperature: Ensure your cream cheese is truly softened. Cold cream cheese will result in a lumpy filling that’s hard to mix and stuff.
- Secure the Bacon: Those toothpicks are your friends! Make sure the bacon is snug around the chicken so it crisps evenly and protects the chicken. Remember to count how many you use so you remove them all before serving.
What to Serve With Your Creamy Stuffed Chicken
This rich and flavorful dish pairs beautifully with a variety of side dishes. Consider something to balance the richness and maybe add a fresh element.
- Simple roasted vegetables like Crispy Roasted Brussels Sprouts or asparagus.
- Creamy mashed potatoes or Creamy Scalloped Potatoes.
- A fresh green salad, perhaps with a light vinaigrette, like our Easy Kale Salad.
- Rice pilaf or Easy Mexican Rice for a slightly different flavor profile.
Your Jalapeno Popper Stuffed Chicken Questions Answered (FAQ)
Here are some common questions folks have about making this delicious stuffed chicken recipe:
Can I prepare the stuffed chicken ahead of time?
Yes, you can prepare the chicken up to the point of wrapping it in bacon. Stuff the chicken breasts, wrap them, and store them in an airtight container in the refrigerator for up to 24 hours. When you’re ready to cook, proceed with the searing and baking steps as directed, adding a few extra minutes to the baking time if cooking from cold.
How do I prevent the cheese filling from leaking out?
While some leakage is normal (and creates delicious crispy cheese bits!), you can minimize it by not overstuffing the chicken and gently pressing the edges together after filling. Wrapping the chicken tightly with bacon also helps hold everything in place.
My bacon isn’t crispy enough, what did I do wrong?
The initial sear is key to getting the bacon crispy in the oven. Ensure your skillet is hot enough before adding the chicken and let it sear for the full 2-3 minutes per side until you see browning. If it’s still not crispy after baking, you can place the chicken under the broiler for 1-2 minutes at the very end, watching it carefully to prevent burning.
Can I use chicken thighs instead of breasts?
While this recipe is optimized for chicken breasts and their cooking time, you could adapt it for boneless, skinless chicken thighs. Thighs are naturally juicier, so the risk of dryness is lower, but they may require a longer cooking time. The method of creating a pocket and stuffing would be similar.
How long do leftovers last?
Leftover Jalapeno Popper Stuffed Chicken can be stored in an airtight container in the refrigerator for 3-4 days. Reheat gently in the oven or air fryer to help the bacon re-crisp and avoid drying out the chicken.
Enjoy Your Homemade Jalapeno Popper Stuffed Chicken!
Say goodbye to dry, boring chicken dinners forever! This Jalapeno Popper Stuffed Chicken recipe is a game-changer, bringing together creamy, spicy, and savory flavors in a way that guarantees a moist and delicious result. It’s the perfect dish to impress your family or simply treat yourself to a truly satisfying meal. Give it a try, and I’m confident it will earn a permanent spot in your recipe rotation.
Have you tried stuffing chicken before? What are your favorite fillings? Let me know in the comments below! Happy cooking!
Jalapeno Popper Stuffed Chicken

Ingredients
- 4 boneless, skinless chicken breasts
- 1 block (8 oz) cream cheese, softened
- 1 cup shredded cheddar cheese
- 1 to 2 jalapenos, finely diced (remove seeds and membranes for less heat)
- 8 slices bacon
- Salt and black pepper to taste
Directions
- Preheat your oven to 400 degrees Fahrenheit (200 degrees Celsius).
- Pat the chicken breasts completely dry with paper towels. This is key for getting a nice sear later, but also helps prevent a watery surface that can steam the chicken instead of letting it cook through properly.
- Trim any fat from the chicken breasts. Carefully slice a pocket into the thickest side of each chicken breast, being careful not to cut all the way through.
- In a small bowl, mix together the softened cream cheese, shredded cheddar cheese, and diced jalapenos. Season with a pinch of salt and pepper.
- Spoon the cheese and jalapeno mixture generously into the pocket of each chicken breast. Don’t overstuff it, or the filling might leak out during cooking. Gently press the edges to seal the filling inside.
- Wrap 2 slices of bacon around each stuffed chicken breast. Secure the ends of the bacon with toothpicks if needed. Season the outside of the bacon-wrapped chicken with salt and pepper.
- Heat a large, oven-safe skillet over medium-high heat. Add a tiny bit of oil if your skillet isn’t non-stick. Place the bacon-wrapped chicken breasts seam-side down in the hot skillet. Sear for 2-3 minutes per side, until the bacon starts to brown and crisp slightly. This initial searing helps the bacon crisp up nicely in the oven AND helps lock in the chicken’s moisture by creating a barrier.
- Transfer the skillet directly to the preheated oven. Bake for 20-25 minutes, or until the chicken is cooked through and reaches an internal temperature of 165 degrees Fahrenheit (74 degrees Celsius) at its thickest point. Using a meat thermometer is the absolute best way to guarantee juicy chicken, avoiding the guesswork that leads to overcooking and dryness.
- Once cooked, remove the skillet from the oven. Let the chicken rest in the skillet for 5-10 minutes before serving. Resting allows the juices to redistribute throughout the chicken, making it incredibly moist. Remove toothpicks before serving.