Oh, the heartbreak! You’ve spent time creating a beautiful, layered pie, carefully assembling each delicious component, only to cut into it and find… a sad, soggy bottom crust. It’s a common culinary calamity, especially when dealing with creamy fillings and fresh, juicy fruits like bananas. That lovely chocolate crust you worked on? Dissolved into a mushy disappointment. I’ve been there more times than I care to admit, and for the longest time, it felt like an unavoidable part of making pies like this one. But guess what? I finally cracked the code! I discovered a simple, brilliant trick that ensures your chocolate crust stays perfectly crisp and firm, even under layers of creamy pudding and sweet bananas. This Layered Chocolate Banana Dream Pie isn’t just incredibly delicious; it’s built on a foundation that stands up to the task. It has become my absolute go-to whenever a dreamy, no-soggy-crust pie craving hits!
Why You’ll Love This Layered Chocolate Banana Dream Pie
Beyond solving the age-old soggy crust dilemma, this pie offers a multitude of reasons to fall head over heels for it:
- The No-Soggy-Crust Guarantee: This is the star feature! The innovative chocolate barrier layer seals the crust, protecting it from moisture and keeping it delightfully crisp from the first slice to the last. Say goodbye to pie plate puddles!
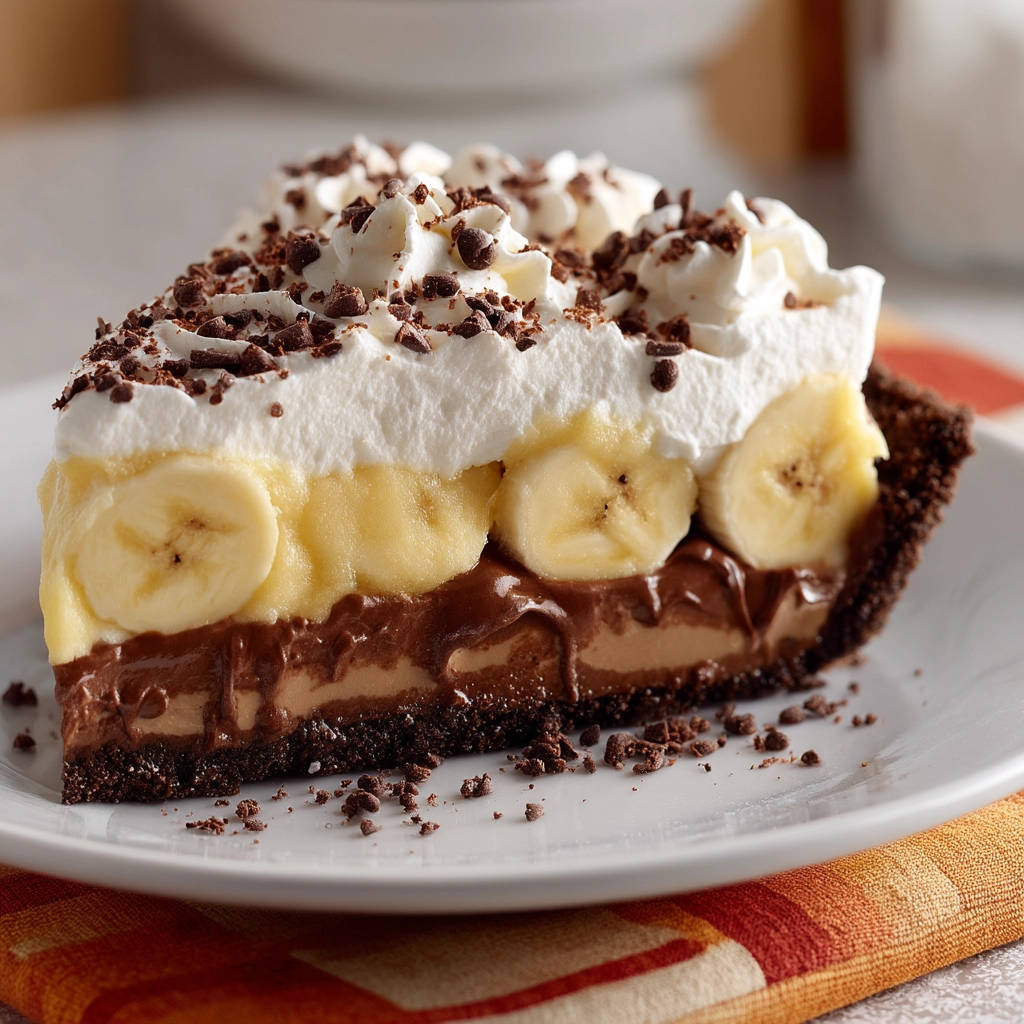
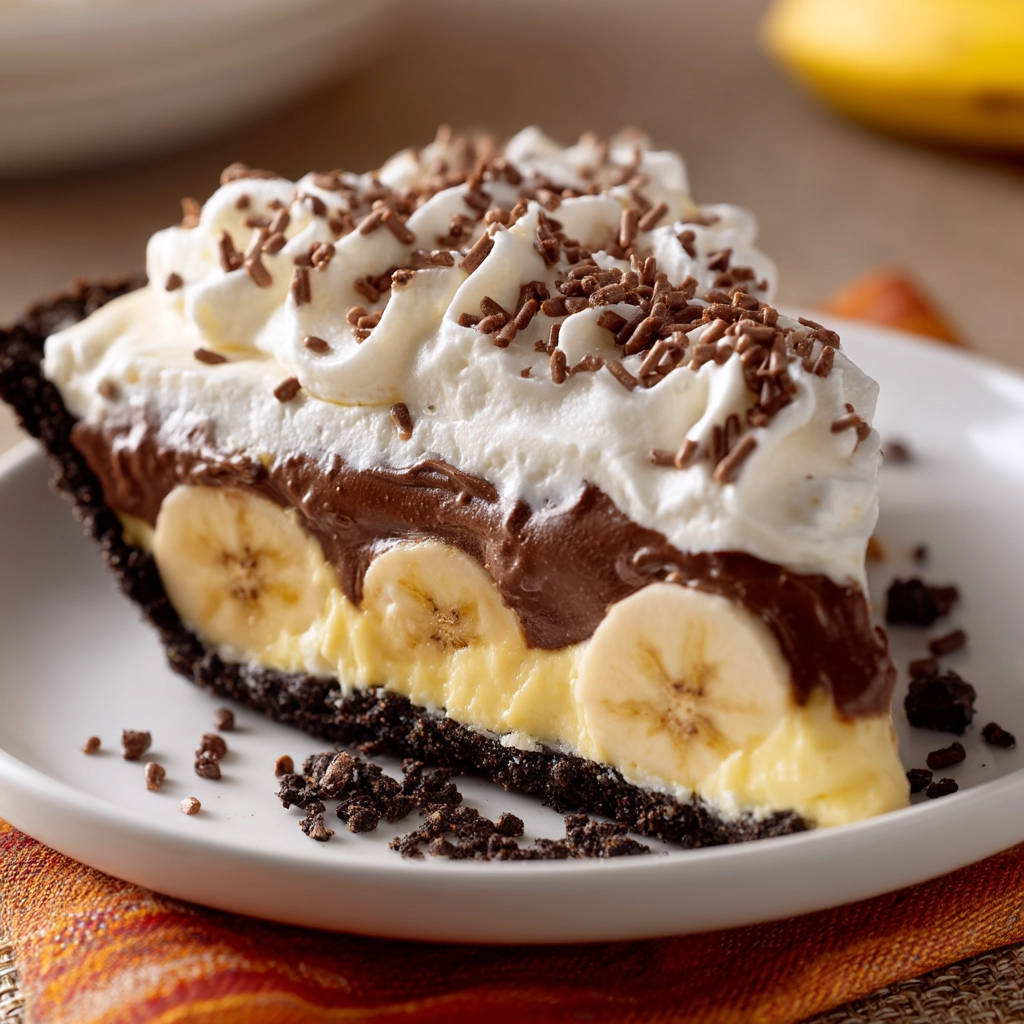
- Layers of Bliss: You get the perfect combination of textures and flavors – a rich chocolate cookie base, sweet, tender bananas, smooth and creamy vanilla pudding, and a cloud of airy whipped cream on top. Each bite is a symphony.
- Relatively Simple Process: While there are distinct layers and chilling steps, the individual components are straightforward. Using instant pudding streamlines the process significantly, making it achievable for bakers of all skill levels.
- Make-Ahead Friendly: Most of the pie needs significant chilling time anyway, making it an ideal dessert to prepare in advance for parties, holidays, or just a weeknight treat.
- Crowd-Pleaser: Seriously, who doesn’t love the combination of chocolate, banana, and vanilla cream? This pie is a guaranteed hit with family and friends.
Gathering Your Ingredients for Chocolate Banana Dream Pie
Creating this layered dessert is a joy, and it starts with assembling the right components. Each ingredient plays a crucial role in building the decadent flavor and delightful texture of this chocolate banana dream pie. We’re building a masterpiece, one delicious element at a time.
For the foundation, you’ll need chocolate cookie crumbs, which provide that deep, slightly bitter contrast to the sweet filling. Using classic chocolate sandwich cookies with the filling removed ensures the right texture and pure chocolate flavor for the crust. Melted unsalted butter acts as the binder, turning those crumbs into a cohesive, pressable base. Unsalted butter is preferred so you can control the salt level yourself.
The secret weapon – the anti-soggy crust layer – requires semi-sweet chocolate chips or finely chopped chocolate and a touch of heavy cream. When gently melted together, these create a rich, pourable ganache-like mixture that hardens into a protective barrier, sealing the crust away from the moist filling. Semi-sweet chocolate provides that classic, balanced chocolate flavor.
For the luscious layers, you’ll need ripe bananas. Look for bananas that are yellow with a few brown spots, indicating they are sweet and tender, perfect for slicing into the pie. Instant vanilla pudding mix provides the creamy, smooth layer that binds the bananas. Make sure you have two boxes for the right consistency. Cold whole milk is essential for whisking the instant pudding; the cold temperature helps the pudding set properly and quickly according to package directions.
Finally, the cloud-like topping calls for cold heavy whipping cream, powdered sugar for sweetness and stability, and vanilla extract to enhance that classic vanilla flavor. Make sure your cream is very cold for the best whipping results! Chocolate shavings or mini chocolate chips add that final touch of visual appeal and extra chocolatey goodness.
- 2 cups chocolate cookie crumbs (from about 28-30 sandwich cookies, filling removed)
- 1/2 cup unsalted butter, melted
- 1 cup semi-sweet chocolate chips or chopped chocolate
- 1/4 cup heavy cream
- 3 ripe bananas
- 2 boxes (3.4 ounces each) instant vanilla pudding mix
- 4 cups cold whole milk
- 2 cups cold heavy whipping cream
- 1/2 cup powdered sugar
- 1 teaspoon vanilla extract
- Chocolate shavings or mini chocolate chips for topping
Crafting Your Chocolate Banana Dream Pie: Step-by-Step
Ready to build this dream pie? It’s easier than you might think, and each step contributes to the final, glorious result. Pay special attention to the chilling times and the chocolate barrier step – they are key to success!
- Prepare the Crust: Start by preparing your chocolate cookie crust. Decide if you want to bake it for a slightly sturdier, toasted flavor or go the no-bake route for simplicity. If baking, preheat your oven to 350 degrees F (175 degrees C). In a medium bowl, combine the chocolate cookie crumbs with the melted butter. Stir them together until all the crumbs are moistened and resemble wet sand. This mixture will form the base and sides of your pie.
- Form the Crust: Carefully press the crumb mixture firmly and evenly into the bottom and all the way up the sides of a standard 9-inch pie plate. Use the bottom of a glass or a flat-bottomed measuring cup to really pack the crumbs down, ensuring a solid, less crumbly crust. If you’re making a no-bake crust, pop it into the refrigerator for at least 30 minutes to allow the butter to firm up and bind the crumbs. If baking, place the pie plate in the preheated oven for just 8-10 minutes, until the edges look set. Once baked, let it cool completely on a wire rack before proceeding. Cooling is crucial!
- The Game-Changing Chocolate Barrier: This is the secret to preventing that dreaded soggy crust! While your crust is cooling (or chilling if no-bake), gently melt the semi-sweet chocolate chips or chopped chocolate with the heavy cream. You can do this in a microwave-safe bowl, heating in short 30-second bursts, stirring well after each, until the mixture is completely smooth and glossy. Alternatively, set a heatproof bowl over a small saucepan of simmering water, ensuring the bottom of the bowl doesn’t touch the water, and stir until melted. As soon as the chocolate mixture is smooth, pour it immediately and evenly over the bottom of your cooled pie crust. Use the back of a spoon or a small offset spatula to spread it slightly up the sides, creating a complete chocolate seal. This protective layer hardens as it cools, creating a waterproof barrier. Place the crust with the chocolate layer back into the refrigerator for at least 15-20 minutes, or until the chocolate is firm and set to the touch. This step is non-negotiable for a crisp crust! If you enjoy working with chocolate and creamy desserts, you might also love our recipe for Easy No-Bake Chocolate Cream Loaf, which features similar rich chocolate elements.
- Prepare the Bananas: While the chocolate barrier is setting up in the fridge, slice your ripe bananas into pieces about 1/2 inch thick. Keep them ready to go.
- Make the Pudding Layer: In a large bowl, combine the two boxes of instant vanilla pudding mix with the 4 cups of cold whole milk. Whisk vigorously for about 2 minutes, or according to the package directions, until the mixture starts to thicken. Let the pudding stand for about 5 minutes; this allows it to thicken further and reach the perfect consistency for the pie filling. Using cold milk is important for instant pudding to set correctly.
- Layer the Bananas: Once the chocolate layer in the crust is completely set and firm, arrange a single, even layer of your sliced bananas over the hardened chocolate. Try to cover the bottom as completely as possible.
- Add the Pudding: Gently pour the slightly thickened vanilla pudding evenly over the layer of bananas, spreading it carefully with a spatula to ensure the bananas are fully covered and the surface is smooth.
- Chill the Pie: This is another critical chilling phase! Place the pie back into the refrigerator. It needs to chill for at least 4 hours, but ideally longer, until the pudding layer is completely set and firm. This chilling time allows all the layers to meld together and ensures the pie holds its shape when sliced.
- Whip the Cream: Just before you’re ready to serve your masterpiece, prepare the fluffy whipped cream topping. In a large, cold bowl, combine the 2 cups of cold heavy whipping cream, powdered sugar, and vanilla extract. Use an electric mixer (a stand mixer with a whisk attachment or a hand mixer) and beat on high speed until stiff peaks form. You’ll know you’ve reached stiff peaks when you lift the whisk and the peaks of cream stand straight up without drooping.
- Top and Serve: Spoon or pipe the whipped cream generously over the chilled, set pudding layer. For a classic look, simply spread it evenly. For a more decorative finish, use a piping bag fitted with a large star tip. Sprinkle the top with chocolate shavings or mini chocolate chips for garnish. Keep the finished pie refrigerated until it’s time to slice and serve.
Tips for Perfect Layered Chocolate Banana Dream Pie Every Time
Want to ensure your Layered Chocolate Banana Dream Pie is absolutely perfect? Here are a few extra tips gleaned from making this dessert over the years:
- Cookie Choice Matters: While most chocolate sandwich cookies work, classics like Oreos (with the filling scraped out) give the best flavor and texture for the crust. The filling can make the crust too greasy or sweet.
- Really Pack that Crust: Don’t be shy when pressing the crumbs into the pie plate. A firmly packed crust is less likely to crumble when you slice the pie, providing a sturdy base for all those delicious layers.
- Chocolate Layer Firmness: Ensure the chocolate barrier layer is completely set before adding the bananas and pudding. If it’s still soft or tacky, it won’t create that crucial moisture seal. Patience here pays off!
- Ripe, But Not Overripe Bananas: Choose bananas that are ripe for sweetness but still firm enough to slice cleanly and hold their shape. Overly mushy bananas can make the pie watery.
- Keep Ingredients Cold: Using very cold milk for the pudding and very cold heavy cream for the whipped topping is essential for them to set and whip properly. Don’t skip this step!
- Chilling Time is Key: The 4+ hours of chilling for the pie layers isn’t just a suggestion; it’s vital for the pudding to fully set and for the flavors to meld. Rushing this step will result in a runny, messy pie.
- Preventing Banana Browning: While the pudding helps protect the banana layer, if you’re worried about browning, you can lightly brush the banana slices with a tiny amount of lemon juice or a fruit preservative like Fruit Fresh before layering. Be very minimal with the lemon juice so you don’t add a sour flavor.
- Variations: Want to mix things up? Consider adding other fruits that pair well with chocolate and vanilla, like thinly sliced strawberries or raspberries. When incorporating other fruits into pies and tarts, preventing a soggy crust is often a concern, just like with bananas! For more ideas on keeping your crust crisp with fruit fillings, check out our guide on making a Perfected Fruit Tart (No More Soggy Crust!).
Your Chocolate Banana Dream Pie Questions Answered (FAQ)
Got questions about making this dreamy dessert? Here are some common ones people ask:
Can I use homemade pudding instead of instant?
Yes, you absolutely can! If you prefer to make pudding from scratch, use your favorite recipe for vanilla pastry cream or cooked pudding that yields approximately 4 cups. Just be sure to let it cool completely before layering it over the bananas in the pie crust. Cooked pudding might require slightly longer chilling time in the finished pie to set firmly.
How far in advance can I make this pie?
This pie needs at least 4 hours to chill and set, but it’s often best when chilled for 6-8 hours or even overnight. You can assemble the pie (crust, chocolate layer, bananas, pudding) up to 24 hours in advance. It’s best to make the whipped cream topping and add it just before serving for the freshest, fluffiest texture. Bananas can sometimes brown slightly after a day, but the pudding layer helps protect them. It will still taste amazing even if the banana layer isn’t perfectly pristine after 24 hours.
How should I store leftovers?
Store any leftover Layered Chocolate Banana Dream Pie in the refrigerator. Cover the pie plate tightly with plastic wrap or aluminum foil. It’s best consumed within 2-3 days, as the bananas will continue to soften.
Can I freeze this pie?
Freezing this pie is generally not recommended. The texture of the bananas can become mushy and watery when frozen and thawed, and the pudding layer might separate or become grainy. This is definitely a pie best enjoyed fresh from the refrigerator after it’s properly chilled.
What if my chocolate layer doesn’t spread easily?
The melted chocolate mixture needs to be poured immediately after melting, while it’s still very fluid. If it cools down too much before you pour it, it will start to thicken. If this happens, you can gently warm it again for a few seconds (either in the microwave or over the hot water bath) until it’s pourable, then try again. Work quickly once it’s melted!
Enjoy Your Homemade Layered Chocolate Banana Dream Pie!
There you have it! A truly dreamy dessert that delivers on flavor and texture, all built upon a foundation designed to stay perfectly crisp. No more soggy crust disappointments here! This Layered Chocolate Banana Dream Pie is perfect for any occasion, from a simple family dessert to a special celebration. The combination of rich chocolate, sweet banana, and creamy vanilla is simply irresistible, and knowing your crust will hold up makes it even better. Give this recipe a try, and prepare to fall in love. I’d love to hear how yours turns out! Leave a comment below and let me know what you think, or share any variations you try!
Layered Chocolate Banana Dream Pie

Ingredients
- 2 cups chocolate cookie crumbs (from about 28-30 sandwich cookies, filling removed)
- 1/2 cup unsalted butter, melted
- 1 cup semi-sweet chocolate chips or chopped chocolate
- 1/4 cup heavy cream
- 3 ripe bananas
- 2 boxes (3.4 ounces each) instant vanilla pudding mix
- 4 cups cold whole milk
- 2 cups cold heavy whipping cream
- 1/2 cup powdered sugar
- 1 teaspoon vanilla extract
- Chocolate shavings or mini chocolate chips for topping
Directions
- Preheat oven to 350 degrees F (175 degrees C) if baking the crust, or proceed as no-bake.
- In a medium bowl, combine the chocolate cookie crumbs and melted butter until well mixed. Press the mixture firmly into the bottom and up the sides of a standard 9-inch pie plate. For a no-bake crust, chill for at least 30 minutes until firm. For a baked crust, bake for 8-10 minutes, then let cool completely on a wire rack.
- This is the game-changer for a non-soggy crust: While the crust cools (or is chilling), melt the chocolate chips and heavy cream gently in a microwave-safe bowl in 30-second intervals, stirring until smooth. Alternatively, melt in a heatproof bowl set over a saucepan of simmering water. Once smooth, immediately pour the melted chocolate mixture evenly over the bottom of the cooled pie crust, spreading it slightly up the sides. This creates a protective chocolate barrier. Chill the crust with the chocolate layer in the refrigerator for at least 15-20 minutes, or until the chocolate is completely set and firm.
- While the chocolate sets, slice the bananas about 1/2 inch thick.
- In a large bowl, whisk together the instant vanilla pudding mix and cold milk according to package directions. Let stand for 5 minutes to thicken slightly.
- Arrange a layer of sliced bananas evenly over the set chocolate layer in the pie crust.
- Pour the thickened pudding gently over the bananas, spreading it to cover them completely.
- Chill the pie in the refrigerator for at least 4 hours, or until the pudding layer is fully set.
- Just before serving, make the whipped cream topping. In a large bowl using an electric mixer, beat the cold heavy whipping cream, powdered sugar, and vanilla extract on high speed until stiff peaks form.
- Spread or pipe the whipped cream over the chilled, set pie. Sprinkle with chocolate shavings or mini chocolate chips. Keep refrigerated until ready to serve.