Ever found yourself staring at deflated, dense cream puffs, wondering where you went wrong? I’ve been there! It used to be my biggest baking frustration until I uncovered the simple, yet game-changing secrets to truly light and airy Lemon Cream Puffs.
This recipe isn’t just about delicious flavor; it’s designed to deliver perfectly hollow shells every single time, ready to embrace their bright, zesty filling. Get ready to master these elegant treats and impress everyone with your newfound expertise.
Why This Lemon Cream Puffs Recipe Will Become Your Favorite
Guaranteed Hollow & Airy Shells, Every Single Time
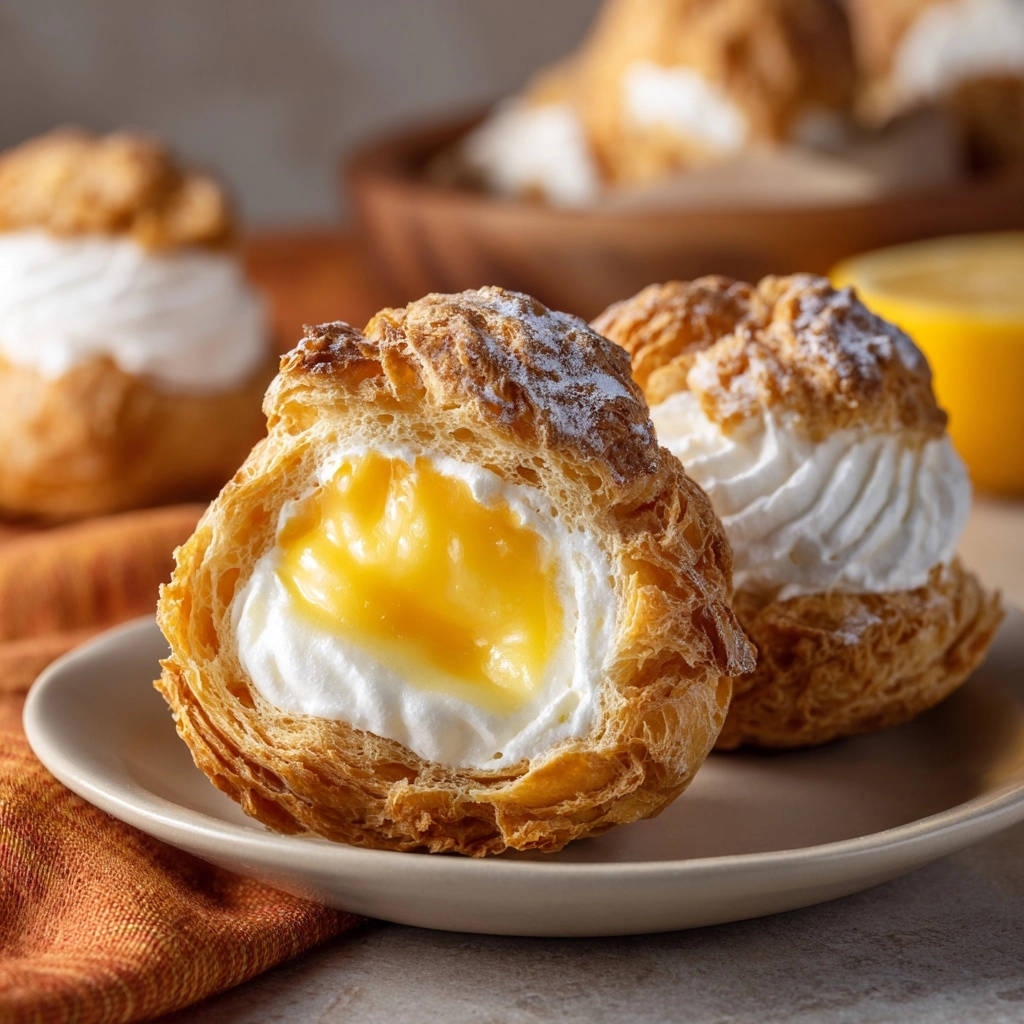
The hallmark of a perfect cream puff is its ethereal lightness and spacious hollow interior. This recipe focuses on precise techniques, including a crucial dough-drying step, to ensure your choux pastry consistently achieves that coveted airy structure.
Say goodbye to dense, uninspired puffs and hello to crisp, delicate shells that practically melt in your mouth.
A Burst of Zesty Lemon Flavor
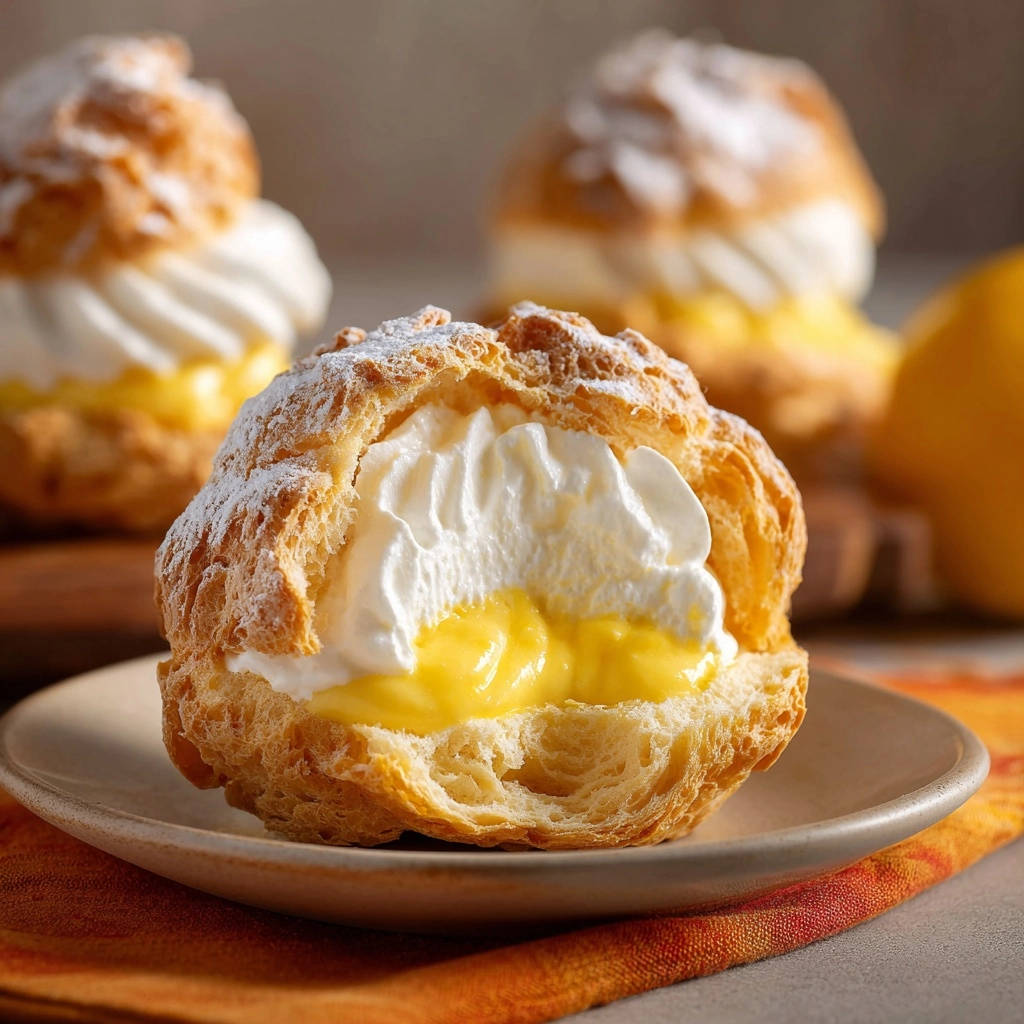
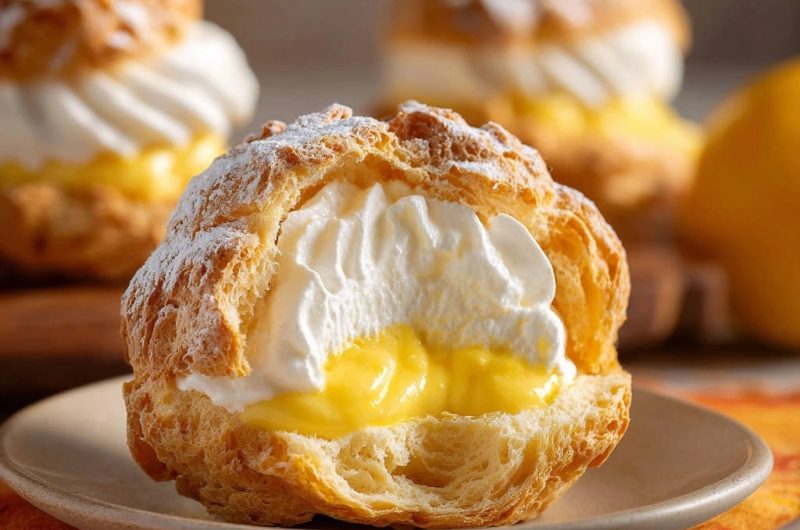
Beyond the flawless pastry, this recipe shines with its vibrant lemon pastry cream. It’s infused with fresh lemon juice and zest, striking a beautiful balance between sweet and tart.
This creamy, bright filling elevates the classic cream puff into a truly unforgettable dessert experience.
Elegantly Simple: Achieving Bakery-Quality at Home
While Lemon Cream Puffs may look sophisticated, this guide breaks down each step into manageable, clear instructions. You’ll be surprised how achievable bakery-quality results are in your own kitchen.
With a few key tips, you’ll gain the confidence to bake these impressive treats with ease.
Tools for Your Lemon Cream Puff Masterpiece
-
Heavy-Bottomed Saucepan: Essential for consistent heat distribution when making the choux pastry.
-
Stand Mixer (or Strong Arm!): For incorporating eggs into the choux dough smoothly and efficiently, or whisking the cream.
-
Piping Bag & Large Round Tip: For neat, uniform cream puffs, though two spoons work too.
-
Parchment Paper-Lined Baking Sheets: Prevents sticking and ensures easy removal.
-
Fine-Mesh Sieve: For sifting powdered sugar over the finished puffs.
Decoding the Deliciousness: Key Ingredients for Lemon Cream Puffs
Crafting the Perfect Choux Pastry Dough
Water & Butter: These form the foundational liquid and fat. When heated, they create steam that pushes the pastry up, forming its hollow center.
All-Purpose Flour: Provides the necessary gluten structure. This allows the dough to hold its shape and expand dramatically during baking.
Eggs: Crucial for emulsifying the dough, adding richness, and contributing significantly to the puff’s final rise and tender interior.
Building the Bright & Zesty Lemon Pastry Cream
Fresh Lemons (Juice & Zest): The undeniable star of the filling. They provide the signature tangy flavor and aromatic brightness that defines this dessert.
Egg Yolks & Cornstarch: The primary thickeners. They work in tandem to give the pastry cream its luxurious, silky smooth texture and stability.
Milk & Sugar: These create the creamy base and provide the essential sweetness, balancing the lemon’s tartness for a harmonious flavor profile.
Whipping Up the Cloud-Like Topping
Heavy Cream: The essential ingredient for creating a light, airy, and stable whipped cream. Ensure it’s very cold for best results.
Powdered Sugar & Vanilla: These additions provide subtle sweetness and a hint of warmth, complementing the bright lemon cream without overpowering it.
Your Journey to Irresistible Lemon Cream Puffs: A Step-by-Step Guide
-
Mastering the Choux Pastry Dough
-
Prepare Your Workspace: Preheat your oven to 400°F (200°C) and line two baking sheets with parchment paper. This preparation is essential for a seamless baking process once your dough is ready.
-
Boil the Base: In a medium saucepan, combine water, butter, salt, and granulated sugar. Bring this mixture to a rolling boil over medium heat, ensuring the butter is completely melted before it reaches a vigorous boil.
-
The “One Simple Trick”: Drying the Dough: Remove the saucepan from heat and immediately add all the flour at once. Stir vigorously with a wooden spoon until a smooth ball of dough forms, pulling away from the sides of the pan.
Return the saucepan to medium heat and continue to cook and stir the dough for 2-3 minutes, pressing it against the sides of the pan. You’ll notice a thin film forming on the bottom of the pan and the dough becoming less sticky; this crucial step thoroughly dries out the dough, which is essential for it to puff up properly and create hollow interiors.
-
Cool and Incorporate Eggs: Transfer the dried dough to a large bowl or the bowl of a stand mixer. Let it cool for 5 minutes, stirring occasionally, until it’s warm but not hot to the touch. You should be able to comfortably touch it without discomfort.
Add the eggs one at a time, beating well after each addition until fully incorporated and the dough is smooth and glossy. The dough should be thick but fall slowly from a spoon in a distinct v-shape.
-
Pipe Your Puffs: Spoon the dough into a large piping bag fitted with a large round tip. Alternatively, you can use two spoons to scoop and shape the dough.
Pipe 2-inch mounds onto the prepared baking sheets, leaving about 2 inches of space between each puff. This ensures they have ample room to expand without touching.
-
-
Baking Brilliance: Achieving Golden, Hollow Shells
-
Initial High Heat Bake: Bake the puffs for 15 minutes at 400°F (200°C). This initial high temperature creates a powerful burst of steam inside the dough, which is essential for the puff’s dramatic rise and the formation of those crucial hollow centers.
-
Lower Temperature & Final Bake: Without opening the oven door (this is important to prevent collapse), reduce the oven temperature to 350°F (175°C).
Continue to bake for another 20 minutes, or until the puffs are deeply golden brown and feel firm to the touch when gently tapped. This lower temperature allows them to bake through without burning.
-
Preventing Collapse: The Oven Door Trick: Once the baking time is complete, turn off the oven. Critically, prop the oven door open slightly with a wooden spoon and leave the puffs inside for an additional 10-15 minutes.
This allows them to slowly cool and dry out within the oven’s residual heat, preventing them from collapsing due to a sudden temperature change when they are removed. This step is a game-changer for consistently crisp shells.
-
Cool Completely: Remove the puffs from the oven and transfer them immediately to a wire rack to cool completely. They must be fully cooled before you fill them to prevent the cream fillings from melting or making the pastry soggy.
-
-
Crafting the Luscious Lemon Pastry Cream
-
Combine Dry Ingredients: In a medium saucepan, whisk together granulated sugar, cornstarch, and a pinch of salt. This ensures these dry ingredients are evenly distributed.
-
Prepare Egg Mixture: In a separate bowl, whisk the two large egg yolks until smooth. Slowly whisk the milk into the egg yolks to temper them, preventing the yolks from cooking too quickly when added to the hot mixture.
-
Cook Until Thick: Pour the tempered egg yolk mixture into the saucepan with the sugar mixture. Whisk constantly over medium heat until the mixture thickens significantly and comes to a gentle boil, which usually takes about 5-7 minutes.
Once it reaches a boil, continue to boil for 1 full minute, stirring continuously. This ensures the cornstarch is fully cooked and activated, giving your cream a stable and smooth texture.
-
Flavor & Chill: Remove the saucepan from the heat. Stir in the 2 tablespoons of unsalted butter, 1/4 cup of fresh lemon juice, and 1 tablespoon of lemon zest until the butter is fully melted and the mixture is smooth and glossy.
Transfer the pastry cream to a clean bowl, then immediately cover the surface directly with plastic wrap to prevent a skin from forming. Refrigerate until completely chilled, which will take at least 2 hours. Chilling is crucial for the cream to set properly and for its flavors to fully develop.
-
-
Whipping Up Your Dream Topping
-
Whip to Stiff Peaks: In a very cold bowl with equally cold beaters, whip the very cold heavy cream, powdered sugar, and vanilla extract on medium-high speed until stiff peaks form. The cold equipment significantly aids in achieving maximum volume and stability for your whipped cream.
-
-
The Grand Finale: Assembling Your Lemon Cream Puffs
-
Prep the Puffs: Once the cream puffs are completely cool, gently slice each one horizontally in half using a serrated knife, or make a small hole in the bottom of each puff if you prefer a cleaner look.
-
Fill with Lemon Cream: Spoon or pipe the chilled lemon pastry cream into the bottom half of each puff. Ensure an even layer of this vibrant filling.
-
Add Whipped Cream: Pipe or spoon a generous dollop of the freshly whipped cream on top of the lemon pastry cream. This creates a delightful two-layered filling.
-
Complete & Dust: Carefully place the top half of the puff back on its base. For an elegant finish, dust generously with powdered sugar just before serving. Enjoy your perfectly hollow, delightful Lemon Cream Puffs!
-
Cream Puff Conundrums Solved: Common Problems & Fixes
Why Are My Cream Puffs Dense or Not Puffing?
This common issue is most often due to insufficient drying of the choux dough. Ensure you cook the dough in the saucepan for the full 2-3 minutes, pressing it against the sides, until a thin film forms on the bottom of the pan.
Another culprit can be adding the eggs when the dough is too hot. Hot dough can prematurely cook the eggs, hindering their ability to emulsify properly and contribute to the puff’s rise. Always allow the dough to cool to a comfortably warm temperature before adding eggs.
My Puffs Collapsed After Baking! What Happened?
Cream puffs are sensitive to sudden temperature changes. They often collapse if the oven door is opened during baking, or if they are removed from the oven too quickly.
The crucial fix for preventing collapse is the “oven door trick.” After baking, turn off the oven, prop the door open slightly with a wooden spoon, and leave the puffs inside for an additional 10-15 minutes. This gradual cooling allows them to dry out slowly and maintain their structure.
Skin on Pastry Cream? Preventing Common Filling Issues.
A skin forms on pastry cream when its surface is exposed to air as it cools. To prevent this, always cover the surface of your lemon pastry cream directly with plastic wrap as soon as it’s transferred to a bowl for chilling.
If your pastry cream isn’t thickening as expected, ensure you are whisking constantly over medium heat and boiling it for the full minute once it thickens. Cornstarch requires sufficient heat and time to fully activate its thickening properties.
Beyond the Recipe: Expert Tips for Lemon Cream Puff Success
-
Don’t Skip the Dough Drying Step: This is arguably the most critical part of making choux pastry. Thoroughly cooking the dough in the saucepan ensures enough moisture evaporates, allowing the steam to create those perfect hollow centers when baked. It’s the secret to light, airy puffs.
-
Eggs Must Be Incorporated One at a Time: Adding eggs slowly and ensuring each is fully absorbed before adding the next is vital for a smooth, homogenous dough. This process creates the perfect emulsification, crucial for a dough that puffs evenly and beautifully.
-
Resist Opening the Oven Door: During the initial baking stages, especially the first 15-20 minutes, opening the oven door can cause your puffs to deflate prematurely due to a sudden temperature drop. Trust the process and keep the heat locked in for optimal rise.
-
Chill Your Pastry Cream Thoroughly: A well-chilled pastry cream is not only easier to pipe or spoon into the shells but also has a superior, firm texture and a more intensely developed flavor. Don’t rush this step, as proper chilling is key to the overall experience.
-
Use Cold Ingredients for Whipped Cream: Ensure your heavy cream, mixing bowl, and beaters are all very cold before you begin whipping. This significantly helps in achieving stiff peaks quickly and creates a more stable, voluminous whipped cream that holds its shape beautifully.
Enjoying & Preserving Your Lemon Cream Puffs
Presentation & Serving Suggestions
Dust your Lemon Cream Puffs generously with powdered sugar just before serving for a simple yet elegant finish. They are perfect on their own as a delightful dessert or a sophisticated afternoon tea treat.
For an added touch, consider serving them alongside a medley of fresh berries or a light fruit compote. Arranging them on a tiered dessert stand creates an impressive focal point for any gathering.
Prep Ahead: Smart Strategies for Entertaining
The baked choux pastry shells are incredibly versatile for make-ahead convenience. You can bake them completely, cool them, then store them in an airtight container at room temperature for up to 2 days, or freeze them for up to a month.
To refresh frozen shells, simply re-crisp them in a 300°F (150°C) oven for 5-10 minutes. The lemon pastry cream can also be made 1-2 days in advance and kept refrigerated, ensuring it’s covered tightly with plastic wrap directly on its surface to prevent a skin from forming.
For the freshest taste and best texture, whip the cream just before you are ready to assemble and serve your cream puffs.
Keeping Them Fresh: Storage Guidelines
Assembled Lemon Cream Puffs are truly at their best when enjoyed on the day they are made. The shells will gradually soften over time due to the moisture from the filling.
If you happen to have leftovers, store them in an airtight container in the refrigerator for up to 1 day. For optimal freshness and texture, it’s always recommended to store the baked shells and fillings separately and assemble them just before serving.
Your Lemon Cream Puffs Questions Answered
Can I Make Lemon Cream Puffs Gluten-Free?
Yes, it’s often possible to substitute a good quality all-purpose gluten-free flour blend for the regular flour in the choux pastry. Look for blends specifically designed for baking that contain xanthan gum, as this helps with structure.
While the texture might vary slightly from traditional choux, successful gluten-free cream puffs are definitely achievable with careful attention to consistency.
Are There Other Filling Options I Can Use?
Absolutely! While the lemon pastry cream is undeniably delightful, cream puffs are incredibly versatile. You can use classic vanilla pastry cream, rich chocolate pastry cream, or simply a dollop of sweetened whipped cream. For an alternative that still focuses on perfect shells, you might enjoy exploring recipes like easy cream puffs that never collapse.
Berry compotes or even a light fruit curd can also make fantastic, vibrant fillings. Feel free to experiment with your favorite flavors and textures.
Can I Freeze the Baked Cream Puff Shells?
Yes, baked and completely cooled choux pastry shells freeze exceptionally well, making them perfect for meal prep or entertaining. To freeze, arrange them in a single layer on a baking sheet until solid, then transfer them to a freezer-safe bag or airtight container.
They can be stored in the freezer for up to 1 month. When ready to use, thaw them at room temperature for a short while, then re-crisp them in a warm oven (around 300°F/150°C) for a few minutes before filling.
What If My Dough Is Too Runny After Adding Eggs?
If your choux dough becomes too runny after adding the eggs, it typically indicates that you’ve added too much egg, or that the eggs weren’t thoroughly incorporated one at a time, leading to an overly loose consistency. Unfortunately, once the dough is too thin, it’s very difficult to correct.
For your next batch, try adding the eggs very gradually, perhaps reserving a tiny bit of the last egg, and observe the dough’s consistency carefully to ensure it’s thick enough to slowly fall from a spoon in a v-shape.
Ready to Indulge? Share Your Lemon Cream Puffs Masterpiece!
With this comprehensive guide and our insider tips, you’re now equipped to create Lemon Cream Puffs that are not just desserts, but triumphs of texture and flavor. Say goodbye to dense shells and hello to perfectly hollow, light-as-air pastries bursting with zesty lemon and delicate cream.
We encourage you to embark on this delightful baking journey and share your stunning creations with us. Whether it’s for a special occasion or simply a treat for yourself, these Lemon Cream Puffs are sure to impress and bring smiles.
Happy baking, and enjoy every exquisite bite!
Lemon Cream Puffs
Course: DessertCuisine: French cuisineDifficulty: easy10
cream puffs45
minutes35
minutes60
minutesFrench cuisine
Ingredients
For the Choux Pastry:
1 cup water
1/2 cup unsalted butter, cubed
1/4 teaspoon salt
1 teaspoon granulated sugar
1 cup all purpose flour
4 large eggs
For the Lemon Pastry Cream:
1/2 cup granulated sugar
1/4 cup cornstarch
Pinch of salt
2 large egg yolks
1 1/2 cups milk
2 tablespoons unsalted butter
1/4 cup fresh lemon juice
1 tablespoon lemon zest
For the Whipped Cream:
1 cup heavy cream, very cold
2 tablespoons powdered sugar
1/2 teaspoon vanilla extract
For Dusting:
Powdered sugar
Directions
- Prepare the Choux Pastry:
- Preheat oven to 400°F (200°C). Line two baking sheets with parchment paper.
- In a medium saucepan, combine water, butter, salt, and granulated sugar. Bring to a rolling boil over medium heat, ensuring the butter is fully melted.
- Remove from heat and immediately add the flour all at once. Stir vigorously with a wooden spoon until a smooth ball of dough forms.
- Return the saucepan to medium heat. This is the key to hollow puffs! Continue to cook and stir the dough for 2-3 minutes, pressing it against the sides of the pan. You will see a thin film form on the bottom of the pan and the dough will become less sticky. This step thoroughly dries out the dough, which is essential for it to puff up properly.
- Transfer the dough to a large bowl or the bowl of a stand mixer. Let it cool for 5 minutes, stirring occasionally, until it’s warm but not hot to the touch (you should be able to comfortably touch it).
- Add the eggs one at a time, beating well after each addition until fully incorporated and the dough is smooth and glossy. The dough should be thick but fall slowly from a spoon in a v-shape.
- Spoon the dough into a large piping bag fitted with a large round tip (or use two spoons). Pipe 2-inch mounds onto the prepared baking sheets, leaving about 2 inches between them.
- Bake the Puffs:
- Bake for 15 minutes at 400°F (200°C). Without opening the oven door, reduce the oven temperature to 350°F (175°C) and continue to bake for another 20 minutes, or until deeply golden brown and firm.
- Crucial for preventing collapse and ensuring hollowness: Turn off the oven, prop the oven door open slightly with a wooden spoon, and leave the puffs inside for an additional 10-15 minutes. This allows them to slowly cool and dry out, preventing them from collapsing as they come out of the heat.
- Remove from the oven and transfer to a wire rack to cool completely.
- Make the Lemon Pastry Cream:
- In a medium saucepan, whisk together granulated sugar, cornstarch, and salt.
- In a separate bowl, whisk egg yolks. Slowly whisk the milk into the egg yolks.
- Pour the egg yolk mixture into the saucepan with the sugar mixture. Whisk constantly over medium heat until the mixture thickens significantly and comes to a gentle boil, about 5-7 minutes. Boil for 1 minute, stirring.
- Remove from heat. Stir in the butter, lemon juice, and lemon zest until smooth.
- Transfer the pastry cream to a bowl, cover the surface directly with plastic wrap to prevent a skin from forming, and refrigerate until completely chilled, at least 2 hours.
- Make the Whipped Cream:
- In a cold bowl with cold beaters, whip the heavy cream, powdered sugar, and vanilla extract on medium high speed until stiff peaks form.
- Assemble the Cream Puffs:
- Once the cream puffs are completely cool, gently slice each one horizontally in half or make a small hole in the bottom.
- Spoon or pipe the chilled lemon pastry cream into the bottom half of each puff.
- Pipe or spoon a dollop of whipped cream on top of the lemon pastry cream.
- Place the top half of the puff back on. Dust generously with powdered sugar just before serving. Enjoy your perfectly hollow, delightful cream puffs!
Notes
- Ensure choux pastry is thoroughly dried on the stove and cooled slowly in the oven to prevent collapse and ensure hollow centers.