
Nothing kills the vibe at game day like soggy loaded beef nachos. You pile on toppings, and bam, those chips turn into a mushy mess in minutes. But here’s the fix: bake the chips, beef, and cheese first to create a crispy seal that locks out moisture.
Therefore, this method keeps every bite crunchy and loaded with flavor. You get that perfect contrast of hot, melty cheese against cool, fresh toppings. In addition, it takes just minutes to pull off.
The secret lies in that quick 5-7 minute bake at 400°F. The cheese melts into a barrier, while the heat crisps the chips underneath. Trust me, you’ll never go back to sad nachos.
Why Loaded Beef Nachos Demand Precision Layering
The Soggy Chip Crisis Explained
Traditional loaded beef nachos fail because wet toppings like tomatoes and sour cream seep into the chips right away. Moisture penetrates fast, turning crunch into chewiness. However, this recipe flips the script with a bake-first approach.
First, you layer chips, beef, and cheese, then bake. That melted cheese acts as a shield. Consequently, fresh toppings go on last, staying crisp while the base stays hot and crunchy.
Picture loaded beef nachos where every chip holds its shape. No more sliding toppings or limp bites. This precision layering delivers beef nachos perfection every time.
Key to Ultimate Crunch in Every Bite
The 5-7 minute bake melts cheese into a bubbly seal over the beef and chips. Heat crisps the tortilla edges slightly, boosting texture. You’ll smell that savory aroma filling your kitchen.
Moreover, 400°F ensures even melting without burning. Pull them out when edges bubble. That signals the perfect moisture lock for loaded beef nachos that stay crunchy.
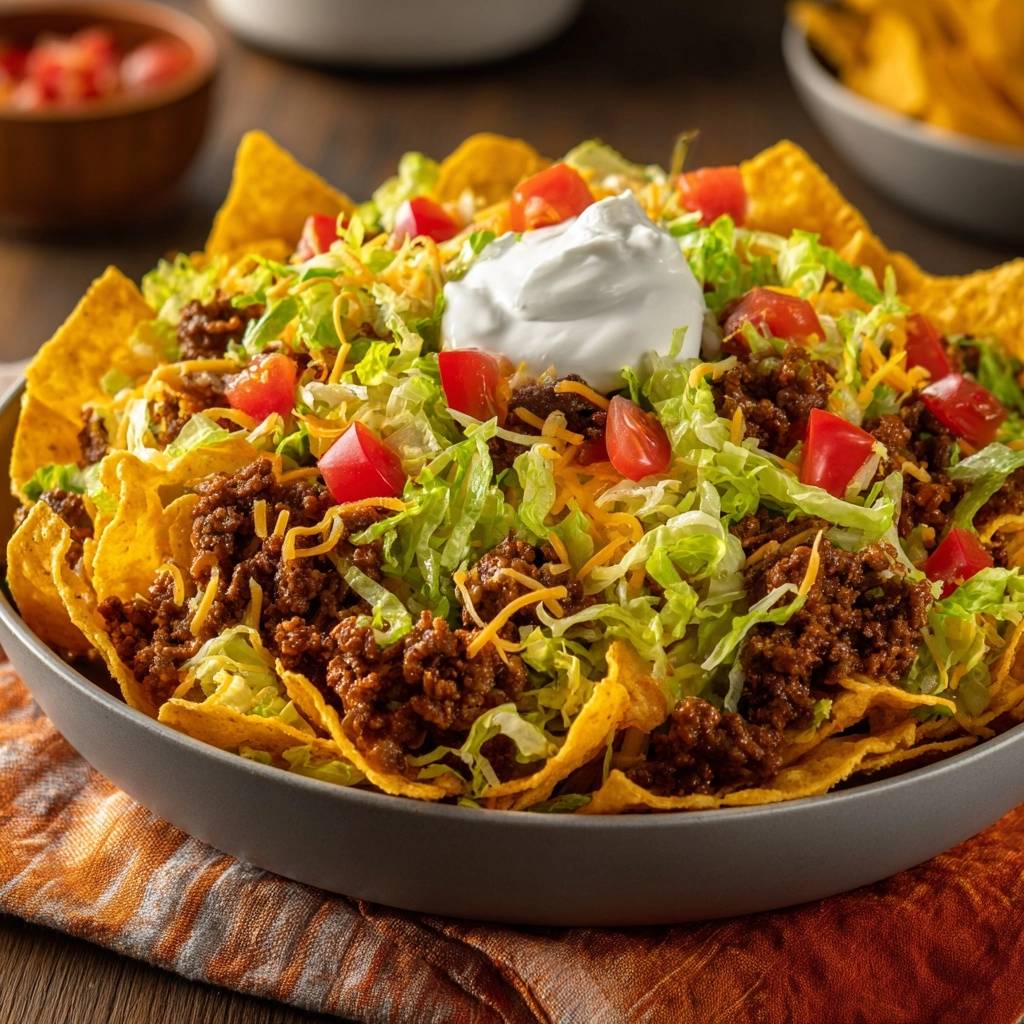
Essential Components for Loaded Beef Nachos
Browning Ground Beef to Taco Perfection
Start with 1 pound of 80/20 ground beef for the best beef nachos base. The fat renders flavor without greasiness once drained. Grass-fed adds a richer taste, but conventional works fine too.
Cook over medium heat until browned and crumbled, about 6-7 minutes. Tilt the skillet to drain fat, or use paper towels. This keeps your loaded beef nachos from getting oily.
Tortilla Chips and Shredded Cheddar Selection
Grab 8 ounces of sturdy, restaurant-style tortilla chips. They hold up under beef and cheese in loaded beef nachos. Thicker ones prevent breakage.
Shred 2 cups of sharp cheddar yourself. Its acidity cuts through richness and melts smoothly. Pre-shredded has starch that clumps, so skip it for even coverage.
Fresh Toppings: Lettuce, Tomatoes, Sour Cream
Use 2 cups shredded iceberg lettuce for snap. Dice 2 cups Roma tomatoes; they release less water. Dollop 1 cup sour cream last for creaminess.
Add these post-bake only. That keeps loaded beef nachos fresh and crunchy. A pinch of salt on tomatoes boosts flavor without sogginess.
Taco Seasoning and Water Simmer Mechanics
One packet taco seasoning brings cumin and chili powder synergy to the beef. Stir in 1/4 cup water after browning. Simmer 2-3 minutes to thicken.
This coats every bit without excess liquid. Packets save time over homemade, but either way, it infuses bold taste. Your loaded beef nachos will pop.
Science of Crispy Loaded Beef Nachos Baking
How Cheese Seals Against Moisture Intrusion
At 400°F, cheese proteins form a hydrophobic matrix over chips and beef. It blocks steam and juices from toppings. Maillard reaction browns edges for extra crisp.
Bubbling means proteins have set, creating the seal. Therefore, loaded beef nachos resist sogginess even after topping. Physics keeps crunch intact.
Pro tip: watch for golden bubbles, not just melting. That ensures the barrier holds through every loaded bite.
Heat Transfer in Beef Nachos Layers
Spread chips in a single layer for even conduction. Parchment or foil insulates the sheet, preventing direct burn. Heat rises uniformly to melt cheese fast.
Time it to 5-7 minutes max. Longer risks over-crisping chips. This balance gives loaded beef nachos ideal texture.
Step-by-Step: Building Loaded Beef Nachos
Prepping Oven and Baking Sheet Base
Preheat to 400°F. Line a large baking sheet with parchment or foil. This prevents sticking and simplifies cleanup for loaded beef nachos.
Use a big sheet to avoid crowding. Chips need space for even baking.
Cooking and Seasoning the Beef Layer
Heat skillet to medium. Crumble in beef, stirring until browned, 6-7 minutes. Drain fat by tilting or patting dry.
Stir in taco seasoning and water. Simmer until thickened; it smells amazing. Set aside for layering.
Layering Chips, Beef, and Cheese Evenly
Arrange chips in a single layer on the sheet. Spoon beef evenly over them. Sprinkle cheese to cover fully.
Even distribution ensures no bare spots. You’ll see uniform melt ahead.
Baking for the Crispy Seal
Bake 5-7 minutes until cheese bubbles. Edges might brown lightly. Avoid broiling; it burns fast.
Post-Bake Fresh Topping Assembly
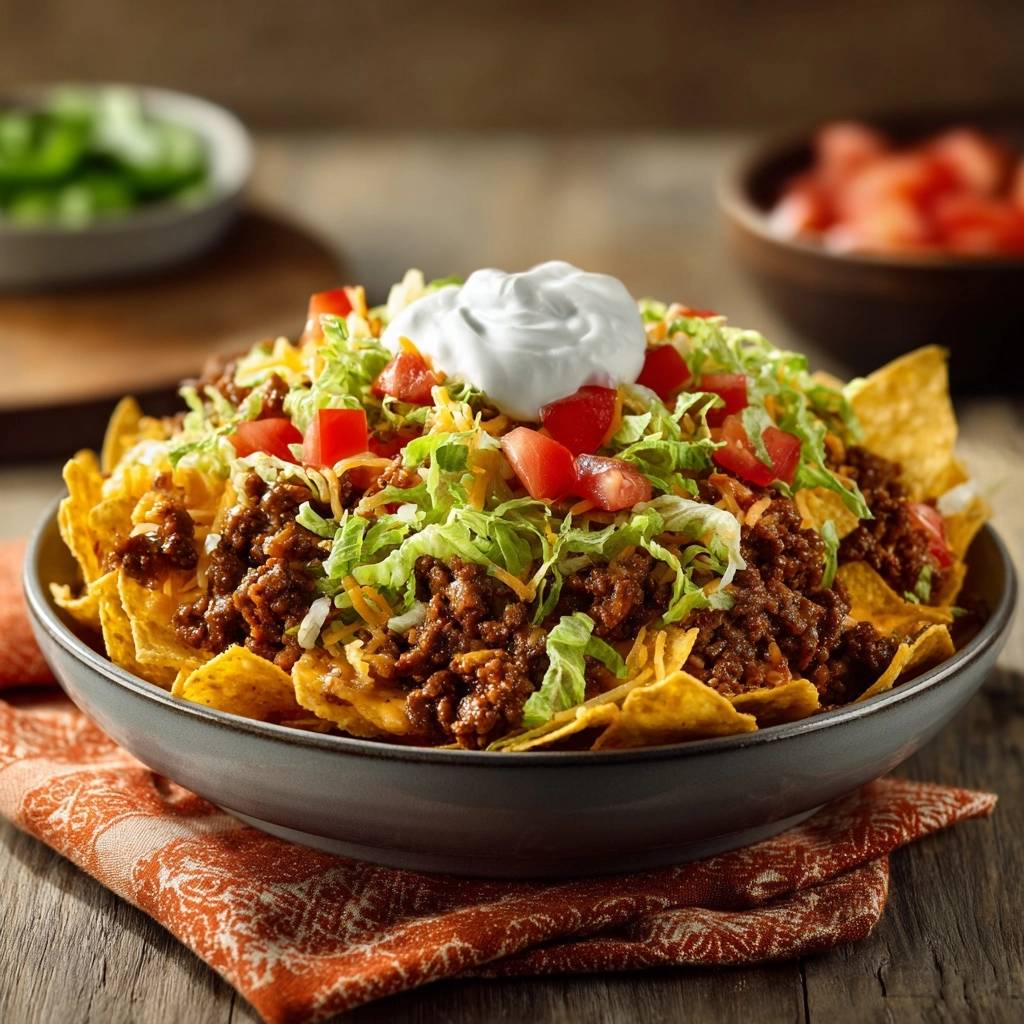
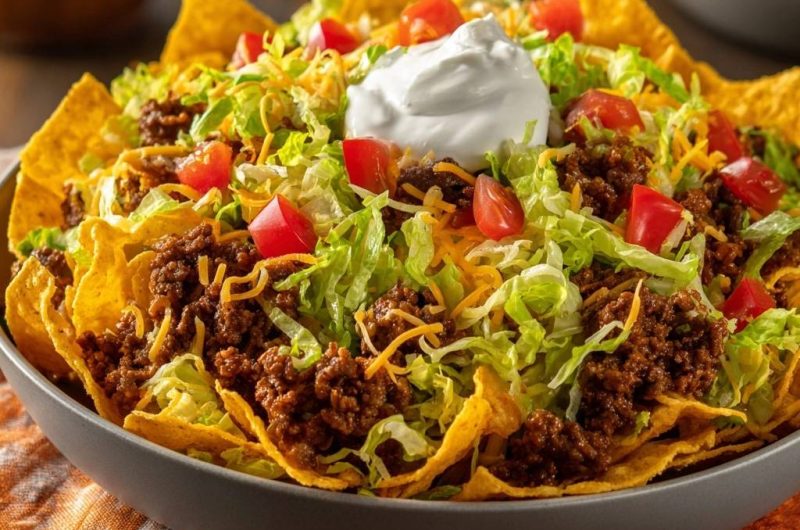
Top immediately with lettuce, tomatoes, and sour cream dollops. Serve right away. Crunch hits peak now.
Plate family-style for sharing. Dig in while hot.
Avoiding Common Loaded Beef Nachos Pitfalls
Overloading Chips Causes Structural Failure
Don’t pile too much beef or cheese per ounce of chips. Layers tilt and collapse. Stick to even spoons for stability.
If overloaded, chips snap under weight. Balance keeps loaded beef nachos intact.
Skipping the Drain Leads to Greasy Bites
Always drain beef fat. Undrained oil pools, making cheese greasy. Tilt skillet over a bowl or use towels.
This step ensures clean melts and crisp layers.
Topping Too Early Ruins Crispiness
Moisture migrates in seconds if added pre-bake. Wait until out of oven. Chill toppings first for best contrast.
Flavor Variations for Loaded Beef Nachos
Spicy Jalapeño and Pepper Jack Twists
Add 1/2 cup pickled jalapeños over beef before cheese. Swap half cheddar for pepper jack. It melts great with heat.
Scale spice by slicing thin. Brings fire to loaded beef nachos without overwhelming.
Vegetarian Black Bean Substitutes
Swap beef for 15 oz rinsed black beans. Simmer with extra cumin for meaty texture. Drain well to match.
Perfect for loaded veggie nachos. Crunch stays the same.
Guacamole and Pico de Gallo Upgrades
Mash avocado with lime, onion, cilantro for guac. Chop Roma tomatoes, onion, jalapeño for pico. Add post-bake.
These elevate freshness in loaded beef nachos.
Perfect Pairings for Loaded Beef Nachos
Chilled Beverages That Complement Crunch
Iced tea cuts through cheese richness. Soda’s fizz refreshes. Horchata adds creamy contrast.
Skip hot drinks; they wilt toppings fast.
Simple Sides to Round Out the Plate
Cucumber slices bring cool crunch. Corn salad adds sweet pop. Fruit skewers balance hearty flavors.
Make-Ahead Strategies for Loaded Beef Nachos
Prepping Beef and Chips in Advance
Cook beef up to 3 days ahead; store airtight in fridge. Keep chips sealed to stay crisp. Assemble and bake fresh.
Reheats ruin texture, so final bake is key.
Freezing Components Without Quality Loss
Freeze cooked beef up to 2 months in bags. Shred cheese fresh. Thaw beef overnight, then layer and bake.
Never freeze assembled nachos or toppings.
Troubleshooting Loaded Beef Nachos Issues
Cheese Not Melting Evenly?
Shred finer and cover fully. Check oven hotspots; rotate sheet. Fresh cheese melts best.
Beef Mixture Too Dry or Runny?
Adjust water to 3 tbsp if runny; simmer longer. Use 85/15 beef for moisture balance.
Chips Burning on Edges?
Drop to 375°F, use middle rack. Foil edges if needed. Watch closely past 5 minutes.
Toppings Wilting Too Fast?
Stick to iceberg; chill before adding. Serve promptly to loaded beef nachos.
Frequently Asked Questions About Loaded Beef Nachos
Can I Use Oven Instead of Skillet for Beef?
Yes, spread beef on a sheet pan at 400°F for 10-12 minutes, stirring once. Drain fat after. It works but skillet browns better for flavor.
How to Scale for Larger Crowds?
Double ingredients; use two sheets. Rotate midway for even bake. Serves 8-10 easily without sogginess.
Best Chips for Maximum Crispiness?
Thick corn tortilla chips like restaurant-style hold best. Avoid thin or flour; they sog quick. Test for sturdy snap.
Make It Dairy-Free?
Use vegan cheddar shreds and cashew-based sour cream. They melt decently at 400°F. Add a tsp oil for smoothness.
Storage Leftovers Without Sogginess?
Store baked base and toppings separately airtight in fridge up to 2 days. Re-crisp base at 350°F for 3-5 minutes; add fresh toppings. Don’t freeze full nachos; chips get chewy.
Why Are My Nachos Still Soggy?
Common issue: toppings added too early or overcrowded layers. Bake cheese fully first, use single chip layer, top post-oven. Drain beef well too.
Can I Substitute Ground Turkey for Beef?
Yes, turkey works; use 93/7 lean to mimic fat flavor. Brown same way, add extra taco seasoning for boldness. Texture stays crisp.
Loaded Beef Nachos
Course: AppetizerCuisine: AmericanDifficulty: easy4
servings15
minutes15
minutes30
MinutesAmerican
Ingredients
1 pound ground beef
1 packet taco seasoning mix
1/4 cup water
8 ounces tortilla chips
2 cups shredded cheddar cheese
2 cups shredded lettuce
2 cups diced tomatoes
1 cup sour cream
Directions
- Preheat oven to 400 degrees F. Line a large baking sheet with parchment paper or foil for easy cleanup.
- In a skillet over medium heat, cook ground beef until browned and crumbled, about 6-7 minutes. Drain excess fat. Stir in taco seasoning and water. Simmer 2-3 minutes until thickened. Remove from heat.
- Spread tortilla chips evenly in a single layer on the baking sheet. Spoon cooked beef evenly over chips, then sprinkle shredded cheddar cheese over everything.
- Bake for 5-7 minutes until cheese is fully melted and bubbly. This key step seals the chips with melted cheese, locking out moisture for guaranteed crispiness.
- Remove from oven. Immediately top with shredded lettuce, diced tomatoes, and dollops of sour cream. Serve right away for the ultimate crunch. No sogginess, ever!
Notes
- Bake cheese onto chips and beef first to seal out moisture and prevent sogginess. Serve immediately for maximum crunch.


