
You’ve likely experienced the heartbreak of a beautiful cream puff that turns into a mushy, limp mess within twenty minutes of assembly. It’s the ultimate pastry frustration where the moisture from the cream migrates into the dough, destroying that coveted crunch. These Caramel Cream Puff Pastry Squares solve that problem entirely by using a professional moisture-barrier technique that keeps the pastry shatteringly crisp for hours.
The secret lies in a specific sugar-caramelization method that creates a glass-like shield on the surface of the dough. When you bite through the layers, you get an immediate, graphic snap followed by the velvet-smooth embrace of a stabilized cream filling. It’s a sophisticated play on textures that feels like it came straight from a high-end French patisserie, yet you can achieve it in your own kitchen with a few clever tricks.
I’ve found that the real key to success isn’t just the ingredients, but the temperature control of your sugar. By “searing” the sugar onto the hot pastry, you create a hydrophobic barrier that prevents the cream from ever touching the actual dough. This ensures that even if you make these an hour before your guests arrive, they’ll still have that signature crackle when someone takes their first bite.
The Physics of Flakiness: Why Pastry Fails
Puff pastry is a marvel of engineering, relying on hundreds of thin layers of fat trapped between layers of dough. When it hits the oven, the water in the fat turns to steam, pushing those layers apart to create a light, airy structure. However, that same porous structure acts like a sponge the moment it comes into contact with a high-moisture filling like whipped cream.
Through a process similar to osmosis, the water in the cream naturally wants to move into the dry, thirsty layers of the pastry. This is why most Napoleons or cream squares become chewy and tough shortly after they’re built. By introducing a “glass shield” of caramelized sugar, we physically block that moisture migration, preserving the structural integrity of every single flake.
Essential Components for Caramel Cream Puff Pastry Squares
Quality matters immensely when you’re working with so few ingredients. For the filling, you need heavy whipping cream with at least 36% milk fat to ensure it holds its shape. If the fat content is too low, your mousse will be runny and won’t provide the necessary height to support the top pastry square.
Your cream cheese acts as the anchor for the filling, so make sure it’s completely softened to room temperature before you start. If it’s even slightly cold, you’ll end up with tiny lumps that ruin the silky mouthfeel. For the vanilla, skip the imitation stuff and go for a high-quality extract or even vanilla bean paste to get those beautiful dark specks throughout the cream.
Selecting the Right Puff Pastry
When shopping, look for an all-butter puff pastry rather than one made with vegetable shortening. Butter has a lower melting point, which results in a cleaner “shatter” and a much richer flavor profile. Ensure the pastry is thawed but still very cold to the touch; if the butter starts to melt before it hits the oven, the layers will stick together and fail to rise properly.
The Role of Granulated Sugar in Structural Integrity
In this recipe, granulated sugar isn’t just a sweetener—it’s a construction material. When the sugar melts in the final stages of baking, it undergoes a chemical change that turns it into a hard, water-repelling glaze. This layer is what protects the pastry from the cream, acting as a literal raincoat for your dessert.
The Compressed Baking Method for Uniform Squares
To get those perfectly flat, professional-looking squares, we use the “Double Tray” technique. By placing a second baking sheet directly on top of the pastry squares, you limit their vertical rise. This forces the layers to compress into a dense, ultra-crispy wafer that is much easier to eat than a giant, messy puff.
You’ll want to bake them under the weight for about 12 to 15 minutes. When you lift the top tray, the pastry should be pale gold and set in its flat shape. If they still look a bit doughy in the center, give them another minute or two before moving on to the sugar-searing step, as the weight is what ensures that uniform, elegant look.
Step-by-Step: Executing the Sugar-Sear Moisture Barrier
Once the squares are flat and par-baked, sprinkle a thin, even layer of granulated sugar over each one. Return them to the oven uncovered and watch them like a hawk. You are looking for the sugar to melt and turn a deep amber brown, which usually takes about 3 to 5 minutes depending on your oven’s hot spots.
Be careful not to let the sugar go too dark, as it can turn bitter very quickly. As soon as it looks like bubbling liquid gold, pull the tray out. As the squares cool on a wire rack, that liquid sugar will harden into a brittle, glass-like surface. This is the most critical step for ensuring your pastry stays crunchy for hours.
Creating the Stabilized Mousse Filling
The filling is a hybrid between a cheesecake and a whipped cream, known as a stabilized mousse. You’ll want to beat the cream cheese and powdered sugar until they are completely smooth and aerated. In a separate, chilled bowl, whip your heavy cream until it forms stiff peaks that stand straight up when you lift the whisk.
The “folding” technique is vital here. Use a rubber spatula to gently cut through the center of the mixture and fold the bottom over the top. Do not stir vigorously, or you’ll deflate all the air you just whipped into the cream. The goal is a filling that is light as air but sturdy enough to hold up the weight of the top pastry square without bulging out the sides.
Achieving Stiff Peaks Without Over-Whipping
Watch your cream closely as it thickens. Soft peaks will slump over when the whisk is lifted, while medium peaks will hold their shape but the tips will curl. You want stiff peaks, where the cream stands firm and upright. If you go too far, the cream will look grainy and start to turn into butter, so stop the mixer the moment it looks matte and solid.
The Caramel Core: Viscosity and Temperature
For the center of these squares, use a high-quality sea salt caramel that is thick and chilled. If the caramel is room temperature, it will likely run right off the sides of the cream. A cold, viscous caramel stays exactly where you put it, providing a concentrated burst of flavor in every bite without making a mess of your presentation.
Assembly Architecture: Layering for Longevity
When you’re ready to build, place one pastry square glazed-side up on your plate. Pipe a generous mound of the cream mousse, then create a small well in the center for the caramel. This “well” technique helps keep the caramel contained so it doesn’t leak out when you place the top layer on.
The most important part of assembly is placing the top square glazed-side down. This means the sugar-seared side is the one touching the caramel and cream. By sandwiching the moist fillings between two waterproof sugar barriers, you ensure that the exterior of the pastry remains dry and crisp while the interior stays luscious.
Troubleshooting Common Pastry Pitfalls
If your sugar didn’t melt evenly, your oven might have hot spots. Try rotating the pan halfway through the searing process next time. If the sugar stays sticky rather than hardening, it likely didn’t reach a high enough temperature to fully caramelize, or your kitchen is very humid. You can usually fix this by popping them back into a hot oven for sixty seconds.
If your cream starts to weep or lose its shape, it usually means the cream cheese wasn’t beaten enough or the whipped cream was too soft. Always ensure your heavy cream is ice-cold before whipping, as warm cream will never reach the proper stability. If the caramel is sliding out, simply chill the assembled squares for 15 minutes to help everything set.
Make-Ahead Strategies and Storage Logistics
While these are best served within a few hours of assembly, you can absolutely prep the components in advance. Store the baked and glazed pastry squares in an airtight container at room temperature for up to two days. Do not refrigerate the plain shells, as the moisture in the fridge will soften the sugar glaze.
The cream filling can be made a day ahead and kept in the refrigerator. When you’re ready to serve, just do a quick assembly. I don’t recommend freezing the fully assembled squares because the cream texture will change, but you can freeze the unbaked pastry squares and bake them fresh whenever a craving hits.
Flavor Variations and Seasonal Adaptations
Once you master the base recipe, you can get creative with the flavors. Try folding a teaspoon of instant espresso powder into the cream for a mocha version, or add a pinch of cardamom for a warm, spicy twist. In the summer, a thin layer of raspberry jam underneath the caramel adds a beautiful tartness that cuts through the richness.
For a more decadent version, you can drizzle the finished squares with a bit of melted dark chocolate. The bitterness of the chocolate balances the sweetness of the caramel perfectly. You could even swap the vanilla extract for almond extract and top the squares with toasted sliced almonds for extra crunch.
Expert Tips for Professional Presentation
To get that iconic look, don’t be shy with the powdered sugar dusting at the end. Use a fine-mesh sieve and coat the tops heavily until they look like they’ve been caught in a snowstorm. This provides a beautiful contrast to the dark caramel peeking out from the sides.
If you want perfectly clean edges, you can assemble one large rectangle and then cut it into squares using a very sharp serrated knife. Use a gentle sawing motion rather than pressing down, which would crush the delicate layers. Garnish with a tiny pinch of fleur de sel on top of the cream to really make the caramel flavors pop.
Frequently Asked Questions
Can I use homemade rough-puff pastry?
You certainly can, and the flavor will be outstanding. However, keep in mind that homemade pastry often has more irregular rising patterns than commercial versions. If you use homemade, you may need to use a slightly heavier weight during the compressed baking phase to ensure the squares stay perfectly flat and uniform for the sugar-sear step.
Why did my sugar layer turn sticky instead of hard?
This usually happens due to high humidity in the kitchen or because the sugar didn’t quite reach the “hard crack” stage in the oven. If the sugar is just melted but not slightly caramelized, it will remain tacky. To fix this, ensure your oven is fully preheated to 400°F and wait until you see the sugar bubbling and turning a distinct golden-brown before removing it.
Is there a substitute for cream cheese in the filling?
Mascarpone is an excellent substitute if you want a richer, more buttery flavor. It has a higher fat content than cream cheese and provides a very sophisticated, silky texture. Since mascarpone is less tangy than cream cheese, you might want to reduce the powdered sugar by a tablespoon to keep the sweetness in balance.
How do I prevent the caramel from being too sweet?
The best way to balance the sweetness is to use a “salted” caramel or to cook your own caramel until it reaches a deep, dark amber color. The slight bitterness of a dark caramel provides a necessary counterpoint to the powdered sugar and cream. Additionally, adding a tiny pinch of salt directly into the cream cheese mixture can help cut through the sugar.
What is the best way to serve these at a party?
For the best experience, I recommend a “Last Minute Assembly” approach. Have your pastry squares glazed and ready in a container, and your cream and caramel in piping bags in the fridge. You can assemble a dozen of these in under five minutes right before serving, which guarantees that every guest gets the maximum “shatter” from the pastry.
Caramel Cream Puff Pastry Squares
Course: DessertCuisine: French InspiredDifficulty: easy8
servings20
minutes20
minutes40
Minutes340
kcalFrench Inspired
Ingredients
1 sheet frozen puff pastry, thawed but cold
1/2 cup granulated sugar (for caramelizing)
1 cup heavy whipping cream, chilled
4 ounces cream cheese, softened
1/4 cup powdered sugar
1 teaspoon vanilla extract
1/2 cup thick, high-quality sea salt caramel sauce (chilled)
Extra powdered sugar for dusting
Directions
- Preheat your oven to 400°F (200°C). Line a large baking sheet with parchment paper.
- Unfold the puff pastry and cut into 16 equal-sized squares. Place them on the baking sheet, leaving 1 inch of space between them.
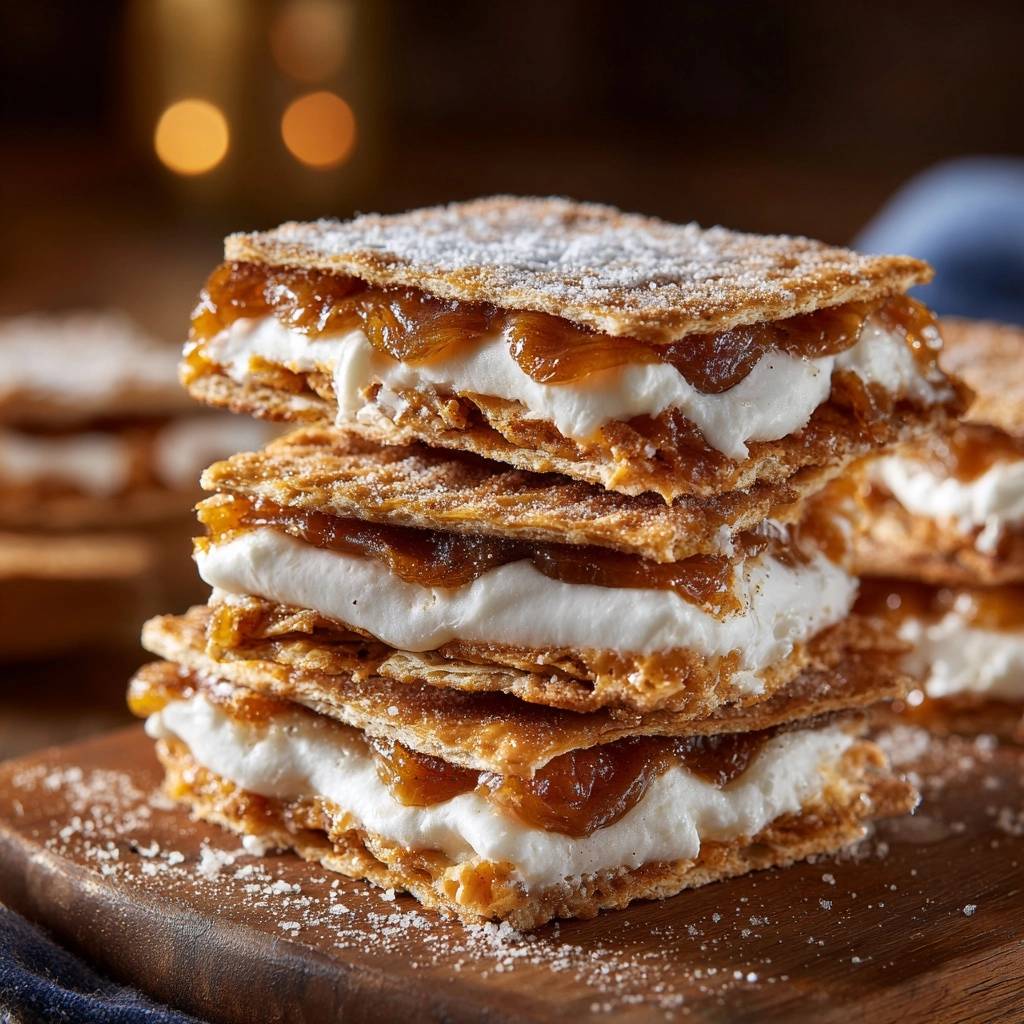
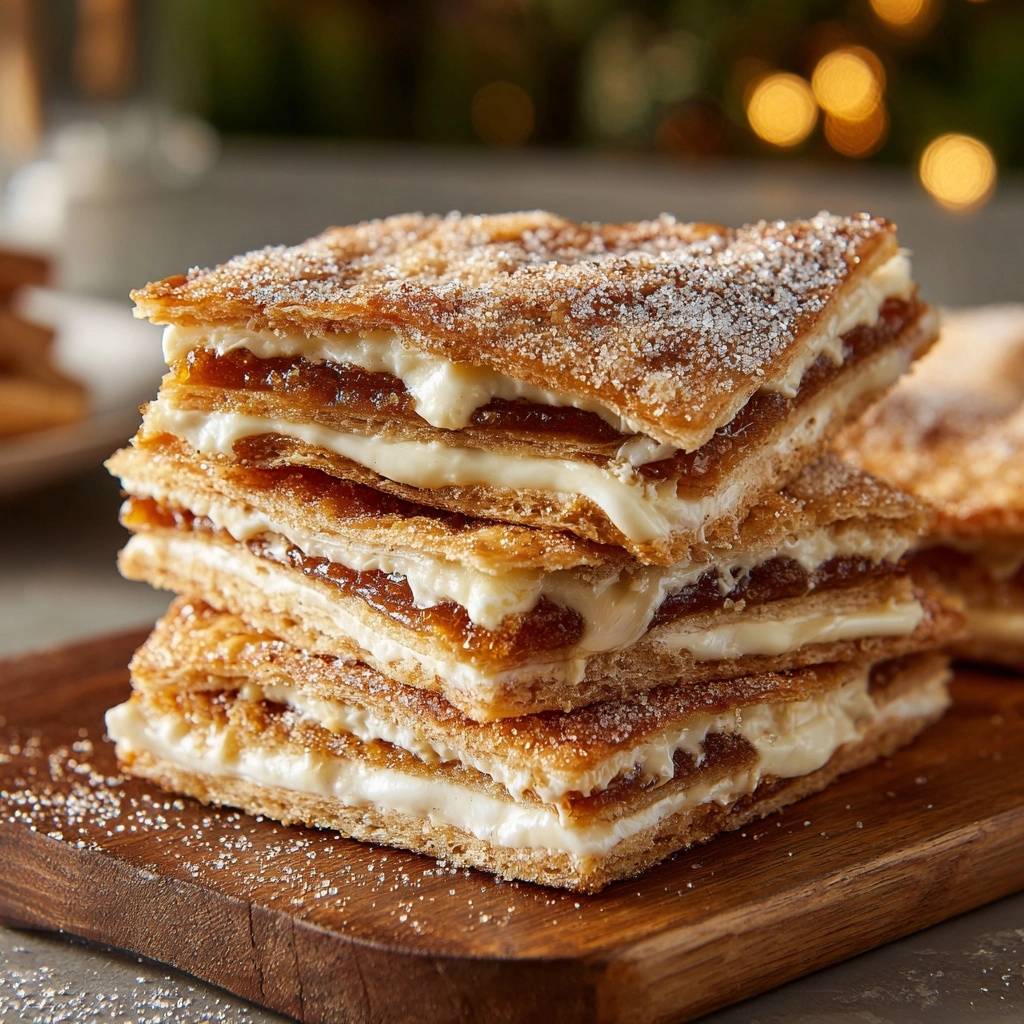
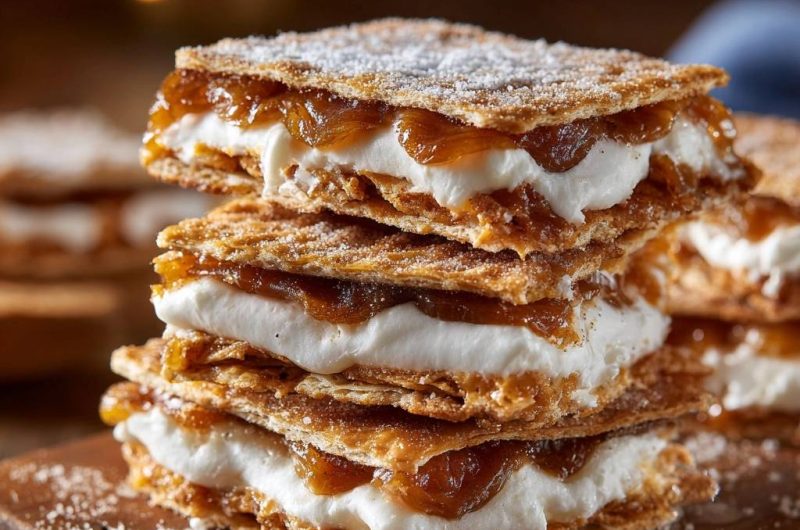
- To achieve the compressed, ultra-crispy texture shown in the image, place a second piece of parchment paper over the squares and weigh them down with a second baking sheet.
- Bake for 12-15 minutes under the weight. Remove the top tray and the top layer of parchment.
- Sprinkle a thin, even layer of granulated sugar over the hot pastry squares. Return to the oven (uncovered) for 3-5 minutes, or until the sugar has melted into a golden-brown, bubbling glaze. This “sugar-sear” creates the waterproof barrier. Let the squares cool completely on a wire rack until the glaze is hard and glass-like.
- In a medium bowl, beat the softened cream cheese, powdered sugar, and vanilla until smooth. In a separate bowl, whip the heavy cream to stiff peaks. Gently fold the whipped cream into the cream cheese mixture. This creates a stabilized mousse that won’t weep or soften the pastry.
- To assemble, take one glazed pastry square (glaze side up). Pipe or spread a thick, even layer of the cream mixture.
- Spoon a generous layer of thick caramel sauce over the cream. The caramel should be thick enough to hold its shape at the edges as seen in the image.
- Top with a second pastry square, glazed side down (facing the caramel). This ensures the moisture from the filling is trapped between two waterproof sugar barriers.
- Dust the tops heavily with powdered sugar. Serve immediately or chill; the sugar-sear method ensures these remain crunchy for several hours.
Notes
- The secret to the anti-soggy bottom is the sugar-sear method which creates a glass-like shield. Ensure the caramel sauce is high quality and chilled to maintain the structure of the layers.


