
We’ve all been there. You pull a beautiful tray of breadsticks out of the oven, the cheese is bubbling, and the smell of garlic fills the kitchen. But the moment you lift one up, it flops over like a wet noodle, leaving a greasy puddle on the pan. It’s the ultimate heartbreak for any home cook.
The secret to a truly elite breadstick isn’t just the dough; it’s about moisture management and structural integrity. This recipe is a masterclass in the “Anti-Soggy Bottom” philosophy. We’re going to focus on high-heat searing and a specific layering technique that ensures every bite has a crisp, golden snap on the outside and a cloud-like crumb on the inside.
I’ve found that the biggest mistake people make is putting cold dough onto a cold pan. To get that restaurant-quality crunch, you have to treat your oven like a professional hearth. By using a preheated surface and a “dry-cheese barrier,” we’re going to transform standard pizza dough into something spectacular.
The Physics of the Perfect Breadstick Crunch
When dough hits a cold baking sheet, the fats in the butter and cheese have time to soak into the flour before the crust sets. This results in a heavy, oily texture. However, when you use a preheated surface, you trigger “Temperature Shock.”
This immediate blast of heat causes the moisture in the dough to turn into steam instantly. This steam pushes the dough upward, creating those airy pockets we love. Simultaneously, the high heat triggers the Maillard reaction, which is the chemical bridge between amino acids and reducing sugars that gives us that deep, savory browned flavor.
By setting the crust in the first sixty seconds of baking, we create a structural wall. This wall prevents the garlic butter from turning the bread into a sponge. Instead, the butter sits on the surface, infusing the crust with flavor without compromising the crunch.
Essential Components for Cheesy Garlic Breadsticks
Quality ingredients are the foundation of this dish. You’ll need one pound of pizza dough, and it must be at room temperature. Cold dough is stubborn; it snaps back when you try to roll it and bubbles unevenly in the heat.
We use unsalted butter here because it allows us to control the seasoning perfectly. When you use salted butter, you’re at the mercy of the manufacturer’s salt levels, which can often overpower the delicate sweetness of the dough. Freshly minced garlic is also a non-negotiable. While powder is convenient, fresh garlic has natural oils that mellow and sweeten as they roast in the oven.
Finally, don’t skip the fresh parsley. It might seem like a garnish, but the bright, peppery notes of fresh herbs are essential for cutting through the richness of the melted mozzarella and butter. It balances the palate and makes the whole dish feel lighter.
Selecting and Preparing Your Pizza Dough
Whether you’re using a store-bought ball of dough or a homemade recipe, the “room temperature” rule is your best friend. If the dough is cold, the yeast is dormant, and the gluten is tight. This leads to a dense, chewy breadstick that lacks that signature pillowy interior.
If you’re short on time and your dough is straight from the fridge, don’t panic. You can safely warm it by placing the sealed bag of dough in a bowl of lukewarm water for about 15 to 20 minutes. You’re looking for the dough to feel soft and supple to the touch, almost like a warm pillow.
Once it reaches about 70°F, the dough will be much easier to stretch into a perfect rectangle. This elasticity is what allows us to get that consistent 1/2-inch thickness across the entire batch, ensuring every stick cooks at the exact same rate.
The Dual-Cheese Strategy: Mozzarella and Parmesan
Most people just pile on the mozzarella and call it a day, but that’s a recipe for a soggy mess. Mozzarella has a high water content. As it melts, it releases moisture that can seep into the dough, making it gummy.
This is where the “Barrier Method” comes in. We sprinkle the finely shredded Parmesan down first. Because Parmesan is a hard, aged cheese with very little moisture, it acts as a protective wick. It absorbs any excess liquid from the mozzarella above it while creating a salty, toasted crust directly against the dough.
Think of the Parmesan as the primer and the mozzarella as the topcoat. This layering ensures the mozzarella stays gooey and stretchy on top, while the Parmesan keeps the base of the breadstick firm and flavorful. It’s a small change that makes a massive difference in the final texture.
The Gear: Why a Preheated Surface Matters
You don’t need a fancy wood-fired oven to get great results, but you do need a heavy-duty surface. A pizza stone or a thick cast-iron baking steel is ideal because they hold onto heat exceptionally well. If you don’t have those, an inverted heavy baking sheet works wonders.
The goal is heat conductivity. A “cold start” is the enemy of the breadstick because it allows the dough to slowly dry out before it actually bakes. We want that 425°F heat to hit the dough the second it enters the oven.
When transferring your breadsticks, keep them on the parchment paper. Carefully slide the paper onto the hot stone or sheet. This keeps the dough from sticking and makes it much safer to move the breadsticks into a scorching hot environment without losing their shape.
Phase One: Shaping and Slicing the Dough
Start by rolling your room-temperature dough into a large rectangle. Aim for about 1/2 inch in thickness. If you go too thin, you’ll end up with crackers; too thick, and the center might stay doughy while the cheese burns.
Use a pizza cutter to slice the dough into 1-inch wide strips. This is the “Golden Ratio” for breadsticks. It provides enough surface area for the cheese to cling to while maintaining a high ratio of crispy edge to soft center.
Once sliced, pull the strips about half an inch apart on the parchment. This “expansion gap” is vital. It allows hot air to circulate around the sides of each breadstick, ensuring the edges get just as golden and crisp as the bottom.
Phase Two: The First Garlic Butter Application
In a small bowl, whisk together your melted butter, minced garlic, dried oregano, and sea salt. The aroma of the oregano blooming in the warm butter is incredible. However, resist the urge to use all the butter now.
We only brush half of the mixture onto the raw dough. If you use too much butter before baking, the dough will essentially “fry” in the oven, which can lead to a heavy, greasy mouthfeel. We want just enough to season the dough and help the cheese stick.
The salt in this mixture is also crucial. It draws out a tiny bit of moisture from the surface of the dough, which helps create a thinner, crispier crust. Make sure the garlic is evenly distributed so every bite has that punchy flavor.
Phase Three: Layering for Structural Integrity
Now it’s time for the cheese. Start with that layer of Parmesan, spreading it evenly across the buttered strips. Remember, this is your moisture barrier. It doesn’t have to be a thick layer, just a consistent one.
Next, add the shredded mozzarella. Use a “Center-Loading” technique here. Keep the bulk of the mozzarella down the middle of each strip. As it melts, it will naturally spread toward the edges.
If you put too much cheese on the very edges, it will spill off onto the hot baking stone and burn. By keeping it centered, you ensure the cheese stays on the breadstick where it belongs, creating those beautiful toasted golden spots without the bitter taste of burnt dairy.
Phase Four: Executing the High-Heat Bake
Slide your prepared breadsticks into the oven. The 10 to 12-minute window is a guide, but your eyes are the best tool. You aren’t just looking for melted cheese; you’re looking for character.
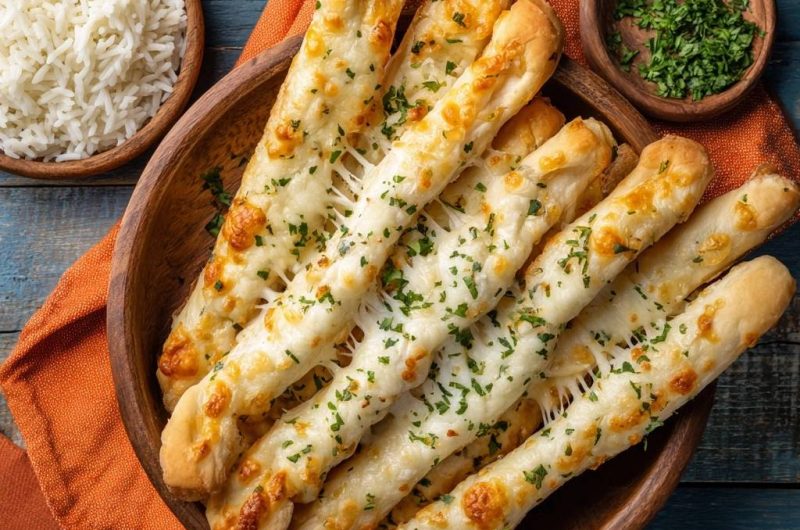
The cheese should be bubbling vigorously, and you want to see those deep brown “leopard spots” forming on the mozzarella. This indicates that the sugars in the dairy have caramelized, which adds a nutty complexity to the flavor.
Check the edges of the dough as well. They should be a deep, toasted golden brown. If they look pale, give them another minute. That color is where all the flavor lives, and it’s the sign that the “Anti-Soggy” technique has worked its magic.
Phase Five: The Post-Oven Finishing Touches
The moment those breadsticks come out of the oven, they are off-gassing steam. This is the perfect time for the second application of garlic butter. Brush the remaining mixture over the hot cheese and crust immediately.
The heat will pull the fresh garlic flavor into the bread, while the butter adds a gorgeous glossy finish. It’s that double-hit of garlic that really makes these taste like they came from a high-end pizzeria.
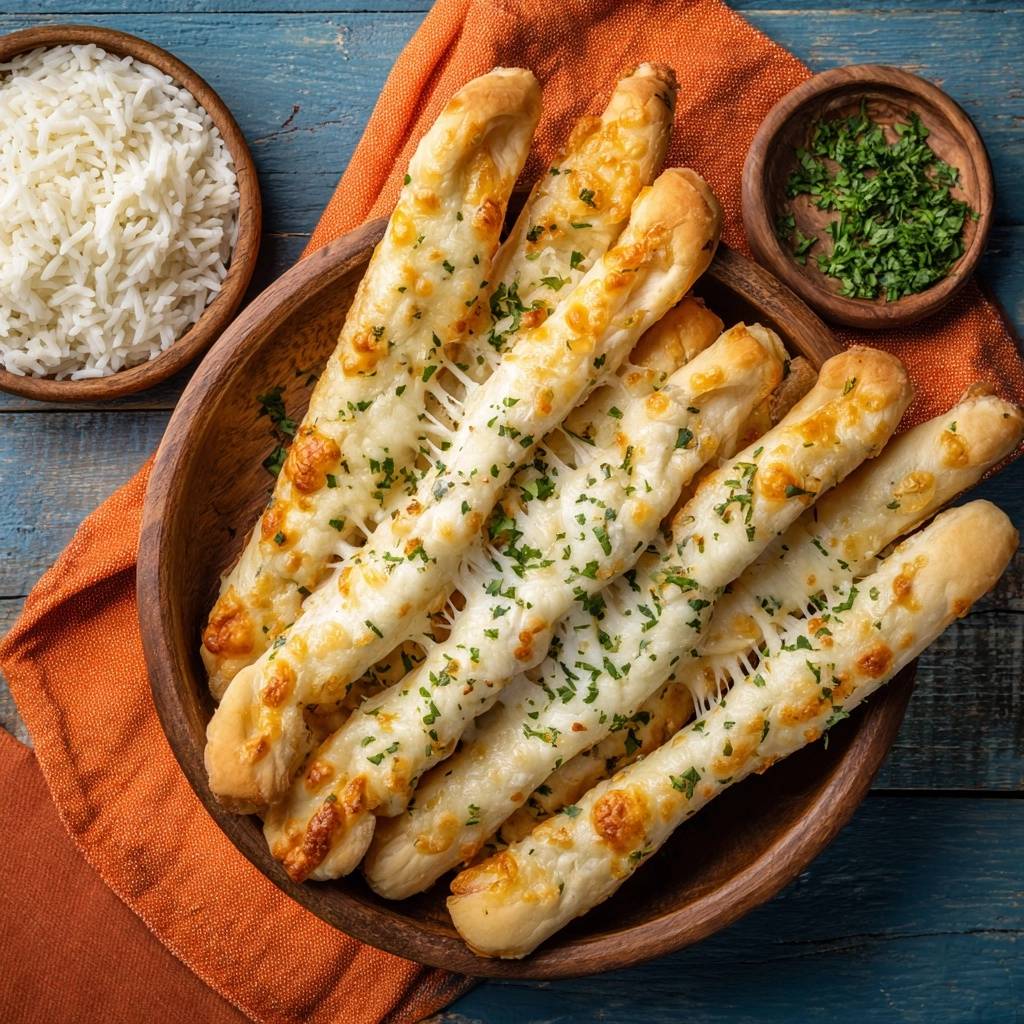
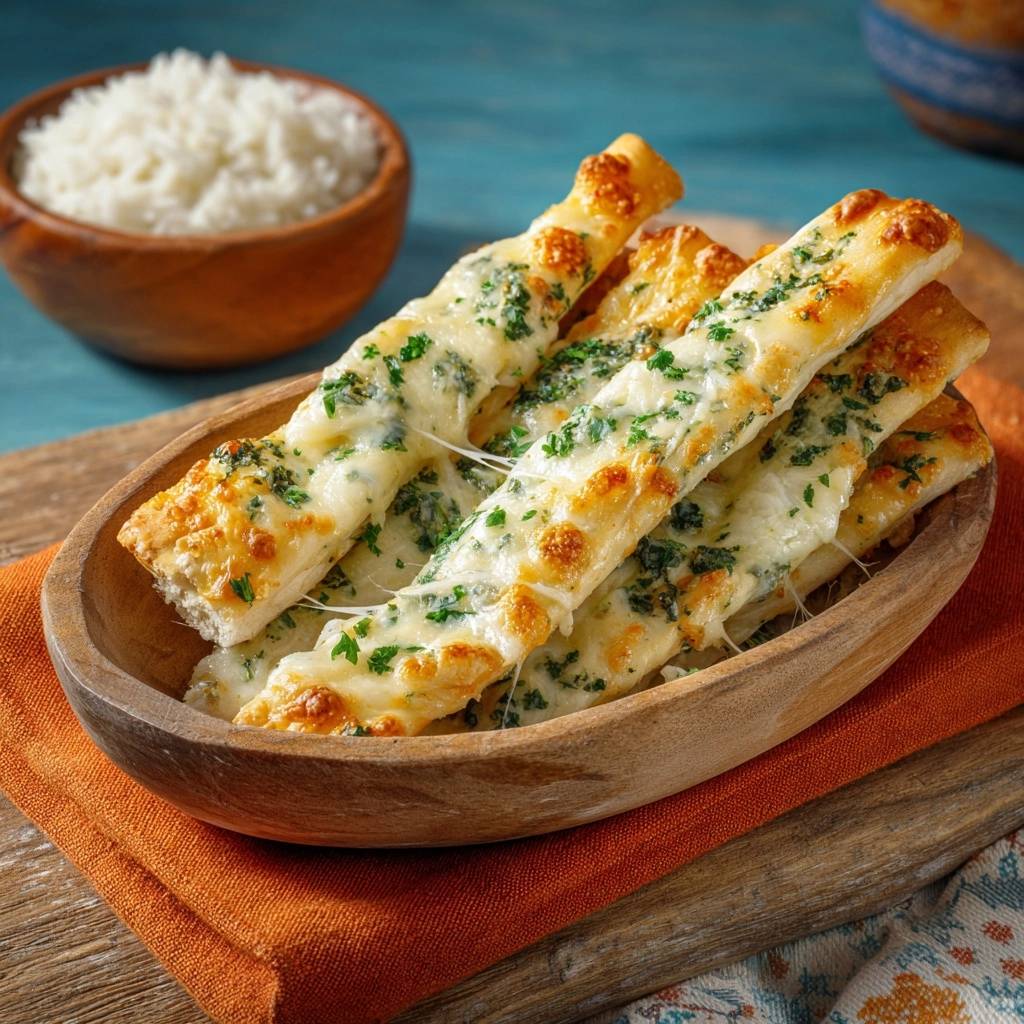
Finally, shower the tray with finely chopped fresh parsley. The heat from the breadsticks will slightly wilt the parsley, releasing its oils and adding a fresh, herbal finish. Serve them hot in a wooden bowl to help retain the heat without trapping moisture.
Troubleshooting Common Breadstick Failures
If you end up with a “Limp Stick,” the culprit is almost always an under-preheated oven. Make sure you let your stone or baking sheet sit in the oven for at least 20 minutes after the oven reaches temperature to ensure it’s truly hot.
For a “Burnt Bottom,” check your rack position. If you’re too close to the bottom heating element, the dough will burn before the cheese melts. Moving the rack to the center of the oven usually fixes this. Also, check your dough for high sugar content, which causes faster browning.
If the flavor feels flat or you have a “Bland Crumb,” it’s likely a lack of salt in the dough itself. You can compensate for this by adding a tiny pinch of flaky sea salt over the top of the breadsticks immediately after the final butter brush. It makes the garlic and cheese flavors pop.
Serving Suggestions: The Rice and Breadstick Pairing
While it might seem unconventional, serving these breadsticks alongside a bowl of fluffy white rice is a fantastic way to round out a meal. The clean, neutral starch of the rice provides a perfect contrast to the rich, salty, and garlicky profile of the bread.
The rice acts as a palate cleanser between bites of cheesy goodness. To keep the breadsticks at their best, place them in a wooden bowl lined with a clean cloth napkin. Wood is a natural insulator that doesn’t sweat, so your breadsticks stay warm without getting soft.
For dipping, skip the heavy creams. A bright, spicy marinara or a thick balsamic reduction works beautifully. These acidic dips cut through the fats of the butter and mozzarella, making every bite feel as exciting as the first one.
Make-Ahead Strategies and Storage Logistics
If you have leftovers, don’t even think about the microwave. Microwaves turn bread into rubber. Instead, store them in an airtight container in the fridge for up to three days. When you’re ready for round two, use an air fryer or a toaster oven.
Reheating at 350°F for about 3 to 5 minutes will bring back that “snap” in the crust and get the cheese stretchy again. You can also freeze these! Par-bake them for about 7 minutes, let them cool completely, and freeze them in a single layer.
When the craving hits, you can bake them straight from the freezer at 425°F for about 8 to 10 minutes. It’s the ultimate convenience food without the quality drop-off of typical frozen snacks. You’ll have fresh, crispy breadsticks faster than you could get a delivery driver to your door.
Frequently Asked Questions
Can I use frozen dough for this recipe?
Yes, you can use frozen dough, but you must thaw it completely in the refrigerator first. Once thawed, let it sit on the counter for at least 60 minutes to reach room temperature. If the dough is even slightly cold in the center, it won’t rise properly, and you’ll end up with a dense, gummy interior that ruins the “Anti-Soggy” effect.
How do I prevent the garlic from burning?
The key is the “Shielding” effect. By mixing the minced garlic into the butter and then covering it with a layer of cheese, you protect the delicate garlic bits from the direct radiant heat of the oven. Also, try to mince your garlic into uniform pieces. If the pieces are too small (like a paste), they can burn quickly; if they are too large, they might stay raw and pungent.
What is the best substitute for a pizza stone?
If you don’t have a stone, use a heavy-duty rimmed baking sheet turned upside down. Preheating the inverted sheet provides a flat, hot surface that mimics a pizza stone. A large cast-iron griddle also works exceptionally well because cast iron has incredible heat retention, which is exactly what we need for that instant crust sear.
Why is my cheese separating or becoming oily?
This usually happens if you use “fresh” mozzarella (the kind stored in water) or a very high-fat artisanal cheese. For this high-heat application, low-moisture, part-skim shredded mozzarella is actually superior. It melts smoothly and browns beautifully without releasing the excess oil or water that leads to a greasy breadstick.
How do I achieve a softer, pillowy interior?
If you prefer a breadstick that is more “fluffy” than “crunchy,” increase the dough thickness to 3/4 of an inch. You can also use the “Steam Tent” method by placing a small pan of hot water on the bottom rack of the oven during the first five minutes of baking. This keeps the surface of the dough moist for a few extra minutes, allowing it to expand more before the crust sets.
Cheesy Garlic Breadsticks
Course: AppetizerCuisine: AmericanDifficulty: easy8
breadsticks15
minutes12
minutes27
MinutesAmerican
Ingredients
1 pound pizza dough, room temperature
4 tablespoons unsalted butter, melted
3 cloves garlic, minced
1 teaspoon dried oregano
1.5 cups shredded mozzarella cheese
1/2 cup shredded parmesan cheese
2 tablespoons fresh parsley, finely chopped
1/2 teaspoon sea salt
Optional: 2 cups cooked white rice (for serving)
Directions
- Place a heavy baking sheet or pizza stone in the oven and preheat to 425 degrees F. This preheating step is the absolute key to preventing a soggy bottom; the dough needs to hit a hot surface immediately to sear the exterior.
- On a piece of parchment paper, roll the dough into a large rectangle about 1/2 inch thick. Use a pizza cutter to slice the dough into 1-inch wide strips. Pull the strips slightly apart so they have room to expand.
- In a small bowl, combine the melted butter, minced garlic, oregano, and salt. Brush half of this mixture generously over the dough strips.
- To solve the moisture issue, sprinkle the parmesan cheese down first. The finer parmesan acts as a barrier, absorbing excess moisture from the mozzarella so it doesn’t soak into the dough. Top with the shredded mozzarella, focusing the cheese down the center of each strip.
- Carefully slide the parchment paper with the breadsticks onto the preheated baking sheet in the oven.
- Bake for 10 to 12 minutes or until the cheese is bubbling with toasted golden spots and the dough edges are a deep golden brown.
- Remove from the oven and immediately brush with the remaining garlic butter. Sprinkle with fresh parsley. Serve hot in a wooden bowl, accompanied by a side of fluffy white rice as pictured.
Notes
- The secret to preventing a soggy bottom is the temperature shock from the preheated baking sheet and using parmesan as a moisture barrier. Serve with white rice as a unique side pairing.


