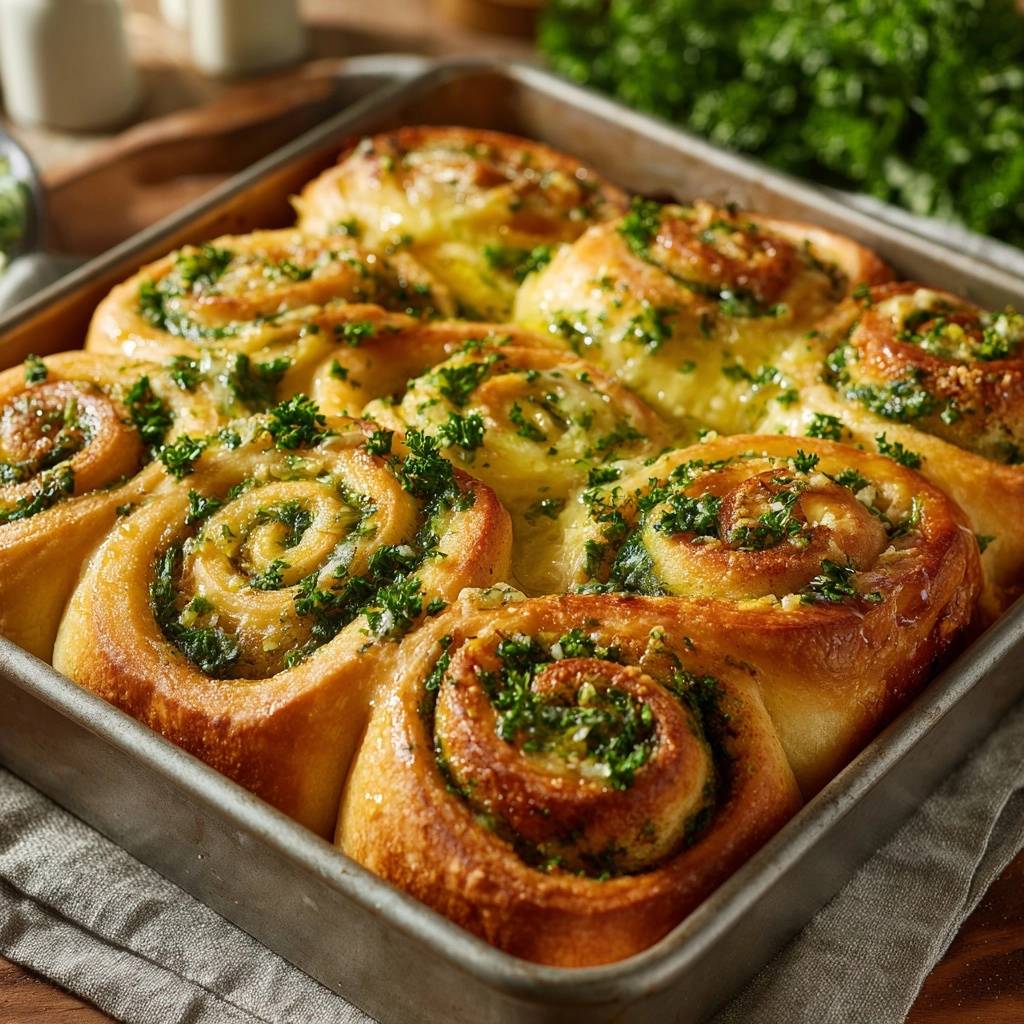
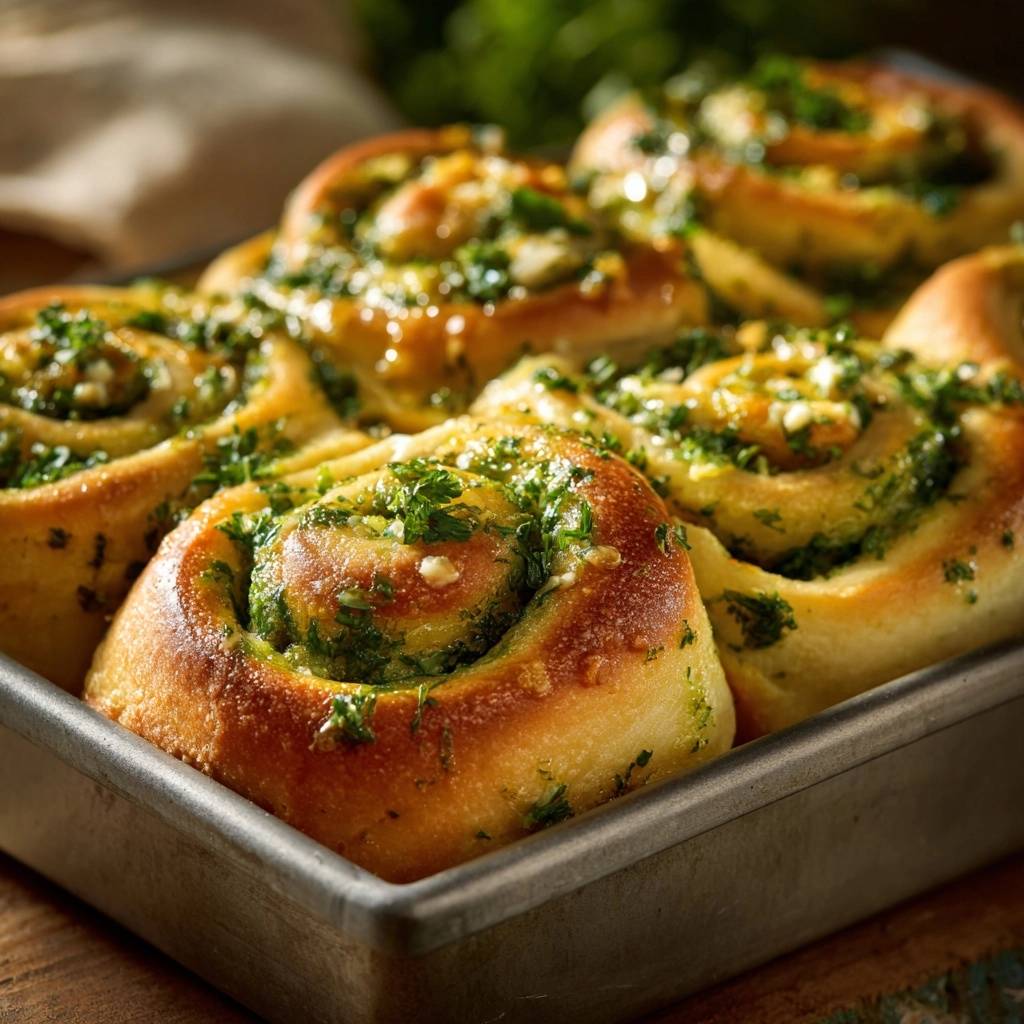
Imagine pulling a pan of golden, bubbling rolls from the oven where the aroma of toasted garlic and fresh parsley fills every corner of your kitchen. You reach in, pull one away from the cluster, and hear that distinct, satisfying crunch from the bottom of the roll. Inside, the crumb is as light as a cloud, swirled with melted mozzarella and a savory herb butter that hasn’t turned the dough into a greasy mess.
Most home bakers struggle with the dreaded soggy bottom when making loaded garlic rolls because the butter and cheese melt faster than the dough can bake. However, this recipe changes the game by introducing a high-heat sealing technique that protects the integrity of the bread. By focusing on the temperature of your equipment, you can achieve a professional-grade contrast between a pillowy center and a fried-like, crispy base.
The secret to this success lies in preheating your baking pan before the dough ever touches it. This immediate contact sears the bottom of the roll, creating a structural barrier that keeps the fats inside the swirl rather than soaking into the floor of the pan. It’s a simple mechanical fix that ensures your Cheesy Garlic Herb Rolls are perfect every single time you bake them.
The Anatomy of a Perfect Cheesy Garlic Herb Roll
A truly great roll relies on the harmony of three specific pillars: structure, flavor, and heat. The structure comes from using a high-quality pizza or brioche dough that has enough gluten strength to hold the weight of the cheese. Without a strong dough, the rolls would collapse under the richness of the filling, resulting in a dense and heavy texture.
The fat acts as the primary flavor carrier, but it must be managed carefully to avoid a greasy finish. By creaming the butter with garlic and herbs into a thick paste, you ensure the flavor stays suspended within the layers of the dough. This prevents the butter from separating and running out of the roll too quickly during the initial stages of baking.
Finally, heat is the transformative element that dictates the final mouthfeel. Using a metal pan at a high temperature creates a convection effect that browns the exterior while the steam trapped inside the dough spirals cooks the interior. This balance of dry heat and internal steam is what creates that sought-after “pull-apart” quality that makes these rolls so addictive.
Why High-Heat Pre-Searing Prevents Sogginess
The “Anti-Soggy Bottom Trick” is rooted in basic food science. When you place room-temperature dough into a 400-degree metal pan, the moisture on the surface of the dough evaporates instantly. This creates a micro-layer of steam that lifts the dough slightly and begins the crust-forming process before the butter in the filling has a chance to melt and migrate downward.
In a cold pan, the butter melts and pools at the bottom long before the dough reaches a temperature where it can form a crust. This results in the bread essentially “frying” in a pool of oil, which leads to a heavy, translucent, and mushy base. By pre-searing, you create a toasted exterior that acts as a waterproof seal, keeping the richness where it belongs.
Furthermore, the olive oil added to the hot pan just before the rolls go in provides a secondary layer of protection. It conducts heat more efficiently than air, ensuring that every millimeter of the roll’s bottom is exposed to intense, even heat. This results in a golden-brown finish that stays crisp even as the rolls cool down on the table.
Essential Components for Cheesy Garlic Herb Rolls
Your choice of dough is the foundation of this entire experience. While you can use a store-bought pizza dough for convenience, ensure it is at room temperature before you start rolling. Cold dough is elastic and “snaps back,” making it nearly impossible to get that thin, even rectangle needed for a beautiful spiral. Letting it sit out for an hour relaxes the gluten and makes the shaping process effortless.
The cheese selection is equally vital for achieving the perfect texture and flavor profile. Mozzarella is the heavy lifter here because of its high moisture content and incredible “stretch” factor. It provides that classic gooey center that everyone loves. However, mozzarella can be a bit mild on its own, which is why we incorporate grated parmesan.
Parmesan brings the necessary salt and umami to the party. Because it is a hard, aged cheese, it doesn’t melt into a puddle; instead, it browns and creates little pockets of intense savory flavor. Using freshly grated parmesan is a must, as the pre-shredded stuff is often coated in potato starch which can prevent the cheese from bonding with the dough and butter.
Fresh Herbs vs. Dried Aromatics
Fresh parsley is not just a garnish in this recipe; it is a functional ingredient that provides brightness. The oils in fresh herbs are volatile and aromatic, cutting through the heavy fats of the butter and mozzarella. Dried parsley often tastes like hay and lacks the “green” punch needed to balance the pungent garlic.
Similarly, fresh minced garlic provides a sharp, spicy kick that mellows into a sweet, nutty flavor as it roasts inside the dough. If you substitute with garlic powder, you lose the texture of the garlic bits and the complexity of the flavor. The fresh aromatics ensure that the rolls feel vibrant and homemade rather than processed.
Selecting the Right Fat: Butter and Olive Oil
We use unsalted butter for the internal filling because it allows you to control the exact amount of salt in the recipe. Different brands of salted butter have varying sodium levels, which can make your rolls unpredictably salty. Softened butter is essential for creating a smooth paste that spreads easily without tearing the delicate dough.
Olive oil is reserved for the pan sear because it has a higher smoke point than butter and adds a distinct Mediterranean fruitiness to the crust. Using butter in the preheated pan would likely result in burnt milk solids and a bitter taste. The combination of butter on the inside and olive oil on the outside gives you the best of both worlds: creamy flavor and a perfect crunch.
Step-by-Step: Preparing the Garlic Herb Infusion
To start, you want to cream your softened butter until it is completely smooth. If the butter is too cold, you will end up with “butter pockets” that will melt and cause the dough to collapse or create large gaps in your rolls. Use a fork or a small spatula to mash the minced garlic, sea salt, and parsley into the butter until it looks like a uniform green paste.
This paste acts as a glue for the cheese and ensures that every single bite of the roll is seasoned. Therefore, take your time with this step. If you see any large chunks of butter, keep mixing. The goal is a consistency similar to frosting, which will glide over the dough and stay put during the rolling process.
Once the paste is ready, set it aside at room temperature. Do not refrigerate it, or it will harden and become impossible to spread. If your kitchen is particularly warm and the butter starts to melt into a liquid, pop it in the fridge for just two minutes to firm it back up to a spreadable state. Consistency is everything here.
Technique: Rolling and Shaping for Maximum Surface Area
On a lightly floured surface, roll your dough into a large rectangle about 1/4 inch thick. You want to aim for a consistent thickness across the entire sheet so the rolls bake at the same rate. If the dough is too thick, the center will remain raw; if it is too thin, the rolls will be crunchy all the way through rather than pillowy.
Spread your garlic butter paste evenly, leaving a small border at the edges. This border is crucial because it allows the dough to stick to itself when you roll it up, preventing the rolls from unraveling in the oven. Sprinkle your cheeses over the butter, making sure to reach near the edges of the buttered section for maximum flavor in every spiral.
When rolling the dough into a log, keep it as tight as possible. A tight roll creates more layers, which means more surface area for the cheese and butter to caramelize. For the cleanest cuts, use a piece of unflavored dental floss. Slide the floss under the log, cross it over the top, and pull quickly. This slices through the dough without squishing the air cells, keeping your rolls round and fluffy.
The High-Heat Pan Method: Executing the Sear
This is the most critical phase of the recipe. Your 9×9 inch metal pan should be screaming hot after sitting in the 400-degree oven. Use heavy-duty oven mitts to remove it and place it on a heat-safe surface. Speed is important here, but safety is the priority. Work quickly but carefully to maintain the pan’s temperature.
Drizzle the tablespoon of olive oil into the hot pan. You should see it shimmer and move fluidly across the surface. Immediately place your cut rolls into the pan. You should hear a distinct sizzle the moment the dough touches the metal. This is the sound of the “sear” happening, which is creating that waterproof crust on the bottom of your rolls.
Once all nine rolls are in the pan, brush the tops with your remaining garlic butter. This extra layer of fat on top will melt down into the crevices, but because the bottom is already searing, it won’t make the base soggy. The contrast between the hot pan and the room-temperature dough creates an immediate spring, helping the rolls rise quickly and stay light.
Baking and Monitoring the Caramelization Process
Slide the pan back into the oven and set your timer for 22 minutes. During this time, the mozzarella will melt and begin to bubble up between the layers of dough. The parmesan will start to brown, creating crispy, lacy edges known as “frico.” You are looking for a deep, golden-brown color on the tops of the rolls.
If the rolls look pale after 20 minutes, give them the full 25. Don’t be afraid of a little dark color on the cheese; that caramelization is where the deep, nutty flavor lives. However, if you notice the garlic on top is browning too quickly, you can loosely tent the pan with foil for the last five minutes of baking.
Once you pull them out, the hardest part begins: waiting. Let the rolls rest in the pan for at least five minutes. This allows the internal steam to redistribute through the crumb, ensuring the center isn’t gummy. It also gives the bottom crust one last moment to finish crisping up against the residual heat of the metal pan.
Troubleshooting Common Garlic Roll Failures
If your rolls unraveled during baking, it usually means the log wasn’t rolled tightly enough or the dough was too floured on the outside, preventing it from sticking to itself. Next time, use a damp finger to lightly moisten the border of the dough before sealing the log. This creates a “glue” that holds everything together as the dough expands.
A doughy or raw center is often the result of using dough that was too cold or rolling it thicker than 1/4 inch. Cold dough takes much longer to heat through, and the outside will burn before the inside is cooked. Always ensure your dough is at a comfortable room temperature before you begin the rolling process.
If your garlic tastes bitter, it likely burnt. This happens if the garlic is minced into a paste that is too fine, or if it is exposed to direct high heat on the very top of the roll for too long. To prevent this, make sure the garlic is well-incorporated into the butter paste, which acts as a heat shield, and keep the pieces of garlic a bit more rustic in size.
Flavor Variations and Ingredient Swaps
While the classic garlic and parsley combo is hard to beat, you can easily adapt this recipe to your preferences. For those who like a bit of heat, add a teaspoon of red pepper flakes to the butter paste. The heat of the peppers infuses into the fat and spreads evenly throughout the roll, providing a warm glow that complements the rich cheese.
If you want a more earthy, autumnal profile, swap the parsley for a mix of finely chopped rosemary and thyme. These hard herbs stand up well to the high heat of the oven and pair beautifully with the parmesan. You can also experiment with different cheeses; a sharp white cheddar or a smoky provolone can add a whole new dimension to the flavor profile.
For sourdough bakers, this technique works wonderfully with sourdough discard dough. The natural acidity of the sourdough cuts through the richness of the butter and cheese perfectly. Just ensure your sourdough is well-proofed so it has the strength to lift the heavy fillings during the bake.
Optimal Pairings for Cheesy Garlic Herb Rolls
These rolls are incredibly rich, so they pair best with dishes that have a bit of acidity to cleanse the palate. A classic tomato-based pasta sauce or a hearty minestrone soup are perfect companions. The acid in the tomatoes cuts right through the butter and cheese, making each bite of the roll feel fresh again.
They also serve as a fantastic side for a large salad with a sharp lemon vinaigrette. If you are serving these as part of a larger meal, consider pairing them with roasted vegetables or a simple grilled protein. The rolls are the star of the show, so keep the other components of the meal relatively simple to avoid overwhelming your guests.
Make-Ahead Strategies and Storage Guidelines
You can prepare these rolls up to the point of cutting them and then freeze the individual rounds on a baking sheet. Once frozen solid, transfer them to a freezer bag. When you’re ready to bake, let them thaw in the fridge overnight and then follow the high-heat pan method as usual. This is a great way to have fresh rolls on a weeknight without the prep work.
Leftover rolls should be stored in an airtight container at room temperature for up to two days. However, the refrigerator will make the bread go stale faster, so avoid it if possible. If you need to store them longer, freezing is the better option. They will stay fresh in the freezer for up to a month.
To reheat, avoid the microwave at all costs, as it will turn the crust rubbery and the bottom soggy. Instead, place the rolls on a baking sheet in a 350-degree oven for about 5 to 8 minutes. This will revive the crispy bottom and melt the cheese again, making them taste almost as good as the moment they first came out of the oven.
Expert Tips for Professional Results
Always use a metal baking pan rather than glass or ceramic for this specific recipe. Metal is a superior conductor of heat, which is essential for the “pre-sear” technique to work. Glass takes too long to heat up and doesn’t hold the temperature as intensely, which can lead to a softer, less crispy crust.
Finally, don’t skimp on the salt. A pinch of high-quality sea salt over the tops of the rolls just before they go into the oven makes a world of difference. It makes the flavors of the garlic and herbs pop and provides a professional finishing touch that balances the richness of the mozzarella. Trust your instincts, watch for that golden color, and enjoy the process.
Frequently Asked Questions
How do I store leftover garlic rolls?
Store your leftovers in an airtight container at room temperature for up to 2 days. If you need to keep them longer, wrap them tightly and freeze them for up to a month. Avoid the refrigerator, as the cold environment crystallizes the starches in the bread, making it taste stale and dry much faster than it would on the counter.
Why are my rolls soggy on the bottom?
Sogginess usually happens because the butter and cheese oils pooled at the bottom of the pan before the dough could form a crust. To fix this, ensure you are using a metal pan and preheating it for at least 10 minutes at 400 degrees. The “sizzle” you hear when the dough hits the pan is the sign that a crisp barrier is forming to block those oils.
Can I use dried herbs instead of fresh?
You can, but the flavor will be significantly different. If you must use dried parsley, reduce the amount to about 2 tablespoons, as dried herbs are more concentrated. However, fresh parsley provides a necessary brightness and “green” flavor that cuts through the heavy butter. For the best results, stick with fresh garlic and fresh parsley.
What is the best way to reheat these rolls?
The oven is your best friend for reheating. Place the rolls on a baking sheet at 350 degrees F for 5 to 10 minutes until the cheese is bubbly again. This restores the crispy bottom. Avoid the microwave, as it traps steam inside the bread, which will turn your once-crispy crust into a soft, rubbery mess.
Can I make the dough ahead of time?
Yes, you can prepare the dough and let it rise in the refrigerator overnight. This slow fermentation actually improves the flavor of the bread. Just make sure to take the dough out of the fridge at least an hour before you plan to roll it out so it can reach room temperature and become easy to work with.
Why did my garlic turn bitter?
Garlic becomes bitter when it burns. This can happen if the garlic pieces are too small or if they are sitting directly on top of the roll exposed to the high heat of the oven. By mixing the garlic into the butter paste, you are essentially “confit-ing” it as it bakes, which keeps it sweet and savory rather than burnt.

Cheesy Garlic Herb Rolls
Course: Appetizer and Side DishCuisine: AmericanDifficulty: easy9
rolls20
minutes25
minutes45
Minutes285
kcalAmerican
Ingredients
1 pound pizza dough or brioche dough, room temperature
1/2 cup unsalted butter, softened
4 cloves garlic, minced
1/2 cup fresh parsley, finely chopped
1 cup shredded mozzarella cheese
1/4 cup grated parmesan cheese
1/2 teaspoon sea salt
1 tablespoon olive oil
Directions
- Preheat your oven to 400 degrees F. To solve the soggy bottom issue, place your empty 9×9 inch metal baking pan in the oven for 10 minutes to get it thoroughly hot before adding the dough.
- In a small bowl, cream together the softened butter, minced garlic, 1/4 cup of the chopped parsley (reserve the rest for the topping), and sea salt until it forms a smooth paste.
- On a lightly floured surface, roll the dough into a large rectangle, approximately 1/4 inch thick.
- Spread two-thirds of the garlic herb butter evenly over the dough, leaving a half-inch border at the edges. Sprinkle the shredded mozzarella and parmesan over the butter layer.
- Roll the dough tightly into a log starting from the long edge. Use a sharp knife or unflavored dental floss to cut the log into 9 even rounds.
- Carefully remove the hot pan from the oven and brush the bottom with olive oil. This immediate contact sears the bottom of the dough, creating a crisp barrier that prevents the butter from soaking in and making it soggy.
- Place the rolls in the pan, cut side up. Brush the tops with the remaining garlic butter and sprinkle with the remaining fresh parsley.
- Bake for 22 to 25 minutes until the tops are deeply golden brown and the cheese is bubbling and caramelized.
- Let the rolls rest in the pan for 5 minutes before serving to allow the internal steam to set the crumb and the bottom crust to finish crisping.
Notes
- Preheating the metal baking pan is essential to sear the bottom of the dough and prevent the butter from soaking in.