

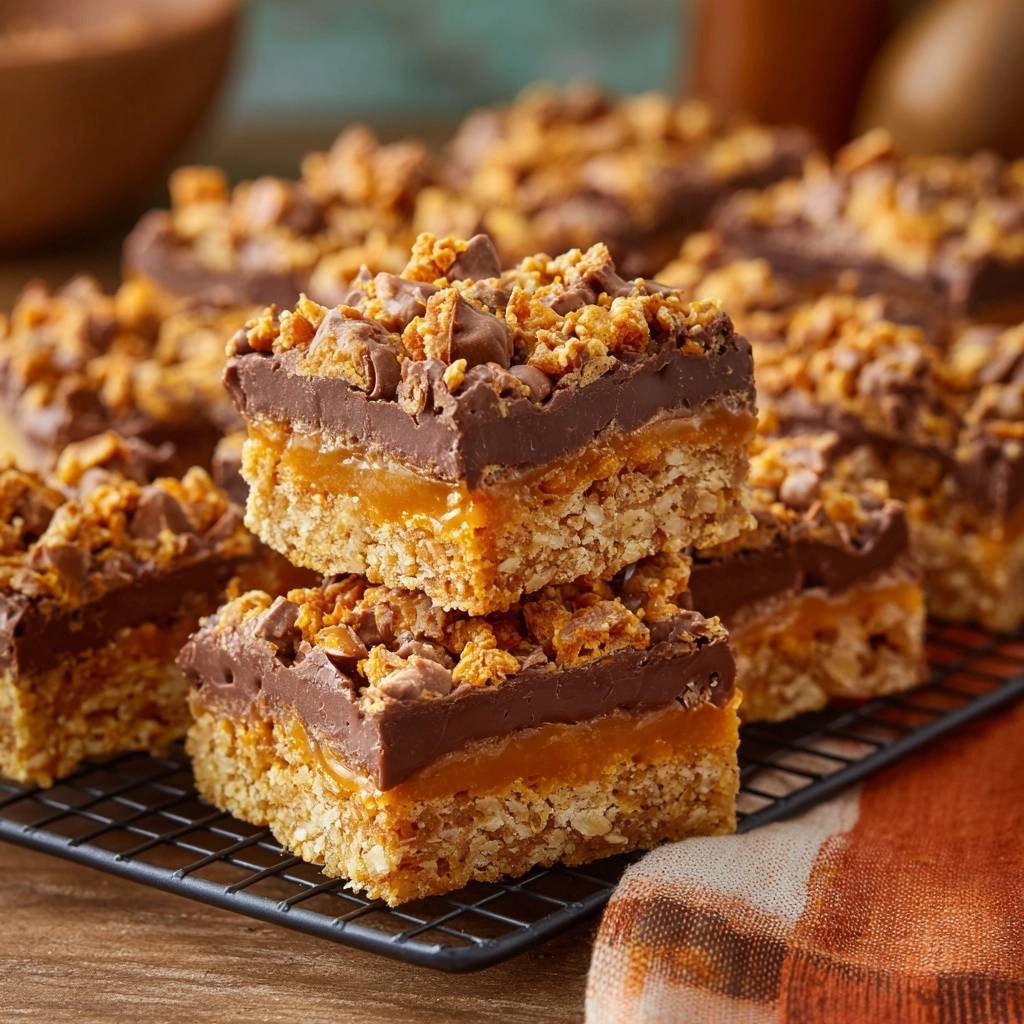
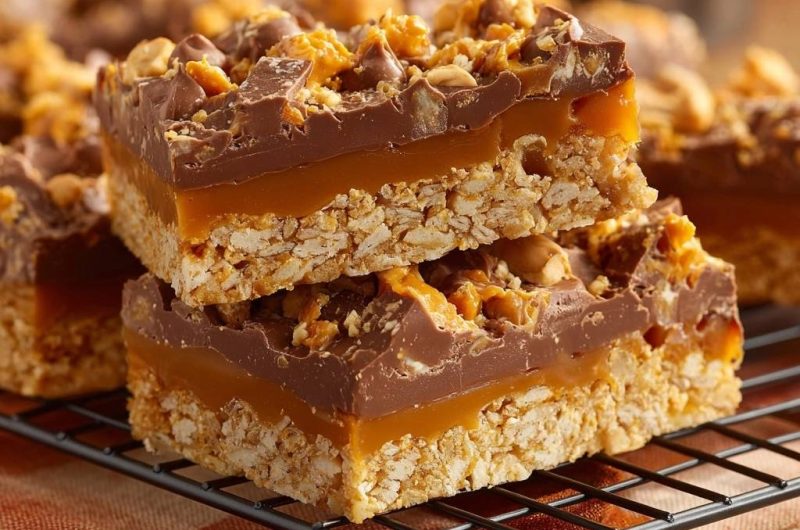
Imagine biting into a treat where a shatteringly crisp base meets a thick, viscous pool of buttery caramel, all finished with a chunky, textured chocolate cap. These Chocolate Caramel Peanut Crunch Bars aren’t your average bake-sale treat; they’re a masterclass in structural dessert engineering. Most layered bars suffer from a disappointing, mushy bottom, but this recipe solves that with a specific three-layer architecture designed for maximum contrast.
The secret lies in the “Double-Bind” concept, a method that ensures the cereal stays loud and crunchy even under the weight of heavy caramel. By treating the base as a structural foundation rather than just a mixture, you create a professional-grade bar that holds its integrity for days. It’s all about managing moisture and fat to keep those textures distinct and satisfying.
The real trick to this recipe is the high-heat sugar stage. Most people just melt their peanut butter and syrup until warm, but we’re going to take it to a full rolling boil. This creates a hydrophobic seal around every single piece of puffed rice, effectively waterproofing the cereal against the caramel layer above. If you’ve ever had a soggy cereal bar, this one technique will change your kitchen game forever.
The Science of the Hydrophobic Sugar-Fat Seal
When you boil peanut butter, corn syrup, and sugar together, you’re doing more than just making a sticky glue. You’re creating a moisture-proof barrier. At a specific temperature, the sugars and fats emulsify into a coating that repels the water content found in the caramel and cream layers. This prevents the cereal from absorbing moisture and turning soft.
Corn syrup plays a vital role here because it’s an interfering agent. It prevents the granulated sugar from recrystallizing into grainy bits, ensuring your base is smooth and snappy rather than sandy. This chemical interaction is what gives the bars that “candy bar” professional finish rather than a homemade, crumbly texture.
Why Temperature Control Prevents Soggy Bases
The 60-second rolling boil rule is non-negotiable. During this minute, the water content in the syrup evaporates, and the sugar molecules reach a stage where they will set firmly upon cooling. You’ll see the mixture transform from a dull tan to a glossy, bubbling amber that looks significantly more fluid than when you started.
At a molecular level, this heat ensures the “snap.” If you under-boil, the base will stay chewy and eventually succumb to the weight of the toppings. If you hit that 60-second mark, the sugars harden into a thin, glass-like coating that protects the air pockets in the rice cereal, keeping them perfectly preserved and crunchy.
Essential Components for Chocolate Caramel Peanut Crunch Bars
Quality ingredients dictate the final mouthfeel of these bars. For the top layer, I recommend a high-quality milk chocolate with a high cocoa butter content. This ensures the chocolate melts smoothly and snaps cleanly when you bite into it, rather than feeling waxy or overly soft at room temperature.
When it comes to the caramel, “soft” chewy candies are the gold standard. Unlike hard toffees, these melt down into a luscious, flowable layer that stays supple. Using pre-made soft caramels provides a consistent protein-to-sugar ratio, which is essential for that iconic “pull” when you pull a bar apart.
Selecting the Right Crispy Rice Cereal
Not all puffed rice is created equal. Brand-name cereals often have a higher density and more consistent air pockets compared to generic versions, which can sometimes be airier and more fragile. A denser cereal provides more surface area for the “binding glue” to grab onto, resulting in a sturdier bar.
If your cereal is too light, it might crush when you apply the pressure needed to set the base. Look for a cereal that feels firm in the box. This structural integrity is what allows the base to support nearly an inch of caramel and chocolate without collapsing or compressing into a brick.
The Role of Heavy Cream in Caramel Stability
Adding heavy cream to your melted caramels is a small step with a huge payoff. The extra fat from the cream prevents the sugar in the caramels from setting back into a rock-hard state once refrigerated. This ensures a “clean bite” where your teeth glide through the caramel rather than getting stuck.
Without the cream, the caramel layer would become brittle and difficult to chew when cold. The cream acts as a stabilizer, keeping the texture silky and luxurious. It also helps the sea salt dissolve evenly, ensuring every bite has that perfect balance of sweet and savory.
Step-by-Step: Engineering the Perfect Crunch
Creating these bars is a process of patience and precision. You aren’t just tossing ingredients together; you’re building layers that need to interact correctly. Each phase requires a specific visual cue to ensure you’re on the right track for that professional finish.
Phase 1: Constructing the High-Density Base
Once your peanut butter mixture has boiled for 60 seconds, you have to move fast. Pour it over the cereal and toss it quickly until every grain is glistening. If you wait too long, the sugar will start to set in the bowl, making it impossible to get an even coat.
When you transfer the mix to the pan, don’t be gentle. Use significant force with a flat-bottomed cup to pack it down. You want a dense, tight foundation. If there are large gaps between the cereal grains, the warm caramel will seep down to the bottom of the pan, ruining the distinct layers and making the bars stick to the parchment.
Phase 2: Tempering and Layering the Salted Caramel
Melting caramel in the microwave requires a gentle touch. Use 30-second bursts and stir vigorously after each one. Even if it looks like nothing is happening at first, the residual heat will suddenly melt the centers of the candies. Stirring ensures the cream and salt are fully incorporated into a glossy, uniform liquid.
Pour the caramel over your chilled base and spread it to the edges. You must let this layer chill for at least 20 minutes. If the caramel is still warm when you add the chocolate, the two will swirl together, and you’ll lose that beautiful, defined line between the gold caramel and the dark chocolate.
Phase 3: The Triple-Texture Chocolate Topping
Melt your chocolate chips at 50% power to avoid scorching. Once it’s smooth and pourable, spread it over the set caramel. Now comes the “wet-set” window. You have about three to five minutes before the chocolate begins to firm up, especially if the caramel underneath is cold.
Immediately shower the top with your chopped peanuts and crushed candies. Press them down lightly with your palms. This embedding process is crucial; if you just sprinkle them on top, they’ll fall off the moment you try to take a bite. You want the toppings to become one with the chocolate layer.
Equipment: Tools for Professional Results
An 8×8 inch square pan is the secret to the thick, decadent layers you see in high-end bakeries. If you use a 9×9 pan, the layers will be too thin, and the ratio of crunch to caramel will be off. A smaller, deeper pan creates that impressive “block” look that makes these bars stand out.
Always use a “parchment sling.” Line the pan with two strips of parchment paper crossing each other, leaving long handles hanging over the sides. This allows you to lift the entire block out of the pan once it’s set, making it much easier to get clean, straight cuts without scratching your bakeware.
Troubleshooting Common Layering Failures
If your caramel layer seems too runny even after chilling, it likely needed another 30 seconds of melting or a bit less cream. However, you can usually save it by popping the bars into the freezer for an hour before slicing. This firms up the fats enough to hold their shape while you work.
If your base crumbles when you cut it, it’s usually because the peanut butter mixture didn’t reach a full boil or wasn’t pressed firmly enough into the pan. Next time, ensure you see big, aggressive bubbles in the saucepan before you stop the timer. For a crumbly batch, just serve them in smaller squares to minimize breakage.
How to Achieve Clean, Professional Slices
The “Hot Knife” method is the only way to slice these bars without making a mess. Dip a large, sharp chef’s knife into a tall glass of very hot water, let it sit for ten seconds, then wipe it completely dry. The heat will glide through the chocolate and caramel like butter.
You must wipe the blade clean and re-heat it between every single cut. If you don’t, the caramel from the previous slice will smear onto the chocolate of the next one, blurring those beautiful layers. It takes a little extra time, but the visual result is worth the effort.
Make-Ahead Strategies and Storage Physics
These bars are incredibly stable, making them perfect for gifting or prep-ahead treats. At room temperature, the caramel will be very soft and stretchy. In the refrigerator, the bars will be firm and have a much more pronounced “snap” in the base. Both are delicious, but it depends on your texture preference.
To freeze them, wrap individual bars in plastic wrap and then place them in a heavy-duty freezer bag. This prevents ice crystals from forming on the chocolate, which can cause “bloom”—those harmless but unsightly white streaks. They can stay frozen for up to three months and thaw in about 20 minutes.
Optimal Serving Temperatures for Texture
For the best experience, I recommend the “10-minute temper.” Take the bars out of the fridge about ten minutes before you plan to eat them. This short window allows the caramel to soften just enough to be chewy, while the base remains cold and perfectly crunchy.
If you serve them straight from the fridge, the base will be at its maximum crispness, but the caramel might feel a bit stiff. If you leave them out for an hour, the base will still be crunchy thanks to our hydrophobic seal, but the chocolate might start to soften on your fingers. Ten minutes is the sweet spot.
Flavor Variations and Texture Swaps
While the peanut and chocolate combo is a classic, you can easily tweak the toppings. Try swapping the crushed peanut butter candies for crushed pretzels if you want an extra hit of salt and a different kind of crunch. The saltiness of the pretzels cuts through the sweetness of the caramel beautifully.
For a more sophisticated, “adult” version, use dark chocolate chips (60% cacao or higher) and skip the candy toppings entirely. Instead, finish the wet chocolate with a heavy sprinkle of flaky sea salt. This highlights the buttery notes of the caramel and the nuttiness of the base without being overly sugary.
Adapting for Nut-Free Requirements
If you need to avoid nuts, you can substitute the peanut butter with sunflower seed butter or soy nut butter at a 1:1 ratio. These alternatives have a similar fat content, so the “Double-Bind” technique still works perfectly. Just be sure to use toasted sunflower seeds on top instead of peanuts.
Keep in mind that sunflower butter can sometimes have a slightly lower boiling point for sugar mixtures. Watch the saucepan closely; once it hits that vigorous, rolling boil, start your 60-second timer immediately. The flavor will be slightly more earthy, but the crunch will be just as satisfying.
Expert Tips for Chocolate Caramel Peanut Crunch Bars
Before you pour the caramel, give your pressed base a “tap test.” Tap the surface with the back of a spoon; it should feel solid and sound hollow. If it feels soft or moves, press it again. A solid base is the only way to ensure the caramel stays where it belongs—on top.
Always use roasted peanuts rather than raw ones for the topping. Roasting brings out the essential oils and provides a much deeper, toasted flavor that stands up to the rich chocolate. If your peanuts are unroasted, toss them in a dry pan over medium heat for 3 minutes until they smell fragrant.
Managing Humidity During the Setting Process
High humidity is the enemy of sugar-based treats. If your kitchen is particularly steamy, the sugar in the base can attract moisture from the air, leading to a “weeping” effect. To combat this, use the freezer for your setting stages rather than just the refrigerator.
The freezer provides a very dry, controlled environment that helps the sugar-fat seal set instantly. This “shocks” the mixture into a stable state, ensuring that the snap remains intact regardless of the weather outside. Just don’t leave them in there too long during the assembly, or the layers might contract and separate.
How should I store these bars and do they freeze well?
Store these bars in an airtight container in the refrigerator for up to two weeks. Because of the dairy in the caramel and the nature of the chocolate, they stay freshest when kept cool. They freeze beautifully for up to three months; just ensure they are wrapped tightly in plastic wrap and stored in a freezer-safe bag to prevent any odors from the freezer affecting the chocolate.
Why did my cereal base turn out soggy instead of crunchy?
A soggy base usually happens for one of two reasons: either the peanut butter and syrup mixture didn’t reach a full rolling boil for a full 60 seconds, or the base wasn’t pressed firmly enough into the pan. The boiling stage is what creates the moisture-proof seal, and the firm pressing prevents the wet caramel from soaking into the gaps between the cereal grains.
Can I use a different type of cereal for the base?
Yes, you can use other puffed cereals like cocoa-flavored rice cereal or even crushed cornflakes. However, avoid cereals that are very large or airy, like puffed wheat, as they don’t pack down tightly enough to create a stable foundation. If you use a larger cereal, you may need to lightly crush it first to ensure a dense enough base to support the caramel.
What can I use if I don’t have light corn syrup?
While light corn syrup is the best choice for preventing sugar crystallization and creating that “anti-soggy” seal, you can substitute it with brown rice syrup or honey. Keep in mind that honey has a lower burning point and a much stronger flavor, so you’ll need to watch the boiling stage very carefully to prevent scorching.
My chocolate layer is cracking when I try to cut the bars. How do I fix this?
Cracking chocolate usually happens when the bars are too cold or the knife is too dull. Use the “Hot Knife” method: dip your knife in hot water, wipe it dry, and let the heat of the blade melt through the chocolate layer. Also, let the bars sit at room temperature for about 10 minutes before slicing to take the chill off the chocolate.
Can I make these without a microwave?
Absolutely. You can melt the caramel and cream in a small saucepan over low heat, stirring constantly to prevent burning. For the chocolate, use a double boiler (a bowl set over a pot of simmering water) to gently melt the chips. The results will be exactly the same as the microwave method as long as you don’t let any water splash into the chocolate.
Chocolate Caramel Peanut Crunch Bars
Course: DessertCuisine: AmericanDifficulty: easy16
bars20
minutes10
minutes120
Minutes320
kcalAmerican
Ingredients
4 cups crispy rice cereal
1/2 cup creamy peanut butter
1/2 cup light corn syrup (preferred for the “anti-soggy” seal)
1/4 cup granulated sugar
11 ounces soft caramel candies, unwrapped
2 tablespoons heavy cream
1/2 teaspoon sea salt
2 cups milk chocolate chips
1/2 cup chopped roasted peanuts
1/2 cup crushed peanut butter candies (such as Butterfinger or Reese’s Pieces)
Directions
- Line an 8×8 inch square baking pan with parchment paper, leaving an overhang on two sides for easy removal.
- To create the moisture-proof base: In a medium saucepan, combine the peanut butter, corn syrup, and granulated sugar. Heat over medium heat, stirring constantly, until the mixture reaches a full rolling boil. Boil for exactly 60 seconds. This high-heat stage is critical to creating the “snap” in the base.
- Remove from heat and immediately pour over the rice cereal in a large bowl. Toss quickly to coat every grain.
- Transfer the mixture to the prepared pan. Using a piece of greased parchment paper or the bottom of a flat measuring cup, press the mixture down with significant force. A dense, tightly packed base prevents the caramel from leaking into the gaps. Chill in the freezer for 10 minutes.
- In a microwave-safe bowl, combine the unwrapped caramels, heavy cream, and sea salt. Microwave in 30-second bursts, stirring well between each, until the mixture is completely smooth and glossy.
- Pour the warm caramel over the chilled cereal base, spreading it into an even, thick layer. Return the pan to the refrigerator for 20 minutes to allow the caramel to set firmly.
- Melt the chocolate chips in a double boiler or in the microwave at 50% power, stirring until smooth. Pour the chocolate over the set caramel layer.
- While the chocolate is still wet, generously top with the chopped roasted peanuts and crushed peanut butter candies. Press the toppings lightly into the chocolate so they become embedded.
- Refrigerate for at least 2 hours until all layers are fully set. To serve, lift the block out of the pan using the parchment handles. Use a large, sharp knife dipped in hot water and wiped dry to slice into 16 bars.
Notes
- The 60-second boil for the peanut butter mixture is critical for the ‘anti-soggy’ seal. Use a hot knife for clean slices through the caramel and chocolate layers.


