
Nothing ruins a dessert faster than a beautiful cookie that turns into a mushy mess the moment you pick it up. We’ve all been there: you spend an hour in the kitchen only to have the caramel seep into the shortbread, leaving the base damp and soft. It’s a common frustration that makes many bakers shy away from layered treats.
The secret to a professional-grade cookie lies in the structural seal. By mastering the ratio of fat to flour and using a specific cooling technique, you can create a shortbread that stays crisp for days. This recipe focuses on a “reservoir” design that holds the gooey center without sacrificing that satisfying, buttery snap.
I’ve found that the real trick is the post-bake press. If you don’t re-establish the well while the dough is still hot and pliable, the caramel won’t have a proper home. This simple move creates a dense, toasted barrier that keeps the moisture where it belongs—in the caramel, not the crumb.
The Anatomy of a Perfect Shortbread Base
Shortbread is a study in simplicity, but the quality of your fat changes everything. While standard butter works, using a high-fat European-style butter provides a lower water content. This means less steam is released during baking, resulting in a tighter, more tender crumb that won’t crumble under the weight of heavy caramel.
You might be tempted to reach for powdered sugar for a “melt-in-your-mouth” feel, but stay the course with granulated sugar. The larger crystals create a sturdier internal lattice. This structural integrity is vital when you’re layering thick caramel and a chocolate cap, as it prevents the cookie from snapping in half before it reaches your mouth.
Essential Components for Chocolate Caramel Shortbread Cookies
All-purpose flour is the backbone of this recipe because it provides just enough protein to hold the “well” shape. However, you must be careful not to over-measure; spoon the flour into your measuring cup rather than scooping it directly. Packing the flour too tightly will result in a dry, sandy cookie that tastes more like flour than butter.
When selecting your caramels, look for the soft, chewy squares often found in the candy aisle. Avoid hard toffee or liquid caramel sauces, as they won’t set firmly enough to support the chocolate layer. The heavy cream we add during melting ensures the caramel remains “biteable” even after it cools, preventing that dreaded tooth-cracking texture.
For the topping, melting wafers are superior to standard chocolate chips. Wafers are formulated with a higher cocoa butter content, which gives them a professional shine. Adding a touch of coconut oil further lowers the melting point, ensuring the chocolate has a gentle “give” when you bite into it rather than shattering into shards.
Finally, don’t skip the flaky sea salt. It isn’t just a garnish; it’s a functional tool that cuts through the richness of the sugar. The large flakes provide a sharp contrast to the smooth chocolate, making the buttery notes of the shortbread pop.
Why Temperature Control Dictates Cookie Texture
The temperature of your butter is the most important variable in your kitchen. You want “cool room temperature” butter, which should be around 65°F. It should dent when pressed but still feel slightly firm to the touch.
If the butter is too soft or melted, it won’t trap the tiny air pockets needed during the creaming process. Since this recipe doesn’t use baking powder, those air pockets are the only thing providing lift. Properly creamed butter ensures the cookies are light and crisp rather than greasy and flat.
Step-by-Step: Engineering the Shortbread Reservoir
Start by mixing your dough until it just comes together. It should feel firm and pliable, almost like playdough, and it definitely shouldn’t stick to your hands. If it feels too tacky, chill it for ten minutes before rolling to help the flour hydrate.
Roll the dough into 1.5-inch balls, aiming for a uniform size so they bake evenly. Once they’re on the sheet, use the back of a rounded measuring spoon to press a wide, shallow well into the center. You’re looking to create a deep “reservoir” with a sturdy rim that will act as a dam for the molten caramel later.
The Anti-Soggy Secret: The Post-Bake Press
As the cookies bake, the centers will naturally puff up. The moment they come out of the oven, you must act quickly. Use your spoon to gently re-press those centers while the dough is still soft and hot. This compacts the crumb, creating a dense floor for your filling.
Crucially, you must let the cookies cool completely on a wire rack before adding the caramel. If you pour hot caramel onto a warm cookie, the heat re-opens the pores of the shortbread. Cooling them first creates a “structural seal” that keeps the caramel sitting proudly on top rather than soaking into the base.
Preparing the Lava-Consistency Caramel Filling
Melting caramel requires patience. Use 30-second intervals in the microwave and stir vigorously between each one. This prevents the sugar from scorching and ensures the heavy cream is fully emulsified into a glossy, golden liquid.
Once it’s smooth, let the caramel sit for about five minutes. You’re looking for a “lava-like” consistency—thick enough to hold its shape but fluid enough to spread. If you pour it while it’s too hot, it will run over the edges; if it’s too cold, it will be lumpy and difficult to smooth.
Capping the Cookies with Glossy Chocolate
The “capping” technique is what gives these cookies their professional look. Spoon the melted chocolate over the set caramel and use the back of the spoon to push it all the way to the edges of the shortbread. This airtight seal protects the caramel and keeps it fresh.
The coconut oil in the chocolate is your best friend here. It provides a beautiful, mirror-like shine and prevents the chocolate from becoming too brittle. It makes the eating experience much more pleasant, as the chocolate melts almost instantly on the tongue.
Troubleshooting Common Shortbread Failures
If your shortbread spread too much in the oven, your butter was likely too warm when you started. You can fix this next time by chilling the rolled dough balls for 15 minutes before baking. This helps the fat solidify so the cookies hold their shape.
If you notice the caramel pulling away from the sides, the cookies might have been “dusty” with excess flour. A quick brush with a pastry brush before filling can help. If the chocolate turns grey or streaky, that’s called “bloom,” usually caused by drastic temperature changes. Avoid the freezer if possible; a cool room is best for setting.
Achieving the Professional White Chocolate Drizzle
To get those perfect, thin lines, work while the base chocolate is still wet. You can use a piping bag with a tiny hole, but a “fork-flick” works just as well for a rustic look. Move your hand quickly across the cookies in a fluid motion to avoid large clumps of white chocolate.
Storage Logistics and Make-Ahead Strategies
These cookies are best stored at room temperature in an airtight container. Refrigeration can actually cause the chocolate to bloom and the shortbread to lose its signature snap. They’ll stay fresh and delicious for up to five days on the counter.
If you want to plan ahead, you can freeze the unbaked dough balls for up to three months. Just thaw them in the fridge overnight before pressing the wells and baking. I don’t recommend freezing the finished cookies, as the caramel can become grainy once thawed.
Expert Tips for High-Altitude Baking
Baking at high altitudes can cause the “well” in your cookie to collapse because the dough rises too quickly. To counter this, try increasing your flour by two tablespoons. You might also want to reduce the sugar by a tablespoon to strengthen the dough’s structure against the lower air pressure.
Frequently Asked Questions
Can I use homemade caramel sauce instead of melted caramels?
I don’t recommend using a standard caramel sauce for this recipe. Most homemade sauces have a high moisture content and are designed to stay pourable at room temperature. This will result in a messy cookie that never sets, eventually causing the shortbread to become soggy. Stick to melting down “set” caramels or use a specific “soft candy” caramel recipe that reaches the firm-ball stage.
How do I prevent the chocolate from cracking when I bite in?
The secret is the tablespoon of coconut oil mixed into the chocolate wafers. Pure chocolate sets very hard, which causes it to shatter when bitten. The coconut oil slightly softens the final set, creating a “soft-snap” texture. This ensures the chocolate yields to your teeth at the same rate as the caramel and shortbread, giving you a perfect, clean bite every time.
What is the best way to clean caramel off my equipment?
Caramel is essentially hardened sugar, so the best way to clean it is with heat and water. Fill your sticky bowls and spoons with boiling water and let them soak for ten minutes. The sugar will dissolve completely, allowing you to wipe the equipment clean without any scrubbing. If the caramel is particularly stubborn, simmering the tools in a pot of water on the stove will do the trick.
Can I substitute the flour for a gluten-free alternative?
Yes, you can use a high-quality 1:1 gluten-free flour blend. However, make sure your blend contains xanthan gum, which provides the elasticity needed to hold the reservoir shape. Gluten-free doughs can be a bit more fragile, so you may need to handle the dough balls more gently when pressing the wells to prevent the edges from cracking too much.
Chocolate Caramel Shortbread Cookies
Course: DessertCuisine: AmericanDifficulty: easy18
cookies25
minutes15
minutes40
MinutesAmerican
Ingredients
1 cup unsalted butter, softened
1/2 cup granulated sugar
1 teaspoon vanilla extract
2 1/4 cups all-purpose flour
1/2 teaspoon salt
11 ounces high-quality soft caramels (unwrapped)
2 tablespoons heavy cream
1 1/2 cups semi-sweet chocolate melting wafers (for a smoother finish)
1 tablespoon coconut oil
Flaky sea salt and 1/4 cup white chocolate chips (for garnish)
Directions
- Preheat your oven to 350°F (175°C). Line two large baking sheets with parchment paper.
- In a large bowl, cream together the softened butter and sugar until pale and fluffy. Stir in the vanilla extract.
- Gradually add the flour and salt. Mix until the dough comes together; it should be firm and not sticky.
- Roll the dough into 1.5-inch balls. Place them on the sheets and use the back of a spoon or your thumb to press a wide, shallow well into the center of each cookie. This creates a “reservoir” for the caramel.
- Bake for 12 to 15 minutes or until the bottoms are lightly golden.
- THE ANTI-SOGGY SECRET: Immediately after removing the cookies from the oven, use the back of a spoon to gently re-press the centers if they puffed up. Let the cookies cool completely on a wire rack. Applying caramel to a warm cookie causes the sugars to melt into the pores of the shortbread; cooling them first creates a structural seal.
- In a microwave-safe bowl, combine the caramels and heavy cream. Heat in 30-second intervals, stirring until completely smooth. Let the caramel sit for 5 minutes to thicken to a lava-like consistency.
- Spoon the thickened caramel into the wells of the cooled cookies, spreading it nearly to the edges. Let the caramel set for at least 20 minutes until firm to the touch.
- Melt the chocolate chips and coconut oil together in the microwave until glossy. Spoon the chocolate over the set caramel, using the back of the spoon to smooth it to the edges, fully “capping” the caramel layer.
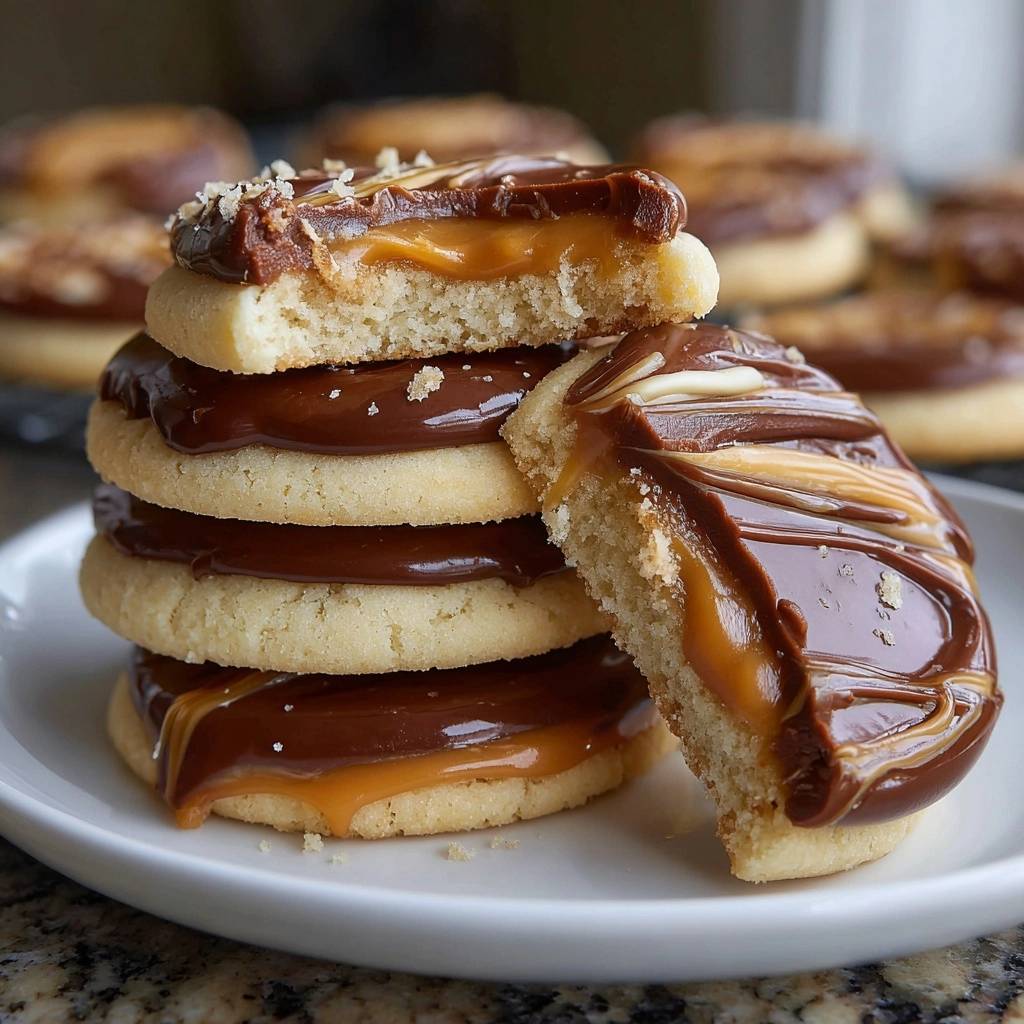
- While the chocolate is still wet, melt the white chocolate chips and drizzle thin lines across the top. Sprinkle with flaky sea salt. Let the cookies set at room temperature for 1 hour or refrigerate for 15 minutes before serving to achieve the clean break shown in the image.
Notes
- The ‘Anti-Soggy Secret’ involves re-pressing the centers immediately after baking and allowing the cookies to cool completely before adding caramel to create a structural seal.


