
Forget everything you know about the sticky, charred mess of a traditional campfire s’more. While we all love that classic flavor, trying to recreate it in a handheld truffle usually ends in a disaster of melted marshmallow and sliding chocolate. Most home cooks struggle because the marshmallow loses its structural integrity the second it touches warm chocolate, resulting in a lumpy, unappealing treat.
This recipe changes the game by focusing on thermal control and a specific binder technique. You’ll get that iconic combination of fluffy center, rich chocolate, and buttery graham cracker without the usual cleanup headache. It’s the perfect way to bring the outdoors in, but with a polished, professional finish that looks like it came from a high-end candy shop.
The secret to success lies in the 15-minute freezer window. By chilling the marshmallows before they hit the chocolate bath, you create a thermal barrier. This prevents the marshmallow from collapsing and helps the chocolate shell set instantly, locking in that perfect circular shape every single time.
The Anatomy of a Perfect S’mores Truffle
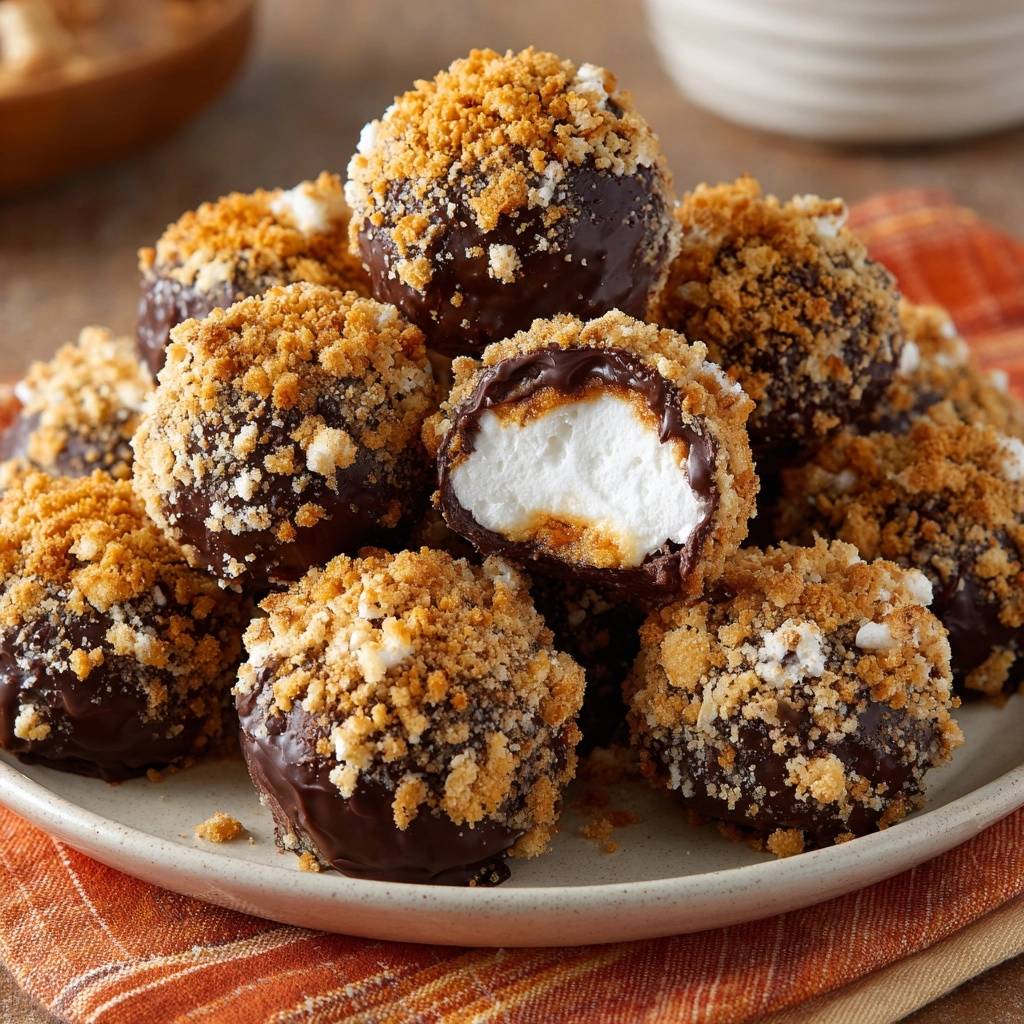
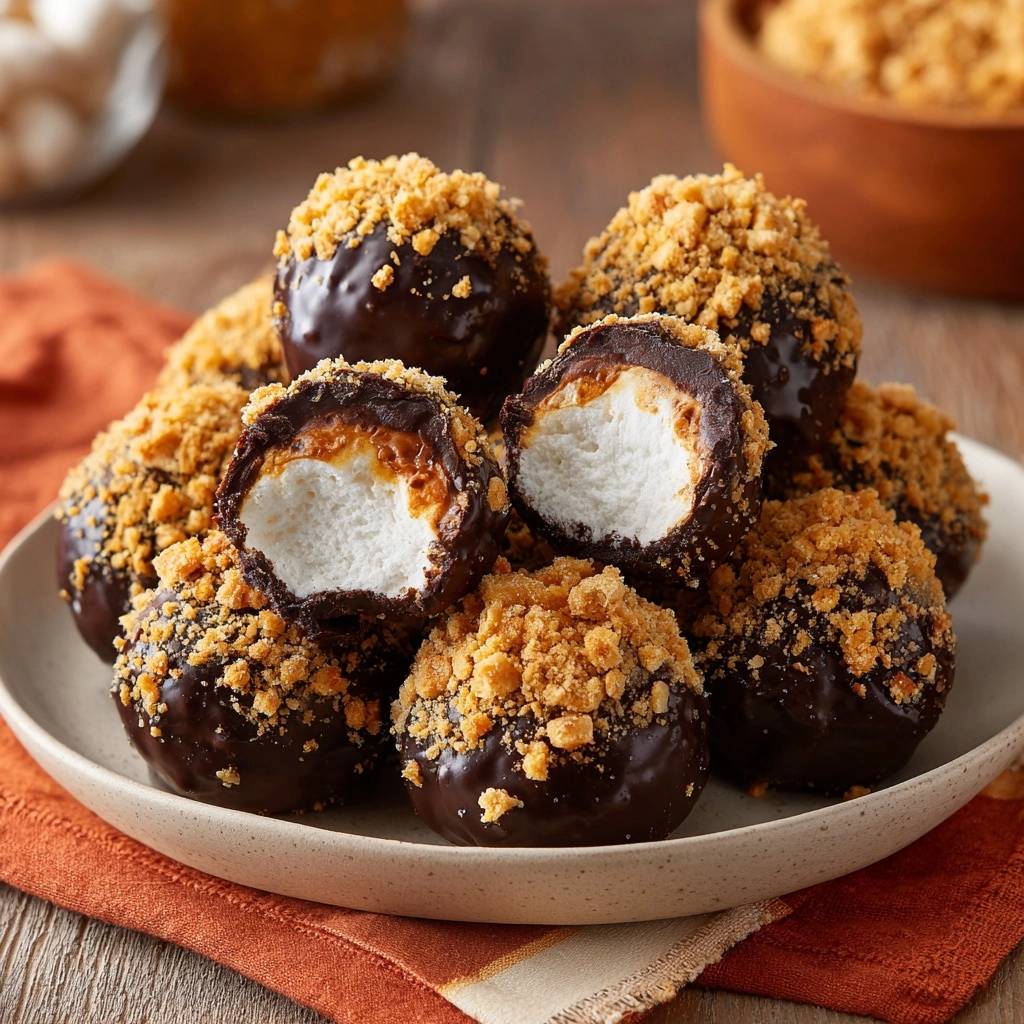
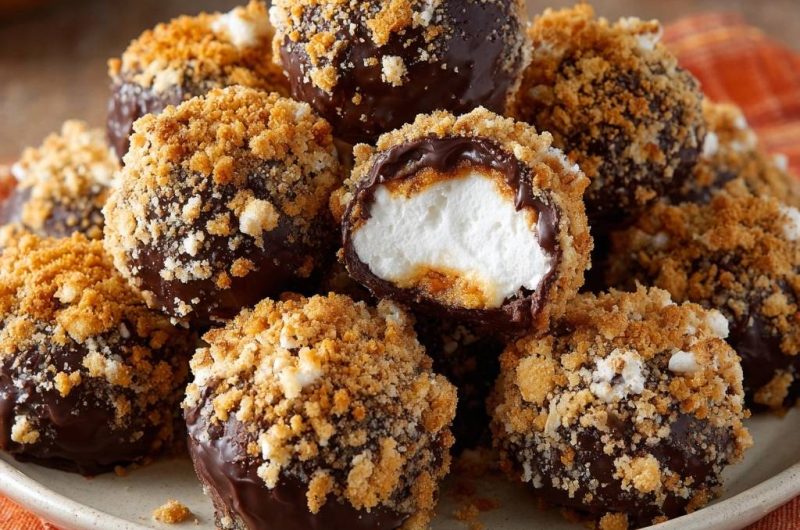
A truly great Chocolate S’mores Truffle relies on three distinct layers working in harmony. At the center, you have a pillowy, soft marshmallow that provides the airy sweetness we crave. This core is protected by a snappy, semi-sweet chocolate shell that offers a satisfying crack when you bite into it.
The final layer is the textured graham cracker crust, which provides the essential salt and crunch. Unlike a standard s’more where the cracker is a dry exterior, this version embeds the crumbs directly into the chocolate. This creates a portable, bite-sized dessert that stays together much better than a traditional sandwich-style treat.
Essential Components for the Graham Cracker Crust
The graham cracker topping isn’t just crushed crackers; it’s a carefully balanced mixture designed to stay crunchy. We use light brown sugar because its slight molasses content helps the crumbs “grip” the chocolate shell. This prevents the topping from simply falling off once the chocolate dries.
Unsalted butter is vital here because it allows you to control the seasoning perfectly. By adding a specific half-teaspoon of sea salt, you create a flavor bridge between the sugary marshmallow and the rich chocolate. That tiny hit of salt cuts through the sweetness and makes the whole bite feel more sophisticated.
Selecting High-Quality Chocolate Melting Wafers
When you’re shopping, look for high-quality melting wafers rather than standard chocolate chips. Chocolate chips are designed to hold their shape in the oven, so they contain stabilizers that make them too thick for smooth dipping. Wafers are formulated with more cocoa butter, which ensures they melt into a fluid, silky pool.
I recommend a semi-sweet profile, usually around 55% to 60% cocoa. This percentage provides enough bitterness to balance the sugar-heavy marshmallow center. If the chocolate is too sweet, the truffle becomes cloying; if it’s too dark, it can overpower the delicate graham cracker flavor.
The Role of Coconut Oil in the Coating
Adding a tablespoon of coconut oil to your chocolate is a professional trick you shouldn’t skip. Coconut oil lowers the viscosity of the melted chocolate, making it thin enough to coat the marshmallow without leaving a thick, heavy layer. This ensures you get a delicate “shell” rather than a clunky block of chocolate.
Furthermore, coconut oil has a relatively low melting point, which contributes to that “melt-in-your-mouth” sensation. It also gives the finished truffles a beautiful, glossy sheen. When the chocolate sets, the oil helps it achieve a clean snap that contrasts beautifully with the soft interior.
Step-by-Step: Preparing the Textured Graham Binder
To start, you want to aim for a “wet sand” consistency with your graham cracker mixture. If the crumbs are too fine, they will turn into a muddy paste when they hit the chocolate. If they are too large, they won’t adhere properly and will crumble away as soon as you take a bite.
Pulse your crackers until you have a mix of fine dust and small, pebble-sized pieces. Stir in the melted butter, brown sugar, and salt until every crumb looks slightly darkened and moist. This moisture is what allows the crumbs to embed themselves into the chocolate shell before it hardens completely.
Thermal Control: Why Freezing Marshmallows is Mandatory
Thermodynamics plays a huge role in candy making, even with simple recipes like this. If you dip a room-temperature marshmallow into warm chocolate, the heat from the chocolate immediately begins to soften the sugar structure of the marshmallow. This causes the marshmallow to sag or, worse, leak air bubbles into your smooth coating.
By freezing the marshmallows for 15 minutes, you create a “cold core.” When the warm chocolate hits the frozen surface, it flash-sets from the inside out. This creates an immediate bond that holds the marshmallow’s shape and provides a stable foundation for the heavy graham cracker topping.
The Melting Process: Achieving a Glossy Finish
Patience is your best friend when melting chocolate in the microwave. Use a microwave-safe glass bowl and heat in 30-second bursts. Even if the wafers look like they haven’t moved, take the bowl out and give it a vigorous stir. The residual heat often does more work than the microwave itself.
Be extremely careful to keep all water away from your workspace. Even a single drop of water can cause the chocolate to “seize,” turning it into a gritty, unworkable clump. If the chocolate looks glossy and flows off your spoon in a continuous ribbon, it’s ready for dipping.
Precision Dipping: How to Achieve a Professional Shell
To get that clean look, use a dipping fork or a long toothpick inserted into the base of the marshmallow. Submerge the marshmallow entirely, then lift it straight up. Use the “lift and drip” method: hold it over the bowl for about 5 seconds, gently tapping your wrist to encourage the excess chocolate to fall away.
This step prevents the dreaded “chocolate foot,” which is that pool of excess chocolate that forms at the bottom of the truffle as it dries. If you’re using a toothpick, you can easily fill the small hole later with a tiny dab of leftover chocolate or simply cover it with extra graham crumbs.
Applying the Crust Without the Mess
Timing is everything when applying the graham cracker crust. You want the chocolate to be “tacky”—not so liquid that the crumbs drown, but not so dry that they bounce off. Immediately after the 5-second drip, roll the marshmallow in the graham mixture.
Use a “dry hand, wet hand” technique to keep things clean. Use one hand (or a tool) to handle the chocolate-dipped marshmallow and the other hand to sprinkle and press the crumbs. This prevents your fingers from becoming coated in a thick paste of chocolate and graham crackers, which can ruin the finish of the next truffle.
Troubleshooting Common Chocolate Coating Issues
If you find the chocolate is sliding off the marshmallow, it’s likely because the marshmallow wasn’t cold enough or the chocolate was too hot. Let the chocolate sit for two minutes to cool slightly, and ensure your next batch of marshmallows comes straight from the freezer.
If your chocolate has white streaks or spots after it dries, this is called “bloom.” It usually happens due to rapid temperature changes or humidity. While it doesn’t look perfect, it’s still perfectly safe to eat. To avoid this, let the truffles set in a cool, dry area of your kitchen rather than a humid fridge if possible.
Make-Ahead Strategies and Storage Logistics
These truffles are fantastic for parties because you can make them up to three days in advance. Store them in an airtight container at room temperature in a cool, dark place. If your kitchen is very warm, you can keep them in the fridge, but be aware that chocolate can “sweat” when moved from a cold fridge to a warm room.
To prevent sweating, place a piece of paper towel in the container to absorb any excess moisture. If you need to stack them, always use a layer of parchment paper between the rows. This protects the delicate graham cracker crust from being crushed by the weight of the truffles above.
Flavor Variations and Ingredient Swaps
Once you master the basic technique, you can get creative with the flavors. For a sophisticated twist, try using a 70% dark chocolate and adding a pinch of ground cinnamon or chili powder to the graham cracker mix. This creates a flavor profile reminiscent of Mexican hot chocolate.
If you want a seasonal variation, swap the graham crackers for crushed ginger snaps or even chocolate sandwich cookie crumbs. For those with dietary restrictions, gluten-free graham crackers work perfectly in this recipe as the butter and sugar binder keeps them just as crunchy as the traditional version.
Expert Tips for Large Batch Production
If you’re making these for a big event, set up an assembly line. Have your chilled marshmallows on the left, your chocolate in the middle, and your graham mixture on the right. This flow keeps the process efficient and prevents the chocolate from cooling down too much before you finish.
If the chocolate does start to thicken, pop it back in the microwave for just 10 seconds. Keeping the chocolate at a consistent, fluid temperature is the only way to ensure the last truffle looks just as good as the first one. You can also use a heating pad set to “low” under your glass bowl to maintain the heat longer.
Frequently Asked Questions
Why is my chocolate coating thick and clumpy?
Thick chocolate is usually caused by overheating or a lack of fat. If you heat chocolate too quickly, the proteins can clump. Always use the 30-second interval method and ensure you’ve added the coconut oil. The oil is essential for thinning the chocolate to a dipping consistency.
Can I use homemade marshmallows for this recipe?
Yes, you can use homemade marshmallows, but they tend to have a higher moisture content than store-bought ones. You may need to freeze them for 25-30 minutes instead of 15 to ensure they are stable enough to withstand the heat of the melted chocolate.
How do I prevent the graham crumbs from getting soggy?
The key is the butter and sugar ratio. The melted butter coats the crumbs, creating a fat barrier that prevents the moisture in the air or the chocolate from softening the cracker. Also, ensure your truffles are stored in a dry environment; humidity is the enemy of a crunchy graham crust.
What is the best way to transport these for a party?
Transport them in a single layer if possible. If you must stack them, use parchment paper between layers. Keep the container in a cool part of your car, away from direct sunlight, to prevent the chocolate shells from softening or scuffing against each other.
Can I use a blowtorch to toast the marshmallow first?
Toasting the marshmallow before dipping is risky because the heat destroys the marshmallow’s structure, making it too soft to dip. If you want a toasted flavor, try toasting the graham cracker crumbs in a dry pan for 2 minutes before mixing them with the butter and sugar.
Chocolate S’mores Truffles
Course: DessertCuisine: AmericanDifficulty: easy18
truffles20
minutes5
minutes25
Minutes165
kcalAmerican
Ingredients
18 large marshmallows
12 ounces semi-sweet chocolate melting wafers (high-quality)
1 ½ cups graham cracker crumbs
2 tablespoons unsalted butter, melted
2 tablespoons light brown sugar
1 tablespoon coconut oil
1/2 teaspoon sea salt
Directions
- Prepare the Graham Topping: In a small bowl, combine the graham cracker crumbs, melted butter, brown sugar, and sea salt. Mix until the crumbs are evenly moistened. This creates the thick, textured “crust” look seen in the image and ensures the crumbs adhere to the chocolate rather than falling off.
- The Temperature Secret: Place your marshmallows on a baking sheet lined with parchment paper and put them in the freezer for 15 minutes. Chilling the marshmallow is the essential secret step; it prevents the marshmallow from softening or losing its shape when it hits the warm chocolate, keeping the center firm and easy to handle.
- Melt the Coating: While the marshmallows chill, combine the chocolate wafers and coconut oil in a microwave-safe bowl. Heat in 30-second intervals, stirring well between each cycle until the mixture is completely smooth and glossy. The coconut oil thins the chocolate to a dipping consistency that creates a professional-grade shell.
- The Dipping Process: Remove the marshmallows from the freezer. Using a toothpick or a dipping fork, submerge one marshmallow at a time into the melted chocolate. Lift it out and let the excess chocolate drip off for about 5 seconds.
- The Crust Application: Immediately roll the chocolate-covered marshmallow in the prepared graham cracker mixture. Press gently so the buttery crumbs embed into the wet chocolate. The chilled marshmallow will help the chocolate set from the inside out, locking the heavy crumb layer in place.
- Set and Serve: Place the finished truffles back on the parchment paper. Let them set at room temperature for 20 minutes (or 5 minutes in the fridge) until the shell is firm. This ensures a snap-perfect chocolate exterior and a soft, fluffy marshmallow interior.
Notes
- Chilling the marshmallows for 15 minutes is the essential secret step to prevent them from melting or losing shape when dipped in warm chocolate.


