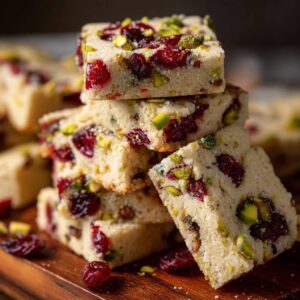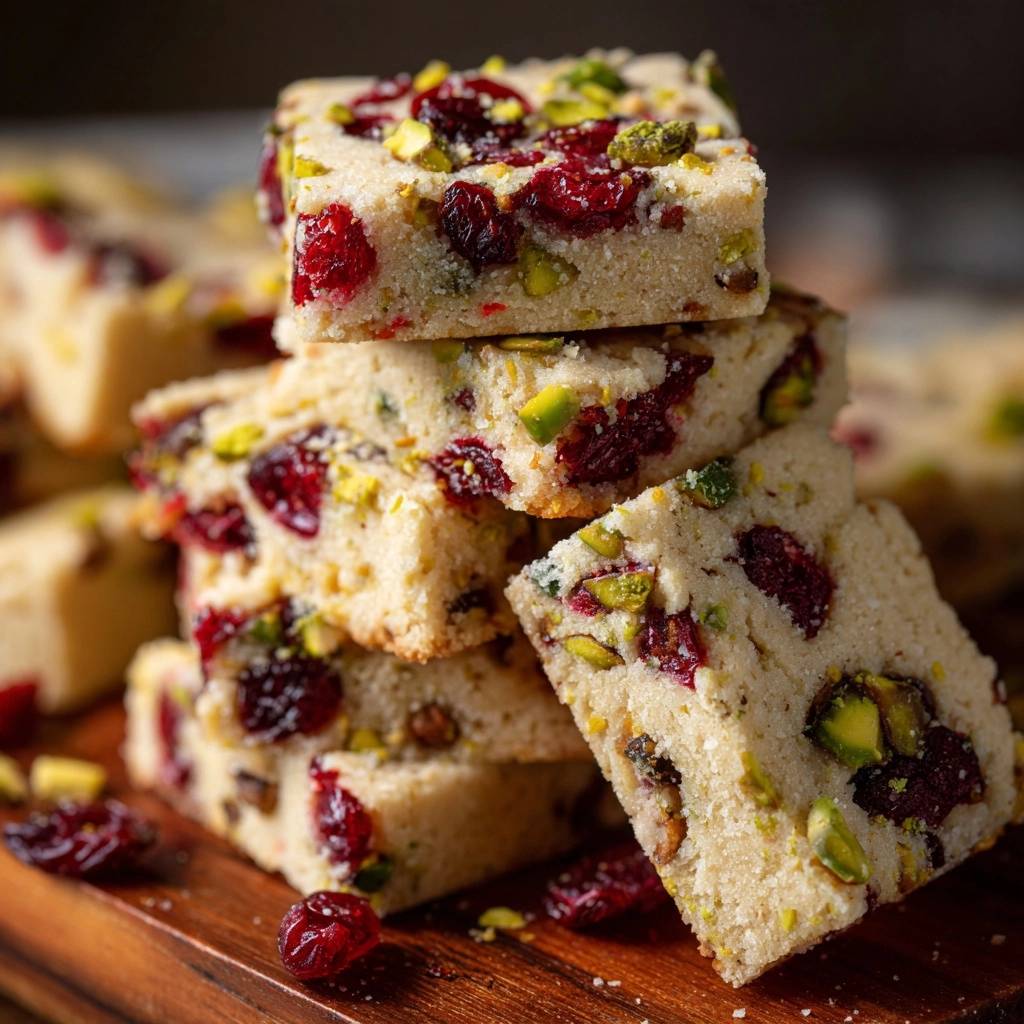
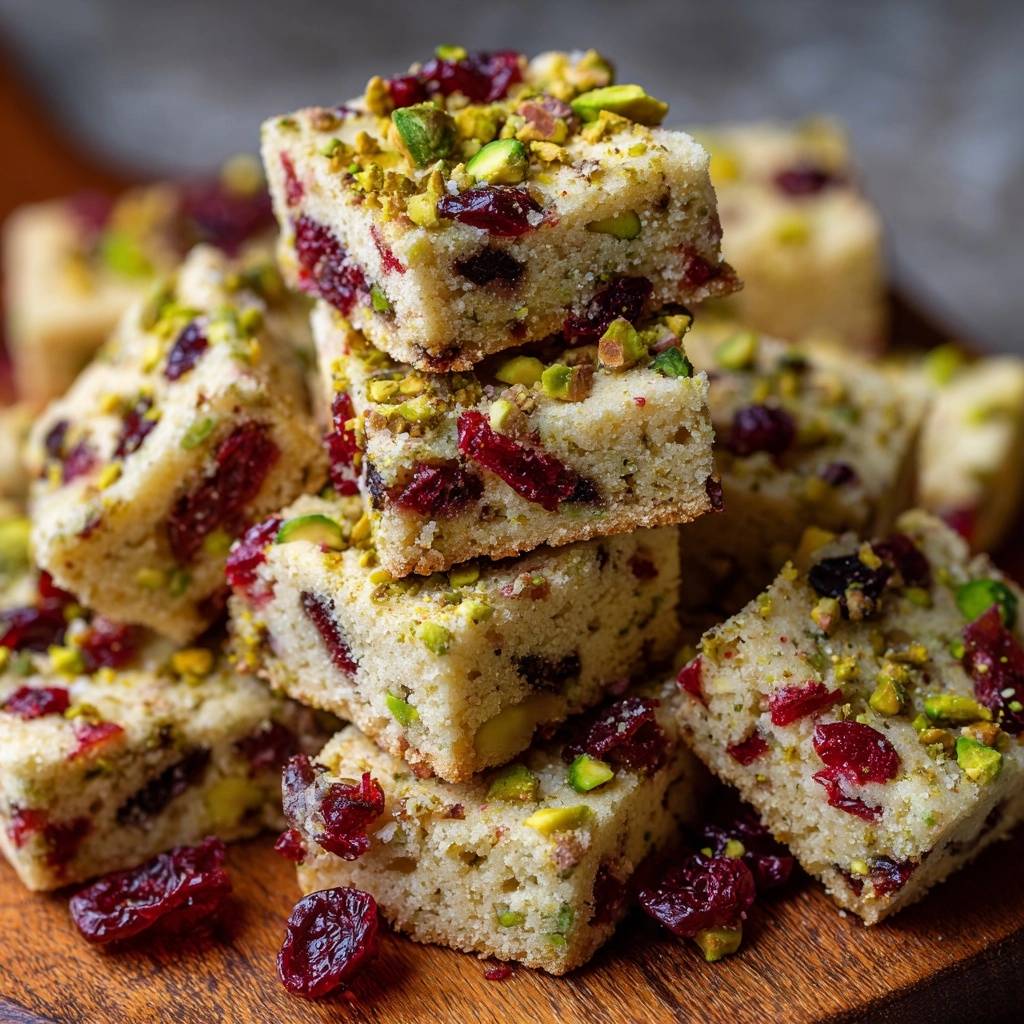
Imagine biting into a shortbread bar that doesn’t immediately explode into a cloud of dry crumbs on your shirt. Instead, it yields with a soft, buttery snap, melting away to reveal the tart chew of a cranberry and the salty crunch of a toasted pistachio. These Cranberry Pistachio Shortbread Bars are the ultimate holiday showstopper, offering a sophisticated balance of vibrant colors and rich, decadent textures that feel far more complex than they actually are.
Most people struggle with shortbread because it either turns out like a rock or shatters the moment a knife touches it. We’ve all been there, staring at a tray of delicious-tasting debris that looks like it went through a woodchipper. This recipe solves that frustration by focusing on structural integrity without sacrificing that classic, sandy mouthfeel. It’s about the harmony between the fats and the flour, ensuring every square stays perfectly intact from the pan to the plate.
The secret to this success lies in the “Anti-Crumbly Slice” technique, which starts with the temperature of your butter. If your butter is too warm, the bars become greasy and heavy; if it’s too cold, they won’t bind. By using butter at exactly 65°F—soft enough to indent but firm enough to hold its shape—you create a stable emulsion that locks the flour in place. This precision ensures your bars have that professional, clean-cut edge every single time.
The Science of the Anti-Crumbly Shortbread Base
Shortbread is a study in simplicity, traditionally relying on a high ratio of fat to flour to create its signature “short” texture. The term “short” actually refers to the way the fat coats the flour particles, shortening the gluten strands so they can’t become elastic or tough. However, that same lack of gluten is what usually makes shortbread so fragile and prone to falling apart.
To fix this, we use a strategic blend of granulated and powdered sugar. While granulated sugar provides the classic sweetness and a slight crunch, powdered sugar contains a small amount of cornstarch. This starch acts as a secondary binder, helping the dough hold its shape after it leaves the oven. It bridges the gap between the butter and the flour, creating a more cohesive crumb that stands up to slicing.
Furthermore, we must be extremely careful with gluten development. The moment you add flour to the creamed butter, the clock starts ticking. If you overwork the dough with an electric mixer, you develop too much structure, leading to a hard, cookie-like bar rather than a delicate shortbread. Hand-folding is the only way to ensure the texture remains light and melt-in-your-mouth tender.
Why Temperature-Controlled Butter is Non-Negotiable
Temperature is the most overlooked ingredient in baking. For these bars, 65°F is the magic number. If your kitchen is hot and the butter starts to look shiny or oily, your shortbread will likely spread too much and turn out greasy. Conversely, if the butter is straight from the fridge, it won’t incorporate the sugar properly, leading to air pockets that cause the bars to crumble later.
You can test this easily with the “finger indent” method. Press your pinky into the side of the butter stick. It should yield easily and leave a deep mark, but your finger shouldn’t slide through it like grease. If the butter feels cool to the touch but is pliable, you are ready to start creaming. This specific state allows the sugar to aerate the butter just enough to provide lift without making the bars cakey.
Essential Components for Cranberry Pistachio Shortbread Bars
Because this recipe has so few ingredients, the quality of each one is magnified. You’ll want to use a high-quality all-purpose flour and ensure you are measuring it correctly. Always fluff your flour with a spoon before scooping it into your measuring cup, then level it off with a flat edge. Packing the flour into the cup is a one-way ticket to a dry, sandy mess that won’t hold together.
Unsalted butter is the preferred choice here because it allows you to control the salt content precisely. Different brands of salted butter have varying levels of sodium, which can easily overwhelm the delicate flavors of the pistachio and orange. By adding your own fine sea salt, you ensure the flavors are enhanced rather than masked by saltiness.
Selecting High-Quality Dried Fruit and Nuts
The visual appeal of these bars depends heavily on the contrast between the red cranberries and green pistachios. Look for “shelled, roasted, and unsalted” pistachios that still have a vibrant green hue. Older nuts tend to turn a dull brown and lose their characteristic floral flavor. If you can find Turkish or Sicilian pistachios, they often provide the most intense color pop.
Dried cranberries are essential here because they provide a concentrated tartness without the excess moisture of fresh berries. Fresh cranberries would release juice during the baking process, creating soggy pockets in the shortbread and ruining the structural integrity. The dried version stays chewy and intact, providing a beautiful textural contrast to the buttery base.
The Aromatic Power of Fresh Orange Zest
Orange zest is the “secret” ingredient that makes people ask for the recipe. The citrus oils found in the peel are fat-soluble, meaning they infuse the butter and carry the flavor through every single bite. It cuts through the richness of the shortbread and complements the tartness of the cranberries perfectly.
When zesting, use a microplane and stop as soon as you see the white pith. The pith is incredibly bitter and can ruin the delicate balance of the dough. You only want the very outer layer of the skin, where the fragrant oils are concentrated. Just one tablespoon is enough to transform the entire aromatic profile of the bars.
Step-by-Step: Mixing the Perfect Shortbread Dough
Start by creaming your cool, softened butter with the granulated and powdered sugars. You aren’t looking for the fluffy, whipped consistency you’d want for a birthday cake. Instead, aim for a mixture that is smooth, pale, and cohesive. This should take about two to three minutes on medium speed. Once it looks like a thick paste, stir in your vanilla and orange zest.
Now comes the most critical transition: put away the electric mixer. From this point forward, you must use a spatula or a wooden spoon. Adding the flour by hand allows you to feel the resistance of the dough and ensures you stop the moment the last white streak disappears. This gentle touch is what separates a professional shortbread from a tough, homemade version.
The Sifting and Folding Technique
Sifting your flour and salt directly over the butter mixture is a step you shouldn’t skip. It breaks up any clumps and aerates the flour, making it much easier to fold in gently. Use a large, sweeping motion with your spatula, cutting through the center of the bowl and folding the bottom over the top. This incorporates the flour without squashing the air you worked into the butter.
As you fold, the dough will look crumbly and “shaggy” at first. Don’t panic and don’t add liquid! Keep folding, and the moisture from the butter will eventually pull the flour into a soft, cohesive dough. Once it starts to clump together into a ball, gently fold in your first portion of cranberries and pistachios until they are evenly distributed.
The High-Pressure Packing Technique for Clean Slices
To achieve that dense, professional look, you need to use the high-pressure packing technique. After transferring the dough to your parchment-lined pan, use your fingers to spread it into the corners. Then, take a flat-bottomed tool, like a metal measuring cup or a heavy glass, and press down firmly across the entire surface. You are trying to eliminate any tiny air gaps within the dough.
This compression is the “Skyscraper” secret. By packing the dough tightly, you are forcing the ingredients to bond together. This creates a solid foundation that won’t crumble when the knife hits it later. It also ensures that the fruit and nuts are deeply embedded in the dough, preventing them from popping out when you take a bite.
Achieving the Professional Bakery Aesthetic
For that “bakery window” look, we use a two-stage inclusion method. You already folded most of the fruit and nuts into the dough, but now you’ll scatter the remaining quarter-cup of each over the top. After scattering, use your flat-bottomed tool again to press these toppings firmly into the surface. This makes the bars look abundant and colorful while keeping the toppings “locked” in place.
Precision Baking and the Carryover Cold-Set
Shortbread likes it low and slow. We bake these at 325°F rather than the standard 350°F to prevent the edges from browning too quickly. You want the bars to cook through evenly while remaining pale and sandy. After about 22 to 25 minutes, the edges should be just barely golden, and the center should feel set but not hard. It will look slightly underbaked, but that’s exactly what you want.
The most difficult part of this recipe is the waiting. Shortbread is essentially held together by butter, which is liquid when hot. If you try to cut these bars while they are warm, they will fall apart instantly. As the bars cool, the butter solidifies, creating a firm, stable structure. This “carryover set” is what gives the bars their final, perfect texture.
The Two-Hour Cooling Mandate
You must allow the bars to cool completely in the pan for at least two hours. If you’re in a hurry, let them sit on the counter for 30 minutes and then move the whole pan into the refrigerator for another 30. This chilling process ensures the butter molecules have fully realigned. A cold shortbread bar is a structurally sound shortbread bar, ready for the knife.
Troubleshooting Common Shortbread Texture Issues
If your dough feels impossibly dry and won’t come together even after several minutes of folding, your flour might have been packed too tightly. You can save it by adding one teaspoon of room-temperature milk. This provides just enough moisture to help the fats bind the flour. Be careful not to add more, or you’ll lose that classic shortbread snap.
If your bars come out greasy or have a “melted” look, the butter was likely too warm when you started, or you over-creamed the mixture. Over-creaming incorporates too much air, which collapses in the oven and forces the butter out of the emulsion. To prevent this next time, stick strictly to the 65°F rule and the “pale and smooth” visual cue rather than beating it until it’s fluffy.
How to Fix a Sandy or Loose Dough
If you find the dough is still too loose to press into the pan, try chilling the entire bowl of dough for 15 minutes. Sometimes the heat from your hands can soften the butter too much during the folding process. Chilling it slightly will firm up the fats, making the dough much easier to handle and press into a solid, even layer.
Advanced Slicing Tactics for Perfect Edges
To get those razor-sharp edges, use a very sharp chef’s knife. Avoid serrated knives, as the sawing motion will tear through the delicate shortbread and cause it to crack. Instead, use a single, firm downward motion. Press the blade straight through the cold block of shortbread, then lift it out and wipe the blade clean between every single cut.
Wiping the blade is essential because the friction of the knife creates a tiny bit of heat, which melts the butter and sugar on the blade. If you don’t clean it, that residue will drag through the next cut, creating a messy, jagged edge. For the absolute best results, chill the bars in the fridge for 30 minutes before slicing; the colder they are, the cleaner the cut will be.
Storage, Make-Ahead, and Longevity Guide
Shortbread is one of the few desserts that actually tastes better the next day. Over 24 hours, the moisture from the cranberries softens the surrounding dough slightly, and the orange oils fully permeate the bars. Store them in an airtight container at room temperature for up to five days. They are incredibly shelf-stable because of their high fat and low moisture content.
If you want to make these ahead of time, they are perfect for gifting. They don’t require refrigeration and hold up well during transport. Just make sure to layer them with parchment paper in your container so they don’t rub against each other, which can dull their beautiful, sharp edges.
Freezing Shortbread for Long-Term Freshness
These bars freeze beautifully for up to three months. To prevent freezer burn, wrap the sliced bars tightly in plastic wrap, then place them in a heavy-duty freezer bag or wrap them again in aluminum foil. This double-layer protection prevents the bars from absorbing any “freezer smells” from other foods. When you’re ready to eat, let them thaw at room temperature for about an hour.
Expert Tips for Customizing Your Shortbread
Once you master the base technique, you can experiment with different flavors. Try swapping the pistachios for toasted pecans and the orange zest for cinnamon for a warm, autumnal vibe. You could also drizzle the finished, cooled bars with a bit of melted dark chocolate to add a layer of bitterness that pairs wonderfully with the sweet cranberries.
Another sophisticated variation is to add a teaspoon of culinary-grade dried lavender to the sugar before creaming. This creates a floral, elegant bar that is perfect for afternoon tea. Regardless of the inclusions you choose, always stick to the high-pressure packing method to ensure your custom creations stay together perfectly.
Frequently Asked Questions
Can I use salted butter?
You can use salted butter if that’s all you have on hand, but you should omit the additional half-teaspoon of salt called for in the recipe. Keep in mind that different brands have different salt levels, so the final flavor might be slightly less predictable than if you used unsalted butter and added the salt yourself.
Why is my shortbread brown instead of pale?
If your shortbread turned dark brown, your oven might be running hot, or you left them in a few minutes too long. Shortbread should remain relatively pale on top with just a hint of gold at the very edges. Use an oven thermometer to check your oven’s accuracy, as many home ovens can be off by 25 degrees or more.
Can I make this dough in a food processor?
Yes, you can use a food processor to pulse the butter, sugar, and flour together until it looks like damp sand. However, you must be extremely careful not to over-process it into a paste. Once it reaches the sandy stage, dump it into a bowl and fold in the cranberries and pistachios by hand to maintain the right texture.
How do I prevent the parchment paper from slipping?
The easiest way to keep your parchment paper in place is to lightly grease the pan with a tiny bit of butter or cooking spray before laying the paper down. The grease acts like glue, holding the parchment against the sides of the pan so it doesn’t slide around while you are trying to press the dough into the corners.
Can I use a different size pan?
This recipe is specifically designed for an 8×8 inch square pan to achieve the ideal thickness. If you use a 9×9 inch pan, the bars will be much thinner and will bake faster, likely in 18 to 20 minutes. If you use a rectangular loaf pan, they will be very thick and may require a longer bake time at a slightly lower temperature to ensure the middle sets without burning the edges.
Cranberry Pistachio Shortbread Bars
Course: DessertCuisine: AmericanDifficulty: easy16
bars15
minutes25
minutes40
Minutes185
kcalAmerican
Ingredients
1 cup unsalted butter, softened to cool room temperature (65°F)
1/2 cup granulated sugar
1/4 cup powdered sugar (contains cornstarch for binding)
2 cups all-purpose flour, leveled
1/2 teaspoon salt
1 teaspoon vanilla extract
3/4 cup dried cranberries, divided
3/4 cup shelled pistachios, roughly chopped, divided
Optional: 1 tablespoon orange zest (for the aromatic profile visible in the dough)
Directions
- Preheat your oven to 325 degrees F. Line an 8×8 inch baking pan with parchment paper, leaving an overhang on two sides for easy removal.
- The secret to the Anti-Crumbly Slice is the butter consistency. Use butter that is soft enough to indent with a finger but still holds its shape. Cream the butter with both the granulated and powdered sugars until smooth and pale.
- Stir in the vanilla extract and orange zest.
- Sift the flour and salt into the butter mixture. Use a spatula to fold the flour in by hand just until a soft, cohesive dough forms. Do not use an electric mixer for this step, as over-working the gluten is what causes the bars to become brittle and dry.
- Gently fold in 1/2 cup of the cranberries and 1/2 cup of the pistachios.
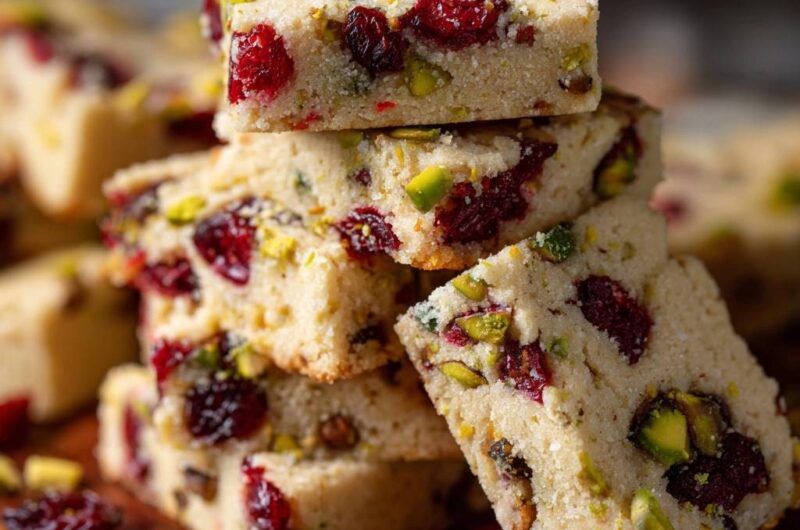
- Transfer the dough to the prepared pan. Press the dough firmly and evenly into the corners. To achieve the look in the image, scatter the remaining 1/4 cup of cranberries and 1/4 cup of pistachios over the top.
- Use the bottom of a flat measuring cup to pack the dough and toppings down with significant pressure. This compression is vital for a clean, non-crumbly slice and ensures the toppings are embedded into the surface rather than sitting loosely on top.
- Bake for 22 to 25 minutes. The bars should be set and the edges just barely turning a light golden brown, while the surface remains pale and sandy in appearance.
- Important: Allow the bars to cool completely in the pan for at least two hours, or refrigerate for 30 minutes once at room temperature. Shortbread sets its structure as the butter solidifies.
- Once cold, use the parchment overhang to lift the block out. Use a very sharp chef’s knife to slice into squares in a single downward motion (do not saw). This ensures the fruit and nuts stay locked in place for the perfect, clean edge shown in the photo.
Notes
- The secret to the clean slice is the high-pressure packing technique and allowing the bars to cool completely so the butter structure can solidify before cutting with a sharp knife.