
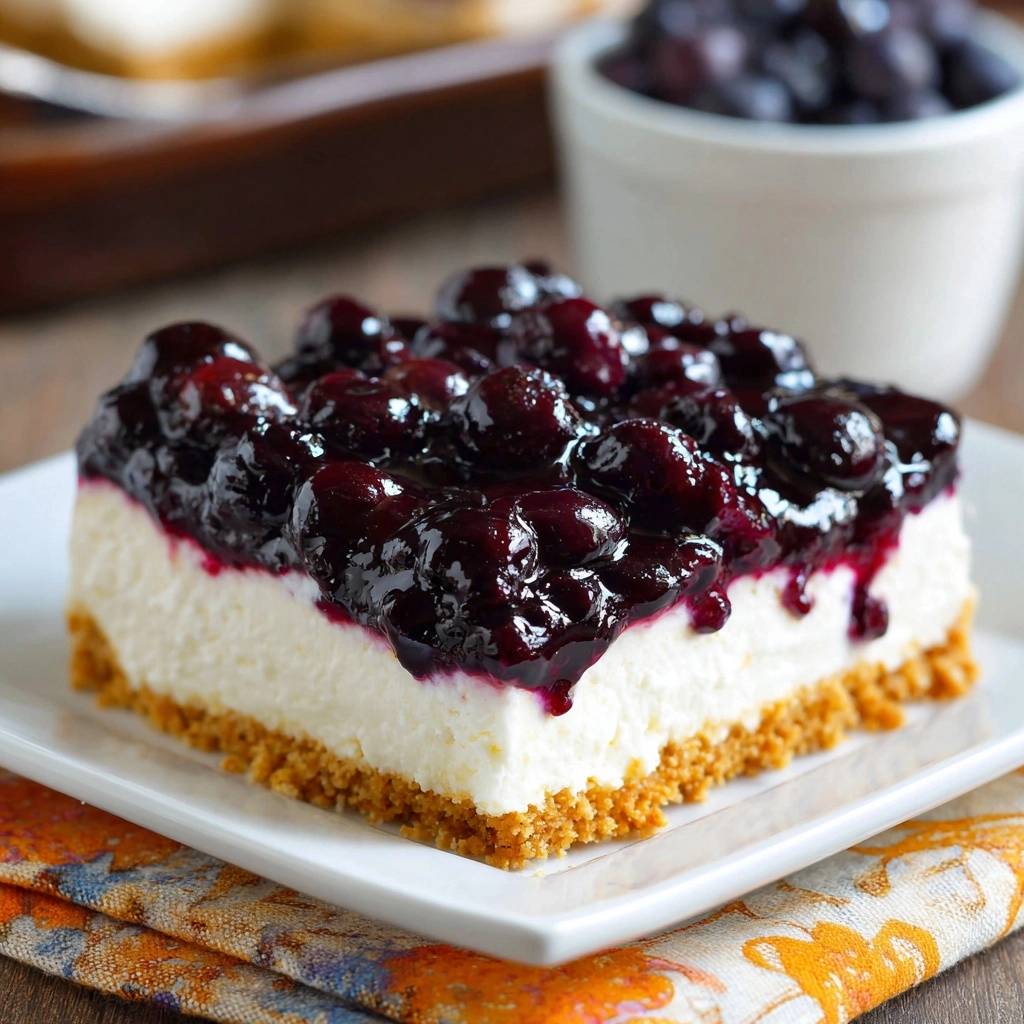
Imagine biting into a dessert where the velvety, tangy cheesecake melts away only to meet a remarkably crisp, buttery graham cracker base. Most homemade cheesecake bars suffer from a common flaw: the crust turns into a soggy, mushy mess under the weight of the filling. These Creamy Blueberry Cheesecake Bars solve that problem entirely by using a professional sealing technique that keeps the base crunchy for days.
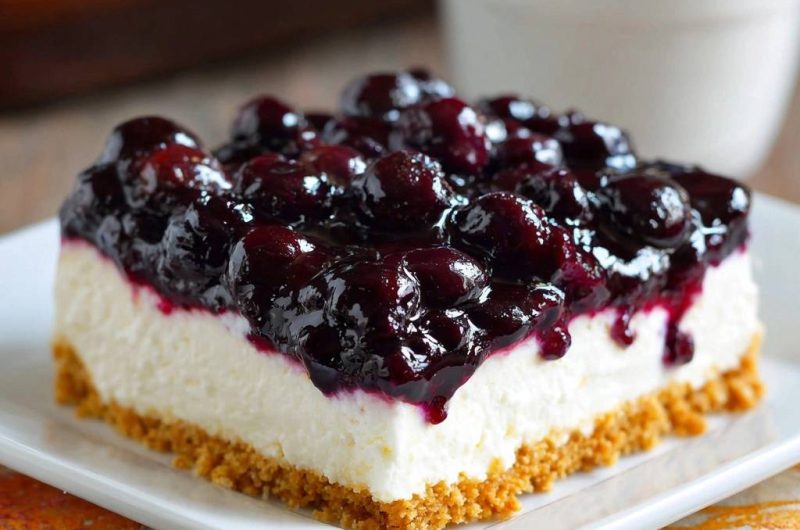
However, the real star is the dual-texture blueberry topping that sits proudly on top rather than bleeding into the white cheesecake layer. By separating the fruit into a cooked reduction and fresh whole berries, you get a glossy, jammy finish with bursts of fresh juice in every bite. These bars are much easier to serve than a traditional round cheesecake, making them the ultimate choice for hosting friends or filling a weekend dessert craving.
The secret to that professional, clean look is all in the temperature control and the “Anti-Soggy Seal.” I’ve found that a quick brush of egg white over a par-baked crust creates a waterproof barrier that keeps the moisture of the batter from seeping into the crumbs. It’s a small extra step that makes a massive difference in the final texture of your bars.
The Science of the Anti-Soggy Graham Base
When you pour a wet cheesecake batter onto a standard graham cracker crust, moisture migration begins almost immediately. The sugar and fats in the batter naturally want to soak into the dry crumbs, which often results in a base that feels more like wet sand than a pastry. To combat this, we use the “Blind-Bake and Seal” method to ensure the crust stays structurally sound.
Firstly, baking the crust alone for ten minutes allows the butter and sugar to caramelize, which hardens the structure. Secondly, the addition of a thin egg white wash acts as a hydrophobic barrier. As the egg white hits the hot crust, it cooks instantly, filling the microscopic gaps between the crumbs. This creates a shield that prevents the cheesecake filling from ever touching the actual crust, preserving that satisfying crunch.
Selecting the Right Graham Cracker Crumbs
While store-bought crumbs are convenient, pulsing whole graham crackers in a food processor gives you more control over the texture. You want a fine, sandy consistency with just a few tiny pebbles for extra crunch. In addition, always use unsalted butter for your base. This allows you to control the salt levels perfectly, ensuring the crust complements the sweet blueberries rather than competing with them.
Essential Components for the Creamy Filling
For an 8×8 inch pan, 16 ounces of cream cheese is the absolute golden ratio. It provides enough height to feel indulgent without becoming so thick that the center fails to set properly. Therefore, choosing high-quality, full-fat block cream cheese is vital. Avoid the “whipped” versions or the stuff in the tub, as they contain too much air and stabilizers that will ruin the density of your bars.
In addition to the cheese, full-fat sour cream is a non-negotiable ingredient. It introduces a necessary acidity that cuts through the heavy fat of the cream cheese, providing a bright, clean finish on the palate. It also softens the protein structure of the eggs, which ensures the bars remain creamy and luscious rather than rubbery or overly firm.
The Importance of Room Temperature Ingredients
You must let your cream cheese, eggs, and sour cream sit on the counter for at least two hours before mixing. Cold cream cheese is stubborn and will stay in tiny, firm lumps no matter how long you beat it. If you try to force it, you’ll end up incorporating too much air, which causes the cheesecake to puff up like a souffle and then collapse into a cracked mess. Room temperature ingredients emulsify effortlessly, creating a batter that looks like liquid silk.
Step-by-Step: Building the Perfect Cheesecake Layer
When you begin mixing the filling, keep your mixer on the lowest possible speed. You aren’t trying to whip the batter; you are simply trying to combine the ingredients into a smooth state. Once you add the eggs, stop the mixer the very second the yellow streaks disappear. Over-mixing at this stage is the primary cause of surface cracks, as trapped air bubbles expand in the heat of the oven and then burst.
Pour the batter gently over your sealed crust and use an offset spatula to smooth the surface. You should see a few tiny bubbles rise to the top; you can pop these with a toothpick to ensure a perfectly flat finish. This attention to detail ensures that your blueberry topping will sit evenly across the entire surface later on.
Achieving the Ideal “Jiggle” During Baking
Knowing when to pull the cheesecake out of the oven is the most critical part of the process. You are looking for the “jiggle test” results. The edges should be slightly puffed and set, but the center two inches should still wobble like firm gelatin when you gently shake the pan. If the center is stiff, you’ve overbaked it, and the bars will likely be dry. Remember, the cheesecake will continue to firm up significantly as it cools.
Crafting the Glossy Two-Texture Blueberry Topping
A great fruit topping should have both depth of flavor and visual appeal. By using a “split-batch” technique, we achieve both. We simmer the first portion of blueberries with sugar and lemon juice to create a thick, jam-like syrup. The lemon juice acts as a pectin activator, helping the fruit juices thicken while providing a sharp contrast to the sweet berries. This cooked component provides the intense, concentrated blueberry flavor.
After the sauce thickens, we fold in the remaining fresh, whole blueberries. These fresh berries don’t break down, so they provide a beautiful “heaping” look and a fresh pop of juice when you bite into them. This contrast between the jammy reduction and the whole fruit makes the bars look like they came straight from a high-end bakery.
Mastering the Cornstarch Slurry for Clarity
Never dump dry cornstarch directly into your simmering berries, or you will end up with white, chalky clumps that never dissolve. Instead, mix the cornstarch with a tiny bit of water first to create a smooth slurry. When you stir this into the bubbling fruit, you will notice the sauce transition from a cloudy purple to a clear, sparkling violet. This transparency is the sign that the starch has hydrated correctly and will set into a beautiful glaze.
Troubleshooting Common Cheesecake Bar Obstacles
If your crust crumbles when you try to slice it, you likely didn’t press the crumbs down firmly enough. Use the flat bottom of a heavy measuring cup to pack the crust into the corners of the pan until it feels like a solid sheet of wood. This compression is what gives the bar its structural integrity.
To prevent the blueberry topping from bleeding into the cheesecake, ensure the cheesecake has cooled for at least 15 minutes before adding the fruit. If the cheesecake is too hot, the steam will thin out the blueberry sauce, causing it to run down the sides. Additionally, if you see cracks on the surface, don’t panic! The thick blueberry topping is the perfect “chef’s camouflage” to hide any imperfections while adding incredible flavor.
The Art of the Clean Slice
To get those sharp, professional edges, you must be patient. Chilling the bars for at least four hours is a requirement, as the fats need time to fully solidify. When you are ready to cut, use a long chef’s knife dipped in hot water. Wipe the blade completely dry, make one clean slice, and then wash and dry the knife again before the next cut. This prevents the creamy filling from sticking to the blade and smearing across the dark blueberry layer.
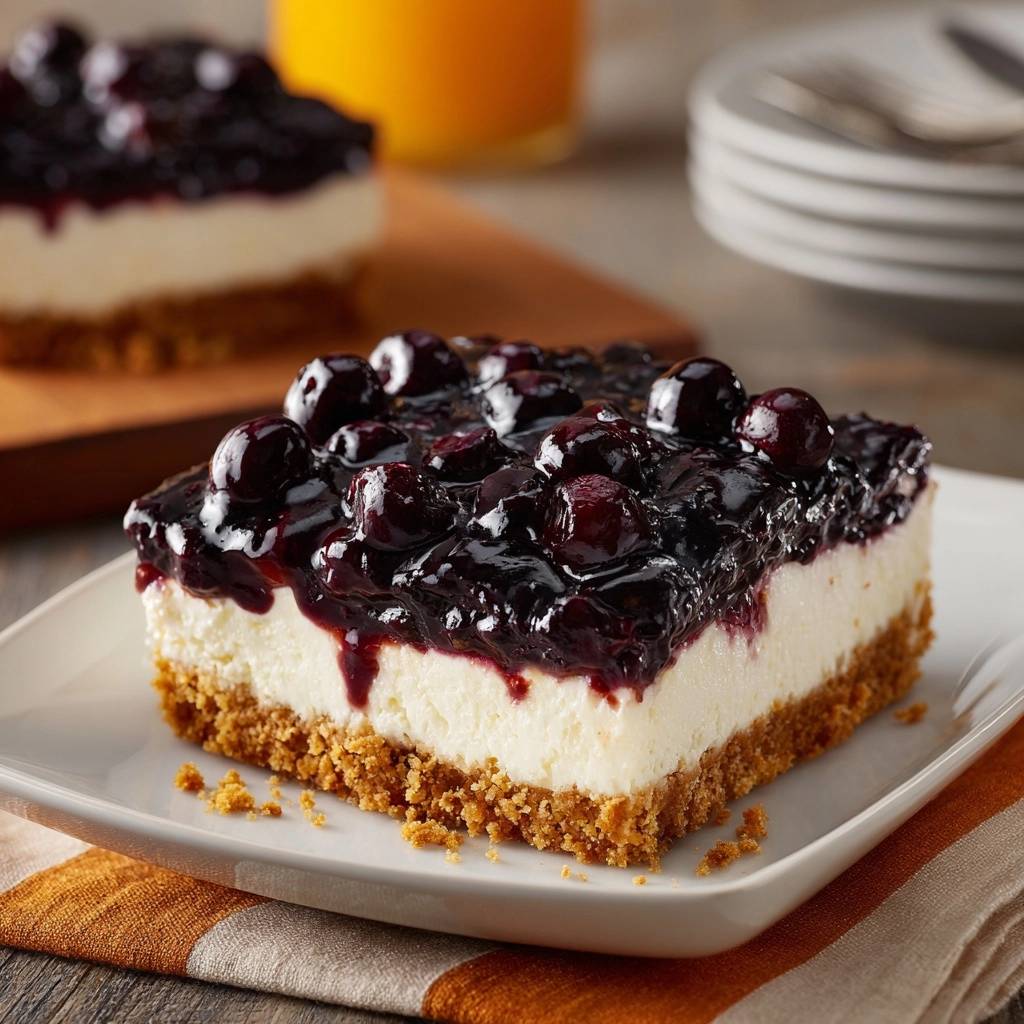
Using the parchment paper overhang is also vital. Gently lift the entire block of cheesecake out of the pan and place it on a cutting board. This allows you to make straight, even cuts without the high sides of the pan getting in your way. You’ll end up with twelve perfect squares that show off the distinct layers of crust, cream, and fruit.
Flavor Variations and Seasonal Swaps
While blueberries are a classic choice, this recipe is incredibly versatile. You can easily swap the blueberries for raspberries or blackberries using the exact same stovetop method. If you want a more autumnal vibe, try using ginger snaps instead of graham crackers for the crust. The spicy bite of ginger pairs beautifully with the creamy filling and dark fruit.
In addition, adding a teaspoon of fresh lemon zest to the cheesecake batter can brighten the entire profile. The citrus oils cut through the richness of the cream cheese and echo the lemon juice in the topping. For a more decadent twist, you could even drizzle a little white chocolate over the finished blueberry layer once it has set.
Make-Ahead Strategies and Storage Logistics
These bars are the perfect make-ahead dessert because they actually taste better after a night in the fridge. The flavors have time to meld, and the crust stays crisp thanks to our egg-white seal. You can store them in an airtight container in the refrigerator for up to five days. Just make sure to keep them covered so they don’t absorb any other odors from the fridge.
If you want to freeze them, it is best to freeze the bars individually. Wrap each sliced bar tightly in plastic wrap and then place them in a freezer bag. They will stay fresh for up to three months. When you’re ready for a treat, just thaw a bar in the fridge for an hour. The blueberry glaze holds its texture surprisingly well even after being frozen.
Expert Tips for Success
Why an 8×8 Pan is Superior to 9×9
Using an 8×8 inch pan is essential for achieving the thick, indulgent layers shown in the recipe. If you switch to a 9×9 pan, the surface area increases significantly, which results in much thinner bars. These thinner bars are prone to overbaking and often lack the satisfying creamy-to-crunchy ratio that makes this dessert so special.
Using High-Quality Vanilla Extract vs. Paste
While standard vanilla extract works perfectly well, using vanilla bean paste adds a touch of luxury. The tiny black specks of vanilla bean are visible in the white cheesecake layer, giving it an artisanal look. Since the ingredient list is simple, the quality of your vanilla will directly impact the depth of the cream cheese flavor.
The Role of Parchment Overhang
Never skip the parchment paper “sling.” By leaving an inch or two of paper hanging over the sides of the pan, you create handles. This allows you to lift the delicate cheesecake out of the pan without having to dig into the corners with a spatula, which almost always breaks the first corner piece.
Adjusting for High Altitude Baking
If you are baking at a high altitude, you may need to make slight adjustments. Increase your oven temperature by about 15 degrees and reduce the sugar in the filling by one tablespoon. This helps the structure set more quickly before the internal pressure causes the cheesecake to expand too much and crack.
How do I store leftover cheesecake bars?
Store your bars in an airtight container in the refrigerator for up to 5 days. For the best texture, keep them in a single layer so the blueberry topping doesn’t stick to the bottom of other bars. If you need to stack them, place a piece of parchment paper between the layers. These bars also freeze beautifully for up to 3 months; just thaw them in the refrigerator before serving.
Why did my cheesecake bars crack on top?
Cracking is usually caused by over-mixing the batter or over-baking the bars. When you beat the eggs at high speed, you incorporate too much air. That air expands in the oven and then escapes, leaving a crack behind. Additionally, if the edges are brown and the center is no longer jiggly, the cheesecake has become too dry and will split as it cools. Always use low speed and pull the bars out while the center still wobbles.
Can I use frozen blueberries instead of fresh?
Yes, you can use frozen blueberries for the cooked portion of the topping. However, do not thaw them first, as this can make the sauce too watery. You may need to simmer the sauce for an extra minute or two to reach the desired thickness. For the “fresh” berries folded in at the end, fresh is highly recommended for the best texture, but you can use frozen if necessary—just be aware they may bleed more color into the sauce.
What can I use if I don’t have sour cream?
Full-fat Greek yogurt is an excellent substitute for sour cream in this recipe. It provides the same tangy acidity and moisture level. Avoid using low-fat or non-fat versions, as the lack of fat can result in a grainy texture. If you are completely out of both, you can use heavy cream, though the filling will be slightly less tangy and more like a traditional New York-style cheesecake.
How do I get perfectly clean slices?
The secret is a hot knife and patience. Ensure the bars have chilled for at least 4 hours (overnight is even better). Dip a sharp chef’s knife into a tall glass of hot water, wipe it completely dry with a clean towel, and make one long, smooth cut. Wipe the blade clean after every single slice to remove any cheesecake residue. This prevents the white filling from smearing and keeps the layers looking sharp and distinct.
Creamy Blueberry Cheesecake Bars
Course: DessertCuisine: AmericanDifficulty: easy12
servings25
minutes50
minutes60
Minutes310
kcalAmerican
Ingredients
– 1.5 cups graham cracker crumbs
– 1/3 cup unsalted butter, melted
– 1/4 cup granulated sugar (for crust)
– 16 oz cream cheese, softened to room temperature
– 1/2 cup sour cream, room temperature
– 2 large eggs, room temperature
– 1/2 cup granulated sugar (for filling)
– 1 teaspoon vanilla extract
– 2.5 cups fresh blueberries (divided)
– 1 tablespoon cornstarch
– 2 tablespoons lemon juice
– 2 tablespoons water
– 1/4 cup granulated sugar (for blueberry topping)
Directions
- Preheat your oven to 325°F (163°C) and line an 8×8 inch square baking pan with parchment paper, leaving an overhang on the sides for easy removal.
- In a medium bowl, combine graham cracker crumbs, 1/4 cup sugar, and melted butter. Press the mixture very firmly into the bottom of the prepared pan using the bottom of a measuring cup.
- The Anti-Soggy Seal: Bake the crust alone for 10 minutes. While hot, lightly brush the surface with a tiny amount of whisked egg white (taken from one of the filling eggs). Return to the oven for 1 minute to set. This creates a moisture-proof barrier.
- In a large bowl, beat the softened cream cheese and 1/2 cup sugar until completely smooth and aerated. Add the sour cream and vanilla, mixing until combined.
- Add the eggs one at a time, mixing on the lowest speed just until the yellow disappears. Do not overbeat, or the cheesecake will puff and crack.
- Pour the cheesecake batter over the sealed crust and smooth the top. Bake for 35-40 minutes until the edges are set but the center still has a slight, jelly-like jiggle.
- The Glossy Topping: While the cheesecake bakes, combine 1.5 cups of blueberries, 1/4 cup sugar, lemon juice, and water in a saucepan. Bring to a simmer over medium heat. In a small bowl, mix the cornstarch with a teaspoon of water to make a slurry, then stir it into the berries. Simmer for 3-5 minutes until the sauce is thick and translucent.
- Remove from heat and gently fold in the remaining 1 cup of fresh, whole blueberries. This creates the textured, “heaping” look seen in the image.
- Once the cheesecake is removed from the oven, let it cool for 15 minutes, then carefully spread the thickened blueberry topping over the top.
- Allow the bars to cool to room temperature, then refrigerate for at least 4 hours (preferably overnight). Slice with a hot, clean knife for perfect edges.
Notes
- The secret to the anti-soggy bottom is brushing the hot crust with egg white to create a moisture-proof barrier. For clean slices, use a hot, clean knife after the bars have chilled for at least 4 hours.


