

Most home cooks have experienced the disappointment of a rubbery, dry chicken breast. You follow the recipe, but the meat ends up tough and the sauce feels like an afterthought. The secret to restaurant-quality chicken isn’t a fancy appliance; it’s mastering the “sear-and-simmer” technique. This method ensures your chicken stays succulent while developing a deep, golden crust that locks in every drop of moisture.
Imagine a velvety Parmesan sauce that clings to the meat, punctuated by the smoky, salty crunch of thick-cut bacon. This dish isn’t just about the flavors; it’s about the contrast between the tender poultry and the rich, emulsified cream. By changing how you approach the heat, you can turn a basic weeknight dinner into a sophisticated meal that feels truly indulgent.
The real trick to success here is patting your chicken completely dry before it ever touches the pan. If there’s moisture on the surface, the chicken will steam rather than sear, leading to that dreaded gray, rubbery texture. I’ve found that using a heavy-bottomed skillet is the best way to maintain the consistent heat needed for that perfect, mahogany-colored crust.
The Science of Succulent Creamy Garlic Bacon Chicken
Achieving the perfect texture starts long before the heat is turned on. Pounding your chicken breasts to an even thickness is a non-negotiable step for moisture retention. When one end of the breast is twice as thick as the other, the thin tapered end overcooks and turns woody before the center is safe to eat. A few quick whacks with a meat mallet ensure the entire piece reaches the finish line at the exact same time.
During the searing phase, we are looking for the Maillard reaction. This is the chemical reaction between amino acids and reducing sugars that gives browned food its distinctive, savory flavor. However, the goal isn’t to cook the chicken all the way through during the sear. If you leave it in the pan until it’s done, it will inevitably dry out once it hits the simmering sauce later.
Resting the meat is the final piece of the science puzzle. When you remove the chicken from the skillet to build your sauce, the muscle fibers begin to relax. This allows the internal juices to redistribute throughout the breast. If you were to cut into it immediately, those juices would spill out onto the plate, leaving the meat parched. By letting it rest, you ensure every bite is dripping with flavor.
Essential Components for the Garlic Cream Base
The quality of your ingredients directly dictates the silkiness of your sauce. When it comes to the cheese, skip the “shaky can” pre-grated versions. Those products are coated in cellulose to prevent clumping, which also prevents them from melting smoothly into an emulsion. A freshly grated wedge of Parmesan will melt almost instantly, creating a glossy, professional finish that coats the back of your spoon.
Heavy cream is the backbone of this recipe for a very specific reason. Unlike milk or half-and-half, heavy cream has a high fat content that makes it stable under heat. When you add it to a pan with acidic garlic and hot chicken broth, it won’t curdle or break. This stability is what gives the sauce its luxurious, mouth-coating quality without needing a flour-based roux.
Don’t underestimate the power of your dry seasonings. Onion powder and paprika aren’t just there for color; they build a “base layer” of flavor directly on the poultry. The paprika adds a subtle earthiness that complements the smokiness of the bacon, while the onion powder provides a savory depth that fresh onions sometimes lack in a quick-sear environment.
Selecting and Preparing the Poultry
When shopping, look for air-chilled chicken breasts if they are available. Most standard chicken is chilled in a water bath, which means the meat absorbs excess liquid that leaks out in the pan. Air-chilled poultry has a tighter grain and sears much more effectively. Once you get it home, use paper towels to press firmly on both sides of the meat until the surface is matte and bone-dry.
The Role of Rendered Bacon Fat
We use the rendered bacon fat as our primary cooking medium because it is liquid gold. It carries the smoky essence of the bacon into the chicken as it sears. Instead of using just plain oil, this fat integrates the different elements of the dish together. It creates a cohesive flavor profile where the chicken, sauce, and garnish all speak the same culinary language.
Step-by-Step: Executing the Perfect Sear and Sauce
Success in this recipe comes down to managing your pan temperature through three distinct phases. You aren’t just throwing ingredients into a skillet; you are building layers of flavor and texture that culminate in a balanced, rich meal.
Phase 1: Rendering the Bacon for Maximum Texture
Start your chopped bacon in a cold skillet rather than a hot one. This allows the fat to render out slowly as the pan heats up, resulting in bacon that is crispy all the way through rather than chewy. You want to cook it until it reaches a deep red color. Be careful not to let the fat smoke or turn black, as burnt bacon fat will make your entire cream sauce taste bitter and acrid.
Phase 2: Achieving the Golden-Brown Crust
Once the bacon is removed, look for the “shimmering pan” stage. The fat should be hot enough that a drop of water would dance and evaporate instantly. Place the chicken in the pan, making sure not to crowd the pieces. If the pan is too full, the temperature drops and the chicken will release moisture, causing it to boil in its own juices. Flip the chicken only when it releases easily from the pan with a beautiful golden crust.
Phase 3: Deglazing and Building the Parmesan Emulsion
After removing the chicken, you’ll see brown bits stuck to the bottom of the pan. This is called “fond,” and it is packed with concentrated flavor. Pour in your chicken broth and use a wooden spoon to scrape those bits up. This process, called deglazing, incorporates all that roasted flavor into your sauce. When you whisk in the cream and cheese, do it over medium-low heat. A gentle simmer is all you need to create a smooth, non-grainy emulsion that looks like liquid velvet.
Troubleshooting Common Texture Issues
If your chicken still feels rubbery, it’s almost certainly a result of overcooking. Chicken breast becomes tough the moment it passes the 165°F mark. I highly recommend using an instant-read thermometer. Pull the chicken from the sauce when it hits 160°F; the carryover heat will bring it to the perfect 165°F while it sits on the plate. This prevents the proteins from tightening up and becoming stringy.
Sauce consistency is the other common hurdle. If your sauce looks too thin, let it simmer for an extra minute or two without the chicken in the pan to reduce the liquid. If it becomes too thick or starts to look oily, whisk in a splash of chicken broth or water. This will “loosen” the emulsion and bring back that creamy, pourable texture you see in high-end restaurants.
Optimal Side Dishes for Creamy Garlic Bacon Chicken
Because this dish is so rich and savory, you want side dishes that offer a bit of contrast. High-acid vegetables are a fantastic choice. Roasted asparagus with a heavy squeeze of lemon or a simple arugula salad with a sharp vinaigrette can cut through the heaviness of the cream. These bright flavors cleanse the palate between bites of the decadent sauce.
For starches, al dente fettuccine is a classic choice as the wide noodles catch the garlic cream perfectly. If you want something lighter, mashed cauliflower or sautéed spinach provides a great base for soaking up the extra sauce without adding too much weight to the meal. Whatever you choose, make sure it’s ready at the same time as the chicken so you can serve everything piping hot.
Storage and Reheating Without Losing Moisture
Leftovers can be stored in an airtight container in the refrigerator for up to three days. However, you must be careful when reheating. The microwave is the enemy of cream sauces; the intense, uneven heat often causes the fat to separate from the solids, leaving you with a greasy mess and rubbery meat. The sauce essentially “breaks,” and there’s no easy way to fix it once that happens.
Instead, reheat your chicken in a small skillet over low heat. Add a tablespoon of chicken broth or a splash of water to the pan to help the sauce come back together. Cover the pan with a lid to trap the steam, which keeps the chicken moist while it warms through. This slow approach preserves the integrity of the Parmesan emulsion and keeps the chicken tender.
Expert Tips for Flavor Variations
Once you’ve mastered the base recipe, you can easily customize the flavor profile. For a “Tuscan” twist, stir in a handful of chopped sun-dried tomatoes and some fresh baby spinach during the final simmering stage. The acidity of the tomatoes balances the cream beautifully. If you prefer a bit of heat, add a half-teaspoon of red pepper flakes when you sauté the garlic to create a “Spicy Garlic” version.
You can also swap the herbs to change the vibe of the dish. While Italian parsley is traditional and bright, fresh thyme or tarragon adds a sophisticated, earthy note that pairs wonderfully with the bacon. If you want an even deeper garlic flavor, try using roasted garlic cloves mashed into the cream instead of raw minced garlic for a mellow, sweet finish.
Frequently Asked Questions
Can I use chicken thighs instead of breasts?
Yes, chicken thighs are a great alternative and are much more forgiving because they have a higher fat content. If you use boneless thighs, increase the searing time by about 2 minutes per side. Thighs can also handle a longer simmer in the sauce without becoming dry, making them a great option for beginners who are worried about overcooking the meat.
Why did my cream sauce separate?
Sauce separation usually happens if the heat is too high or if you use low-fat dairy. When the sauce boils too vigorously, the proteins in the cheese and cream can clump together and push the fat out. To fix this, turn the heat down to low and whisk in a teaspoon of cold water or broth very quickly to help re-emulsify the mixture.
Can I make this dairy-free?
You can substitute the heavy cream with full-fat canned coconut cream for a similar thickness. For the Parmesan, use a combination of nutritional yeast and a pinch of extra salt to mimic the savory, nutty flavor. Keep in mind that coconut cream will add a slight tropical undertone to the dish, so you may want to increase the garlic and black pepper to balance it out.
How do I get the bacon to stay crispy?
The key to crispy bacon is to keep it out of the sauce until the very last second. If you stir the bacon into the cream and let it simmer, it will inevitably turn soft and chewy. Always keep your crispy bacon bits on a separate plate and sprinkle them over the chicken immediately before serving. This ensures you get that satisfying crunch in every bite.
Is it possible to over-deglaze the pan?
Not really, but you can use too much liquid. The goal of deglazing is to lift the flavor from the bottom of the pan, not to make a soup. Stick to the half-cup of broth recommended. If you add too much, you’ll have to simmer the sauce for a long time to get it to thicken, which risks overcooking the chicken once you add it back in.

Creamy Garlic Bacon Chicken
Course: Main CourseCuisine: AmericanDifficulty: easy4
servings10
minutes20
minutes30
Minutes515
kcalAmerican
Ingredients
4 medium boneless skinless chicken breasts (pounded to even thickness)
6 slices of thick-cut bacon, finely chopped
1 cup heavy cream
1/2 cup chicken broth
1/2 cup freshly grated Parmesan cheese
4 cloves garlic, minced
1 teaspoon onion powder
1 teaspoon paprika
1 tablespoon olive oil
Salt and black pepper to taste
1/4 cup fresh Italian parsley, chopped
Directions
- To prevent the chicken from becoming rubbery, pat the meat completely dry with paper towels. Season both sides generously with salt, pepper, onion powder, and paprika.
- In a large skillet over medium heat, cook the chopped bacon until crispy and deep red. Remove the bacon with a slotted spoon and drain on paper towels, leaving the rendered fat in the pan.
- Add the olive oil to the bacon fat and increase heat to medium-high. Once the pan is shimmering, add the chicken. Sear for 4 to 5 minutes per side until a golden-brown crust forms. Do not overcook at this stage; the chicken will finish in the sauce.
- Remove the chicken from the pan and set it on a plate to rest. This allows the fibers to relax and retain moisture.
- Lower the heat to medium and add the minced garlic to the skillet. Cook for 1 minute until fragrant. Pour in the chicken broth to deglaze the pan, scraping up the brown bits (fond) with a wooden spoon.
- Stir in the heavy cream and bring to a gentle simmer. Whisk in the Parmesan cheese until melted and the sauce begins to thicken and coat the back of a spoon.
- Place the chicken and any accumulated juices back into the skillet. Spoon the sauce over the chicken. Simmer for 3 to 4 minutes until the sauce is thick and the chicken reaches an internal temperature of 165°F.
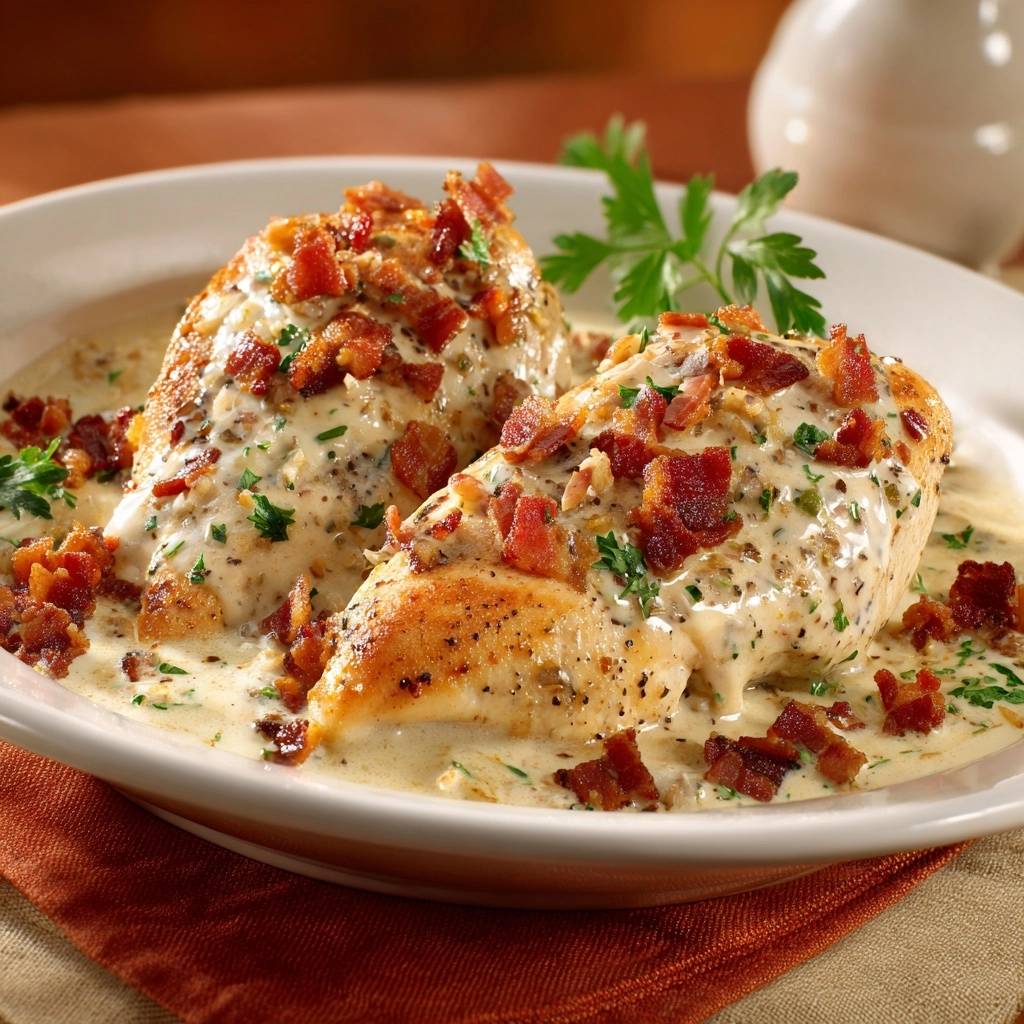
- Garnish heavily with the crispy bacon bits and fresh parsley. Serve immediately, spooning extra sauce from the pan over the top of the breasts as shown in the image.
Notes
- To ensure the chicken is not rubbery, pat the meat completely dry before seasoning and do not overcook during the initial searing phase. The chicken finishes cooking in the sauce to maintain moisture.


