
Most people fail at rice noodles because they treat them like Italian pasta. If you’ve ever ended up with a sticky, gummy brick of noodles that refuses to separate, you know exactly how frustrating it is. This recipe fixes that by focusing on starch management and temperature control to give you a silky, restaurant-quality finish.
The secret to these Creamy Thai Peanut Noodles lies in the contrast between the warm, emulsified sauce and the cold-rinsed noodles. This specific technique ensures every strand stays distinct and glossy rather than clumping together. You’ll get that perfect mouthfeel where the sauce clings to the noodle without turning it into mush.
I’ve found that the real trick is pulling the noodles out of the boiling water about sixty seconds before you think they’re done. They should have a firm, almost snappy bite. Since they’ll continue to soften when tossed with the warm peanut base, this “under-cooking” is your insurance policy against a soggy dinner. You’re only 25 minutes away from a bowl that rivals your favorite takeout spot.
The Science of Starch: Why Rice Noodles Turn Gummy
Rice noodles are packed with amylopectin, a type of starch that becomes incredibly sticky when it’s hydrated and heated. When you boil these noodles, they release that starch into the water and onto their own surface. If you simply drain them and let them sit, that residual heat continues to cook the interior while the surface starch acts like a powerful glue.
This process is called gelatinization, and it’s the enemy of a good noodle bowl. In many Western pasta dishes, we actually want that starch to help the sauce stick. However, with rice-based noodles, too much surface starch leads to a “brick” effect where the noodles fuse together into a solid mass. Managing this starch is the foundational skill for any Thai-inspired noodle dish.
By understanding that rice noodles are more delicate than wheat pasta, you can change your approach. You aren’t just cooking them; you’re preparing them to receive a fat-based sauce. If the starch isn’t managed, the fats in the peanut butter and coconut milk won’t be able to coat the noodles evenly, resulting in a greasy yet clumpy texture.
Temperature Control and the Cold Rinse Technique
Rinsing your noodles under cold running water is absolutely non-negotiable for this recipe. As soon as you hit those noodles with cold water, you halt the cooking process instantly. This prevents the noodles from moving past the al dente stage into the gummy zone.
Furthermore, the physical action of the running water washes away the excess surface starch. While we usually save pasta water for Italian sauces, here we only use a small amount of it to thin the sauce. The noodles themselves must be clean and cold before they meet the peanut mixture to ensure they stay slippery and separate.
Essential Components for the Silky Peanut Sauce
The sauce is the heart of this dish, and the quality of your ingredients dictates the final texture. I always recommend using full-fat canned coconut milk rather than the “light” version or the carton variety used for cereal. The higher fat content in full-fat coconut milk is essential for creating a stable emulsion that won’t break or turn watery.
Fresh aromatics are another area where you shouldn’t compromise. While jarred garlic or ginger powder is convenient, they lack the sharp, bright bite that cuts through the heavy fats of the peanut butter. Freshly grated ginger adds a subtle heat and a floral aroma that balances the richness of the coconut milk perfectly.
Soy sauce provides the necessary salt and umami, but if you need a gluten-free option, tamari is an excellent 1:1 substitute. The goal is to create a sauce that is balanced across the four pillars of Thai flavor: salty, sweet, sour, and spicy. Each ingredient plays a specific role in achieving that harmony.
Choosing the Right Peanut Butter Consistency
You might wonder if natural peanut butter or the stabilized commercial brands work better here. Commercial brands like Jif or Skippy contain stabilizers that help the sauce stay creamy and smooth without much effort. They also bring a bit of extra sweetness and salt that complements the red curry paste.
However, if you prefer natural peanut butter, just be prepared to whisk a little harder. Natural varieties often have a grainier texture and can separate more easily. If your sauce looks a bit oily when using natural peanut butter, a vigorous whisking with an extra splash of warm water usually brings it back together.
The Role of Red Curry Paste and Aromatics
Red curry paste is a flavor powerhouse containing lemongrass, galangal, and shrimp paste (though vegan versions are available). Brands like Mae Ploy or Maesri offer a more concentrated, authentic heat than the milder supermarket brands. Start with a small amount and taste as you go, as the spice levels can vary wildly between labels.
The addition of fresh Fresno chilies at the end isn’t just for show. They provide a crisp, raw heat that contrasts with the cooked-in spice of the curry paste. If you can’t find Fresnos, red jalapeños or even a pinch of red pepper flakes will work to keep that vibrant flavor profile alive.
Step-by-Step: Emulsifying the Perfect Noodle Coating
Creating the perfect bowl of Creamy Thai Peanut Noodles requires a bit of finesse during the assembly phase. You can’t just throw everything in a pot and hope for the best. Instead, think of this process in three distinct phases: the par-boil, the emulsion, and the marriage of the two.
The goal is to have your sauce ready and waiting before the noodles are even finished. This prevents the noodles from sitting in the colander for too long, which is when clumping usually starts. Efficiency in the kitchen is your best friend when working with rice starch.
Phase 1: The Al Dente Par-Boil
Start by boiling your water with a generous pinch of salt. Drop the rice noodles in and set a timer for two minutes less than the package suggests. You are looking for a noodle that is flexible but still has a very firm core when you bite into it.
Before you drain them, grab a measuring cup and scoop out about a cup of that cloudy, starchy water. This liquid is liquid gold for adjusting the final consistency of your sauce. Once you’ve reserved the water, drain the noodles and start that cold rinse immediately until they feel cool to the touch.
Phase 2: Building the Sauce Base
In your largest mixing bowl, whisk together the peanut butter, coconut milk, and aromatics. It will look like a thick, stubborn paste at first, but don’t worry. This is where your reserved warm pasta water comes into play to transform the texture.
Slowly drizzle in the warm water, two tablespoons at a time, while whisking constantly. You’ll see the sauce transform from a thick sludge into a glossy, pourable cream. It should be thin enough to coat a spoon but thick enough that it doesn’t just run off like water.
Phase 3: The Cold-Toss Method
Now comes the “marriage.” Drop those cold, rinsed noodles directly into the bowl of warm sauce. Use a pair of tongs to toss them vigorously. You want to be aggressive here to ensure every single strand is lubricated by the peanut mixture.
As you toss, the noodles will absorb a tiny bit of the moisture and warm up to the perfect eating temperature. This method prevents the sauce from “seizing” and keeps the texture light. If it looks too thick, add one more splash of that reserved water until it looks like silk.
Flavor Variations and Protein Swaps
While these noodles are incredible on their own, they also serve as a fantastic base for whatever you have in the fridge. For a bit of crunch, I love adding thinly sliced red bell peppers or shredded carrots. Sautéed bok choy or snap peas also add a lovely green element that balances the richness of the peanuts.
If you want to add protein, grilled chicken or shrimp are classic choices. Just make sure to cook your protein separately and toss it in at the very end. This keeps the flavors distinct and prevents the protein from overcooking while you’re busy emulsifying your sauce.
Vegetarian and Vegan Protein Additions
Crispy seared tofu is perhaps the best companion for these noodles. To get it right, press your tofu for at least 20 minutes to remove excess moisture, then sear it in a pan until the edges are golden and tough. This allows the tofu to soak up the sauce without falling apart or becoming soggy.
Edamame is another quick and easy protein boost. You can toss frozen, shelled edamame directly into the boiling noodle water during the last minute of cooking. It adds a bright pop of color and a nice textural contrast to the soft noodles.
Adjusting Heat and Sweetness Levels
Thai cooking is all about the balance of flavors. If your sauce feels too heavy, add an extra squeeze of lime juice to brighten it up. If the red curry paste made it a bit too spicy for your liking, a teaspoon of extra honey or brown sugar will help mellow out the heat.
Always taste your sauce before adding the noodles. It should taste slightly “over-seasoned” at this stage because the noodles themselves are quite bland. Once they are combined, the flavors will level out perfectly for a balanced bite.
Troubleshooting Common Peanut Noodle Issues
If you find that your noodles have already clumped together in the colander, don’t panic. You can usually save them by giving them a quick “bath” in warm water to loosen the starch, then immediately tossing them into the sauce. However, the cold-rinse method is much more reliable for preventing this in the first place.
Another common issue is the sauce becoming too thick as it sits. Rice noodles are like sponges; they will continue to drink up moisture even after they are plated. If the dish looks dry by the time it hits the table, a tiny splash of warm water and a quick toss will restore that glossy sheen.
How to Fix a Broken or Oily Sauce
A “broken” sauce happens when the fat separates from the liquids, leaving you with an oily mess. This usually occurs if the sauce gets too hot or if the ratio of peanut butter to liquid is off. To fix it, move the sauce to a bowl away from the heat.
Add a teaspoon of very warm water and whisk like crazy. The mechanical action of whisking helps re-emulsify the fats. If that doesn’t work, a small squeeze of lime juice can sometimes help bind the ingredients back together through its acidity.
Plating and Presentation for Maximum Impact
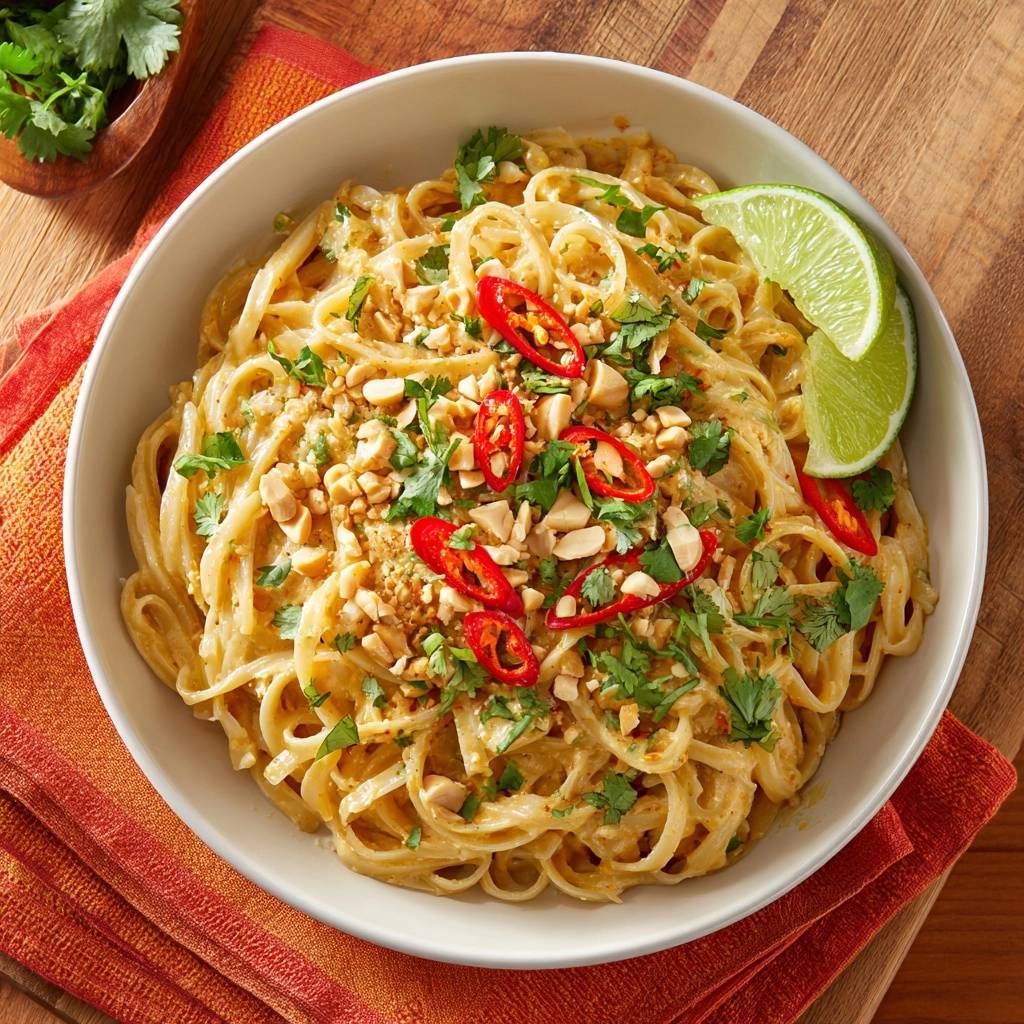
We eat with our eyes first, and this dish looks best when it’s piled high with colorful garnishes. I like to slice my Fresno chilies on a sharp diagonal to give them a professional look. A rough chop on the roasted peanuts provides a rustic feel and ensures you get a bit of crunch in every mouthful.
Don’t forget the fresh cilantro and the lime wedges on the side. The lime isn’t just a decoration; the diner should squeeze it over the noodles right before eating. That hit of fresh acid cuts through the creamy coconut milk and peanut butter, making the whole dish feel much lighter and more vibrant.
Expert Tips for Storage and Reheating
Rice noodles are notoriously difficult to store because they continue to absorb moisture in the fridge. If you have leftovers, store them in an airtight container for up to two days. Be aware that they will likely form a solid mass as they cool, but you can bring them back to life.
To reheat, avoid the microwave if possible, as it tends to make the noodles rubbery. Instead, place them in a skillet over low heat with a splash of coconut milk or water. Cover the pan for a minute to let the steam loosen the noodles, then gently toss them until the sauce becomes creamy again.
Can You Freeze Thai Peanut Sauce?
You can absolutely freeze the peanut sauce on its own! I often make a double batch of the sauce and freeze half in a small jar or freezer bag. It will stay fresh for up to three months. When you’re ready for a quick dinner, just thaw the sauce and boil fresh noodles.
Never freeze the assembled dish, though. Rice noodles lose their structural integrity in the freezer and will turn into a grainy, mushy mess once thawed. For the best experience, always cook your noodles fresh and combine them with your pre-made sauce at the last minute.
Frequently Asked Questions
Can I use peanut flour instead of peanut butter?
Peanut flour can be used, but you will lose the creamy mouthfeel provided by the fats in peanut butter. If you use flour, you’ll need to increase the amount of coconut milk or add a tablespoon of neutral oil to compensate for the missing lipids. The flavor will be similar, but the sauce will be much thinner and less “glossy.”
What is the best substitute for soy sauce to keep it gluten-free?
Tamari is the gold standard for gluten-free cooking as it has a deep, rich flavor very similar to traditional soy sauce. Liquid aminos are another great option, though they tend to be slightly sweeter and less salty. Always check the label of your red curry paste as well, as some brands contain hidden gluten sources.
Why did my sauce turn brown instead of vibrant orange?
The color of your sauce depends heavily on the ratio and brand of red curry paste you use. Authentic Thai brands like Mae Ploy use a high concentration of dried red chilies, which gives the sauce a bright orange-red hue. If your sauce is brown, it may be because you used a high amount of dark soy sauce or a peanut butter that has a very dark roast.
Can I use almond butter or sunflower butter?
Yes, you can substitute other nut or seed butters if you have an allergy. Almond butter provides a more neutral, earthy flavor, while sunflower butter has a distinct “toasted” taste. Keep in mind that the consistency may vary, so you might need to adjust the amount of warm pasta water to reach that perfect silky emulsion.
How do I keep the noodles from breaking while tossing?
The key is to use tongs and a “lift and fold” motion rather than stirring vigorously with a spoon. Because rice noodles are fragile, especially when warm, you want to be gentle but efficient. Rinsing them in cold water first also firms up the exterior, making them much more resilient during the tossing phase.
Creamy Thai Peanut Noodles
Course: Main CourseCuisine: ThaiDifficulty: easy4
servings10
minutes15
minutes25
Minutes510
kcalThai
Ingredients
12 ounces wide rice noodles (Pad Thai style)
1/2 cup creamy peanut butter
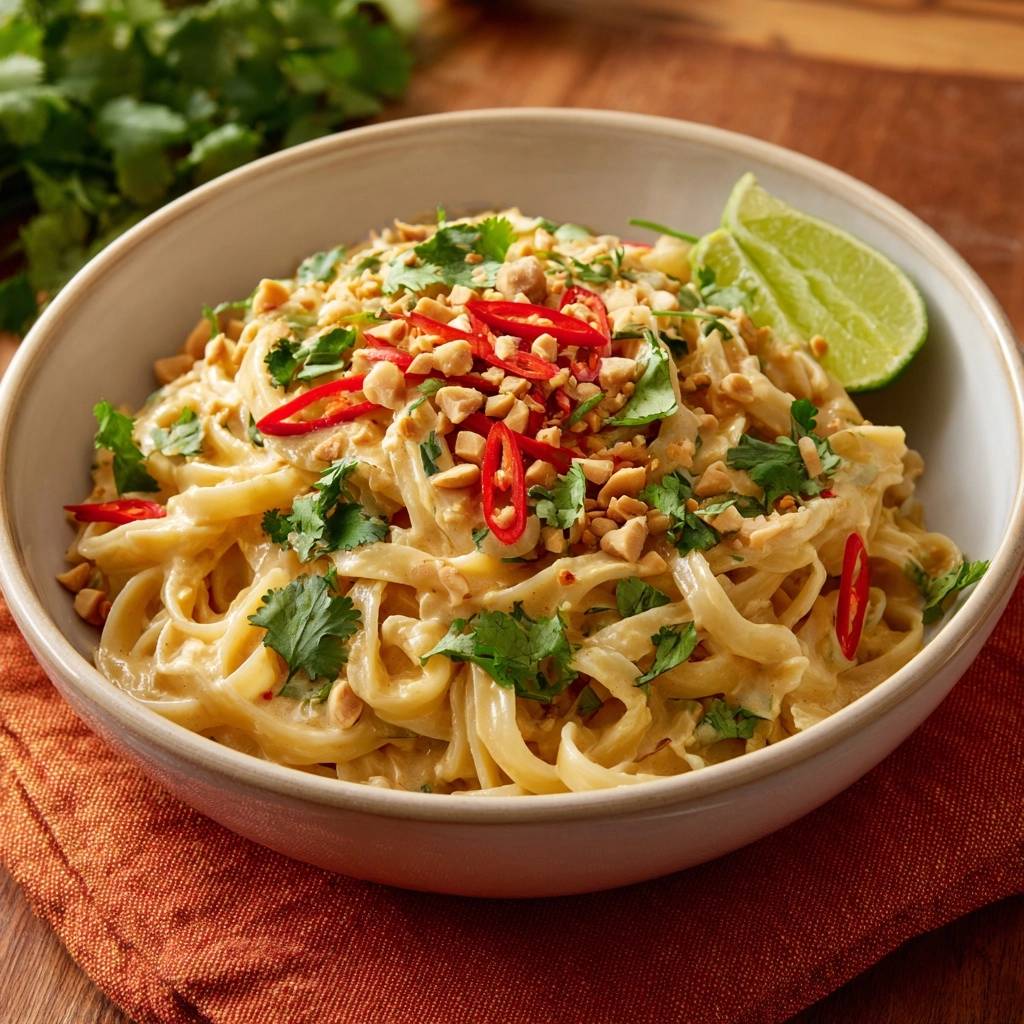
1/2 cup full-fat coconut milk (for the visual creaminess shown in the image)
3 tablespoons soy sauce (or tamari)
1 tablespoon honey or brown sugar
1 tablespoon fresh lime juice
1-2 teaspoons red curry paste (adjust for heat)
1/2 cup warm pasta water (reserved)
2 cloves garlic, minced
1 tablespoon fresh ginger, grated
1 tablespoon toasted sesame oil
1/4 cup roasted peanuts, roughly chopped
2 red Fresno or bird’s eye chilies, sliced diagonally
1/4 cup fresh cilantro, chopped
2 lime wedges for serving
Directions
- Bring a large pot of salted water to a boil. Add the rice noodles and cook for 1-2 minutes less than the package instructions. They should be “al dente” with a firm bite, as they will soften further when tossed with the warm sauce.
- Before draining, scoop out 1 cup of the starchy pasta water and set aside.
- Drain the noodles and immediately rinse them under cold running water for 30 seconds. This is the critical step: it removes the excess surface starch that causes clumping and stops the noodles from overcooking into a gummy mess.
- In a large mixing bowl, whisk together the peanut butter, coconut milk, soy sauce, honey, lime juice, curry paste, garlic, ginger, and sesame oil until a thick paste forms.
- Gradually whisk in the reserved warm pasta water, 2 tablespoons at a time, until the sauce reaches a silky, pourable consistency that looks like heavy cream.
- Add the cold, rinsed noodles to the bowl of sauce. Toss vigorously with tongs for 1-2 minutes. The noodles will slightly warm up and the sauce will thicken and cling to the strands perfectly without becoming sticky.
- Transfer to a serving bowl. Garnish generously with the chopped peanuts, sliced red chilies, and fresh cilantro as shown in the image. Serve immediately with lime wedges on the side to brighten the flavors.
Notes
- The critical step is rinsing the noodles under cold water for 30 seconds to remove excess starch and stop the cooking process, preventing a gummy texture.


