
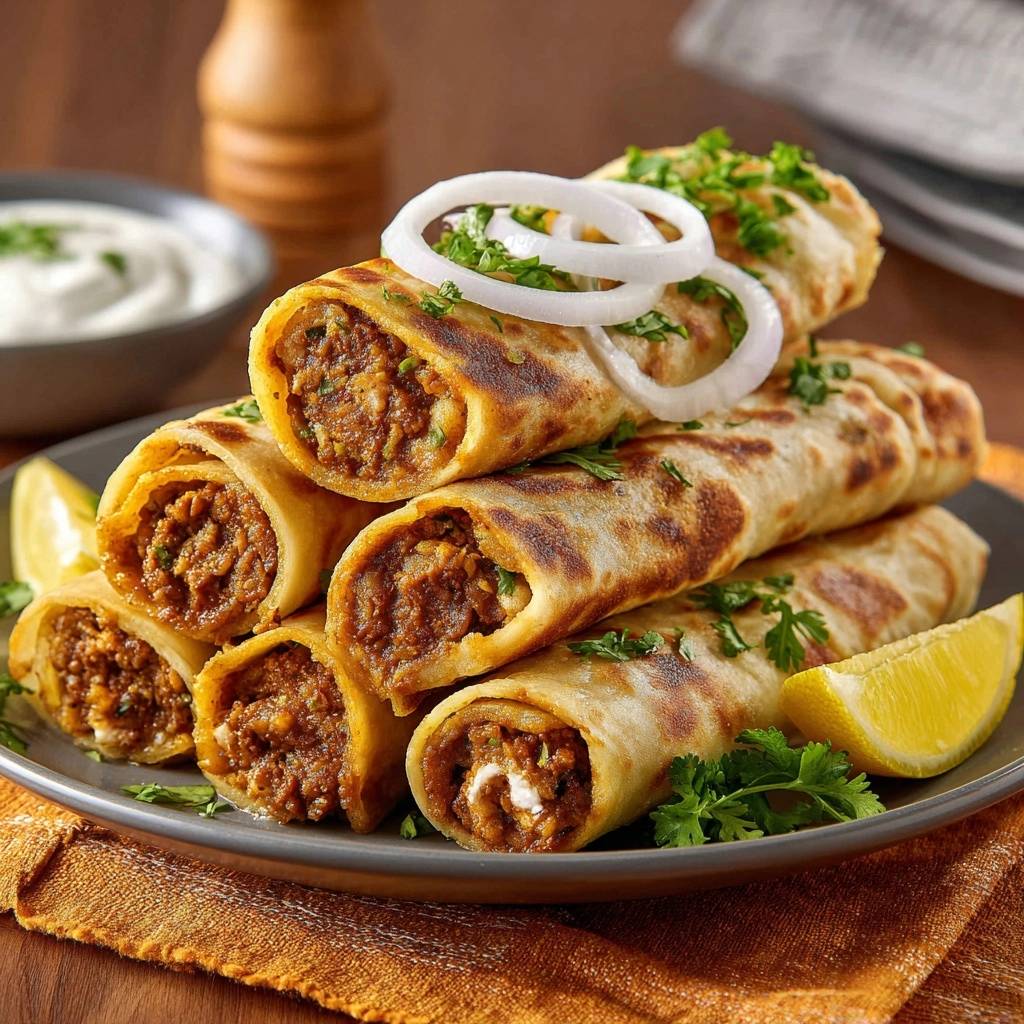
Imagine biting into a roll where the outer layer doesn’t just give way, but actually shatters. That initial crunch leads you into a heart of deeply spiced, savory beef that’s juicy without being greasy. It’s the ultimate street food experience, but achieving that specific texture at home often feels like a losing battle against the dreaded soggy bottom.
Most home cooks struggle because they roll hot, steaming filling directly into the bread, which essentially turns the paratha into a sponge. The secret to a professional-grade roll isn’t just in the spices, but in the physics of the assembly. By using a strategic moisture barrier and a final double-sear, you can ensure every single bite maintains its structural integrity and that signature “shattered-glass” crispness.
The real pro tip here is the cooling phase. You might be tempted to roll the beef while it’s piping hot, but that’s a recipe for a limp wrap. Letting the meat rest for just ten minutes allows the steam to dissipate, meaning the moisture stays in the meat rather than migrating into your beautiful, flaky paratha layers.
The Anatomy of a Perfect Beef Paratha Roll
A perfect paratha roll is a study in contrasts. You have the buttery, laminated layers of the bread playing against the earthy, robust heat of the beef filling. This isn’t just a sandwich; it’s a carefully constructed vessel designed to deliver maximum flavor without making a mess of your hands.
In the world of street food, specifically the famous Kati rolls of Kolkata, the texture is what separates the legends from the amateurs. When you take that first bite, you should hear the crunch before you taste the cumin. It’s a sensory experience that relies on the paratha being cooked until it’s golden-brown and rigid enough to hold its shape.
Why Texture Trumps Everything in Street Food
Humans are biologically wired to crave the sound of a crunch because it often signals freshness and proper preparation. In this dish, the multiple layers of the paratha provide a massive surface area for the Maillard reaction. This chemical reaction between amino acids and reducing sugars is what gives browned food its distinctive, addictive flavor.
Essential Components for the Beef Filling
The foundation of this roll is the beef, and quality matters immensely here. I always recommend using a lean ground beef, specifically a 90/10 or 93/7 blend. While fat usually equals flavor, too much rendered grease in a wrap will soak through the bread and ruin the crunch you’ve worked so hard to achieve.
Using lean meat allows the spices to coat the crumbles evenly without being washed away by excess oil. If you only have a fattier blend on hand, make sure to drain the skillet thoroughly after the initial browning. You want the meat to be moist and tender, but never “wet” or swimming in liquid.
The Spice Profile: Balancing Heat and Earthiness
Garam masala provides the warm, aromatic backbone of this dish, while cumin adds a smoky depth. The turmeric isn’t just there for the health benefits; it lends a beautiful golden hue to the meat. However, the real MVP is the tomato paste, which acts as a concentrated binder to hold the spices to the beef without adding the water content of fresh tomatoes.
Aromatics: The Foundation of Flavor
Fresh ginger paste and minced garlic are non-negotiable for that authentic, punchy flavor profile. I prefer finely dicing the onions rather than slicing them into long strips for the filling. Small, uniform pieces of onion soften into the meat, ensuring the filling stays compact so your roll doesn’t fall apart when you take a bite.
The Science of Preventing Soggy Parathas
The “Steam Effect” is the primary enemy of the paratha roll. When you trap 200°F meat inside a room-temperature or warm dough, the heat creates condensation. That trapped water vapor has nowhere to go but into the bread, turning a crispy paratha into a chewy, doughy mess within minutes.
To combat this, we use a two-step cooling and barrier method. By controlling the temperature of the ingredients and creating a physical shield between the meat and the bread, we can keep the exterior dry. It’s a simple application of thermodynamics that makes a world of difference in the final result.
The Greek Yogurt Moisture Barrier
Using a thick Greek yogurt or Labneh is a brilliant culinary hack. Because these yogurts have a high fat and protein content and very little water, they create a protective film. This shield prevents any residual juices from the beef from migrating into the delicate layers of the paratha, keeping the bread dry and crisp.
Temperature Control: Why Cooling the Meat Matters
If you roll the beef while it’s at its peak cooking temperature, you’re essentially steaming the bread from the inside out. Letting the meat rest until it hits about 130°F ensures it’s still warm enough to be delicious but cool enough that it won’t release a massive burst of steam once it’s wrapped up.
Step-by-Step: Preparing the Concentrated Beef Base
Start by browning your beef in a hot skillet, breaking it into very fine crumbles. You are looking for a specific sound—a sharp sizzle that indicates the water has evaporated and the meat is now frying in its own fat. This is the “bhuna” stage, where the flavors become incredibly concentrated.
Once you add your aromatics and spices, keep stirring until you see the oil just starting to separate from the spice paste at the edges of the pan. This visual cue tells you the spices are fully cooked and the flavors are locked in. The resulting filling should be dark, fragrant, and completely free of any standing liquid.
Executing the Double-Sear Finishing Technique
The double-sear is what gives these rolls their “skyscraper” level of crunch. First, you cook the paratha on its own to develop its internal structure. After filling and rolling, you return the entire assembly to the pan. This second hit of heat crisps the outer layer and seals the seam shut.
Always place the roll into the skillet seam-side down first. The heat will effectively “glue” the dough together, ensuring the roll stays tight and doesn’t unravel while you’re eating. Use a heavy spatula to press down firmly, which maximizes contact with the hot surface for an even, deep-golden color.
Achieving the Shattered-Glass Crunch
When the roll hits the hot oil for the second time, the outer layers undergo a final transformation. The oil “shocks” the paratha, driving out any remaining surface moisture and creating a rigid, brittle texture. You’ll know it’s ready when the roll feels firm to the touch and looks like burnished gold.
Flavor Variations and Ingredient Swaps
While beef is traditional and hearty, this technique works beautifully with other proteins. The key is always managing the moisture and fat content to protect the bread. You can easily adapt this recipe based on what you have in your freezer or pantry.
Alternative Proteins: Lamb or Lentil Options
Ground lamb is a fantastic substitute, though it is significantly fattier than beef. If using lamb, you must be diligent about draining the excess fat after browning. For a vegetarian version, spiced brown lentils or mashed potatoes work well, provided you cook them down until they are quite dry and thick.
Bread Substitutions: From Frozen to Homemade
High-quality frozen Malaysian-style parathas (often found in Asian grocery stores) are actually superior to homemade for many people because they are engineered for maximum flakiness. Avoid using standard flour tortillas; they lack the laminated fat layers required to achieve the specific crunch that defines a true paratha roll.
Troubleshooting Your Paratha Rolls
Even with the best intentions, things can sometimes go sideways in the kitchen. The most common issue is a filling that feels too greasy or a roll that won’t stay closed. Don’t panic; these are easy fixes that won’t require you to start over from scratch.
What to Do if the Filling is Too Oily
If you notice a pool of oil in your beef mixture, tip the skillet over a fine-mesh strainer or use a wad of paper towels to blot the excess. It’s better to lose a little bit of seasoned oil than to have that oil soak through your paratha and turn it into a heavy, greasy mess.
Fixing a Roll That Unravels in the Pan
If your paratha is a bit dry and won’t stick to itself, you can create a simple “food glue” by mixing a teaspoon of flour with a few drops of water. Dab a tiny bit on the edge of the paratha before rolling. Additionally, maintaining firm pressure with your spatula during the first minute of the second sear will usually lock the seam in place.
Optimal Pairings and Serving Suggestions
These rolls are rich and savory, so they benefit immensely from bright, acidic accompaniments. You want something that cleanses the palate between those crunchy, beefy bites. A simple side of pickled vegetables or a light salad can turn this into a complete, balanced meal.
Refreshing Acids: The Role of Lemon and Raw Onion
The sharp, pungent bite of raw white onion rings provides a necessary contrast to the fried bread. Similarly, a fresh squeeze of lemon juice right before serving cuts through the fat and makes the spices pop. These aren’t just garnishes; they are essential components that balance the entire flavor profile.
Expert Tips for Professional Results
To truly master this dish, keep these high-level tips in mind during your next kitchen session:
1. Use a cast-iron skillet for the final sear. The superior heat retention of cast iron creates a much more even and intense crunch than thin non-stick pans.
2. Roll the parathas as tightly as possible. Air pockets inside the roll allow steam to collect, which can soften the bread from the inside.
3. Never cover the finished rolls with a lid or aluminum foil. Even a few seconds of being covered will trap the heat and steam, instantly destroying the crispness you worked so hard to create.
4. Use a sharp serrated knife to cut the rolls on a diagonal. A straight blade might crush the delicate layers, while a serrated edge will saw through the crunch cleanly for a beautiful presentation.
Can I make these ahead of time for a party?
You can prepare the beef filling up to two days in advance and store it in the fridge. However, for the best texture, you should only assemble and do the final sear right before serving. If you have leftovers, the best way to revive the crunch is by heating them in an air fryer at 350°F for about 3-5 minutes.
Is there a way to make these lower in calories?
The paratha itself is the most calorie-dense part of the dish. To lighten it up, you can air-fry the paratha instead of pan-frying it in oil. Use a light spray of oil on both sides to help it brown, and ensure you’re using the leanest ground beef available to keep the fat content in check.
Why did my paratha stay chewy instead of crispy?
This usually happens if the heat is too low or if the pan wasn’t preheated properly. The paratha needs a relatively high heat to “shock” the layers into crisping up. If it sits in a lukewarm pan for too long, it will simply dry out and become tough and leathery rather than light and crunchy.
Can I use pre-cooked taco meat?
While you can use leftover taco meat, the flavor profile will be quite different. To make it work, I recommend adding a teaspoon of garam masala and a bit of ginger paste to the meat while reheating it. Make sure to cook it in a skillet until any residual taco sauce has evaporated so the filling is dry enough for the roll.
How do I store leftovers?
Store any leftover rolls in an airtight container in the refrigerator for up to three days. Do not freeze the assembled rolls, as the yogurt and onions will change texture and make the bread soggy upon thawing. Always reheat in an oven or air fryer rather than a microwave to maintain the crunch.
What if I can’t find Greek yogurt?
If Greek yogurt isn’t available, you can use regular plain yogurt, but you must strain it through a cheesecloth or coffee filter for at least an hour to remove the excess whey. The goal is a thick, spreadable consistency that won’t run. Alternatively, a small amount of cream cheese can work as a moisture barrier, though it will be much richer.
Crispy Beef Paratha Rolls
Course: Main CourseCuisine: South Asian FusionDifficulty: easy4
servings20
minutes25
minutes45
Minutes485
kcalSouth Asian Fusion
Ingredients
1 pound lean ground beef
2 tablespoons vegetable oil (plus more for frying)
1 large onion, finely diced
3 cloves garlic, minced
1 tablespoon ginger paste
1 tablespoon tomato paste (for color and binding)
1 tablespoon garam masala
1 teaspoon cumin
1 teaspoon chili powder
1/2 teaspoon turmeric
Salt and black pepper to taste
4 to 6 large frozen or fresh flaky parathas
1/2 cup thick Greek yogurt or Labneh
1 small white onion, sliced into thin rings
Fresh cilantro, finely chopped
Lemon wedges for serving
Directions
- Heat one tablespoon of oil in a large skillet over medium-high heat. Add the ground beef, breaking it up into very fine crumbles with a spatula. To prevent a soggy roll, you must cook the beef until all the liquid has evaporated and the meat begins to brown and “sizzle” in its own fat.
- Add the diced onion, garlic, and ginger. Sauté for 5 minutes until the onions are translucent and starting to caramelize.
- Stir in the tomato paste, garam masala, cumin, chili powder, turmeric, salt, and pepper. Continue cooking for 3 to 4 minutes, stirring constantly. The filling should be thick, dark, and concentrated, with no standing liquid. Remove from heat and let it cool for 10 minutes. This cooling step is vital to prevent steam from softening the bread.
- In a separate clean skillet or tawa, cook the parathas according to package instructions (usually 2 minutes per side) until they are puffed and golden. Remove and set aside.
- To assemble, spread a thin layer of Greek yogurt down the center of each paratha. This acts as a moisture barrier between the meat and the bread.
- Place a generous portion of the beef mixture over the yogurt. Roll the paratha very tightly into a cylinder.
- Wipe the skillet clean and add a thin film of oil over medium-high heat. Place the rolls into the hot skillet, seam-side down. Press down firmly with a spatula for 1 minute, then rotate the roll to sear the other sides. This “double-fry” method seals the roll and creates the signature deep-golden, shattered-glass crunch shown in the image.
- Garnish with raw onion rings, fresh cilantro, and a squeeze of lemon juice. Serve immediately while the exterior is at peak crispness.
Notes
- The cooling step for the meat and the double-fry method in the skillet are essential for achieving the signature crunch and preventing steam from softening the dough.


