Most people struggle with Hasselback potatoes because they end up with a frustrating contrast: burnt tips and a soggy, pale bottom. It’s a common kitchen heartbreak when you expect a crunch but bite into something gummy. We’re going to fix that by focusing on an “Anti-Soggy Bottom” philosophy that treats the potato like a piece of architecture.
The perfect Hasselback should offer a dramatic sensory experience. You want the edges to be shatter-crisp, almost like a thick-cut potato chip, while the interior remains buttery and tender. Achieving this requires more than just a hot oven; it requires managing moisture and ensuring fat reaches every hidden crevice of the vegetable.
The real secret to this recipe’s success is the salt-water soak. By drawing out the excess starch before the potato ever hits the pan, you prevent the slices from sticking together. This allows the heat to circulate freely, turning each individual slice into a golden, crispy petal. I’ve found that skipping this step is the number one reason home cooks fail to get that deep, uniform crunch.
The Physics of the Perfect Hasselback Slice
When you slice a potato into thin rounds while keeping the base intact, you’re exponentially increasing its surface area. This isn’t just for looks; it’s about the Maillard reaction. More surface area means more space for the heat to transform sugars and proteins into that savory, brown crust we crave.
I recommend aiming for a 1/8 inch thickness for each slice. If you go too thick, the potato feels like a standard baked potato; if you go too thin, the slices become fragile and may break off. This “golden ratio” ensures the potato stays structurally sound while providing enough thin edges to achieve a high-definition crunch.
Using Yukon Gold potatoes is a strategic choice here. Their natural sugars caramelize beautifully at high temperatures, and their medium starch content allows the interior to stay creamy. Unlike a Russet, which can turn mealy, the Yukon Gold holds its shape even after an hour in the intense heat of the oven.
Essential Components for Garlic Parmesan Potatoes
Quality ingredients are the backbone of this dish because there are so few of them. Since the potatoes are the star, you want to ensure your supporting cast is up to the task. Freshness is your best friend here, especially when it comes to the aromatics and the fats.
I always use a mix of unsalted butter and extra virgin olive oil. The butter provides that unmistakable rich flavor and helps with browning thanks to its milk solids. However, butter alone can burn during a long roast. Adding olive oil raises the smoke point, ensuring your garlic stays sweet and toasted rather than bitter and charred.
Speaking of garlic, please step away from the pre-minced jars. Freshly minced cloves have a much higher oil content and a cleaner flavor profile. When those fresh bits of garlic nestle between the potato slices, they infuse the entire tuber with a fragrant, savory punch that jarred versions simply can’t replicate.
Selecting the Right Potato Variety
While you can technically Hasselback any potato, the Yukon Gold is the undisputed champion for this method. Russets are a bit too dry and can fall apart if sliced too thinly. Red Bliss potatoes are waxy and delicious, but they don’t always crisp up as aggressively as we want for this specific texture.
Look for medium-sized potatoes that are relatively uniform in shape. This ensures they all finish cooking at the same time. If you have one giant potato and three small ones, the small ones will be overdone before the center of the large one is even soft.
The Role of High-Quality Fats
The fat isn’t just a seasoning; it’s the heat transfer medium. In the oven, the oil and butter mixture essentially “shallow fries” the edges of the potato slices. This is why we don’t skimp on the amount used in the recipe.
Using unsalted butter allows you to control the seasoning perfectly. You’ll be adding sea salt later, and you don’t want the saltiness to become overwhelming. The combination of the dairy fats and the fruitiness of the olive oil creates a complex flavor base that carries the garlic and parmesan beautifully.
Precision Tools for Uniform Slicing
You don’t need a fancy mandoline to get these perfect slices; in fact, a sharp Chef’s knife is much safer. The trick is to use “guards” to prevent the knife from going all the way through. I find that placing two wooden spoons or a pair of chopsticks on either side of the potato works like a charm.
As you slice, the knife will hit the wood, leaving about a quarter-inch of the potato base intact. This keeps the “accordion” together. Make sure your knife is sharp; a dull blade will require too much pressure and might cause the potato to slip, which is a safety hazard.
A heavy-rimmed baking sheet is also vital. Thin pans can warp at 425°F, leading to uneven heat distribution. A sturdy pan holds the heat and helps the bottoms of the potatoes brown along with the tops, contributing to that all-around crispiness we’re after.
Phase One: The Starch Release Soak
This is the most important technical step in the entire process. After you’ve sliced your potatoes, drop them into a large bowl of cold, heavily salted water. You’ll notice the water starts to turn cloudy almost immediately. That’s the amylose starch escaping from the cut surfaces.
If you leave that starch on the potato, it acts like glue. During roasting, it will cause the slices to stick together, trapping steam and resulting in a gummy texture. A 15-minute soak removes that excess starch and seasons the potato from the inside out through osmosis.
When you pull the potatoes out of the water, they should feel slightly more flexible. The water will be quite murky, which is a great sign. It means you’ve successfully removed the primary obstacle to a shatter-crisp finish.
Phase Two: Eliminating Moisture for Maximum Crunch
Moisture is the absolute enemy of the crunch. If your potatoes are even slightly damp when they go into the oven, they will steam instead of roast. Steaming leads to soft, limp slices that will never achieve that golden-brown glory.
Take the time to pat each potato extremely dry with paper towels or a lint-free kitchen towel. I like to gently fan the slices open and dab the water out from between them. It feels a bit tedious, but it’s the difference between a mediocre side dish and a restaurant-quality masterpiece.
Once they are dry, let them sit on the counter for a few minutes while you prep your garlic butter. This ensures any remaining surface moisture evaporates. You want the fat to hit a dry surface so it can immediately begin the crisping process.
Phase Three: The Initial Fat Application
Now comes the first layer of flavor. Whisk your melted butter, olive oil, minced garlic, and onion powder together. Use a pastry brush to coat the potatoes generously. Don’t just brush the tops; use the bristles to push the fat down into the gaps you’ve created.
This initial baste is about setting the stage. The oil will seep down and coat the “walls” of each slice. This prevents them from sticking back together as they cook and ensures that every bite is infused with garlic and salt.
Season with your sea salt and cracked black pepper at this stage. The salt will help draw out any last bits of internal moisture during the first half of the roast, further concentrating the potato flavor and aiding in the crisping process.
Phase Four: The Two-Stage Roasting Cycle
We roast these in two distinct stages to manage the texture. The first 30 minutes at 425°F are all about structural setting. The heat penetrates the center of the potato, softening the flesh while the edges begin to firm up and turn a light golden color.
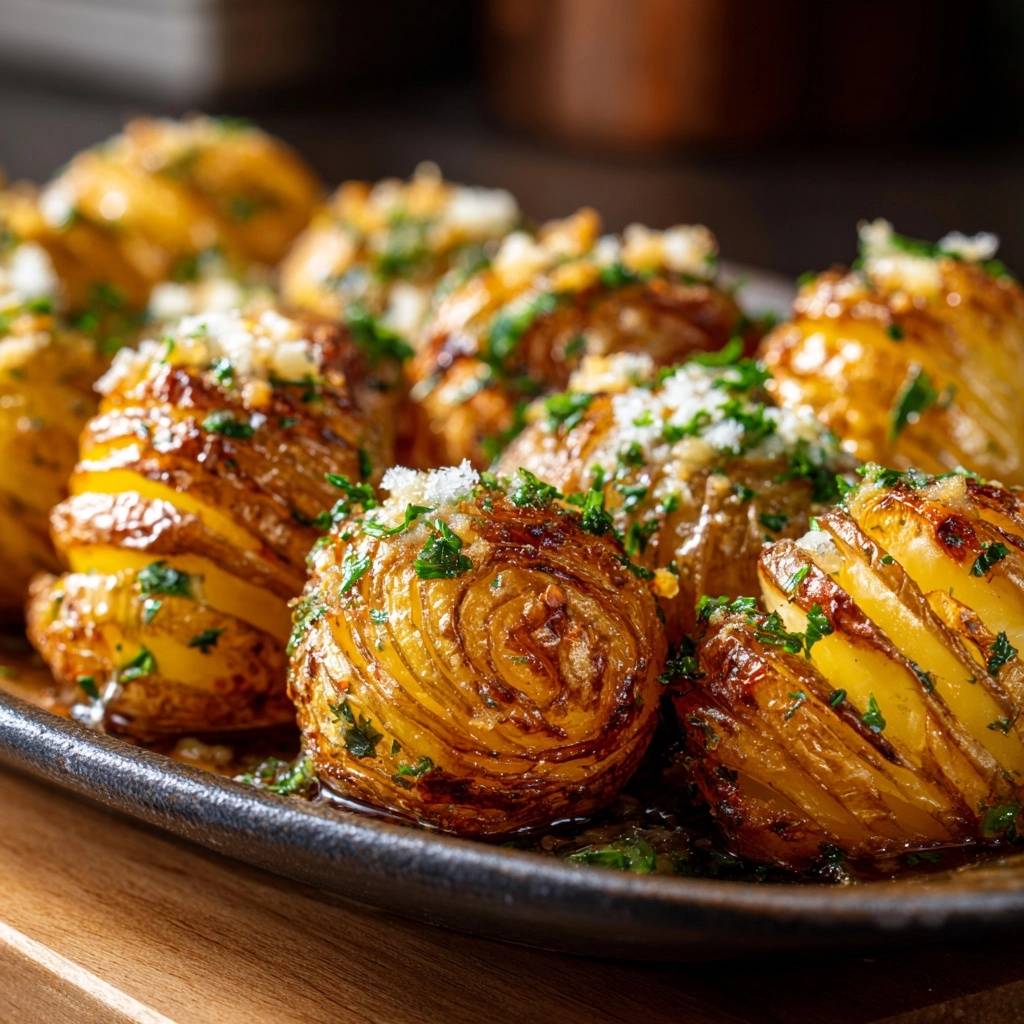
After that first half-hour, you’ll notice the potatoes have naturally fanned out. They look like an open accordion now. This is the perfect time to remove them from the oven for the second baste. Since the slices are open, the remaining garlic butter can reach the very bottom of each cut.
This second application of fat is what creates the “shatter-crisp” effect. You’re essentially re-lubricating the slices just as they are getting hot enough to fry. Put them back in for another 20 minutes, and watch as the edges turn a deep, mahogany brown.
Achieving the Golden Parmesan Crust
The Parmesan cheese is the final touch, but timing is everything. If you put the cheese on at the beginning, it will burn and become bitter long before the potatoes are cooked through. We wait until the final 7 to 10 minutes of roasting.
Use finely grated Parmesan—ideally the kind you grate yourself on a microplane. Avoid the stuff in the green shaker can; it contains anti-clumping agents that prevent it from melting and crisping properly. Real Parmigiano-Reggiano will melt into the crevices and then harden into a savory, lacy crust.
When you sprinkle the cheese, try to get it into the gaps. As it roasts for those last few minutes, it will bond with the potato starch and the butter to create a salty, umami-rich coating that is absolutely addictive. You’ll know they’re done when the cheese is bubbling and golden.
Troubleshooting Common Texture Issues
If you find your potatoes aren’t fanning out properly, they might be sliced too thick or weren’t soaked long enough. You can gently use a knife to nudge the slices apart during the second basting stage. Just be careful not to snap the base of the potato.
If the tops are browning too quickly but the center still feels hard when poked with a skewer, simply tent the pan loosely with aluminum foil. This reflects some of the direct heat while allowing the ambient temperature to continue cooking the interior.
The “Soggy Bottom” usually happens if you use too much oil on the pan itself or if the potatoes weren’t dried properly. Using parchment paper helps absorb a bit of the excess and prevents the potatoes from sitting in a pool of moisture, which is key for a crisp base.
Flavor Variations and Herb Substitutions
While garlic and parmesan are a classic duo, you can easily pivot this recipe. For a smoky, Spanish-inspired version, swap the onion powder for smoked paprika and use a Manchego cheese instead of Parmesan. It adds a wonderful depth and a vibrant red color.
If you prefer a more earthy, Provencal vibe, add finely chopped rosemary and thyme to your butter mixture. These hardy herbs can stand up to the high heat of the oven and will make your kitchen smell like a French bistro. Just remember to keep the fresh parsley for the very end to maintain its bright, grassy flavor.
Regardless of the herbs you choose, keep the garlic as your base. It provides the savory backbone that makes the potatoes feel like a complete meal rather than just a side dish. The Parmesan is also hard to beat for that specific “lace” crunch, so try to keep a hard, salty cheese in the mix.
Optimal Pairings for Crispy Potatoes
These potatoes are quite rich, so they pair best with proteins that have a bit of acidity or a clean, roasted flavor. A simple roasted chicken with lemon and herbs is a perfect match. The lemon juice from the chicken cuts right through the garlic butter of the potatoes.
If you’re looking for something more indulgent, a seared ribeye steak is the way to go. The crunch of the Hasselback slices is a great textural contrast to a juicy, medium-rare steak. For a vegetarian option, try serving these alongside large portobello mushrooms roasted with balsamic vinegar.
I also love serving these with a bright, acidic side salad. A simple mix of arugula, shaved fennel, and a sharp vinaigrette cleanses the palate between bites of the salty, cheesy potatoes. It keeps the meal feeling balanced rather than overly heavy.
Storage and Reheating for Retained Texture
If you have leftovers, do not put them in the microwave! The microwave will turn your hard-earned crispy edges into a soggy, rubbery mess. Instead, store them in an airtight container in the fridge for up to three days.
To revive that “shatter-crisp” texture, use your air fryer or oven. Place the potatoes in a 400°F oven for about 10 minutes, or in an air fryer for 5 minutes. This high, dry heat will re-crisp the Parmesan and the potato edges without drying out the fluffy interior.
I don’t recommend freezing these. Potatoes have a high water content, and the freezing and thawing process tends to make the cell structure collapse. You’ll end up with a grainy, watery potato that loses all the architectural beauty of the Hasselback cut.
Expert Tips for Large Batch Cooking
If you’re hosting a dinner party and need to make a dozen or more of these, you can do the “soak and dry” phase ahead of time. After drying them thoroughly, keep them covered with a dry towel at room temperature for up to two hours before roasting. This saves you a lot of stress when guests arrive.
When cooking a large batch, oven rack placement is crucial. Don’t crowd the potatoes on one tray; use two trays if necessary. If you put too many potatoes on one sheet, they will release too much steam at once, and you’ll end up with the dreaded soggy bottom.
Rotate your pans halfway through the cooking time, moving the bottom tray to the top and vice versa. This ensures that the heating elements in your oven hit all the potatoes equally. With a little planning, you can serve a crowd potatoes that are just as crispy as if you’d only made one.
How do I store leftover Hasselback potatoes?
Store any leftovers in an airtight container in the refrigerator for up to 3 days. Avoid freezing them, as the texture of the potato becomes grainy and the crispy edges will turn mushy upon thawing. For the best results, let them cool completely before sealing the container to prevent condensation from softening the crust.
Why are my Hasselback potatoes soggy instead of crispy?
Sogginess is usually caused by two things: excess starch or trapped moisture. If you skip the 15-minute salt-water soak, the starch will act like glue and keep the slices stuck together, trapping steam. Additionally, if you don’t pat the potatoes completely dry before brushing them with oil, the residual water will steam the potato in the oven rather than roasting it. Always ensure the slices are fanned out during the second half of roasting to let moisture escape.
Can I use a different type of cheese?
Yes, you can substitute the Parmesan with other hard, aged cheeses like Pecorino Romano, Manchego, or even a very sharp aged Cheddar. However, avoid soft cheeses like mozzarella or young cheddar for the topping, as they have a high moisture content and will melt into a gooey puddle rather than creating the desired crispy, lacy crust. If you want a different flavor, stick to cheeses that are dry and crumbly.
What is the best way to reheat them to keep the crunch?
The best way to reheat these potatoes is in an air fryer at 375°F for 3-5 minutes or in a conventional oven at 400°F for about 10 minutes. This dry, intense heat reacts with the fats already in the potato to re-crisp the edges. Never use a microwave, as it heats the water molecules inside the potato, which steams the crust from the inside out and makes it rubbery.
Can I prep these potatoes in advance?
You can slice, soak, and dry the potatoes up to 2 hours before you plan to roast them. Keep them at room temperature covered with a clean, dry kitchen towel. Do not apply the butter and oil mixture until you are ready to put them in the oven, as the salt in the mixture can draw out moisture over time and make the potatoes weep, which ruins the final crunch.
Why do I need to use both butter and olive oil?
This combination is about balancing flavor and physics. Butter provides the best flavor and contains milk solids that brown beautifully, but it has a low smoke point and can burn during a 60-minute roast. Olive oil has a higher smoke point and helps “fry” the potato edges at 425°F. By mixing them, you get the rich taste of butter with the heat resistance of oil, ensuring your garlic and potatoes brown without tasting burnt.
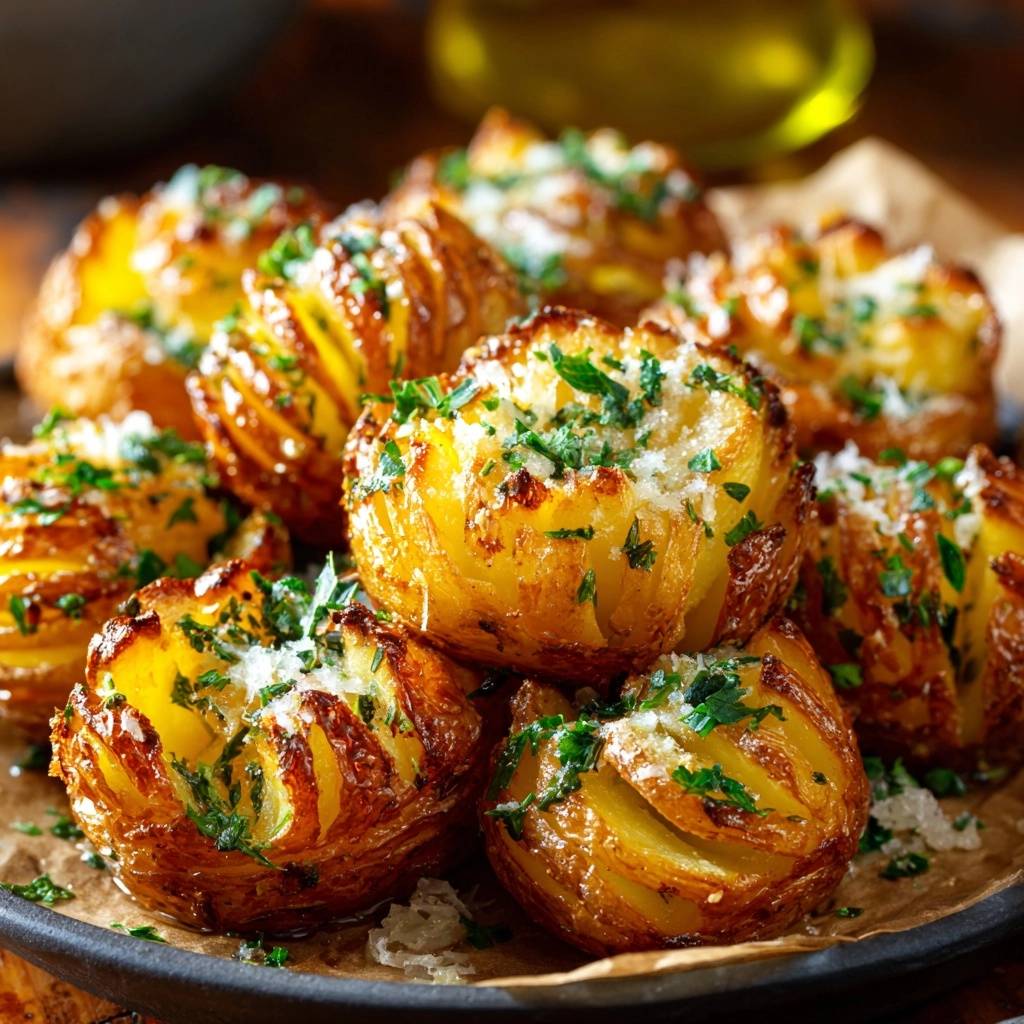
Crispy Garlic Parmesan Hasselback Potatoes
Course: Side DishCuisine: AmericanDifficulty: easy4
servings20
minutes1
hour80
Minutes245
kcalAmerican
Ingredients
6-8 medium Yukon Gold potatoes (uniform in size)
4 tablespoons unsalted butter, melted
3 tablespoons extra virgin olive oil
4 cloves garlic, finely minced
1/2 cup finely grated Parmesan cheese (plus extra for garnish)
3 tablespoons fresh parsley, finely chopped
1 teaspoon sea salt
1/2 teaspoon cracked black pepper
Optional: 1/2 teaspoon onion powder for depth
Directions
- Preheat your oven to 425°F (220°C).
- The Hasselback Cut: Place two wooden spoons or chopsticks on either side of a potato to act as guards. Slice the potato into very thin rounds (about 1/8 inch), stopping when the knife hits the spoons so the bottom remains intact.
- The Starch Release: To solve the soggy bottom issue, soak the sliced potatoes in a bowl of cold, heavily salted water for 15 minutes. This draws out surface starch that causes gumminess.
- The Dry Down: Drain the potatoes and pat them extremely dry with a paper towel, ensuring you get between the slices. Moisture is the enemy of the crunch.
- The First Baste: In a small bowl, whisk together the melted butter, olive oil, minced garlic, and onion powder. Place the potatoes on a parchment-lined baking sheet. Brush half of the fat mixture over the potatoes, using the brush to gently fan the slices so the oil gets deep into the crevices. Season generously with salt and pepper.
- The Initial Roast: Roast for 30 minutes. This sets the structure and begins the browning process.
- The Fan & Crisp: Remove from the oven. The slices will have naturally fanned out. Brush the remaining garlic butter/oil mixture over the potatoes, ensuring the centers are well-coated.
- The Parmesan Crust: Return to the oven for another 20 minutes. Remove once more and sprinkle the finely grated Parmesan cheese over the tops and into the gaps. Roast for a final 7-10 minutes until the cheese is golden and the edges of the potato slices are deep brown and “shatter-crisp.”
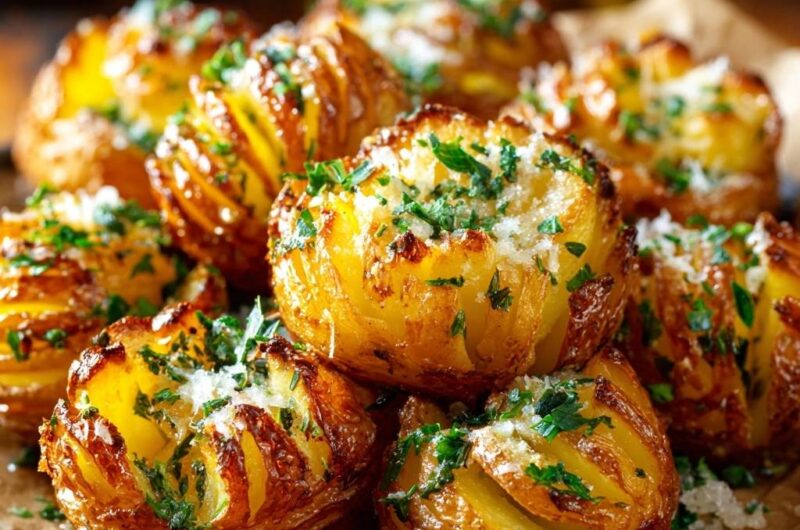
- Finish: Garnish heavily with fresh chopped parsley and an extra dusting of Parmesan. Serve immediately while the texture is at its peak.
Notes
- The salt-water soak and thorough drying are essential steps to prevent a soggy texture and ensure maximum crunch.