
We’ve all been there. You spend forty minutes perfectly breading and frying chicken, only to watch it turn into a sad, spongy mess the moment you drizzle on the sauce. It’s a heartbreaking kitchen fail that usually happens because the steam inside the chicken has nowhere to go but into your crust.
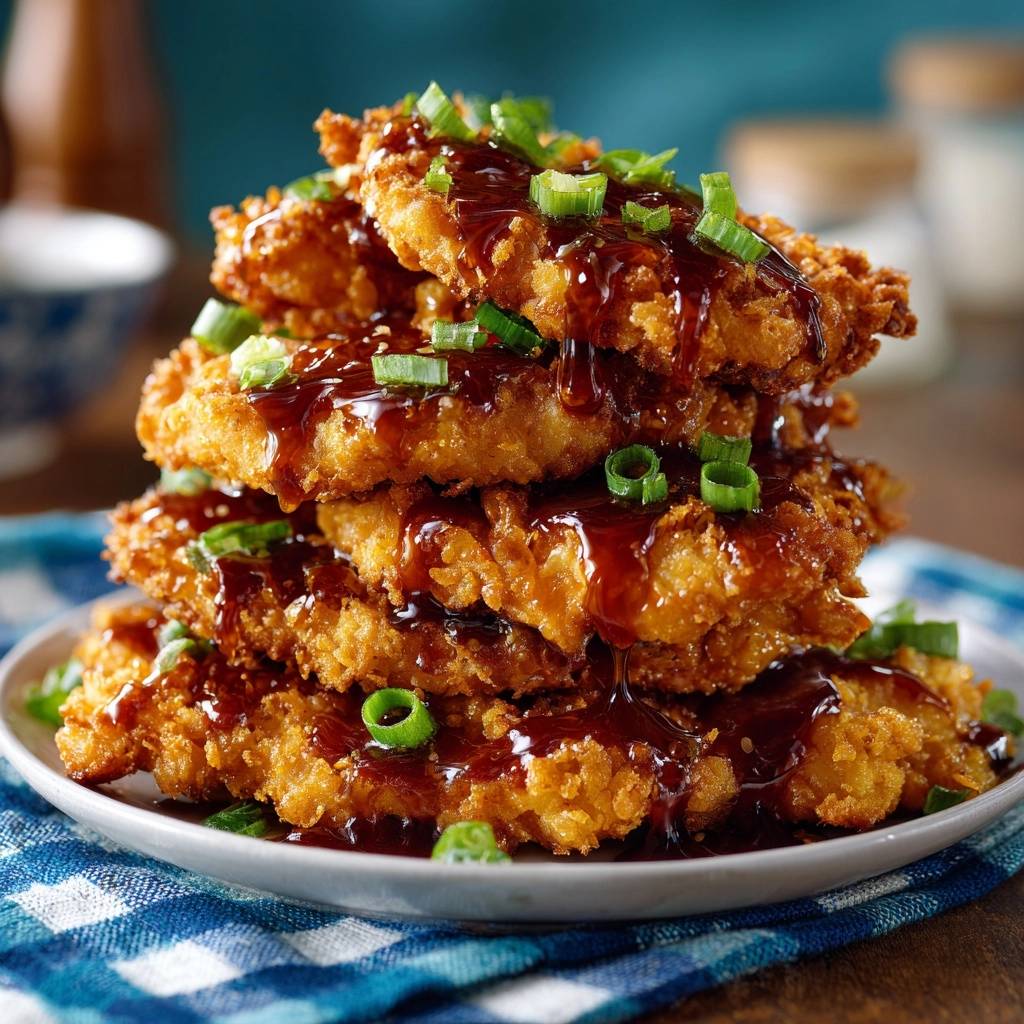
The goal here is a shatter-crisp exterior that survives even the heaviest, stickiest glaze. You want that audible crunch when your fork hits the meat, followed by the sweet and savory punch of a honey-ginger reduction. This isn’t just about frying; it’s about engineering a moisture-resistant barrier that stands up to liquid.
The secret to this professional-grade crunch is a specific double-starch foundation. By mixing cornstarch with your flour, you create a brittle, glass-like shield that blocks moisture from migrating. I’ve found that skipping this one simple step is why most home-cooked cutlets lose their texture within minutes of hitting the plate.
The Physics of the Perfect Chicken Crunch
Standard breading fails because of the “Steaming Effect.” As the chicken cooks, it releases juices that turn into steam. In a traditional flour-and-egg dredge, that steam gets trapped between the meat and the crust, effectively boiling the breading from the inside out.
However, when you introduce a high-starch foundation, you change the chemistry of the crust. Cornstarch doesn’t contain the proteins that make flour chewy, so it fries up much harder and drier. This creates a moisture-resistant barrier that keeps the juices inside the meat and the oil outside the crust.
This recipe differs from the standard “flour-egg-crumb” method by using a 50/50 split of cornstarch and all-purpose flour. This hybrid base layer acts like a sealant. It ensures that even when you drench the cutlet in a syrupy glaze, the Panko remains structurally sound and incredibly crispy.
Essential Components for Crispy Glazed Chicken Cutlets
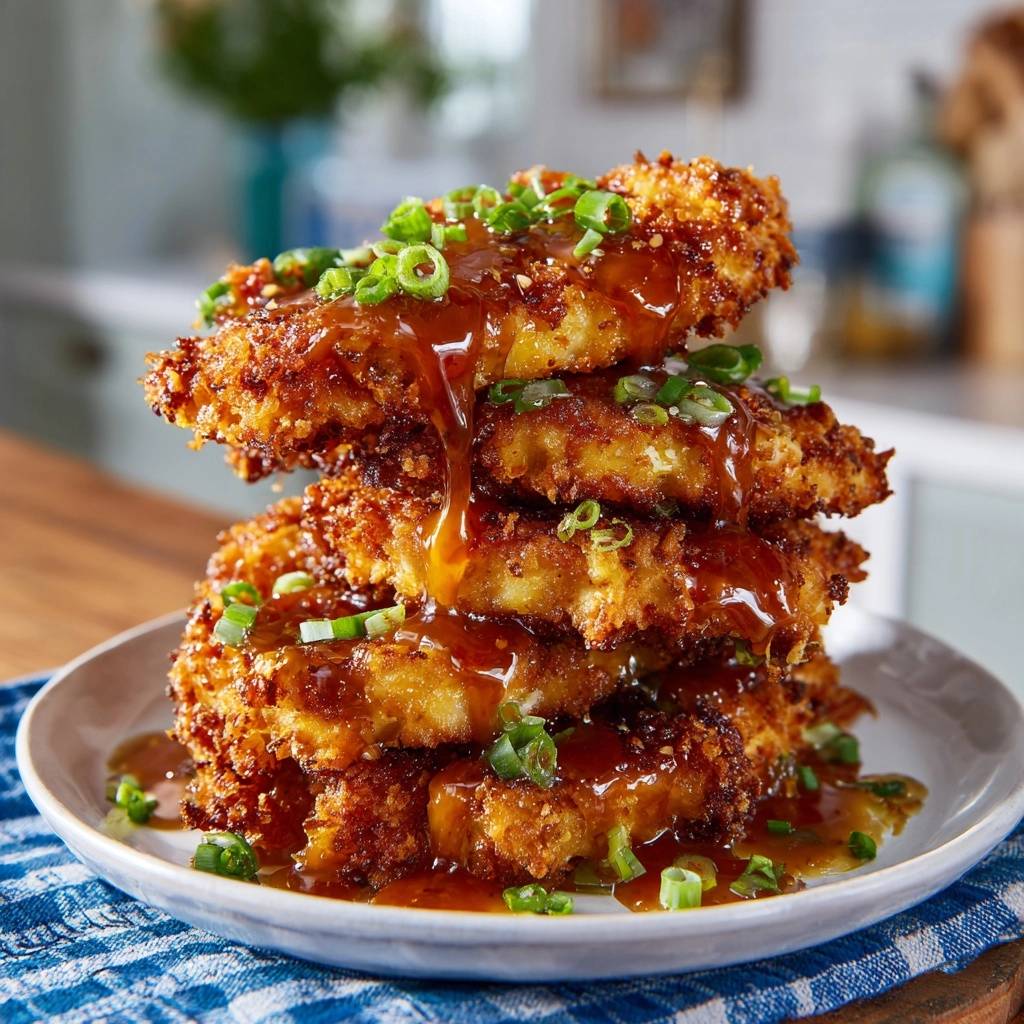
Quality ingredients are the backbone of this dish, and Panko is absolutely non-negotiable. Unlike traditional Italian breadcrumbs, which are fine and sandy, Panko is made from crustless bread processed into large, airy flakes. These flakes create more surface area, which means more places for the oil to create a golden, jagged crunch.
For the glaze, rice vinegar plays a crucial role that many people overlook. It provides a sharp, acidic backbone that cuts through the heavy sugar profile of the honey. Without it, the sauce feels cloying and flat; with it, the flavors brighten and pop against the savory soy sauce.
When it comes to the frying medium, reach for vegetable or canola oil rather than olive oil. You need an oil with a high smoke point because we are shallow frying at 350°F. Olive oil will smoke and impart a bitter flavor at these temperatures, whereas vegetable oil stays neutral and lets the ginger and garlic shine.
The Double-Starch Dredge System
The 50/50 split of cornstarch and all-purpose flour is your insurance policy against sogginess. Cornstarch prevents gluten development, which is the enemy of a brittle, crispy shell. If you used only flour, the coating would become bread-like and soft once the glaze hit it.
In addition to the texture benefits, this mixture adheres to the chicken much better than plain flour. It creates a smooth, even surface for the egg wash to cling to. This ensures that your breading doesn’t peel off in large, disappointing sheets while you’re eating.
Aromatics and the Glaze Foundation
Fresh ginger is a powerhouse in this glaze, and you really shouldn’t swap it for the powdered stuff. Fresh ginger has a spicy, peppery bite and a floral aroma that balances the saltiness of the soy sauce. It adds a layer of complexity that makes the dish taste like it came from a high-end bistro.
The honey-to-soy ratio is also vital for achieving the right “cling.” You want a glaze that is thick enough to coat the back of a spoon but fluid enough to drizzle. If you have too much soy, the sauce will be watery; too much honey, and it becomes a sticky candy that’s hard to chew.
Step-by-Step: Preparing the Chicken for Frying
Start by pounding your chicken breasts to a uniform 1/2-inch thickness. This isn’t just about making them look nice; it’s about physics. If one side is thicker than the other, the thin part will dry out before the thick part is even safe to eat.
Once the chicken is even, use paper towels to pat every single cutlet completely dry. If the surface of the meat is wet, the starch won’t stick properly. It will create a layer of steam that pushes the breading away from the meat, leading to those dreaded air pockets in your crust.
I always season the meat directly with a little salt and pepper before dredging. While there is salt in the breading and the glaze, seasoning the meat itself ensures that every bite is flavorful from the inside out. It’s a small detail that makes a massive difference in the final result.
The Three-Station Coating Process
Set up your assembly line: Station 1 is the flour and cornstarch mix, Station 2 is the beaten eggs, and Station 3 is the Panko. This order is essential for building the layers of the “Anti-Soggy” shield. Work with one hand for dry ingredients and one for wet to keep things clean.
When you get to the Panko station, don’t just toss the chicken in the crumbs. You need to use a firm press technique. Use the palm of your hand to literally grind the Panko into the egg-coated chicken. This ensures the flakes are embedded deeply so they don’t flake off in the hot oil.
Shake off any excess flour before the egg dip. If there’s too much loose flour, the egg wash will slide right off, taking the Panko with it. You want a thin, even coating at every stage to keep the final crust light rather than heavy and doughy.
Mastering the Shallow Fry Technique
Heat about half an inch of oil in your skillet until it reaches 350°F. If you don’t have a thermometer, drop a single Panko flake into the oil. If it sizzles vigorously and stays on the surface, you’re ready; if it sinks or sits there quietly, the oil is too cold.
Once the chicken hits the pan, follow the “No-Movement Rule.” Do not touch, poke, or slide the cutlets for at least 3 minutes. The proteins in the egg need time to coagulate and “glue” the Panko to the starch layer. Moving them too early is the number one reason breading falls off in the pan.
Watch for the visual cues: you’re looking for the edges of the chicken to turn a deep, golden brown. When you flip, the crust should be hard and resonant. Fry for another 3 to 4 minutes on the second side until the chicken is opaque and firm to the touch.
The Wire Rack Cooling Protocol
This is the most important step for maintaining crunch. Never, ever place freshly fried chicken on paper towels. While it seems like a good way to soak up grease, it actually traps steam underneath the cutlet. That steam has nowhere to go, so it re-hydrates the bottom crust, making it soggy in seconds.
Instead, transfer the cutlets to a wire cooling rack set over a baking sheet. This allows air to circulate around the entire piece of chicken, letting the steam escape freely. It keeps the bottom just as crispy as the top, preserving the structural integrity of your hard work.
If you’re cooking in batches, you can slide this entire rack and sheet setup into a 200°F oven. This keeps the first batch warm and dry while you finish the rest. The dry heat of the oven actually helps further set the crust, making it even more resistant to the glaze.
Reducing the High-Viscosity Savory Glaze
While the chicken rests, whisk your soy sauce, honey, ginger, vinegar, and that extra teaspoon of cornstarch in a small saucepan. Bring it to a simmer over medium heat. You’ll notice the color darken and the bubbles become smaller and more viscous as the water evaporates.
You are looking for the “Nappe” stage, which is a fancy way of saying the sauce should coat the back of a spoon. If you run your finger through the sauce on the spoon, the line should stay clean and sharp. This thickness is what allows the glaze to “cling” to the jagged Panko flakes.
The cornstarch in the glaze is your insurance policy. It creates a glossy, silken texture that stays put. Without it, the glaze might be too thin and run right off the chicken, pooling at the bottom of the plate and soaking the underside of your cutlets.
Troubleshooting Common Coating Failures
If your breading is falling off, it’s usually because the oil wasn’t hot enough or the chicken was too wet before dredging. If the oil is cold, it soaks into the breading instead of searing it, which dissolves the “glue” holding it together. Always wait for that sizzle before adding the meat.
If your glaze tastes too salty, you can balance it with a tiny splash of water or an extra teaspoon of honey. If it’s too sweet, add another teaspoon of rice vinegar. The balance of salt, sweet, and acid is subjective, so don’t be afraid to taste and tweak the sauce at the very end.
For chicken that is dark brown on the outside but raw inside, your heat is too high. The sugar in the Panko (yes, most bread has a little sugar) is burning before the meat can cook. Lower the heat slightly and flip the chicken more frequently to finish the cooking process without burning the crust.
Optimal Side Dishes for Glazed Cutlets
Since this chicken is rich and savory, you want sides that offer a clean contrast. Steamed bok choy or charred broccolini are perfect because their slight bitterness cuts through the honey glaze. They also provide a vibrant green color that makes the whole plate look professional.
Jasmine rice is the classic choice for a reason. It acts like a sponge, soaking up any extra glaze that drips off the chicken. If you want something heartier, quinoa or even a simple brown rice works well to provide a nutty base for the bold flavors of the ginger and soy.
For a refreshing temperature contrast, try a cold smashed cucumber salad with a little sesame oil and chili flakes. The cool, crisp cucumbers cleanse the palate between bites of the warm, crunchy chicken. It’s a great way to keep the meal feeling light despite the fried components.
Flavor Variations and Ingredient Swaps
If you need a gluten-free version, you can substitute the all-purpose flour with potato starch or a 1-to-1 gluten-free flour blend. Use gluten-free tamari in place of the soy sauce and ensure your Panko is a gluten-free variety. The potato starch actually creates an even crispier crust than wheat flour.
For those who love heat, add a tablespoon of chili garlic sauce or a squeeze of sriracha to the glaze while it simmers. The spice pairs beautifully with the honey and ginger. You can also press some red pepper flakes directly into the Panko breading for a more subtle, built-in heat.
If you’re out of rice vinegar, lime juice and a bit of lime zest make an excellent substitute. The citrus provides a different kind of brightness that feels very tropical and fresh. It works especially well if you garnish the final dish with some fresh cilantro along with the green onions.
Make-Ahead Strategies and Storage
These cutlets are definitely best served fresh, but you can make them ahead if you follow a few rules. Store the fried chicken and the glaze in separate airtight containers in the fridge. Keeping them apart is the only way to prevent the breading from turning into mush overnight.
When you’re ready to eat, avoid the microwave at all costs. It will make the chicken rubbery and the crust soft. Instead, use an air fryer at 375°F for about 3 to 5 minutes, or a toaster oven. This dry, circulating heat will re-crisp the Panko and bring that “shatter” back to the crust.
You can also prep the chicken through the breading stage and freeze the raw, breaded cutlets on a baking sheet. Once frozen solid, transfer them to a bag. You can fry them straight from frozen; just add about 2 minutes to the cooking time per side to ensure the center is cooked through.
Expert Tips for Professional Results
To avoid “club hand” while breading, use the wet hand/dry hand technique. Designate your left hand for the flour and Panko (dry) and your right hand for the egg wash (wet). This prevents your fingers from becoming breaded along with the chicken, keeping the process much faster and cleaner.
Always fry in batches. If you crowd the pan with too many cutlets at once, the temperature of the oil will drop significantly. This leads to greasy, soggy chicken because the oil soaks into the breading instead of searing it. Give each piece of chicken plenty of “breathing room” in the skillet.
Finally, don’t be stingy with the green onions. The fresh, sharp bite of the raw onion is the perfect finishing touch for the deep, cooked flavors of the glaze. It adds a pop of color and a layer of freshness that makes the dish feel balanced and complete.
Frequently Asked Questions
Can I bake these instead of frying?
You can bake them, but you will lose some of that signature crunch. To get the best results in the oven, bake at 425°F on a wire rack set over a baking sheet. You must spray the Panko-coated chicken generously with cooking oil spray before baking to help the breadcrumbs brown and crisp up. It won’t be quite as decadent as the fried version, but it’s a solid alternative.
Why is my glaze not thickening?
Cornstarch needs to reach a specific temperature (about 203°F) to “gel” and thicken a liquid. If your glaze is still watery, it likely hasn’t reached a full rolling simmer. Make sure the sauce comes to a bubble and stays there for at least a minute. If it’s still too thin, whisk another half-teaspoon of cornstarch with a teaspoon of water and stir that slurry into the simmering sauce.
What is the best oil for frying chicken?
Vegetable oil, canola oil, and peanut oil are the top choices because they have high smoke points and neutral flavors. Peanut oil is often cited by chefs as the gold standard for frying because it adds a very subtle richness, but vegetable oil is more accessible and works perfectly. Avoid butter or extra virgin olive oil, as they will burn and turn bitter at the temperatures required for a good sear.
How do I keep the chicken warm while batch frying?
The best method is to keep a wire rack set over a baking sheet in a 200°F oven. As each batch of chicken finishes frying, move it to the rack in the oven. The low heat keeps the meat safe and warm, while the dry air and wire rack prevent the bottom of the chicken from getting soggy. This allows you to serve everyone at the same time with perfectly hot, crispy food.
Can I use chicken thighs instead of breasts?
Yes, chicken thighs are a great substitute and are much harder to overcook. However, they contain more fat and connective tissue, which can sometimes cause the breading to slide off if not trimmed well. Make sure to trim any large pieces of overhanging fat and pound them to an even thickness just like the breasts. They may take an extra minute or two per side to cook through completely.
Crispy Glazed Chicken Cutlets
Course: Main CourseCuisine: AmericanDifficulty: easy4
servings15
minutes15
minutes30
MinutesAmerican
Ingredients
1.5 lbs chicken breast, pounded to half-inch thickness
1.5 cups Panko breadcrumbs
1/2 cup cornstarch
1/2 cup all-purpose flour
2 large eggs, beaten
1 teaspoon garlic powder
1 teaspoon salt
1/2 teaspoon black pepper
1/2 cup soy sauce
1/3 cup honey
1 tablespoon ginger, minced
2 tablespoons rice vinegar
1 teaspoon cornstarch (for glaze thickening)
1/4 cup sliced green onions
Vegetable oil for shallow frying
Directions
- Pat the chicken cutlets completely dry with paper towels. This is the first step in preventing a soggy coating.
- Set up three bowls. In the first, whisk together the 1/2 cup cornstarch, flour, salt, pepper, and garlic powder. In the second, place the beaten eggs. In the third, place the Panko breadcrumbs.
- Dredge each cutlet in the flour/cornstarch mix first, shaking off every bit of excess. Dip into the egg, then press firmly into the Panko. The cornstarch in the base layer creates a tight, moisture-resistant seal that prevents the chicken juices from steaming the breading from the inside out.
- Heat 1/2 inch of oil in a large skillet over medium-high heat (350°F). To ensure the coating doesn’t fall off, do not move the chicken for at least 3 minutes once it hits the pan. Fry until deep golden brown and crisp, about 4 minutes per side.
- Transfer the fried chicken to a wire cooling rack rather than a paper towel. Air circulation is vital to maintaining the crunch.
- In a small saucepan, whisk the soy sauce, honey, ginger, rice vinegar, and the 1 teaspoon of cornstarch. Simmer over medium heat for 3-5 minutes until it reduces into a thick, dark, syrupy glaze that coats the back of a spoon.
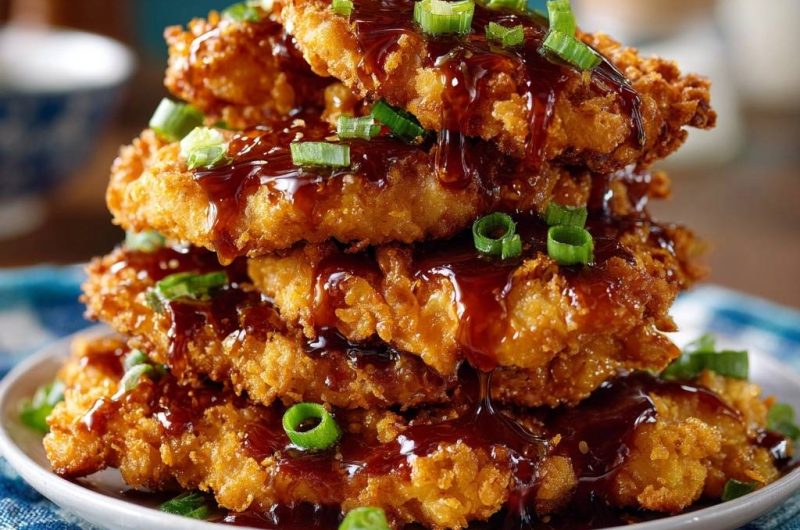
- Stack the chicken cutlets on a plate. Drizzle the hot, thickened glaze over the chicken just before serving and garnish with a generous amount of fresh green onions. Because of the cornstarch seal and the reduced glaze, the breading will remain crispy until the very last bite.
Notes
- Always use a wire cooling rack instead of paper towels to maintain crunch through air circulation. The cornstarch in the initial dredge is the key to preventing the breading from steaming off.


