
We have all been there: you are craving those salty, golden diner-style potatoes, but you end up with a mushy, steamed mess that sticks to the pan. It is incredibly frustrating when you want a shattered-glass exterior and instead get a pile of soft spuds. The secret to that perfect crunch is not just luck; it is all about moisture control and heat management.
By using a specific par-boiling and steam-drying technique, we ensure the outside crisps up instantly while the inside stays fluffy. This method creates a starchy coating on the surface of the potato that acts like a natural batter. When that starch hits the hot oil, it transforms into a deep, craggy crust that holds its shape even after you plate it.
The real pro tip here is the “scuffing” method. After draining your potatoes, you have to shake them vigorously in the pot. This roughs up the edges and creates a layer of mashed potato starch on the surface. That extra surface area is exactly what catches the oil and turns into the golden brown crunch you are looking for.
Why Most Home Fries Turn Out Mushy
Most home cooks fail because they throw raw potatoes directly into a skillet. This creates a conflict between the inside and the outside of the vegetable. By the time the center is soft, the outside is either burnt or, more likely, soggy from the steam trapped underneath the potato.
Overcrowding the pan is the second biggest mistake. When potatoes are packed too tightly, the moisture they release has nowhere to go. Instead of searing in the oil, they end up boiling in their own juices. You need space between the cubes for the steam to escape so the Maillard reaction can actually happen.
Finally, excess surface moisture is the enemy of the sear. If your potatoes are wet when they hit the oil, the energy of the stove goes into evaporating that water rather than browning the starch. This delay is why your potatoes often stick to the bottom of the pan and tear when you try to flip them.
Selecting the Best Spuds for Searing
Choosing the right potato is half the battle. While many people reach for Russets, they can often become too mealy and fall apart during the par-boiling stage. On the other hand, waxy red potatoes hold their shape well but lack the starch necessary to create a thick, crunchy crust.
Yukon Golds are the “Goldilocks” choice for this recipe. They have a medium starch content and a naturally buttery flavor. They offer the perfect balance: they are sturdy enough to survive the pot shake but starchy enough to develop a beautiful golden exterior.
The Role of Starch in Surface Texture
Starch is composed of two molecules: amylose and amylopectin. When you par-boil the potatoes, these starch granules gelatinize and move toward the surface. This creates a sticky, glue-like layer that is essential for frying.
When these gelatinized starches hit the hot oil in your skillet, they dehydrate rapidly. This creates a rigid, porous structure that we perceive as “crunch.” Without that initial boil, you never get enough starch on the surface to build a substantial crust.
Essential Pantry Staples for Seasoning
The seasoning blend is simple but intentional. We use smoked paprika instead of regular paprika because it adds a deep, wood-fired flavor that mimics a professional flat-top grill. It provides a rich color that makes the potatoes look as good as they taste.
Garlic and onion powders are used here instead of fresh aromatics for a specific reason. Fresh garlic would burn and turn bitter during the long frying process. The powders adhere to the starchy surface of the potatoes, ensuring every bite is evenly seasoned without any burnt bits.
Fat Selection: Oil vs. Clarified Butter
You need a fat with a high smoke point for the initial sear. Vegetable oil or clarified butter (ghee) works best because they can handle the medium-high heat without breaking down or smoking. This allows you to get the pan shimmering hot before the potatoes ever touch the surface.
However, we save a tablespoon of unsalted butter for the very end. Whole butter contains milk solids that brown beautifully and add a rich, nutty aroma. Adding it during the final few minutes of cooking gives you that classic buttery flavor without the risk of the butter burning during the long sear.
Fresh Herbs and Aromatic Finishers
Fresh Italian parsley is the secret to making these potatoes feel like a restaurant dish. It provides a bright, grassy contrast to the heavy, salty fried notes. It cuts through the richness of the oil and makes the whole dish feel lighter.
The timing is everything. You want to toss half the parsley in while the potatoes are still in the hot pan. The residual heat wakes up the oils in the herb, releasing a fresh aroma that hits you the moment you serve the dish.
The Par-Boil Method: Why Cold Water Matters
Always start your potatoes in a pot of cold, salted water. If you drop them into boiling water, the outside will overcook and turn to mush before the inside even gets warm. Starting cold ensures the potato heats up evenly from the edge to the core.
You only want to cook them for about 5 to 7 minutes once the water hits a simmer. They should be “fork-tender” on the outside but still have a firm, almost raw center. This partial cook is what sets the stage for the final fry in the skillet.
The “Scuffing” Technique for Maximum Surface Area
Once you drain the potatoes, do not be gentle with them. Return them to the warm pot and shake it vigorously for about 30 seconds. You want the edges of the cubes to look fuzzy and battered. This is the “scuffing” technique that separates amateur home fries from professional ones.
This process creates a layer of dehydrated mashed potato on the outside of every cube. As the potatoes sit in the warm pot for a minute, the remaining steam escapes, drying out that fuzzy layer. This dry, starchy coating is what will eventually become a “shattered-glass” crust in the hot oil.
Step-by-Step: Frying Crispy Skillet Breakfast Potatoes
Heat your oil in a heavy skillet until it is shimmering and just starting to wisps of smoke. Carefully add the potatoes, making sure they land in a single layer. You should hear a loud, aggressive sizzle the moment they hit the pan.
If you don’t hear that sizzle, your pan isn’t hot enough. Stop and wait for the heat to recover. Once they are in, use a spatula to ensure every piece has direct contact with the bottom of the skillet. This is where the transformation begins.
The Golden Rule: Do Not Stir
The hardest part of this recipe is doing nothing. You must let the potatoes sit undisturbed for at least 6 to 8 minutes. If you move them too early, you will tear off the developing crust and they will stick to the pan.
Resisting the urge to stir allows the heat to build a deep, even browning. You are looking for a dark golden color. Once that crust is set, the potatoes will naturally release from the pan, making them easy to flip with a metal spatula.
The Butter Baste and Spice Integration
After the first flip, it is time to build flavor. Add the tablespoon of butter and let it foam up around the potatoes. This is when you sprinkle your smoked paprika, garlic powder, onion powder, salt, and pepper over the top.
We add the spices late because paprika and garlic powder burn very easily. By waiting until the final 10 minutes of cooking, you toast the spices just enough to release their flavor without turning them bitter. Keep tossing them every few minutes until they are dark and crispy all over.
Troubleshooting Common Skillet Issues
If your potatoes are sticking, your heat is likely too low or your pan wasn’t properly preheated. Don’t try to force them up; give them another minute to develop a crust, and they should release on their own. A thin metal spatula is your best friend for getting underneath that crust.
If the potatoes are browning too fast but still feel hard in the middle, turn the heat down to medium. You can also cover the pan with a lid for 2 minutes to trap some steam and soften the centers, then remove the lid for the final 3 minutes to re-crisp the exterior.
Optimal Equipment: The Case for Cast Iron
A 12-inch cast iron skillet is the gold standard for this recipe. Cast iron has incredible heat retention, meaning the temperature won’t drop when you add two pounds of potatoes. It also provides even emissivity, which helps brown the sides of the potatoes, not just the bottoms.
Stainless steel works well too, but you must be more diligent with your oil levels to prevent sticking. Avoid non-stick pans if possible. Non-stick surfaces generally cannot handle the high heat needed to get a truly “shattered” crust, and you’ll end up with golden but soft potatoes.
Flavor Variations and Regional Twists
Once you master the base technique, you can play with the flavors. For a Tex-Mex twist, swap the paprika for ground cumin and finish with fresh cilantro and a squeeze of lime juice. The acidity of the lime cuts beautifully through the fried starch.
If you want a Mediterranean vibe, use dried oregano and lemon zest in the spice mix. Finish the dish with fresh rosemary instead of parsley. For those who like a spicy kick, add a half-teaspoon of cayenne pepper or dried chili flakes when you add the butter.
What to Serve with Your Skillet Potatoes
These potatoes are the star of the show, but they love company. They are the perfect partner for soft-scrambled eggs. The creamy, delicate texture of the eggs provides a brilliant contrast to the loud, crunchy snap of the potatoes.
You can also serve them alongside a bright avocado toast or even use them as a base for a breakfast bowl. If you are feeling fancy, serve them with a side of shakshuka. The spicy tomato sauce is perfect for dipping those extra-crispy edges.
Make-Ahead Strategies and Reheating Tips
You can actually do the hard work in advance. Par-boil and “scuff” the potatoes a day before you need them. Store them in an airtight container in the fridge. When you are ready for breakfast, just head straight to the frying step.
If you have leftovers, stay away from the microwave! It will turn your crispy masterpiece into a rubbery mess. Instead, reheat them in an air fryer at 400°F for 5 minutes or in a hot skillet with a tiny bit of oil. This will bring that “shattered-glass” texture right back to life.
Expert Tips for Professional Results
If your potatoes seem very wet after par-boiling, pat them dry with a paper towel before the “scuffing” step. Any extra water will slow down the browning process. You want them to be as dry as possible before they hit the oil.
Always use a metal spatula. Plastic spatulas are often too thick to get under the delicate crust. A thin metal turner allows you to scrape the bottom of the pan effectively, ensuring you don’t leave any of that delicious golden crust behind.
Never double the recipe in one pan. If you need to feed a crowd, work in batches or use two separate skillets. Maintaining that single layer is the only way to ensure every single potato gets the heat it needs to crisp up properly.
Frequently Asked Questions
Can I leave the skins on the potatoes?
Yes, you absolutely can! Leaving the skins on adds extra texture and a rustic look to the dish. If you choose to keep the skins, just make sure to scrub the Yukon Golds thoroughly before cubing them. The skin will also get nice and crispy in the skillet.
Why are my potatoes sticking to the cast iron?
Sticking usually happens for two reasons: the pan wasn’t hot enough when the potatoes were added, or you tried to flip them too soon. Make sure the oil is shimmering before you start. If they stick, just wait. As the crust forms and hardens, the potato will naturally pull away from the metal surface.
Can I use an air fryer for this entire recipe?
While you can cook potatoes in an air fryer, you won’t get the same deep, fried crust that a skillet provides. The skillet allows the potatoes to fry in a thin layer of fat, which creates a much richer flavor and a more substantial crunch. The air fryer is better suited for reheating than the initial cook.
How do I scale this for a large crowd?
To scale this up, par-boil all the potatoes at once in a large stockpot. However, when it comes to frying, you must work in batches. If you pile too many potatoes into one skillet, they will steam instead of fry. Keep the first batch warm in a 200°F oven while you finish the rest.
What if I don’t have Yukon Gold potatoes?
If you can’t find Yukon Golds, Russets are your next best bet. They are very starchy, so they will get extremely crispy. Just be very careful during the par-boiling stage, as Russets tend to fall apart much faster than Yukon Golds. Reduce the boiling time by a minute or two to compensate.
Is it okay to use dried herbs instead of fresh?
You can use dried herbs, but add them at the same time as the other spices so they have time to rehydrate in the butter. However, fresh parsley adds a “pop” of color and freshness that dried herbs simply cannot match. If you use dried, use about one-third of the amount called for in the recipe.
Crispy Skillet Breakfast Potatoes
Course: BreakfastCuisine: AmericanDifficulty: easy4
servings10
minutes25
minutes35
Minutes210
kcalAmerican
Ingredients
2 pounds Yukon Gold potatoes, peeled and cut into 3/4 inch cubes
3 tablespoons vegetable oil or clarified butter
1 tablespoon unsalted butter (for the final baste)
1 teaspoon smoked paprika
1 teaspoon garlic powder
1/2 teaspoon onion powder
1 teaspoon kosher salt
1/2 teaspoon cracked black pepper
1/4 cup fresh Italian parsley, roughly chopped
Directions
- Place the cubed potatoes in a large pot and cover with cold water by at least an inch. Add a generous pinch of salt. Bring to a boil, then reduce to a simmer and cook for 5-7 minutes until the edges are just softening but the centers are firm.
- Drain the potatoes thoroughly in a colander. Return them to the warm, empty pot off the heat. Shake the pot vigorously for 30 seconds; this dries the surface moisture and “scuffs” the edges, creating a starchy mash on the surface that will fry into a deep crust.
- Heat the oil in a 12-inch heavy cast iron skillet over medium-high heat until the oil is shimmering and just starting to smoke.
- Carefully add the potatoes to the skillet. Spread them into a single layer. If your skillet is too small, work in batches; overcrowding causes steaming.
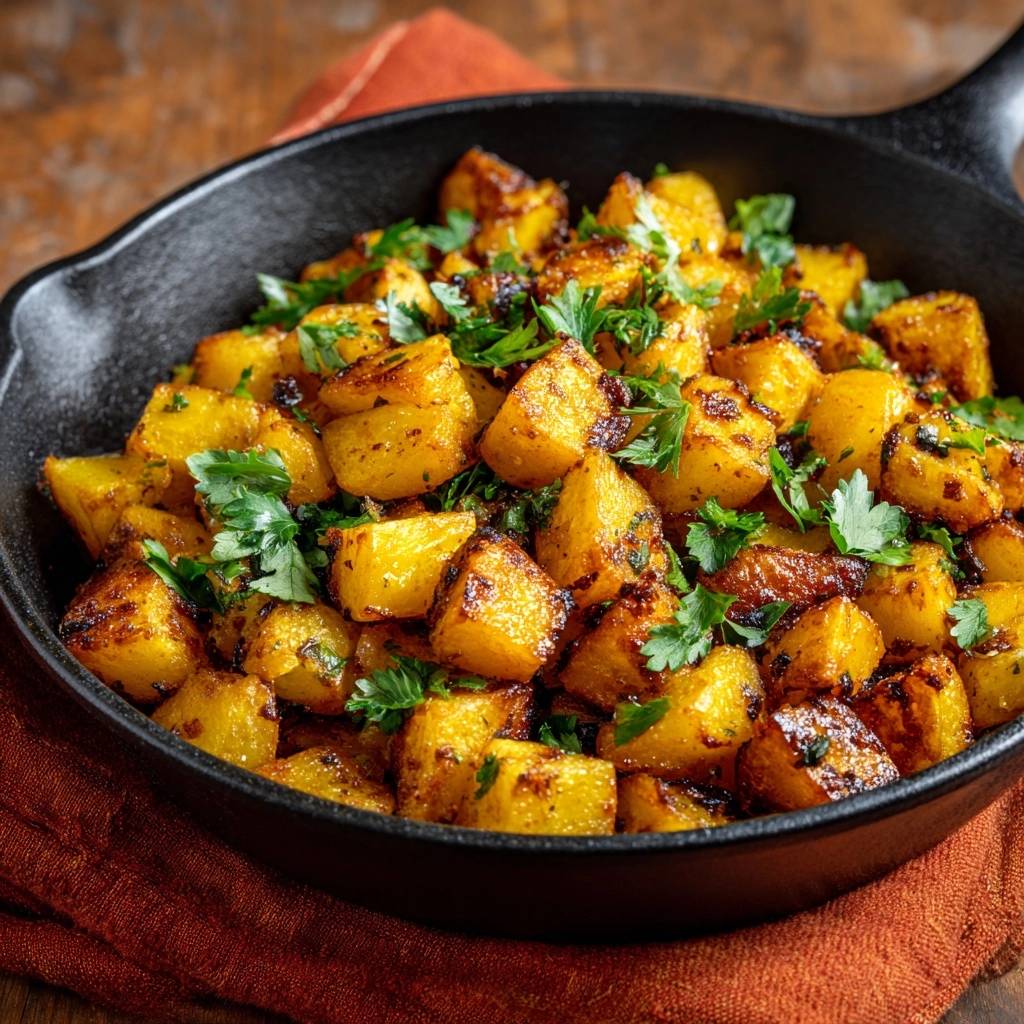
- Let the potatoes sit undisturbed for 6 to 8 minutes. Resisting the urge to stir is vital for building the deep golden-brown crust shown in the image.
- Use a metal spatula to flip the potatoes. Add the tablespoon of butter to the pan. Once melted, sprinkle the smoked paprika, garlic powder, onion powder, salt, and pepper over the potatoes.
- Continue to cook for another 8 to 10 minutes, tossing every few minutes, until the potatoes are fork-tender and have a dark, shattered-glass exterior.
- Remove from heat. Toss in half of the fresh parsley while the potatoes are still in the hot pan so the residual heat releases the herb’s aroma. Garnish with the remaining fresh parsley and serve immediately.
Notes
- The secret to the crunch is the par-boiling and shaking step, which creates a starchy mash on the surface that fries into a deep crust. Avoid overcrowding the pan to prevent steaming.


