
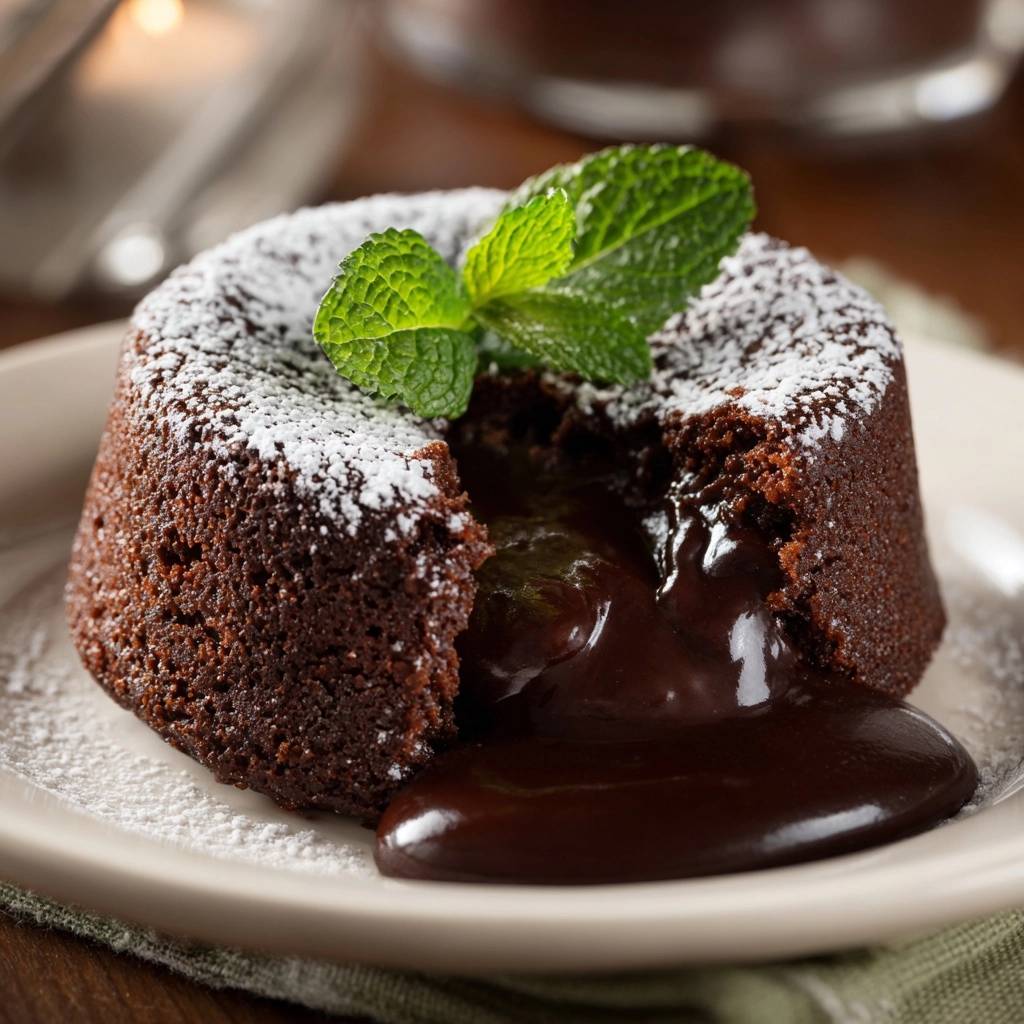
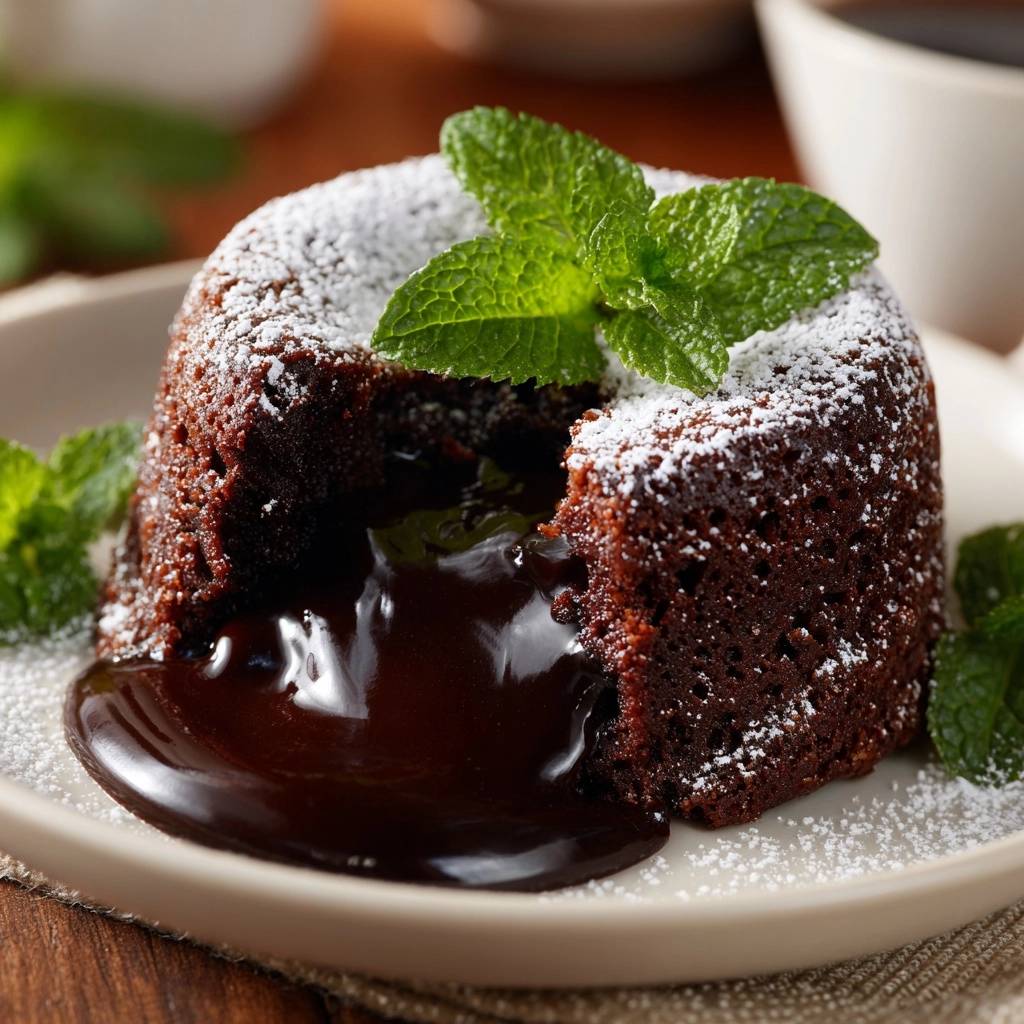
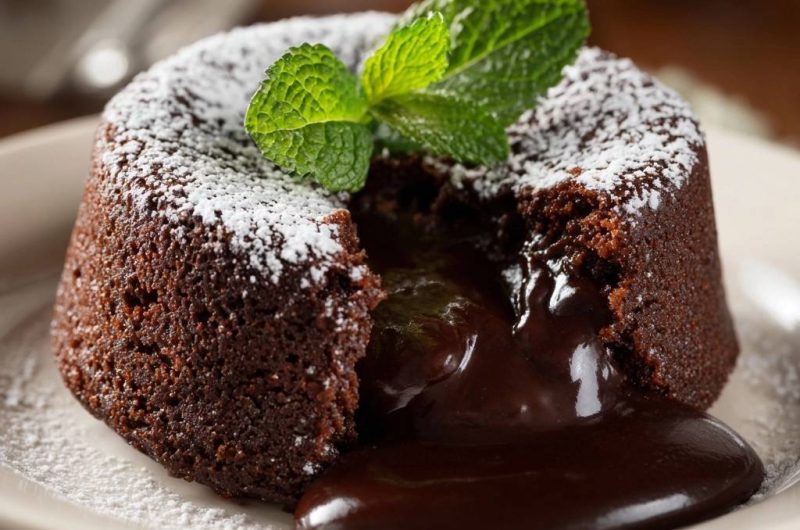
Imagine your spoon breaking through a delicate, warm chocolate crust to reveal a glossy, flowing river of rich cocoa. The contrast between the firm, brownie-like exterior and the velvety, liquid core creates a sensory experience that few desserts can match. It is the ultimate indulgence for any chocolate lover, offering a sophisticated balance of textures that feels like a high-end restaurant treat.
However, many home bakers struggle with the timing, often ending up with a fully cooked muffin or a structural collapse. This recipe solves that problem by focusing on the specific physics of the batter and the preparation of the vessel. By mastering the “jiggle,” you can ensure that every single cake you serve has that iconic, molten center that guests find so captivating.
The secret to success lies in the temperature of your ingredients and the high-heat blast of the oven. I’ve found that using room temperature eggs is the non-negotiable step that prevents the melted chocolate from seizing. When the batter remains fluid and aerated, the heat can set the outer walls while leaving the heart of the cake perfectly liquid.
The Physics of the Molten Chocolate Center
Creating a lava cake is a race against heat transfer. In a standard cake, you want the heat to reach the center evenly to cook the crumb through. With Decadent Chocolate Lava Cakes, we intentionally disrupt that process. By using a high temperature of 425°F, we force the outer edges of the batter to solidify into a sturdy “cake” wall almost immediately upon entering the oven.
This intense heat creates a protective shell that insulates the interior. Because the baking time is so short, the thermal energy doesn’t have enough time to penetrate the core and coagulate the proteins in the center. Therefore, the middle remains a warm, thickened sauce rather than a solid sponge. It is a delicate balance of timing and temperature that requires precision.
The addition of extra egg yolks is the hidden engine behind this recipe. While whole eggs provide structure, the yolks add fat and lecithin, which creates a custard-like viscosity. This ensures the “lava” isn’t just raw batter, but a rich, silky ganache-style flow. This extra fat also prevents the center from tasting like raw flour, giving it a luxurious mouthfeel instead.
Why 60% Cacao is the Ideal Standard
The quality of your chocolate dictates the viscosity of the flow. I recommend using chocolate with at least 60% cacao because it has the perfect sugar-to-fat ratio. Higher cacao percentages can make the lava too thick or bitter, while lower percentages often contain too much sugar, which can cause the cake to stick to the ramekin.
Avoid using standard chocolate chips for this recipe. Most chips contain stabilizers and soy lecithin designed to help them hold their shape under heat. For a true molten flow, you need high-quality bar chocolate that melts into a smooth, uniform liquid. This ensures the center pours out elegantly rather than clumping.
The Emulsion: Combining Fats and Proteins
Creating the batter is an exercise in emulsion. When you fold the melted chocolate and butter into the aerated eggs, you are combining two different types of fats. If the chocolate is too hot, it will scramble the eggs, leaving you with tiny cooked bits in your cake. If it is too cold, it will clump and won’t incorporate smoothly.
You want the chocolate mixture to be warm to the touch but not steaming. This allows it to blend seamlessly with the eggs without deflating the air bubbles you worked so hard to create. A smooth emulsion is what gives the cake its light, airy exterior and its glossy, liquid interior.
Essential Components for Decadent Chocolate Lava Cakes
Success starts with the quality of your pantry. Since this recipe has very few ingredients, each one must perform perfectly. You aren’t just mixing things together; you are building a structural masterpiece that relies on the chemical properties of fats and proteins to hold its shape on the plate.
Using the right tools is just as important as the ingredients. Standard 6-ounce ceramic ramekins are the ideal size for this recipe. They hold heat consistently and provide the right height-to-width ratio to support the liquid center. If your ramekins are larger or smaller, the baking time will shift significantly, so stick to the standard size for the best results.
Selecting High-Quality Fats and Chocolates
Butter is the backbone of the flavor profile here. I always reach for unsalted butter so I can control the seasoning precisely with a pinch of fine salt. If you can find European-style butter, use it. It has a higher butterfat content and less water, which results in a silkier, more decadent mouthfeel in the molten center.
The chocolate should be the best you can afford. Since there is very little flour or sugar to mask the flavor, the nuances of the cocoa beans will shine through. Look for brands that list cocoa butter as a primary ingredient rather than vegetable oils. This ensures a clean melt and a professional finish.
The Role of Room Temperature Eggs
Cold eggs are the enemy of a smooth lava cake batter. If you add cold eggs to your melted chocolate and butter, the fat will immediately begin to solidify. This creates a grainy, broken batter that won’t rise properly. Take your eggs out of the fridge at least 30 minutes before you start baking.
When you beat the eggs and sugar, you are looking for the “ribbon stage.” This is when the mixture becomes pale yellow and thick enough that when you lift the whisk, the batter falls back into the bowl in a slow, trailing ribbon. This trapped air is the only leavening agent in the cake, providing the lift needed for a light texture.
Flour Ratios and Gluten Minimization
You might be surprised to see only two tablespoons of flour in this recipe. This low ratio is intentional. We want just enough starch to bind the ingredients together without creating a bready, tough texture. The goal is a tender crumb that yields easily to a spoon.
Sifting the flour is a mandatory step. Because the amount of flour is so small, any clumps will be very noticeable in the finished cake. Sifting ensures the flour incorporates instantly into the wet ingredients, allowing you to fold it in with minimal strokes. This prevents gluten development, keeping the cake delicate and soft.
Preparing Ramekins for a Clean Release
The most heartbreaking moment in baking is when a beautiful cake sticks to the pan. For lava cakes, a tear in the sidewall means the molten center leaks out before it even hits the table. Proper preparation of your ramekins is the “fail-safe” insurance policy for a perfect presentation.
Start with softened, not melted, butter. Use your fingers or a pastry brush to coat every single nook and cranny of the ramekin. You want a visible, even layer of butter. This creates a non-stick barrier that allows the cake to slide out effortlessly once inverted onto a dessert plate.
Butter and Cocoa Powder vs. Flour
Most traditional cake recipes call for dusting greased pans with flour. However, for chocolate cakes, white flour leaves an unappealing, dusty white film on the dark exterior. Using unsweetened cocoa powder instead preserves the deep, rich color of the cake and adds an extra layer of chocolate flavor.
After greasing with butter, add a spoonful of cocoa powder to the ramekin. Tilt and rotate the dish until the bottom and sides are completely coated, then tap it upside down over the sink to remove the excess. This creates a professional, matte finish that looks stunning under a dusting of powdered sugar.
Structural Integrity and Resting Times
Patience is a virtue when it comes to the release. When the cakes come out of the oven, they are incredibly fragile. The outer “skin” needs exactly 60 seconds to firm up. During this minute, the steam inside the cake slightly pulls the edges away from the sides of the ramekin.
If you try to invert the cake immediately, the sidewalls may not be strong enough to hold the weight of the liquid center, leading to a collapse. Conversely, if you wait too long, the residual heat from the ceramic ramekin will continue to cook the center, turning your lava into a solid cake. Set a timer for exactly one minute.
Step-by-Step: Executing the Perfect Molten Flow
Executing this recipe is all about the transition from one phase to the next. You want to work efficiently but gently. The batter should feel light and voluminous, almost like a thick chocolate mousse, before it goes into the oven. This ensures the final product isn’t dense or heavy.
Preheating your oven is the first and most important step. Use an oven thermometer if you have one to verify it has reached 425°F. If the oven is too cool, the cake will cook through before the outside sets. If it is too hot, the outside will burn before the structure is strong enough to be moved.
Phase 1: Aerating the Egg Base
Start by beating your eggs, yolks, sugar, and salt. If you are using an electric hand mixer, this usually takes about two minutes on medium-high speed. You are looking for the volume to double. The mixture should change from a translucent orange-yellow to a thick, opaque, pale cream color.
This aeration is what gives the cake its “lift.” Since we aren’t using baking powder or soda, these air bubbles are responsible for the texture of the cake walls. If you under-beat the eggs, your cake will be flat and dense. If you over-beat them, the cake might rise too high and then collapse like a failed souffle.
Phase 2: The Gentle Fold Technique
Once your chocolate and butter mixture has cooled slightly, it is time to combine the two bases. Use a large rubber spatula and the “J-fold” motion. Cut through the center of the bowl, scoop across the bottom, and fold the batter over the top while rotating the bowl slightly.
Stop the moment you see the last streak of chocolate disappear. Then, sift in your flour and repeat the gentle folding process. You want to see a uniform, chocolatey brown color with no white specks of flour. Every extra stroke of the spatula knocks out air and develops gluten, so be as efficient as possible.
Phase 3: Precision Baking and The Jiggle Test
Divide the batter evenly among your four prepared ramekins. Place them on a sturdy baking sheet to make it easier to move them in and out of the oven. Slide them onto the center rack and set your timer for 12 minutes. Do not open the oven door during the first 10 minutes, as the draft can cause the cakes to fall.
At the 12-minute mark, perform the “jiggle test.” Gently shake the baking sheet. The edges of the cakes should look firm, matte, and slightly pulled away from the ceramic. However, the center circle (about one inch in diameter) should still wobble like gelatin. If the whole top is firm, they are overbaked. If the whole top ripples, they need another 60 to 90 seconds.
Troubleshooting Common Baking Obstacles
Even experienced bakers can run into trouble with lava cakes because every oven behaves differently. Some have hot spots, while others lose heat quickly when the door opens. Understanding how to read the cake’s visual cues will help you adjust your technique for your specific kitchen environment.
If your first attempt doesn’t result in a flow, don’t be discouraged. It usually means your oven runs hot or your ramekins are thinner than standard ceramic. Small adjustments in timing make a world of difference. Even an overbaked lava cake is still a delicious, rich chocolate cake, so nothing goes to waste.
Correcting a Firm or Cake-Like Center
If you cut into your cake and find a solid center, the most likely culprit is over-exposure to heat. Next time, try reducing the bake time by 60 seconds. Also, ensure you are using 6-ounce ramekins; smaller dishes will cook through much faster. Always check the “jiggle” early to be safe.
Another factor could be the temperature of the batter when it enters the oven. If your chocolate was still very hot when you mixed it, the starting temperature of the batter is higher, leading to a faster cook time. Let the chocolate and butter mixture cool until it is just barely warm before combining it with the eggs.
Preventing the Dreaded Sidewall Collapse
If your cake collapses or leaks from the side when you remove the ramekin, the walls weren’t set enough. This often happens if the oven temperature was too low or if the cake wasn’t baked long enough. Ensure your oven is fully preheated to 425°F before the ramekins go in.
The 10-second pause after inverting the cake is also vital. When you flip the ramekin onto the plate, gravity pulls the cake down. Letting it sit for 10 seconds allows the cake to settle and the steam to release, which helps the cake maintain its shape once the support of the ramekin is removed.
Optimal Temperature and Serving Suggestions
Decadent Chocolate Lava Cakes are a “moment-of” dessert. They are at their absolute best the second they are plated. The heat of the molten center is what provides that luxurious, flowing texture. As the cake sits, the center will naturally begin to thicken and set, so have your guests ready at the table.
The richness of the chocolate benefits greatly from a bit of contrast. Whether it is a temperature contrast or a flavor contrast, adding a secondary element to the plate elevates the dish from a simple cake to a gourmet dessert. Think about balance when choosing your garnishes.
Temperature Contrast: Cold Toppings vs. Warm Cake
The classic pairing for a warm lava cake is a scoop of high-quality vanilla bean ice cream. The way the cold cream melts into the hot chocolate sauce is heavenly. If you prefer something lighter, a dollop of cold, unsweetened whipped cream or a pour of heavy cream provides a similar effect.
To cut through the intense sugar and fat, consider adding something tart. A fresh raspberry coulis or a handful of blackberries provides an acidic brightness that cleanses the palate between bites. This prevents the dessert from feeling too heavy and allows the chocolate flavor to pop.
Plating for Professional Presentation
For a professional look, use a fine-mesh sieve to apply a heavy dust of powdered sugar over the top of the cake. This hides any minor imperfections on the crust and provides a beautiful white-on-dark-chocolate contrast. Do this just before serving so the sugar doesn’t dissolve into the warm cake.
A single, bright green mint sprig placed tucked against the side of the cake adds a necessary pop of color. It makes the plate look finished and intentional. If you want to go the extra mile, a few chocolate shavings or a sprinkle of flaky sea salt on top of the lava can add a sophisticated touch.
Make-Ahead Strategies and Storage Logistics
Lava cakes are famous for being stressful for dinner parties, but they don’t have to be. You can actually prepare the batter in advance, which takes the pressure off during the meal. This allows you to focus on your guests while the oven does the hard work at the end of the night.
While fresh is always best, knowing how to handle leftovers ensures you don’t lose a single bite of this chocolate goodness. Just remember that the “molten” factor is a fleeting state of matter, so reheating requires a very specific touch to avoid turning the center into a solid sponge.
Chilling Batter for Later Use
You can prepare the batter and fill the greased and dusted ramekins up to 6 hours in advance. Cover each ramekin tightly with plastic wrap and store them in the refrigerator. This is a great way to get the messy prep work out of the way before your guests arrive.
When you are ready to bake, you can take them straight from the fridge to the oven. However, because the batter and the ceramic ramekins are cold, you will need to add about 1 to 2 minutes to the total baking time. Start checking for the “jiggle” at the 13-minute mark to ensure they are perfect.
Can You Reheat a Lava Cake?
If you have leftovers, store them in an airtight container in the fridge for up to two days. While you won’t get the same dramatic “lava” flow as a fresh cake, you can still enjoy a very moist chocolate dessert. The best way to reheat is in the microwave using short, 15-second bursts.
Be very careful not to overdo it. You just want to warm the center enough to soften it. If you heat it for too long, the center will cook through completely. It will still taste like a delicious brownie, but the molten magic will be gone. For the best experience, I always recommend baking them fresh whenever possible.
Frequently Asked Questions
How do I store leftover lava cakes?
Store any leftover cakes in an airtight container in the refrigerator for up to 2 days. Because these cakes have a high moisture content in the center, they do not freeze well; the texture of the molten core becomes grainy and loses its silky flow upon thawing. For the best results, always try to bake only what you plan to eat immediately.
Why did my lava cake turn out like a regular muffin?
This is almost always caused by overbaking. Even 60 seconds too long in the oven can solidify the delicate center. Another common cause is an oven that is not hot enough; if the temperature is too low, the center cooks at the same rate as the outside. Use an oven thermometer to ensure you are at a true 425°F and pull the cakes out while the center still has a noticeable wobble.
Can I use gluten-free flour for this recipe?
Yes, you can substitute the all-purpose flour with a 1-to-1 gluten-free flour blend. Since the recipe only calls for two tablespoons of flour, the structural impact is minimal. The gluten-free version will still have a beautiful molten center and a tender exterior. Avoid using nut flours like almond flour, as they don’t provide enough binding power to hold the sidewalls together.
What if I don’t have ramekins?
If you don’t have ceramic ramekins, you can use a standard muffin tin. Grease and dust the cups just as you would the ramekins. However, because muffin tins are usually made of thin metal, they conduct heat much faster than ceramic. Reduce your baking time to 8-10 minutes and watch them very closely. They will be smaller and more delicate to remove, so use a butter knife to gently loosen the edges before inverting.
Can I use milk chocolate instead of semi-sweet?
I do not recommend using milk chocolate for the main batter. Milk chocolate has a much higher sugar and milk solid content, which changes the melting point and the structural integrity of the cake. It often results in a cake that is too sweet and a center that is too thin. If you want a milder flavor, stick to a 50% cacao chocolate, but 60% provides the most reliable results.
Why is my cake sticking even though I buttered the dish?
Sticking usually happens if the butter was too thin or if the cocoa powder coating was uneven. Make sure you use softened butter and apply a generous, visible layer. Also, ensure you let the cake rest for exactly one minute after taking it out of the oven. This rest period allows the steam to naturally release the cake from the sides of the ramekin.
Decadent Chocolate Lava Cakes
Course: DessertCuisine: French and AmericanDifficulty: easy4
servings10
minutes12
minutes22
Minutes410
kcalFrench and American
Ingredients
6 ounces high-quality semi-sweet chocolate (60% cacao), chopped
1/2 cup unsalted butter, plus more for greasing
2 large eggs plus 2 large egg yolks, room temperature
1/4 cup granulated sugar
1/2 teaspoon vanilla extract
1 pinch salt
2 tablespoons all-purpose flour
1 tablespoon unsweetened cocoa powder (for dusting ramekins)
Powdered sugar for dusting
Fresh mint for garnish
Directions
- Preheat your oven to 425°F (218°C). High heat is essential to set the outer walls quickly while keeping the center liquid.
- Grease four 6-ounce ramekins thoroughly with softened butter. Dust the inside of each with cocoa powder, tapping out the excess. This “Fail-Safe” step ensures the cake releases cleanly without tearing the delicate crust, which would cause the lava to leak prematurely.
- Melt the chopped chocolate and butter together in a microwave-safe bowl in 30-second increments, stirring until completely smooth. Stir in the vanilla extract. Let the mixture cool for 5 minutes so it does not scramble the eggs.
- In a separate medium bowl, beat the eggs, egg yolks, sugar, and salt with a whisk or electric mixer until the mixture is thick, pale yellow, and doubled in volume (about 2 minutes).
- Gently fold the melted chocolate mixture into the beaten eggs using a spatula until just combined.
- Sift the flour over the batter and fold it in gently. Stop as soon as no white streaks remain. Overmixing will develop gluten and result in a tough, bready cake rather than a tender crumb.
- Divide the batter evenly among the prepared ramekins.
- Place ramekins on a baking sheet and bake for 12 to 14 minutes. The edges should be firm and slightly pulled away from the sides, but the center must still look soft and have a noticeable jiggle when shaken.
- Remove from the oven and let the cakes rest in the ramekins for exactly 1 minute. This allows the outer structure to firm up enough to support the weight of the liquid center.
- Place a small dessert plate over the top of a ramekin and carefully invert it. Let it sit inverted for 10 seconds, then gently lift the ramekin off.
- Dust heavily with powdered sugar and garnish with a fresh mint sprig as shown in the image. Serve immediately while the center is at peak flow.
Notes
- The secret to the molten center is the high oven temperature and the cocoa powder dusting, which prevents the cake from sticking and tearing. Ensure eggs are at room temperature to achieve maximum volume when beating.


