
You’ve likely experienced the heartbreak of a soggy roasted potato. You expect a loud, satisfying crunch, but instead, you get a limp, greasy wedge that lacks any structural integrity. It’s a common kitchen fail that usually stems from one thing: moisture trapped against the skin.
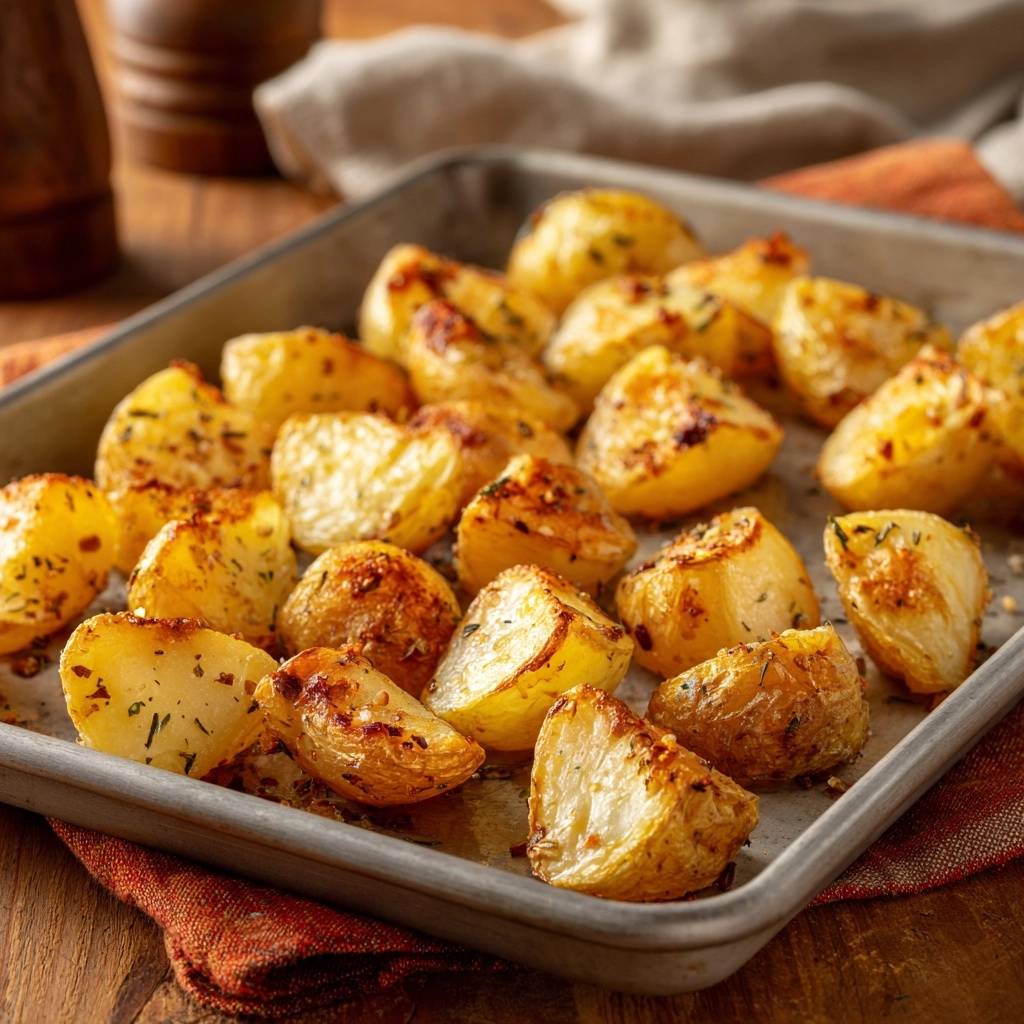
The professional secret to fixing this isn’t a fancy oven or a special type of salt. It’s the “Rough-Up” technique. By intentionally damaging the surface of the potato before it hits the oven, you create a thick, starchy slurry that dehydrates into a glass-like crust. This method ensures your Garlic and Herb Roasted Potatoes have a shell so crisp it crackles, while the inside remains as light as a cloud.
I’ve found that the real magic happens when you combine this mechanical agitation with a specific chemical tweak. Adding a pinch of baking soda to your boiling water changes the pH level, breaking down the exterior pectin faster than the interior starch. This creates the perfect “fuzz” on the potato surface, which is the foundation for the ultimate crunch. Trust me, once you see those frayed edges, you’ll know you’re on the right track.
The Chemistry of Crispy Garlic and Herb Roasted Potatoes
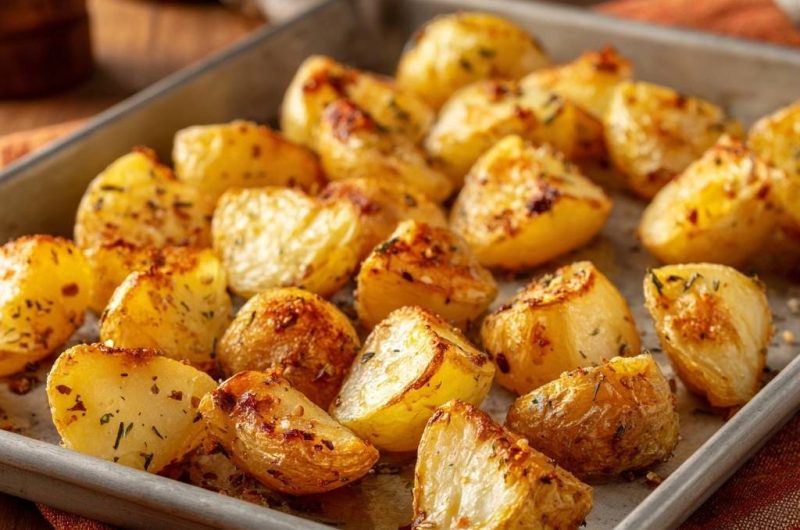
Achieving the perfect roast is a battle of starches. Potatoes contain two main types: amylose and amylopectin. To get that legendary crunch, we need to coax the amylose to the surface. Yukon Gold potatoes are the undisputed champions for this task because they sit right in the middle of the starch spectrum. They have enough starch to crisp up beautifully but enough moisture to stay creamy and buttery inside.
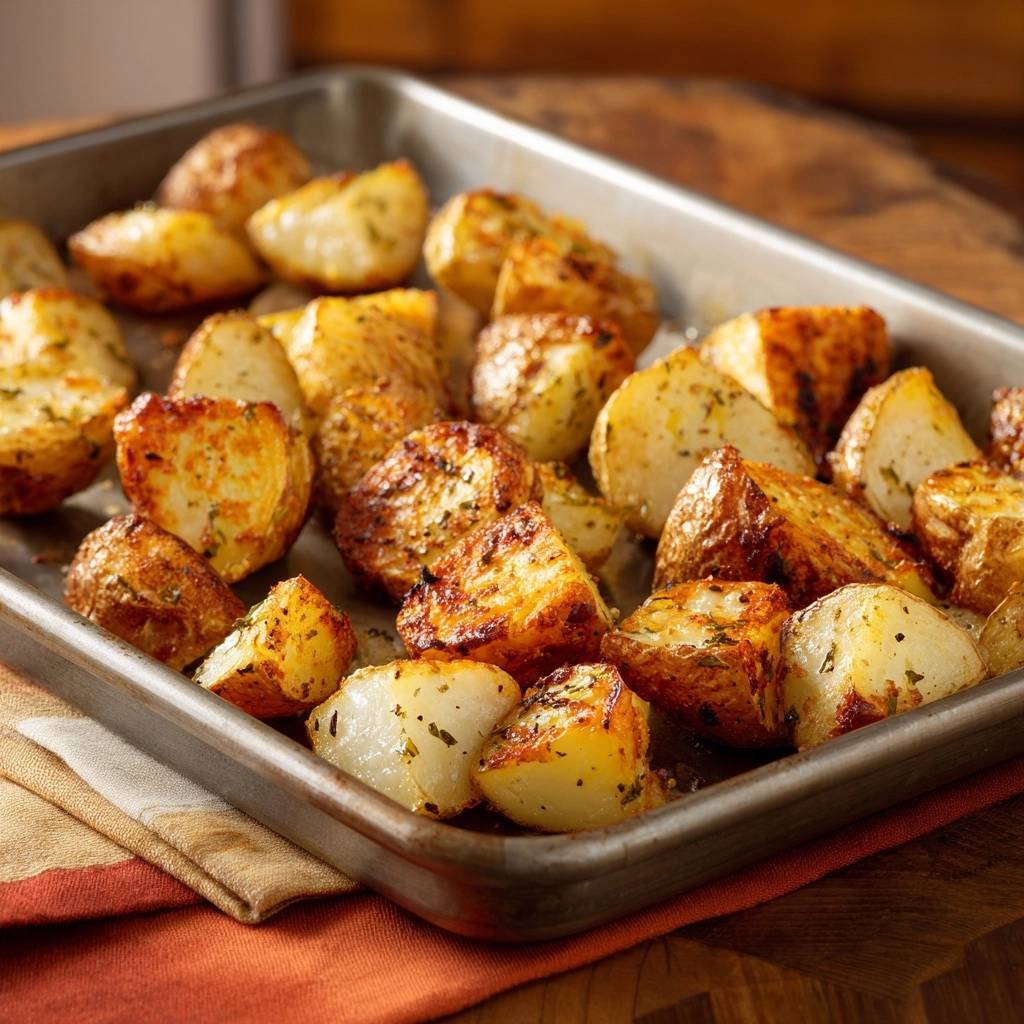
When you use the “Rough-Up” method, you are essentially creating a high-surface-area starch paste. As the potatoes roast, the oil penetrates this shaggy exterior. The heat of the oven evaporates the water within that paste, leaving behind a structural matrix of dehydrated starch. This is what creates that thick, golden shell that stays crispy even as the potatoes cool slightly on the plate.
If you were to just toss raw potato chunks into the oven, the smooth surface would seal too quickly. This traps steam inside, which eventually migrates outward and turns the skin leathery. By par-boiling and shaking them, you’re giving the steam an escape route and the oil a place to anchor. It’s the difference between a thin, tough skin and a deep, crunchy crust.
Why Baking Soda Changes Everything
Adding half a teaspoon of baking soda to your boiling water might seem like a small detail, but it’s a total game-changer. Baking soda creates an alkaline environment. This alkalinity breaks down the pectin—the cellular “glue” that holds the potato together—much faster than the heat alone could. It allows the very outside of the potato to soften into a mash while the center stays firm.
Without the baking soda, the potato surface stays relatively smooth even after shaking. With it, the exterior becomes incredibly shaggy and porous. This increased surface area is exactly what you need for maximum oil absorption and heat contact. It’s a simple scientific shortcut that yields professional-grade results every single time.
Essential Components for Herb-Infused Potato Roasts
Quality ingredients are the backbone of this dish. While extra virgin olive oil is a fantastic choice for its fruity undertones and healthy fats, don’t be afraid to experiment. If you want an even more intense crunch, high-quality beef tallow or duck fat has a higher smoke point and adds a savory depth that olive oil can’t quite match. However, for a classic, bright flavor, a premium olive oil is hard to beat.
The seasoning also requires a bit of care. Always use freshly cracked black pepper rather than the pre-ground stuff. The volatile oils in fresh pepper provide a sharp, woody bite that cuts through the richness of the roasted fat. Similarly, a coarse sea salt or kosher salt is better than table salt because the larger grains provide little bursts of flavor and extra texture on the finished crust.
Selecting and Preparing Your Aromatics
Garlic is a fickle friend in a 425°F oven. If you toss raw, minced garlic in with the potatoes at the start, it will burn into bitter, black acrid bits long before the potatoes are done. The secret is to infuse your oil first. By heating the garlic in the oil just until it’s fragrant, you transfer all that savory flavor into the fat itself. This flavored oil then coats every nook and cranny of the “roughed-up” potato.
When it comes to herbs, rosemary and thyme are the gold standard. Interestingly, dried herbs often perform better during the high-heat roasting phase. Fresh herbs have a high water content and delicate leaves that tend to scorch and turn bitter. Dried rosemary and thyme are more resilient; they rehydrate in the flavored oil and release their earthy aromas slowly as the potatoes roast to perfection.
Phase One: The Par-Boil and Surface Preparation
The journey to the perfect roast starts in a pot of cold water. Starting with cold water ensures that the potato chunks heat up evenly from the core to the surface. If you drop them into boiling water, the outside will turn to mush before the inside even begins to cook. You want to simmer them until they are “knife-tender.” This means a paring knife should slide in with just a tiny bit of resistance in the very center.
Once they reach this stage, drain them thoroughly. Don’t rush the next part: let them sit in the colander for about two minutes. You want to see that visible steam escaping. This is excess moisture leaving the potato. The drier the surface of the potato is before it hits the oil, the crispier it will become in the oven. Moisture is the enemy of the crunch.
The Mechanical Rough-Up: Creating the Starch Paste
Now comes the most satisfying part of the process. Return those drained, slightly dried potatoes to the pot, pop the lid on, and shake it like you mean it. You aren’t trying to make mashed potatoes, but you do want to be vigorous. When you open the lid, the potatoes should no longer have sharp, clean edges. Instead, they should look “fuzzy” or shaggy, coated in a thick, white starchy paste.
This “fuzz” is your secret weapon. It might look a bit messy at first, but this is exactly what transforms into that thick, crunchy shell. Every one of those little frayed bits of potato will catch the oil and harden in the heat of the oven. If your potatoes still look smooth after shaking, give them another few seconds of work. That texture is the key to success.
Phase Two: High-Heat Roasting and Oil Infusion
While your potatoes are par-boiling, your baking sheet should be in the oven getting screaming hot. This is a crucial step for preventing sticking. When the starchy, roughed-up potatoes hit that hot metal, the surface sears instantly. This creates an immediate barrier that stops the potato from bonding to the tray. You should hear a loud sizzle the moment they touch the pan.
Carefully drizzle your garlic and herb-infused oil over the potatoes and toss them quickly. You want every single shaggy edge to be glistening with oil. Use metal tongs to ensure total coverage. The oil acts as a heat conductor, frying the starch paste as the potatoes roast. If there are dry spots, those areas will turn out tough and leathery rather than light and crispy.
Managing Oven Airflow and Tray Spacing
The biggest mistake people make during the roasting phase is crowding the pan. If your potatoes are touching or piled on top of each other, they will release steam that gets trapped between them. This steam softens the crust you worked so hard to build. You want at least a half-inch to an inch of space around each potato chunk to allow for proper airflow.
If you’re doubling the recipe, use two separate baking sheets. It is better to have two trays with plenty of room than one tray that is packed tight. Halfway through the roasting time, give the potatoes a flip with a metal spatula. This ensures that the side touching the pan—the hottest part—doesn’t over-brown while the top stays pale. You want an even, deep golden hue all the way around.
Troubleshooting Common Roasting Failures
If you end up with the dreaded “Soggy Bottom,” it usually means one of two things: too much moisture or not enough heat. Ensure you are letting the potatoes steam-dry after boiling. If they are still dripping wet when you add the oil, you’re essentially boiling them in oil rather than roasting them. Also, check your oven temperature with a thermometer; many ovens run cooler than the dial suggests, which prevents the crust from forming quickly.
Another common issue is a leathery skin. This happens when the potatoes roast for too long at too low a temperature. The goal is a fast, high-heat sear that dehydrates the exterior while leaving the interior moist. If your oven has hot spots, make sure to rotate your pans front-to-back halfway through. This ensures every potato gets equal exposure to the heating elements.
Preventing Burnt Garlic and Bitter Herbs
If you notice your garlic is turning black and tasting bitter, it’s likely because it was minced too finely or wasn’t properly coated in oil. Very small bits of garlic have almost no thermal mass and will burn in minutes at 425°F. Try a slightly coarser mince, or ensure the garlic is fully submerged in the oil before tossing it with the potatoes. The oil acts as a protective buffer against the direct heat.
If you prefer using fresh herbs like parsley or chives, wait until the very end. Toss the potatoes with fresh herbs the second they come out of the oven. The residual heat will wake up the oils in the fresh herbs without scorching them. This gives you the best of both worlds: the deep, roasted flavor of dried rosemary and the bright, fresh pop of green herbs.
Flavor Variations and Herb Substitutions
Once you master the “Rough-Up” technique, you can play with the flavors. For a Mediterranean twist, swap the rosemary for dried oregano and add a teaspoon of lemon zest to the oil infusion. The acidity of the lemon cuts through the fat beautifully. Alternatively, try a “Smoky Spanish” version by using smoked paprika and a pinch of cumin in the oil. The technique remains the same, but the flavor profile shifts entirely.
For those who love a bit of heat, adding a pinch of red pepper flakes to the oil infusion provides a subtle, back-of-the-throat warmth. You can even go the “Parmesan” route by tossing the potatoes in finely grated cheese during the last five minutes of roasting. The cheese will melt into the starchy crust and create an incredibly savory, lacy texture that is hard to resist.
Optimal Pairings for Garlic and Herb Roasted Potatoes
These potatoes are the ultimate sidekick for a variety of main courses. Their intense crunch makes them a perfect partner for a juicy, seared steak or a tender roasted chicken. The contrast between the crispy potato and the succulent meat is a classic culinary pairing. They also hold up well next to hearty roasted root vegetables like carrots or parsnips, providing a textural counterpoint to the softer veggies.
To balance the richness of the roasted fat and garlic, serve these with something bright and acidic. A simple green salad with a sharp vinaigrette or a side of steamed broccoli with a squeeze of lemon juice works wonders. The acidity cleanses the palate between bites of the salty, savory potatoes, making every mouthful feel as exciting as the first one.
Storage, Reheating, and Texture Recovery
Roasted potatoes are at their absolute peak within ten minutes of leaving the oven. However, if you have leftovers, do not reach for the microwave. Microwaves heat the water molecules inside the potato, which turns that beautiful crust into a soggy, rubbery mess. Instead, store leftovers in an airtight container in the fridge for up to three days.
To revive the crunch, use an air fryer or a hot oven. Place the potatoes in a 400°F oven for about 8 to 10 minutes until they sizzle again. An air fryer is even faster, usually taking only 4 or 5 minutes to bring back that glass-like exterior. While they won’t be quite as perfect as they were on day one, this method gets them about 90% of the way back to their original glory.
Expert Tips for Professional Results
Can I use Russet potatoes instead of Yukon Gold?
You can use Russets, but the texture will be different. Russets are very high in starch, so they will get incredibly crispy, but the insides tend to be more “mealy” or dry compared to the creamy interior of a Yukon Gold. If you use Russets, keep a close eye on them as they can go from golden to burnt much faster than other varieties.
Why did my potatoes stick to the metal baking sheet?
Sticking usually happens if the pan wasn’t hot enough when the potatoes were added or if you didn’t use enough oil. The initial sear is what creates the non-stick barrier. Always preheat your tray for at least 10 minutes. If you are still having trouble, you can use parchment paper, but keep in mind that you won’t get quite as much browning on the bottom side.
Can I prep these 24 hours in advance?
Yes, you can par-boil and “rough up” the potatoes a day ahead. After shaking them in the pot, let them cool completely, then store them in the fridge. When you’re ready to eat, proceed with the oil infusion and roasting steps. This actually helps the starch dehydrate even more, which can lead to an even crispier potato.
Is it necessary to peel the potatoes for this recipe?
For the “Rough-Up” technique to work effectively, peeling is highly recommended. The skin acts as a barrier that prevents the starch from fraying and creating that shaggy paste. If you leave the skins on, you’ll still get a good roasted potato, but you won’t achieve that specific, thick-crusted crunch that makes this recipe famous.
How do I know if I’ve boiled them for too long?
If your potatoes are falling apart in the water or turning into soup when you shake them, they are overcooked. You want them to be “al dente”—firm enough to hold their shape but soft enough on the surface to be scratched. If they do get too soft, just be very gentle during the shaking process so you don’t end up with a tray of mashed potatoes.
What is the best way to store leftovers?
Store your roasted potatoes in an airtight container in the refrigerator for up to 3 days. Avoid freezing them, as the freezing and thawing process breaks down the cellular structure of the potato, making them grainy and watery when reheated. Stick to the oven or air fryer for reheating to maintain as much of that original crunch as possible.
Garlic and Herb Roasted Potatoes
Course: Side DishCuisine: AmericanDifficulty: easy4
servings15
minutes45
minutes60
Minutes280
kcalAmerican
Ingredients
2 pounds Yukon Gold potatoes, peeled and cut into 1.5-inch chunks
1/2 teaspoon baking soda (added to boiling water)
1/3 cup extra virgin olive oil (or duck fat for extra crunch)
4 cloves garlic, minced
1 teaspoon dried rosemary
1 teaspoon dried thyme
1 teaspoon sea salt
1/2 teaspoon cracked black pepper
Fresh parsley for garnish (optional)
Directions
- Preheat your oven to 425°F (220°C). Place a large rimmed baking sheet inside the oven while it preheats. Heating the pan first is the second secret to preventing sticking and ensuring an immediate sear.
- Place the potato chunks in a large pot and cover with cold water by at least an inch. Add a generous pinch of salt and the baking soda. The baking soda breaks down the potato’s pectin and draws starch to the surface.
- Bring to a boil, then reduce to a simmer. Cook for 8 to 10 minutes, or until the exteriors are tender but the centers still offer resistance when pierced with a knife.
- Drain the potatoes thoroughly in a colander and let them sit for 2 minutes to allow excess steam to evaporate. This is the crucial step: return the potatoes to the dry pot, cover with a lid, and give it a vigorous shake for 10-15 seconds. You want the edges of the potatoes to look “fuzzy” and coated in a thick layer of starchy paste.
- In a small saucepan or microwave-safe bowl, combine the olive oil, minced garlic, rosemary, thyme, salt, and pepper. Heat briefly until the garlic is fragrant (do not brown).
- Carefully remove the hot baking sheet from the oven. Pour the potatoes onto the tray and immediately drizzle with the herb oil mixture. Toss quickly with metal tongs to coat every surface thoroughly.
- Spread the potatoes out so they are not touching. If they are crowded, they will steam instead of roast, which leads to sogginess.
- Roast for 35 to 45 minutes, flipping with a metal spatula every 15 minutes, until the potatoes are deep golden brown and have a visible, thick crust. Serve immediately while the crunch is at its peak.
Notes
- The secret to preventing sogginess is the ‘Rough-Up’ technique: shaking the par-boiled potatoes to create a starchy mash on the surface. Always preheat your baking sheet to ensure an immediate sear and prevent sticking.


