
Imagine biting into a plump, tender mussel that’s swimming in a pool of savory garlic butter, only to be met with a topping so crisp it actually shatters. Most home cooks struggle with seafood gratins because the moisture from the shellfish inevitably turns the breadcrumbs into a soggy, unappealing paste. This recipe solves that heartbreak by using a specific moisture-barrier technique that keeps the topping incredibly crunchy while the mussel stays juicy.
The secret lies in how we treat the breadcrumbs before they ever touch the seafood. By pre-toasting the crumbs and coating them in a fat-based barrier, we ensure they stay elevated and crisp rather than sinking into the juices. It’s the difference between a mediocre appetizer and a restaurant-quality masterpiece that people will talk about for weeks.
I’ve found that the real trick to success is the temperature of your butter and the timing of your toast. You aren’t just mixing ingredients; you’re engineering a texture. When you coat dry, toasted Panko in melted butter, you’re essentially waterproofing each crumb so the steam from the mussel can’t soften it during the final bake.
Selecting and Preparing Fresh Mussels for Baking
When you’re shopping for Garlic Butter Baked Mussels, freshness is your top priority. Look for mussels that are tightly closed or those that snap shut immediately when you tap them against the counter. If a shell stays open after a firm tap, it’s no longer alive and should be tossed out immediately.
Most grocery stores carry Prince Edward Island (PEI) mussels, which are consistently sweet and tender. Mediterranean mussels are often larger and meatier, making them excellent for stuffing, though they may require a minute or two longer in the steamer. Regardless of the variety, the shells should look shiny and moist, never dry or cracked.
The Importance of Proper Cleaning
Before you start cooking, give your mussels a quick soak in cool water for about 20 minutes. This encourages them to breathe and expel any internal sand or grit. However, don’t leave them in fresh water for hours, as they are saltwater creatures and will eventually die without oxygen.
After the soak, scrub the shells with a stiff brush to remove any external debris. You’ll also need to “debeard” them by grabbing the hairy brown tuft (the byssus) and pulling it firmly toward the hinge of the shell. Do this right before cooking to keep the mussel as fresh as possible.
Essential Components for the Garlic Butter Topping
Quality ingredients make a massive difference when the list is this short. I always recommend using unsalted butter because it allows you to control the seasoning perfectly. Since mussels naturally hold a bit of salty seawater, using salted butter can often push the dish over the edge into being too salty.
Freshness is also key for your aromatics. Use curly parsley for this specific application because its sturdy texture holds up better under the high heat of the broiler compared to flat-leaf parsley. Similarly, fresh lemon zest provides a bright, floral citrus note that bottled juice simply cannot replicate.
Panko vs. Traditional Breadcrumbs
If you want that “skyscraper” height and a crunch that lasts, Panko is the only way to go. Unlike traditional fine breadcrumbs, Panko consists of large, airy flakes that create more surface area. This extra space allows the heat to circulate, ensuring every single crumb gets toasted and golden.
The Science of the Anti-Soggy Moisture Barrier
The biggest enemy of a crispy topping is steam. As the mussels bake, they release liquid that usually travels upward into the breadcrumbs. To fight this, we use the science of fats. By mixing the toasted crumbs with melted butter, we coat the starch in a hydrophobic (water-repelling) layer.
This fat barrier prevents the mussel’s natural juices from soaking into the bread. Additionally, pre-toasting the Panko removes any residual moisture from the bread itself. This ensures that the crumbs start bone-dry and stay that way, even as they sit atop a steaming, succulent mussel.
Step-by-Step: Pre-Toasting and Flavor Infusion
Start by tossing your dry Panko into a skillet over medium heat. You don’t need any oil or butter yet. Stir them constantly for about 2 to 3 minutes. You’re looking for a very pale golden color, just enough to signal that the moisture is gone and the flavor is waking up.
Once they reach that light gold stage, remove them from the heat and stir in your garlic and melted butter. Adding the garlic to the warm crumbs allows its natural oils to bloom and infuse the bread without the risk of burning the garlic in a hot pan. This creates a deep, uniform flavor in every bite.
The Steaming Phase: Building the Flavor Base
We steam the mussels before baking to ensure they are all open and cooked through. For the liquid, choose a high-acidity white wine like Sauvignon Blanc or Pinot Grigio. These wines cut through the richness of the butter and highlight the oceanic sweetness of the seafood.
Place the mussels in the pot with the wine and garlic, cover it tightly, and let them work for 3 to 5 minutes. As soon as the shells pop open, they are ready. Be sure to discard any mussels that refuse to open after steaming, as this is a sign they weren’t healthy before cooking.
Capturing the Pot Liquor
Don’t you dare pour that leftover liquid down the drain! That “pot liquor” is a concentrated broth of wine, garlic, and mussel nectar. It’s pure gold. Strain it through a fine-mesh sieve to remove any stray bits of shell or grit.
You’ll use a few tablespoons of this strained liquid in the bottom of your baking skillet. This creates a humid environment in the oven that keeps the mussel meat from turning into rubber while the topping gets its final crisp.
Assembling the Half-Shell Presentation
Once the mussels are cool enough to handle, snap off the top shell and discard it. Use a knife to gently ensure the mussel meat is loosened from the bottom shell but still sitting inside it. This makes it much easier for your guests to eat later.
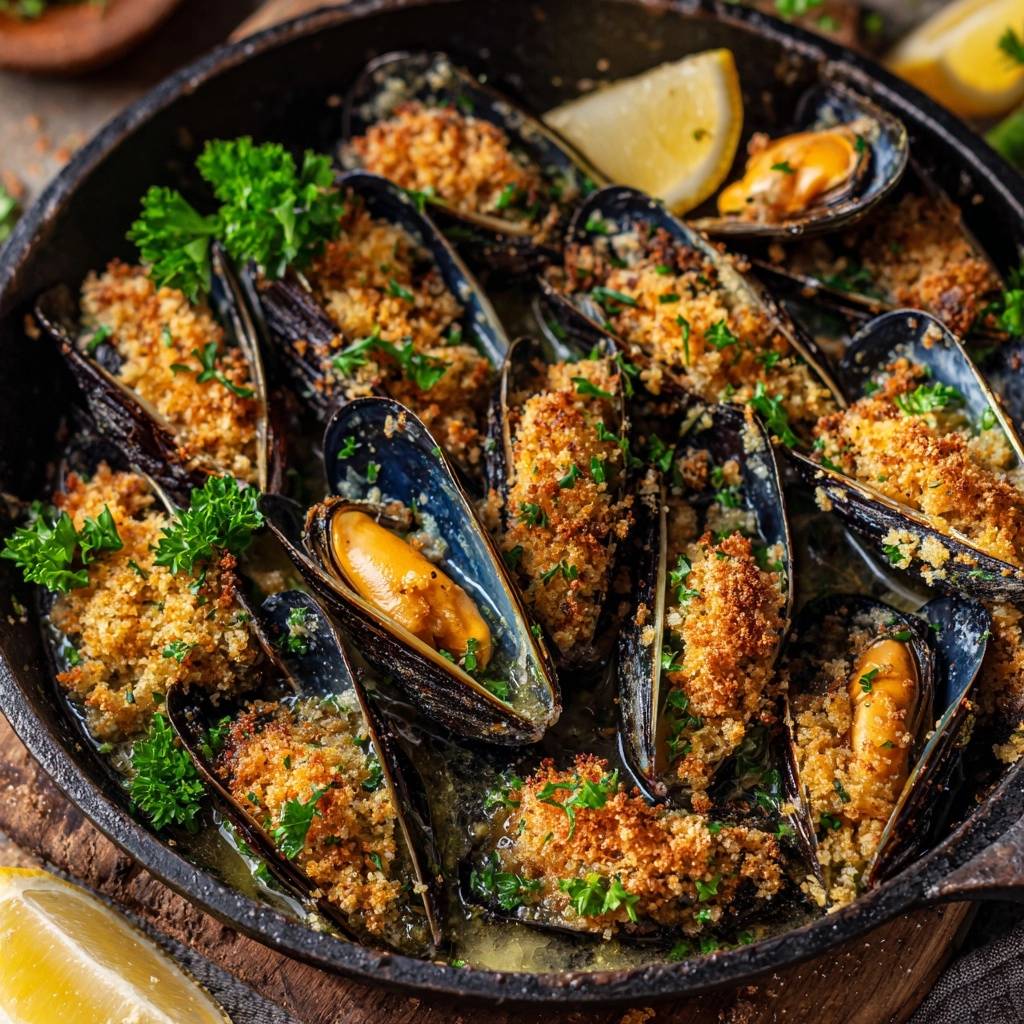
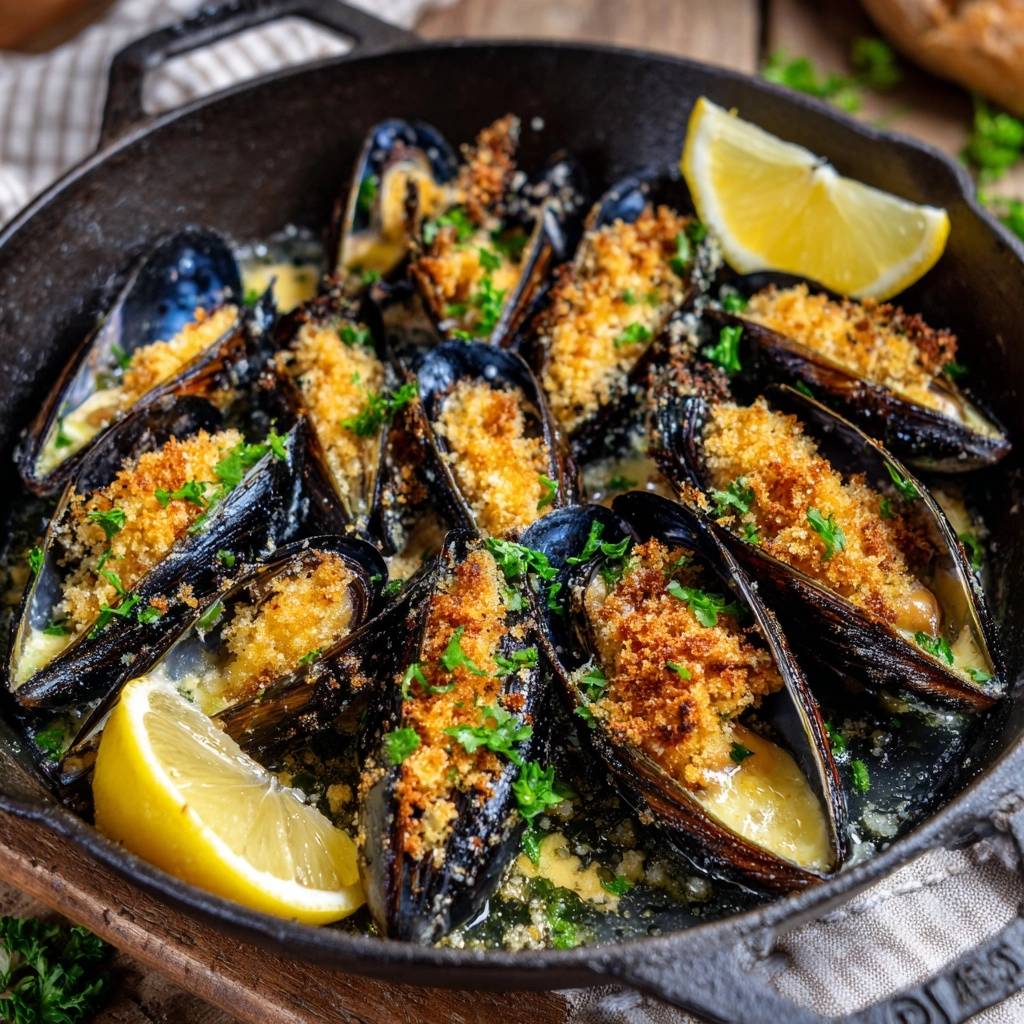
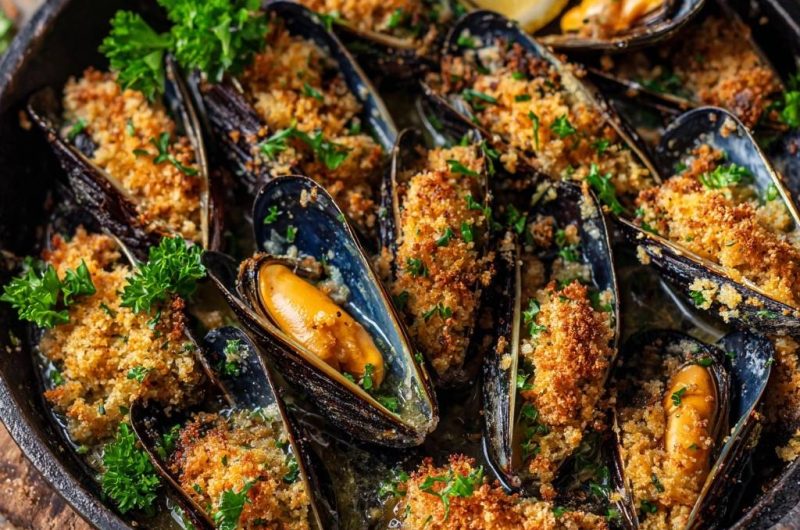
Arrange the mussels in a cast-iron skillet. I prefer cast iron because it holds heat beautifully and looks stunning on the table. Pack them in fairly tightly so they support each other, which helps keep the garlic butter topping from sliding off into the pan.
The Final Bake: Achieving the Golden Crust
The final stage happens in two parts. First, bake the mussels at 425°F for about 5 minutes. This melts the butter dots in the pan and ensures the meat is hot all the way through. The crumbs will start to settle and adhere to the mussel meat during this time.
Then, switch your oven to the broil setting. This is the “danger zone” where you must stay focused. It usually takes only 1 to 2 minutes for the topping to turn a deep, vibrant brown. Watch for the butter to bubble aggressively around the edges of the crumbs. Pull them out the second they look perfect.
Troubleshooting Common Mussels Mistakes
If your mussels end up rubbery, you likely overcooked them during the steaming phase or left them under the broiler too long. Remember, the steaming is the primary cooking; the oven is mostly for the topping. If the meat is detaching from the shell too easily, try pressing the breadcrumb mixture down a bit more firmly to “anchor” it.
Another common issue is a lack of flavor. If the dish tastes flat, it usually needs more lemon zest or a tiny pinch more sea salt in the crumb mixture. The salt brings out the sweetness of the seafood, while the zest provides the necessary contrast to the heavy butter.
Flavor Variations and Ingredient Swaps
While Parmesan adds a wonderful umami punch, you can swap it out for Pecorino Romano if you want a saltier, sharper finish. For a dairy-free version, you can use a high-quality plant-based butter and replace the cheese with a tablespoon of nutritional yeast to keep that savory depth.
If you want to change the herb profile, try using fresh tarragon or chives. Tarragon has a slight licorice note that pairs beautifully with shellfish. You can also add a pinch of smoked paprika to the breadcrumbs if you want a hint of woodsy heat that mimics a Spanish style.
What to Serve with Garlic Butter Baked Mussels
You absolutely need a vehicle for all that leftover garlic butter in the bottom of the pan. A crusty sourdough baguette is the traditional choice. Toast the bread slightly so it can stand up to being dipped into the rich, garlicky sauce without falling apart.
To balance the meal, serve a simple arugula salad on the side. The peppery bite of the greens and a sharp lemon vinaigrette act as a palate cleanser between the rich, buttery mussels. It keeps the meal feeling light and sophisticated rather than overly heavy.
Expert Tips for Seafood Food Safety
Always buy your mussels the same day you plan to cook them. If you must store them overnight, place them in a bowl covered with a damp cloth in the coldest part of your fridge. Never store them in an airtight plastic bag or submerged in water, as they will suffocate.
Trust your nose above all else. Fresh mussels should smell like the clean ocean or salty air. If you detect any “fishy” or ammonia-like odors, play it safe and toss them. When it comes to seafood, your instincts are usually your best guide for safety.
Frequently Asked Questions
Can I use frozen mussels for this recipe?
Yes, you can use frozen mussels, but try to find those that are already on the half-shell to save time. If using whole frozen mussels, thaw them completely in the refrigerator before steaming. Note that frozen seafood releases more moisture, so you may need to be even more diligent about pre-toasting your breadcrumbs to prevent sogginess.
How do I store and reheat leftovers?
Store any leftover mussels in an airtight container in the refrigerator for up to one day. To reheat, avoid the microwave at all costs as it will turn the mussels into rubber. Instead, place them back in a skillet and pop them under the broiler for 2 or 3 minutes until the topping sizzles again. This helps revive some of the original crunch.
What is a good substitute for white wine?
If you prefer not to use wine, a high-quality seafood stock or even chicken bone broth works well. To mimic the necessary acidity that wine provides, add a tablespoon of lemon juice or a teaspoon of white wine vinegar to the broth before steaming the mussels. This ensures the flavor profile remains balanced and bright.
Why did my breadcrumbs fall off the shell?
This usually happens if the breadcrumb mixture is too dry or if the mussels weren’t tucked closely together in the pan. Make sure you use the full amount of melted butter in the topping, as it acts as the glue. When applying the topping, give it a very gentle press with the back of a spoon to help it adhere to the mussel meat.
Is the Parmesan cheese mandatory?
The Parmesan is not strictly mandatory, but it serves a functional purpose beyond flavor. As the cheese melts in the oven, it acts as a secondary binder that helps the Panko clumps stay together. If you omit it, you might find the topping is a bit more “loose” or crumbly, though it will still taste delicious.
Garlic Butter Baked Mussels
Course: AppetizerCuisine: SeafoodDifficulty: easy4
servings15
minutes10
minutes25
Minutes310
kcalSeafood
Ingredients
2 pounds fresh mussels, scrubbed and debearded
1 cup Panko breadcrumbs
6 tablespoons unsalted butter (4 melted for the topping, 2 for the pan)
1/4 cup dry white wine (Pinot Grigio or Sauvignon Blanc)
4 cloves garlic, minced
1/4 cup fresh curly parsley, finely chopped
1/2 teaspoon lemon zest
1/4 teaspoon sea salt
1/4 teaspoon black pepper
1/4 cup freshly grated Parmesan cheese (optional, for extra crust)
Lemon wedges for serving
Directions
- Preheat your oven to 425°F (220°C).
- To solve the soggy topping problem, start by dry-toasting your Panko breadcrumbs in a skillet over medium heat for 2-3 minutes until they are pale golden. This removes residual moisture before they touch the seafood.
- In a small bowl, combine the toasted breadcrumbs with 4 tablespoons of melted butter, half of the minced garlic, lemon zest, salt, pepper, and Parmesan. The butter coats each crumb, creating a fat-based barrier that prevents the mussel juices from soaking into the bread.
- Steam the mussels: In a large pot, add the white wine and the remaining garlic. Add the mussels, cover tightly, and steam over medium-high heat for 3 to 5 minutes just until they open. Discard any that remain closed.
- Prepare the half-shells: Remove the top shell of each mussel. Arrange the mussels on the half-shell in a large cast-iron skillet.
- Add the pan sauce: Take 2 tablespoons of butter and place small dots of it in the bottom of the skillet between the mussels. Pour 2-3 tablespoons of the leftover steaming liquid (strained) into the bottom of the skillet to ensure the mussels don’t dry out during the bake.
- Apply the topping: Spoon a generous amount of the garlic butter crumb mixture onto each mussel, pressing down very lightly so it adheres without compacting.
- Bake and Broil: Place the skillet in the center of the oven for 5 minutes to heat through. Then, switch the oven to Broil for 1-2 minutes. Watch closely until the topping is a deep, vibrant golden brown and the butter in the pan is bubbling.
- Garnish heavily with fresh chopped parsley and serve immediately directly from the skillet with lemon wedges. The pre-toasting and butter-coating technique ensures that even the bottom layer of the crumb stays crunchy despite the juicy mussel below.
Notes
- Discard any mussels that do not open during the steaming process. For the best results, use fresh curly parsley and high-quality dry white wine like Pinot Grigio or Sauvignon Blanc.


