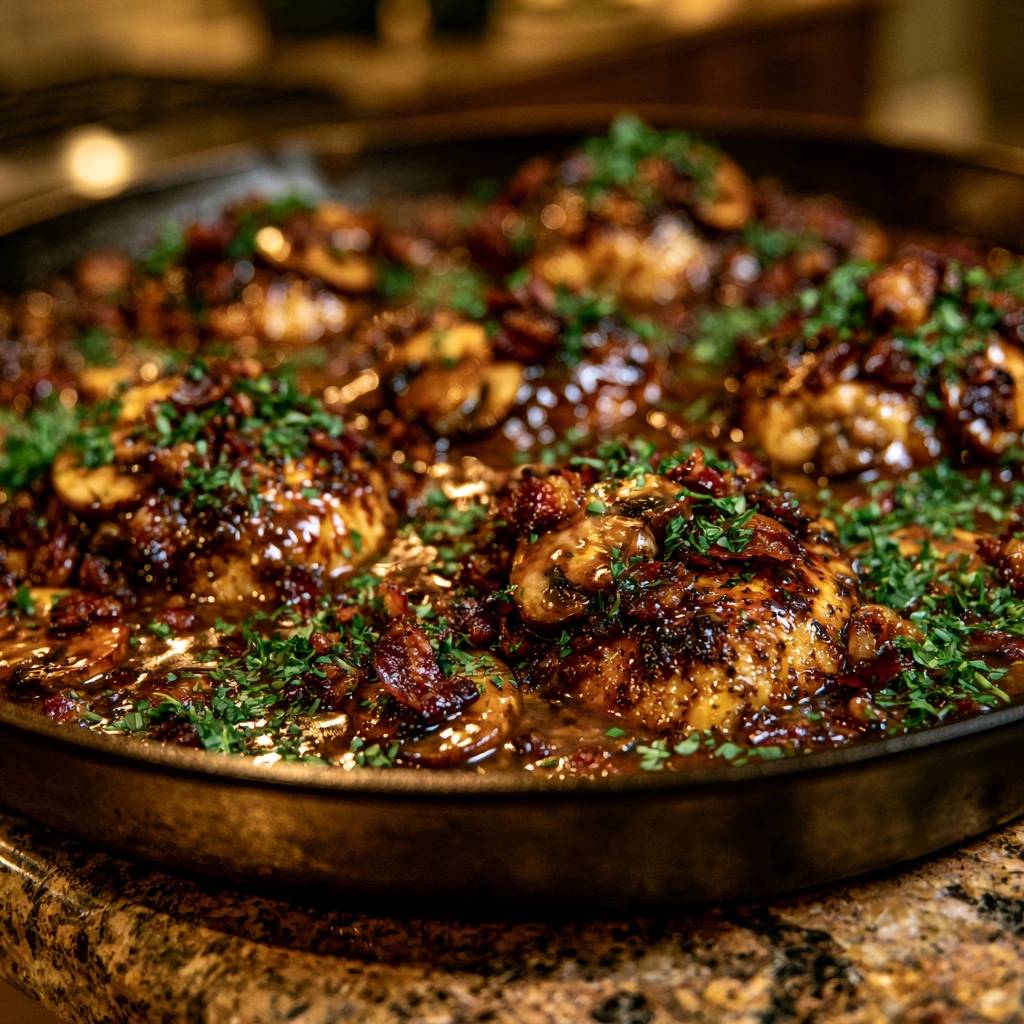
The secret to a world-class chicken dish lies in the violent contrast between a shatteringly crisp skin and a deep, umami-rich sauce. Most home cooks struggle with mushroom chicken because the moisture from the fungi inevitably turns the chicken skin into a rubbery, soggy mess. This recipe solves that frustration by utilizing a strategic two-stage cooking process that prioritizes structural integrity.
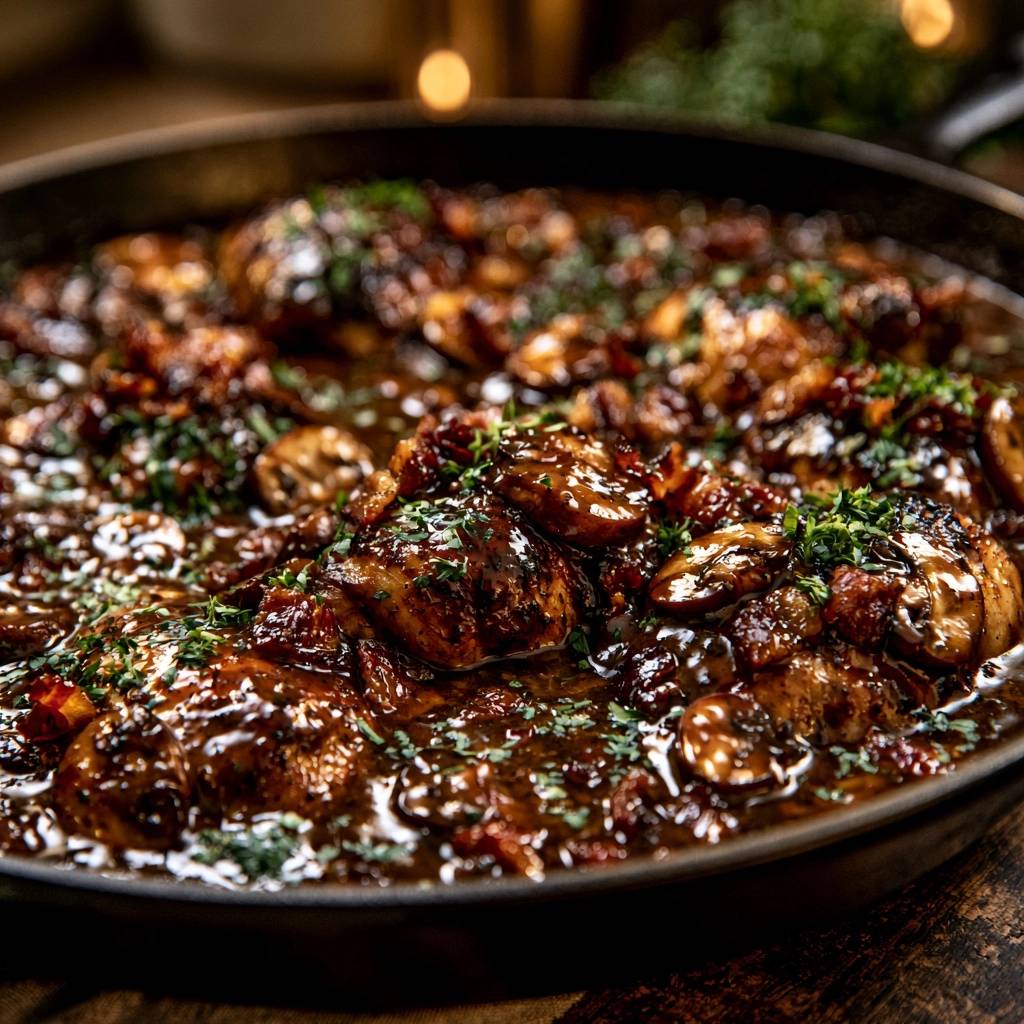
By starting with a hard sear to render out the fat and finishing with a high-heat oven roast, we create a lacquered, dark balsamic finish that looks like it came from a high-end bistro. The sauce remains at the base of the pan, allowing the mushrooms to soak up the garlic butter while the chicken skin stays high, dry, and incredibly crunchy. It’s a technical balance that ensures every bite delivers both a rich mouthfeel and a satisfying snap.
The real pro move here is the “Anti-Soggy” secret: we never submerge the chicken in the liquid. Instead, we build a thick, syrupy reduction and carefully spoon it only over the center of the meat. This protects the perimeter of the skin from the steam, ensuring that the Maillard reaction we worked so hard to achieve in the skillet isn’t lost once the broth hits the pan.
The Anatomy of a Perfect Pan-Seared Chicken Thigh
When you’re aiming for maximum flavor, bone-in, skin-on chicken thighs are the only way to go. The bone acts as a natural insulator, slowing down the cooking process just enough to keep the internal meat succulent while the exterior reaches a deep golden brown. Without the bone, the meat often dries out before the skin can fully render its fat.
Before the chicken even touches the heat, you must trim any large, overhanging flaps of fat. While fat is flavor, too much of it will pool in the pan and prevent the skin from crisping, essentially boiling the meat in its own grease. A clean trim ensures a focused sear and a sauce that is glossy rather than oily.
Why Bone-In Thighs Outperform Breasts
Chicken thighs are packed with connective tissue and collagen that break down during the oven-set phase. As this collagen melts, it enriches the garlic butter sauce, giving it a velvety body that chicken breasts simply can’t provide. This natural thickening agent is what creates that lip-smacking quality in the final glaze.
Essential Components for the Dark Balsamic Glaze
To achieve the dark, moody aesthetic of a professional glaze, the quality of your liquids matters immensely. We use beef bone broth instead of standard chicken broth because it offers a deeper color and a more robust protein profile. This swap provides a savory backbone that stands up to the pungent garlic and sharp balsamic notes.
Worcestershire sauce acts as our secret umami booster, bridging the gap between the earthy mushrooms and the rich butter. It adds a complex fermented saltiness that rounds out the sweetness of the balsamic glaze. When these ingredients reduce together, they transform from a thin liquid into a sticky, concentrated nectar.
Selecting and Prepping Cremini Mushrooms
Cremini mushrooms, often sold as Baby Bellas, are the superior choice for this dish. They have a lower water content than white button mushrooms, which means they brown faster and hold their shape better under heat. Their denser texture allows them to absorb the garlic butter without turning into mush.
When prepping, slice them thick—at least a quarter-inch. If you slice them too thin, they will shrivel up and disappear into the sauce. You want substantial, meaty bites of mushroom that can compete with the texture of the crispy chicken skin and the crunch of the beef bacon.
The Role of Balsamic Glaze vs. Vinegar
It is vital to use balsamic glaze (a reduction) rather than plain balsamic vinegar. The glaze has a higher sugar content and a syrupy consistency that is essential for creating a “lacquered” finish. If you use vinegar, the sauce will be too acidic and won’t cling to the chicken during the final roast.
Step-by-Step: Achieving the Anti-Soggy Hard Sear
The most important step happens before you turn on the stove: you must pat the chicken thighs extremely dry with paper towels. Any surface moisture will turn to steam the moment it hits the oil, which is the enemy of a crispy crust. Seasoning with salt immediately before searing also helps draw out any remaining surface dampness.
Start with a hot pan and a mix of olive oil and butter. Place the chicken skin-side down and leave it alone. You’ll be tempted to peek, but moving the meat prematurely tears the skin and ruins the sear. Wait for the fat to render and the skin to naturally release from the pan, signaling a perfect crust has formed.
The Cast Iron Advantage
A heavy-bottomed skillet, specifically cast iron, is non-negotiable for this recipe. Cast iron has incredible heat retention, meaning the temperature won’t plummet when you add six cold chicken thighs. A thin pan will lose its heat, causing the chicken to release juices and steam rather than sear, resulting in grey, flabby skin.
Managing Rendered Fat and Fond
As the chicken sears, it leaves behind “fond”—those little brown bits stuck to the bottom of the pan. This is concentrated flavor gold. However, keep an eye on the heat; if the fat starts to smoke excessively, turn it down slightly. You want the fond to be dark brown, not black and bitter.
Building the Umami-Rich Mushroom Base
Once the chicken is removed, the mushrooms go into the rendered fat. The trick here is to let them sit undisturbed for several minutes. Mushrooms are like sponges; they first release their liquid and then re-absorb the flavorful fats in the pan. Letting them brown deeply creates a savory crust on each slice.
Deglazing Techniques for Maximum Flavor
When you pour in the beef broth and balsamic glaze, use a wooden spoon to scrape the bottom of the skillet. This process, called deglazing, incorporates all that caramelized fond back into the liquid. You’ll see the sauce instantly turn a deep, rich mahogany color as the proteins dissolve into the broth.
Emulsifying the Garlic Butter Sauce
To get that professional glossy finish, we use a technique called “Monte au Beurre.” By whisking cold butter into the simmering reduction at the very end, you create a stable emulsion. The cold temperature of the butter prevents the sauce from breaking, resulting in a thick, creamy coating that clings to the mushrooms.
The High-Heat Oven Finish and Glaze Setting
We finish the dish in a 400°F oven to “set” the glaze. This high temperature does two things: it ensures the chicken is cooked through to a safe 165°F and it dehydrates the skin one last time. The intense heat causes the sugars in the balsamic glaze to bubble and thicken into a sticky lacquer.
Strategic Glazing to Protect Texture
When you return the chicken to the pan, make sure the skin sits well above the sauce line. Use a spoon to drizzle just a bit of the thick glaze over the center of each thigh. By leaving the edges of the skin untouched by the sauce, you ensure they remain brittle and crunchy even after roasting.
Troubleshooting Common Texture Issues
If your sauce looks too thin after the reduction time, simply remove the chicken and simmer the liquid for another two minutes. The sauce should be thick enough to coat the back of a spoon. Remember, it will continue to thicken slightly as it cools and as the butter emulsifies.
How to Fix a Broken Butter Sauce
If you see the fat separating from the balsamic reduction, don’t panic. Whisk in a single teaspoon of warm water and stir vigorously. The water helps re-bind the fats and liquids, bringing the sauce back to a smooth, cohesive state. Always whisk in a circular motion for the best results.
Preventing Rubbery Mushroom Texture
The most common mistake is crowding the pan. If you dump too many mushrooms in at once, they will steam in their own moisture. If your skillet is small, sauté the mushrooms in two batches to ensure every single piece gets that vital golden-brown sear.
Optimal Side Dishes for Garlic Butter Poultry
Because this dish is incredibly rich and savory, you need sides that can either absorb the extra glaze or cut through the fat. A neutral starch is the perfect vehicle for the garlic butter sauce, while a bright, acidic vegetable provides a necessary palate cleanser between bites.
Starchy Bases to Absorb the Glaze
Garlic mashed potatoes or a smooth cauliflower purée are classic choices that soak up the balsamic reduction beautifully. If you want something lighter, a simple orzo tossed with lemon zest and parsley works wonders. The goal is to have a base that doesn’t compete with the complex flavors of the chicken.
Acidic Greens to Balance the Fat
A simple arugula salad dressed with nothing but lemon juice and a pinch of salt is the perfect foil for the heavy umami of the mushrooms and beef bacon. Alternatively, steamed broccolini with a heavy hand of lemon zest provides a crisp, fresh contrast that keeps the meal from feeling too heavy.
Storage, Reheating, and Meal Prep Standards
Store any leftovers in an airtight container for up to three days. To keep the skin as crisp as possible, store the chicken skin-side up and try not to stack the pieces. The mushrooms and sauce actually improve in flavor the next day as the garlic and thyme continue to meld.
The Best Way to Reheat Without Losing Crunch
Avoid the microwave at all costs, as it will turn the skin soft and the mushrooms rubbery. Instead, use an air fryer or a 375°F oven for about 8-10 minutes. This dry heat will re-crisp the skin and warm the chicken through without overcooking the center.
Freezing Guidelines for Braised Thighs
You can freeze this dish for up to two months. For the best results, freeze the chicken and the mushroom sauce in separate containers. When you’re ready to eat, thaw them in the fridge overnight and reheat in the oven to restore the textural contrast between the meat and the glaze.
Expert Tips for Professional Presentation
Presentation is all about the final garnishes. Don’t be shy with the fresh parsley; the bright green color pops against the dark mahogany glaze. Adding the crispy beef bacon at the very last second ensures it stays crunchy, providing one final layer of texture that makes this dish truly memorable.
Frequently Asked Questions
How do I keep the chicken skin from getting soggy in the fridge?
The best way to preserve the crunch is to store the chicken uncovered for the first hour in the fridge to let any residual steam escape. Once cooled, cover it loosely. When reheating, always use dry heat like an oven or air fryer to draw out any moisture absorbed during storage.
Can I use chicken breast instead of thighs?
You can, but you must adjust the timing. Breasts cook much faster and lack the fat content of thighs, so they can become dry. Sear them for only 5 minutes per side and reduce the oven time to 5-6 minutes. Be aware that the sauce won’t be quite as rich without the collagen from the thigh bones.
What if I don’t have a cast iron skillet?
Any heavy-bottomed, oven-safe stainless steel pan will work. Avoid non-stick pans for this recipe, as they cannot handle the high heat required for a hard sear and won’t produce the flavorful fond needed for the balsamic glaze.
Is the balsamic glaze really necessary?
Yes, it is the key to the “lacquered” look and the balanced sweetness of the sauce. If you only have balsamic vinegar, you can make your own glaze by simmering 1/2 cup of vinegar with 1 tablespoon of honey until it reduces by half and becomes syrupy.
Why use beef bacon instead of regular bacon?
Beef bacon provides a deeper, smokier flavor that complements the beef bone broth and mushrooms perfectly. It also tends to stay crispier when placed on top of a glazed dish. If you cannot find it, you can omit it, but you’ll lose that extra layer of salty crunch.
My sauce is too salty, how can I fix it?
If the reduction becomes too salty, whisk in a splash of water or a little extra unsalted butter. The fat in the butter helps coat the palate and mutes the perception of salt. Next time, ensure you are using low-sodium bone broth to have more control over the seasoning.
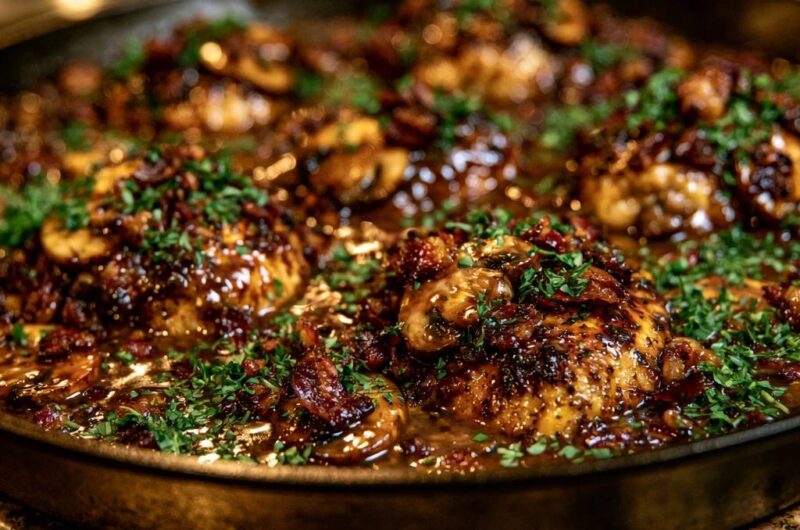
Garlic Butter Mushroom Chicken Thighs
Course: Main CourseCuisine: AmericanDifficulty: easy4
servings15
minutes30
minutes45
Minutes480
kcalAmerican
Ingredients
6 bone-in, skin-on chicken thighs (trimmed of excess fat)
10 ounces cremini mushrooms, sliced thick
6 cloves garlic, minced
1/2 cup high-quality beef bone broth
2 tablespoons balsamic glaze (essential for the dark color and shine shown)
1 tablespoon Worcestershire sauce
3 tablespoons unsalted butter, divided
1 tablespoon olive oil
1 teaspoon dried thyme
1/2 cup fresh parsley, finely chopped
4 slices beef bacon, diced and fried until crispy
Salt and cracked black pepper to taste
Directions
- Prep the Surface: Pat the chicken thighs extremely dry with paper towels. Season both sides generously with salt and pepper. Preheat your oven to 400°F (200°C).
- The Hard Sear: Heat olive oil and 1 tablespoon of butter in a large, oven-safe heavy skillet (cast iron is preferred) over medium-high heat. Place chicken skin-side down. Press down slightly and sear for 8-10 minutes without moving them until the skin is deep golden and the fat has rendered. Flip and sear the bottom for 2 minutes. Remove chicken to a plate, skin-side up.
- Caramelize Mushrooms: In the same skillet with the rendered fat, add the mushrooms. Sauté undisturbed for 3-4 minutes to develop a dark crust. Stir and cook until all moisture has evaporated.
- Build the Glaze: Add the minced garlic and thyme, cooking for 1 minute. Pour in the beef broth, balsamic glaze, and Worcestershire sauce. Scrape the bottom of the pan to release the fond. Simmer for 3-5 minutes until the liquid reduces by two-thirds and becomes syrupy.
- The Gloss Finish: Whisk in the remaining 2 tablespoons of butter until the sauce is thick, dark, and glossy.
- Oven Set: Place the chicken thighs back into the skillet, but do not submerge the skin. Spoon a small amount of the thick glaze only over the very center of the thighs, leaving the edges of the skin exposed.
- Final Roast: Transfer the skillet to the oven for 8-10 minutes. This high-heat finish ensures the chicken is cooked to 165°F while “setting” the glaze into a sticky lacquer and crisping the skin further.
- Garnish: Remove from the oven. Immediately top the chicken with the crispy beef bacon and a heavy layer of fresh parsley. Serve directly from the skillet to maintain the visual presentation, ensuring the sauce stays at the base of the chicken to keep the skin crisp.
Notes
- To maintain the anti-soggy skin promise, ensure the chicken is patted extremely dry before searing and do not submerge the skin in the sauce during the oven finish.