
We have all been there. You pull a beautiful, steaming pan of cornbread out of the oven, slice into it, and it immediately disintegrates into a pile of dry, yellow sand. It is heartbreaking when a side dish meant to soak up savory juices turns into a gritty mess that requires a gallon of water just to swallow. The “Dry Cornbread Epidemic” usually stems from a lack of structural balance and a misunderstanding of how cornmeal behaves under heat.
This recipe changes the game by focusing on the “Anti-Crumbly Secret.” By adjusting the fat-to-flour ratio and utilizing a specific searing technique, we create a bread that is sturdy enough to swipe through a bowl of chili but tender enough to melt on your tongue. We are moving away from the fragile, cake-like textures of the past and toward a robust, golden loaf that holds its shape perfectly every single time.
The real magic happens before the batter even touches the bowl. The secret is the “Thermal Shock” method. By preheating your cast iron skillet until it is screaming hot and adding fat just before the batter, you create an instant non-stick crust. This doesn’t just prevent sticking; it seals the exterior, trapping moisture inside the crumb so the bread stays soft for days rather than hours.
The Science of Moisture and Structural Integrity
Most traditional recipes lean too heavily on cornmeal, which lacks the gluten necessary to hold a loaf together. We use a precise 1:1 ratio of yellow cornmeal to all-purpose flour. This balance provides that classic corn flavor and “tooth” while the flour provides the protein structure needed to prevent crumbling. If you use too much cornmeal, the grains simply slide past each other, leading to that dreaded “sandpaper” feel.
In addition to the flour, we incorporate honey as a natural humectant. Unlike granulated sugar which just adds sweetness, honey actually attracts and holds onto water molecules. This chemical property ensures the bread remains moist for over 48 hours. It creates a tight, velvety crumb that feels rich and substantial rather than airy and brittle.
Why Buttermilk and Eggs Must Be Room Temperature
Temperature control is the most overlooked step in home baking. If you pour melted butter into ice-cold buttermilk, the butter will immediately seize into tiny, waxy clumps. This prevents the fat from distributing evenly throughout the batter. When the fat isn’t emulsified, you end up with a loaf that is oily in some spots and bone-dry in others.
Take your eggs and buttermilk out of the fridge at least 30 minutes before you start. When these ingredients are at room temperature, they bond together into a smooth, homogenous liquid. This emulsion coats every grain of cornmeal, ensuring that every single bite has the same tender, buttery consistency. It is the difference between a professional-grade crumb and a dense, heavy mess.
Essential Components for Golden Skillet Cornbread
Quality ingredients are the foundation of great flavor. For the best texture, look for a fine or medium-grind yellow cornmeal. Stone-ground varieties offer a deeper, nuttier corn flavor, but they are thirstier than mass-produced brands. If you go the stone-ground route, let your batter sit for five minutes before baking to allow the grains to fully hydrate.
Don’t skimp on the buttermilk, either. Use full-fat buttermilk if you can find it. The acidity in the buttermilk reacts with the baking powder to create tiny air bubbles, giving the bread its “spring.” If you only have low-fat, it will work, but the final result won’t have that same decadent, creamy mouthfeel that makes this recipe so addictive.
Selecting the Right Fat: Butter vs. Oil
We use a hybrid approach to fat because butter and oil serve two different purposes. Melted unsalted butter is whisked into the batter for that unmistakable, rich flavor that defines good cornbread. However, butter contains water and milk solids which can burn or stick if used to grease the pan at high temperatures. Therefore, we use vegetable oil or beef drippings to coat the skillet.
The oil in the pan has a higher smoke point, allowing it to get incredibly hot without scorching. When the batter hits that hot oil, it essentially “fries” the bottom and sides of the cornbread. This creates a deep, mahogany crust that provides a beautiful textural contrast to the soft, honey-sweetened interior. It is the best of both worlds: buttery flavor inside, crispy fried texture outside.
The Role of Chemical Leaveners in Heavy Batters
Cornmeal is heavy and dense, which means it needs a lot of help to rise. We use a full tablespoon of baking powder to ensure the bread doesn’t turn into a leaden brick. This leavening agent works in two stages: once when it hits the liquid and again when it hits the heat of the oven. This double-action lift is what creates the “springy” texture that bounces back when you touch it.
The reaction between the acidic buttermilk and the alkaline baking powder also helps with browning. This chemical dance encourages the Maillard reaction, which is responsible for that gorgeous golden-brown hue on the top of the loaf. Without enough leavener, the bread would stay pale, flat, and unappealingly dense.
Equipment: Why Cast Iron is Non-Negotiable
If you want the perfect cornbread, you need a 10-inch cast iron skillet. Cast iron has incredible thermal mass, meaning it holds onto heat much better than glass or thin aluminum. When you preheat the skillet in a 400°F oven, it becomes a heat reservoir. This intense heat is what gives you that signature “sizzle” the moment the batter hits the pan.
Glass dishes take a long time to heat up, which results in pale, soft edges that often stick to the sides. Aluminum pans can hot-spot, leading to uneven browning. A well-seasoned cast iron skillet provides a naturally non-stick surface and radiates heat evenly from all sides. It acts like a mini-oven within your oven, ensuring the bottom is just as crispy and golden as the top.
Step-by-Step: Achieving the Perfect Sizzle
The process is quick, but the order of operations matters immensely. You want to move with purpose once that skillet comes out of the oven. Have all your ingredients measured and ready to go before you even turn on the stove. This ensures the pan doesn’t cool down while you are fumbling with a measuring cup.
Phase 1: Aerating the Dry Base
Start by whisking your cornmeal, flour, sugar, baking powder, and salt in a large bowl. Don’t just stir them; whisk vigorously for about 30 seconds. This aerates the mixture and breaks up any clumps of flour or leavening agent. Creating “loft” in the dry stage leads to a lighter, more uniform crumb once the liquids are added.
You are looking for a consistent, pale yellow color throughout the bowl. If you see streaks of white flour or clumps of baking powder, keep whisking. This step ensures that the leavening is evenly distributed so the bread rises perfectly level rather than forming a dome or sinking in the middle.
Phase 2: The Gentle Fold Technique
Once your wet ingredients are emulsified, pour them into the dry base. Now, put down the whisk and pick up a spatula. Use a gentle folding motion—cutting through the center and lifting from the bottom—until the flour just disappears. You might still see a few small lumps, and that is perfectly fine. In fact, it is exactly what you want.
Over-mixing is the primary cause of tough, rubbery cornbread. When you stir too much, you develop the gluten in the flour, which creates a bread-like elasticity. For cornbread, we want a tender, short crumb. Stop the moment you no longer see dry streaks of flour. This “Gluten Trap” is easy to avoid if you stay patient and use a light hand.
Phase 3: The Preheated Pan and Searing the Crust
This is the most exciting part of the process. Carefully pull that hot skillet out of the oven using a heavy-duty mitt. Add your oil and swirl it around until the bottom and sides are glistening. Immediately pour the batter into the center. You should hear a loud, satisfying hiss as the edges start to fry and set instantly.
This searing action creates a moisture barrier. By cooking the outside of the batter immediately, you prevent the internal moisture from evaporating too quickly in the oven. It locks the steam inside, which is why this cornbread stays so incredibly soft. Smooth the top quickly with your spatula and get it back into the oven as fast as possible.
Troubleshooting Common Cornbread Failures
If your cornbread sinks in the middle, it usually means your baking powder is expired or you opened the oven door too early. Sudden temperature drops can cause the delicate air bubbles to collapse before the structure has set. Always wait until at least the 18-minute mark before checking for doneness with a toothpick.
If the bottom is burnt but the top is pale, your oven rack might be too low. Move the rack to the center position to ensure even heat distribution. Conversely, if the top is browning too fast, you can tent the skillet loosely with foil for the last five minutes of baking. Every oven is different, so keep a close eye on that golden color.
Preventing the “Sandpaper” Texture
The most important step happens after the oven dings. You must let the cornbread rest in the skillet for at least 10 minutes. I know it smells amazing and you want to dive in, but resist the urge! During this time, the residual steam inside the bread redistributes, finishing the cooking process and “setting” the crumb.
If you cut into it while it is screaming hot, the steam escapes instantly, leaving the bread dry and prone to falling apart. Letting it rest allows the starches to firm up, which is how you get those clean, sharp-edged squares. A sprinkle of flaky sea salt during this resting period adds a beautiful crunch and pops against the sweetness of the honey.
Flavor Variations and Regional Adaptations
Once you master the base recipe, you can start experimenting. For a spicy kick, fold in two deseeded and finely diced jalapeños. If you love a cheesy bite, add a cup of sharp cheddar cheese to the dry ingredients. The cheese will melt into little pockets of savory goodness that contrast beautifully with the corn flavor.
You can also add a cup of fresh or frozen corn kernels for extra texture. Just remember to keep the additions moisture-neutral. Avoid adding very wet ingredients like salsa, which can throw off the chemistry and lead to a soggy center. To keep this recipe inclusive for everyone, we stick to vegetable oil or beef drippings rather than pork-based fats.
Optimal Pairings for Savory Skillet Bread
This cornbread is a superstar alongside a hearty vegetarian chili or a slow-simmered bean stew. The sweetness of the honey and the richness of the butter provide a perfect foil for spicy, acidic, or smoky flavors. It is also sturdy enough to be used as a base for a “cornbread bowl” topped with roasted vegetables and gravy.
For a simpler treat, try a thick slice for tea-time. Reheat a square and drizzle it with a little extra honey and a tiny pinch of flaky salt. The way the honey soaks into the warm, golden crumb is absolutely heavenly. It is a versatile bread that works just as well for a fancy dinner party as it does for a quick weeknight meal.
Storage, Reheating, and Longevity
To keep your cornbread fresh, let it cool completely before storing. Wrap the leftovers tightly in aluminum foil rather than plastic wrap. Foil helps maintain the integrity of the crispy crust, whereas plastic wrap can trap too much moisture and make the exterior soggy. It will stay fresh on the counter for up to three days.
When you are ready for round two, avoid the microwave if possible. Microwaves tend to make bread rubbery. Instead, pop a slice into a toaster oven or a dry skillet over medium heat for a few minutes. This revives the crispy edges and warms the center through, making it taste like it just came out of the oven for the first time.
Freezing for Long-Term Meal Prep
This cornbread freezes beautifully thanks to its high moisture content. Slice the loaf into squares and place them on a baking sheet in the freezer for an hour. Once they are firm, transfer them to a freezer-safe bag. This “flash-freezing” method prevents the squares from sticking together so you can grab just one at a time.
When you’re ready to eat, let a square thaw at room temperature for about an hour, then reheat in the oven. Because of our “Anti-Crumbly” technique, the bread won’t fall apart or get grainy after being frozen. It maintains that same springy, tender texture even after a month in the freezer.
Expert Tips for the Perfect Golden Finish
Always use the “Toothpick Test” to check for doneness. Insert a wooden toothpick into the very center of the bread; it should come out clean or with just a few moist crumbs. If you see wet batter, give it another two minutes. Over-baking is the enemy of moisture, so pull it out the second that toothpick comes back clean.
Don’t forget the flaky sea salt at the end! The large crystals don’t just add saltiness; they provide a sophisticated crunch that elevates the entire dish. It balances the sugar and honey, making the corn flavor taste even more intense. It is a small touch that makes a massive difference in the final presentation.
The Importance of Skillet Maintenance
A well-seasoned skillet is your best friend in this recipe. The layers of polymerized oil on a seasoned pan create a slick surface that works with the preheated oil to release the bread effortlessly. If your skillet is looking a bit dull or dry, give it a light rub with oil after cleaning to keep it in top shape for your next batch of Golden Skillet Cornbread.
Frequently Asked Questions
How do I store leftovers so they don’t get hard?
The best way to store this cornbread is to wrap it tightly in aluminum foil and keep it at room temperature. The foil protects the crust while allowing the bread to breathe slightly. It will stay moist and delicious for up to three days. Avoid the refrigerator, as the cold air can actually speed up the staling process and make the bread feel dry.
Why did my cornbread turn out crumbly despite the recipe?
The most common culprit for crumbling is over-mixing the batter. When you stir too much, you create a tough structure that eventually snaps and breaks. Another reason could be using a cornmeal that is too coarse without allowing it time to hydrate. Ensure you are using a 1:1 ratio of flour to cornmeal and folding the ingredients together just until the flour streaks disappear.
Can I use a different pan if I don’t have a cast iron skillet?
You can use a 9×9-inch square baking pan or a 9-inch round cake pan, but you will lose that signature fried crust. If using glass or ceramic, do not preheat the pan in the oven while empty, as it could shatter. Instead, grease the pan well and accept that the edges will be softer and paler. Increase the bake time by 2-4 minutes as these materials take longer to heat up.
What can I use if I don’t have buttermilk?
If you are out of buttermilk, you can make a quick substitute by adding 1 tablespoon of lemon juice or white vinegar to 1 cup of whole milk. Let it sit for 5-10 minutes until it looks slightly curdled. While this provides the necessary acidity to react with the baking powder, it won’t be quite as thick or rich as real buttermilk, so your cornbread might be slightly less tender.
Is there a way to make this without honey?
You can substitute the honey with maple syrup or simply increase the granulated sugar to 1/3 cup. However, keep in mind that honey is a humectant that specifically helps with moisture retention. If you swap it out, the cornbread may dry out a bit faster, so be sure to wrap it extra tight for storage and eat it within 48 hours for the best texture.
Golden Skillet Cornbread
Course: Side DishCuisine: AmericanDifficulty: easy8
servings10
minutes20
minutes30
MinutesAmerican
Ingredients
1 cup yellow cornmeal (fine or medium grind)
1 cup all-purpose flour
1/4 cup granulated sugar
2 tablespoons honey
1 tablespoon baking powder
1 teaspoon salt
1 cup full-fat buttermilk, room temperature
2 large eggs, room temperature
1/2 cup unsalted butter, melted and slightly cooled
2 tablespoons vegetable oil or bacon drippings (for the skillet)
Flaky sea salt for topping
Directions
- Place a 10-inch cast iron skillet into the oven and preheat to 400°F (200°C). Heating the pan before the batter hits it is the secret to a non-stick, deep golden bottom crust.
- In a large bowl, whisk together the cornmeal, flour, sugar, baking powder, and salt until well combined.
- In a separate bowl, whisk the eggs, buttermilk, and honey until smooth. Slowly stream in the melted butter while whisking constantly to prevent the eggs from scrambling.
- Pour the wet ingredients into the dry ingredients. Fold gently with a spatula until just combined and no large streaks of flour remain. To solve the crumbly texture issue, do not overmix; overworking the batter develops gluten which makes the bread tough and prone to breaking.
- Carefully remove the hot skillet from the oven using a heavy-duty oven mitt. Add the 2 tablespoons of vegetable oil (or bacon drippings) and swirl to coat the bottom and sides completely.
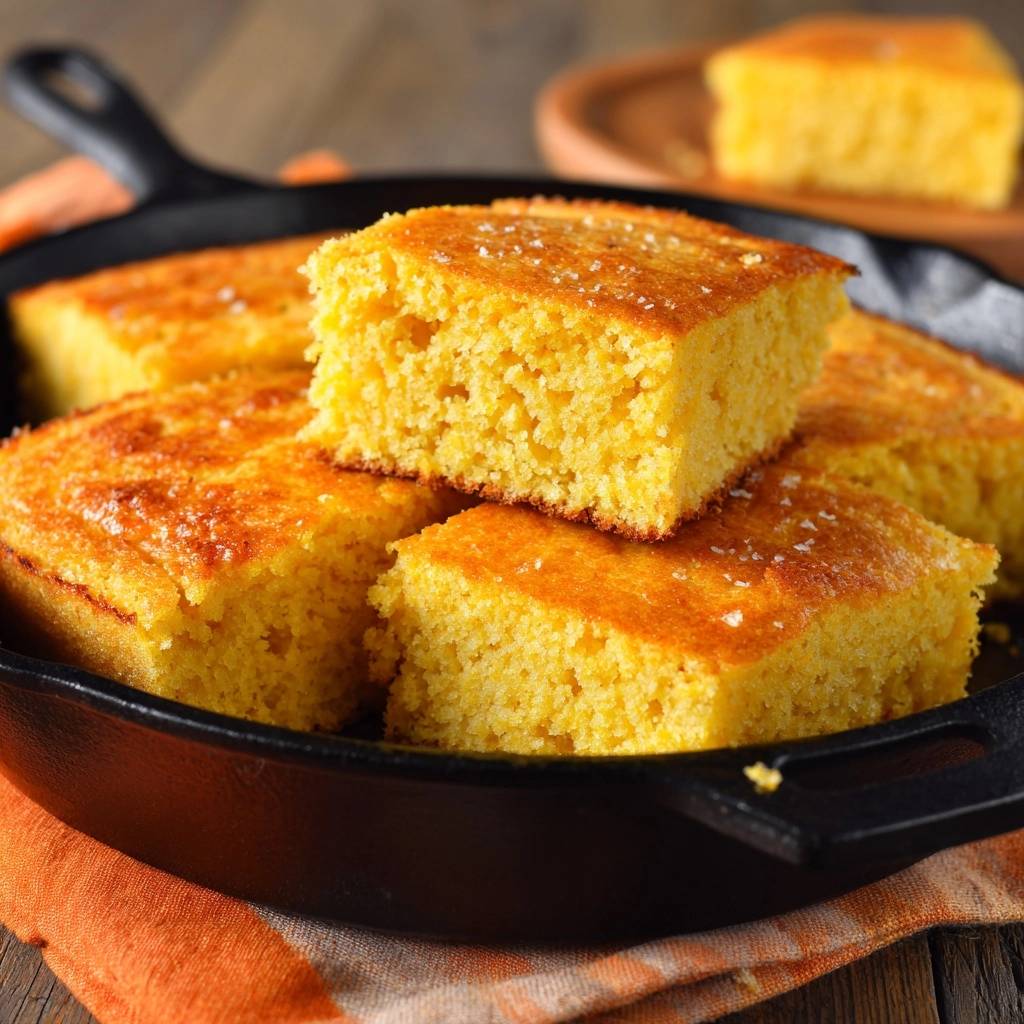
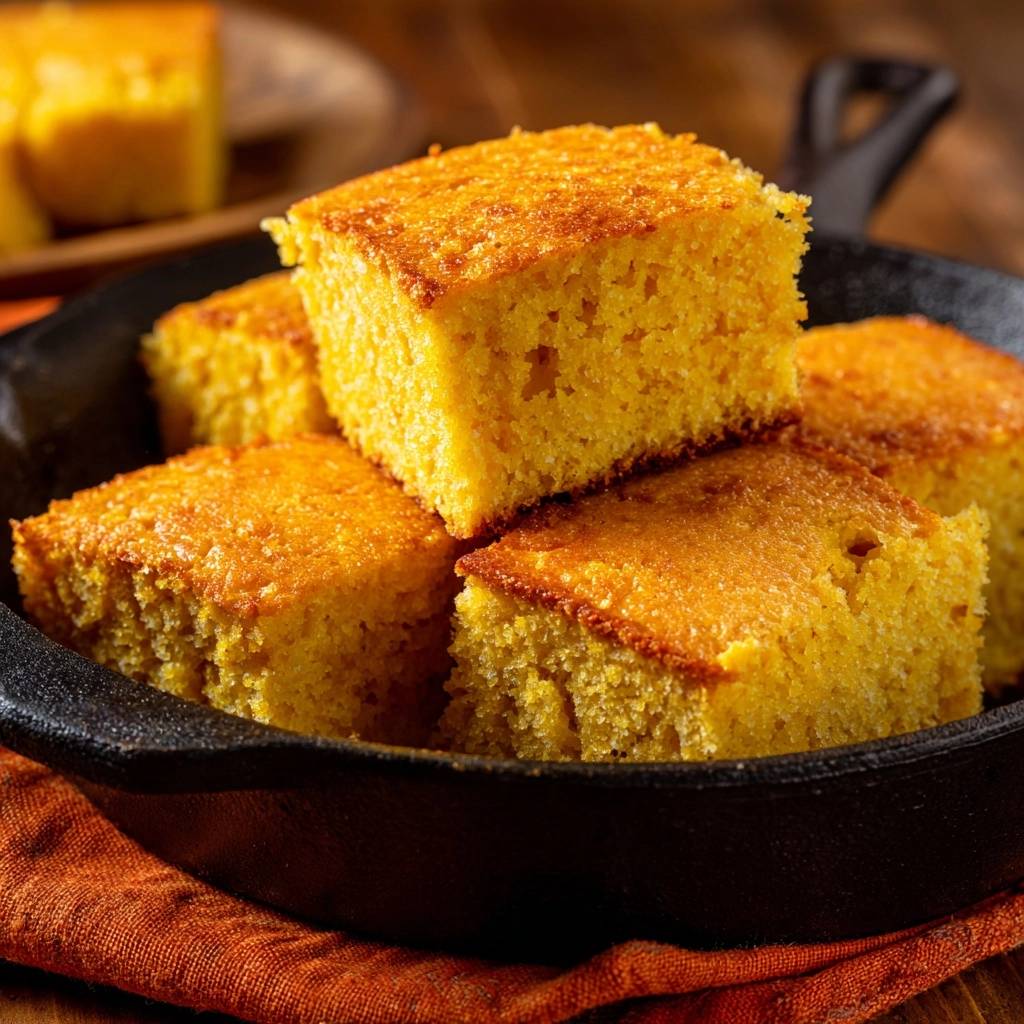
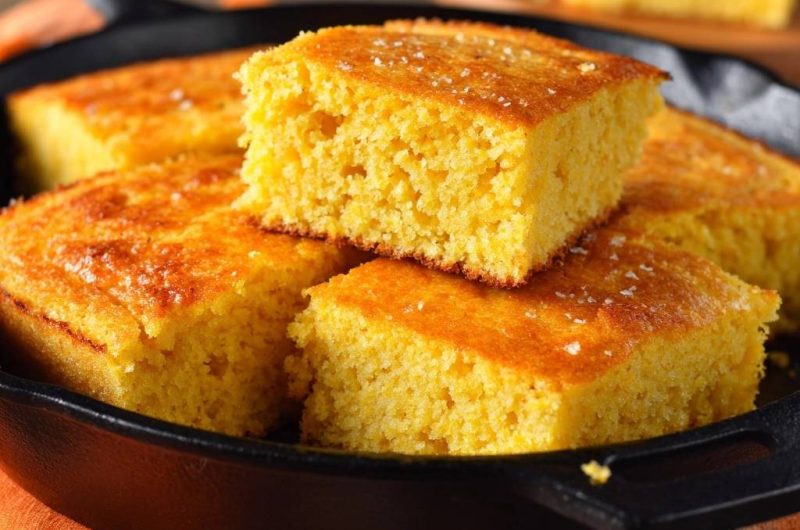
- Immediately pour the batter into the sizzling skillet. The edges should start to set and fry instantly, which seals the moisture inside and creates the signature crust shown in the image.
- Bake for 20 to 23 minutes. The top should be golden brown and spring back when lightly touched, and a toothpick inserted into the center should come out clean.
- Sprinkle generously with flaky sea salt immediately upon removal from the oven.
- Let the cornbread rest in the skillet for at least 10 minutes before slicing. This resting period allows the internal steam to settle and the structure to set so it produces the clean, sharp-edged squares seen in the visual reference without crumbling.
Notes
- Do not overmix the batter to avoid a tough texture. Letting the bread rest for 10 minutes after baking is crucial for clean slicing without crumbling.


