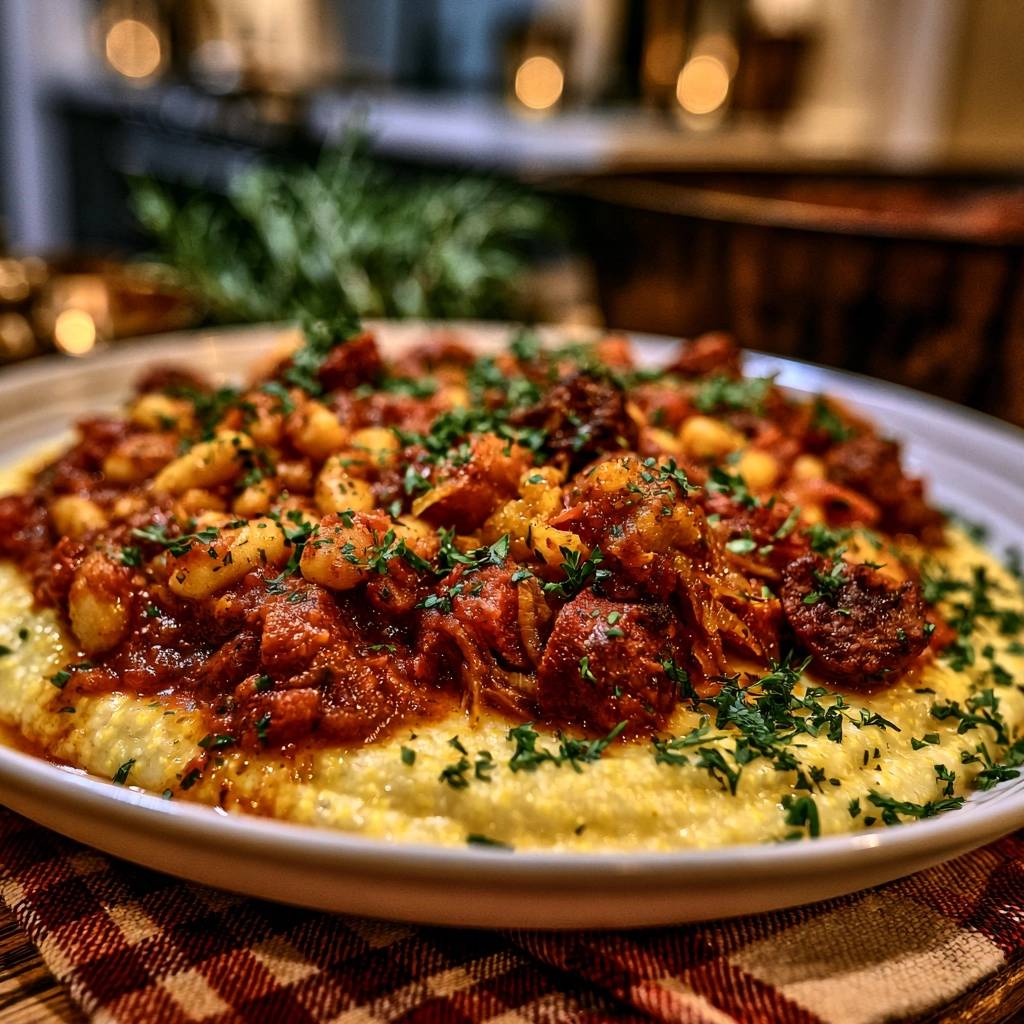
Most home cooks struggle with the dreaded “soggy bottom” when serving stews over grains. You spend hours simmering a beautiful sauce, only to have it bleed into the base, turning your dinner into a watery, monochromatic mush. This Hearty Beef and Bean Ragout over Creamy Polenta solves that problem through a dedicated reduction phase that creates a thick, glossy coating for the meat.
The secret to this restaurant-quality finish lies in the contrast between the velvety, stable polenta and a highly concentrated ragout. By focusing on a long braise followed by an uncovered reduction, you ensure the sauce clings to the beef and beans. This creates a distinct separation of textures that makes every bite feel intentional and luxurious rather than accidental.
I’ve found that the real trick to a stable base is the addition of parmesan at the very end of the polenta cooking process. The cheese doesn’t just add flavor; it provides a structural “grip” that helps the polenta hold its shape under the weight of the beef. If you follow the reduction steps carefully, your ragout will sit proudly on top of the grains like a crown.
Essential Components for the Beef and Bean Ragout
Beef chuck is the undisputed king of this dish because of its high collagen content. Unlike leaner cuts like sirloin, which turn dry and stringy when cooked for over an hour, chuck breaks down into succulent, melt-in-your-mouth morsels. As the connective tissue melts, it naturally enriches the sauce with a silky mouthfeel you simply can’t get from a quick-cooking cut.
Cannellini beans play a dual role here, acting as both a creamy protein and a natural thickener. When you fold them in during the final minutes, their outer skins provide a slight pop, while their starchy interiors help bind the tomato-based sauce. Using whole milk and real butter in the polenta is equally vital, as the fats create a barrier that prevents the cornmeal from absorbing too much liquid from the ragout.
Selecting the Right Cut of Beef
When you’re at the butcher counter, look for a piece of chuck roast with plenty of white marbling. Those streaks of fat and connective tissue are exactly what will transform into gelatin during the braise. I recommend cutting the beef into uniform 1-inch cubes; this size is the “Goldilocks” zone for a 90-minute cook time.
If the cubes are too small, they’ll disintegrate into the sauce before the flavor fully develops. If they’re too large, the center of the meat might remain tough while the outside overcooks. A consistent 1-inch dice ensures that every piece of beef reaches peak tenderness at the exact same moment the sauce reaches its ideal thickness.
The Role of Cannellini Beans in Texture
Canned cannellini beans are incredibly convenient, but you must rinse them thoroughly in a colander before use. The liquid in the can is often salty and has a metallic aftertaste that can muddy the bright flavors of your tomatoes and rosemary. Rinsing them ensures you’re only adding the clean, nutty flavor of the bean itself.
During the final five minutes of simmering, the beans release a small amount of starch into the ragout. This acts as a final “glue” for the sauce, helping it achieve that professional, glossy sheen. If your sauce still looks a bit thin at the end, you can even mash a few of the beans against the side of the pot to release more starch.
The Maillard Reaction: Searing for Deep Flavor
The foundation of a great ragout isn’t the simmering; it’s the searing. Before the beef even touches the oil, you must pat it bone-dry with paper towels. If the meat is damp, it will release steam the moment it hits the pan, resulting in grey, boiled beef instead of a dark, caramelized crust. Moisture is the enemy of the Maillard reaction, which is the chemical process that creates those complex, savory flavors.
You also need to resist the urge to dump all the meat into the pot at once. Crowding the pan drops the temperature too quickly, causing the beef to stew in its own juices. Work in batches, giving each cube enough space to breathe. You’re looking for a deep, dark brown color on all sides—almost the color of a well-worn mahogany desk. This crust isn’t just for looks; it’s the primary source of the dish’s deep, umami flavor.
As you sear, you’ll notice a dark film forming on the bottom of the pot. Don’t worry, it’s not burnt! That is the “fond,” a concentrated goldmine of flavor. By searing in batches and maintaining a high heat, you build up layers of this fond, which will eventually dissolve into your broth to create a sauce with incredible depth and character.
Building the Base: Aromatics and Tomato Paste
After the beef is seared and set aside, the onions go into the pot to pick up those leftover beef juices. You want to sweat them until they’re translucent and just starting to turn golden. This softens their sharp bite and brings out their natural sweetness, which balances the acidity of the tomatoes later on. Only add the garlic once the onions are soft, as garlic burns easily and can turn bitter in seconds.
The most important step in this phase is toasting the tomato paste, a technique known as “pincé.” Instead of just stirring it in, let the paste fry in the oil for about three minutes until it turns from a bright red to a dark brick hue. This removes the raw, metallic taste of the paste and develops a rich, toasted flavor that acts as a savory backbone for the entire ragout.
Deglazing the Fond for Maximum Umami
Once your aromatics and paste are toasted, it’s time to deglaze. Pour in the first half-cup of beef broth and use a wooden spoon to vigorously scrape the bottom of the pot. You’ll see all those browned bits—the fond—lift off and dissolve into the liquid. This is where the magic happens, as those concentrated flavors are reintegrated into the sauce.
Think of the broth as a solvent that captures every bit of effort you put into searing the meat. If you skip this step or don’t scrape thoroughly, you’re leaving the best part of the dish stuck to the bottom of the pan. Once the bottom is clean, you can add the rest of the liquid and the beef back into the pot.
The Science of the Low and Slow Braise
Patience is your best friend when working with beef chuck. A 30-minute simmer might make the meat hot, but it will leave it rubbery and difficult to chew. You need at least 75 to 90 minutes for the heat to penetrate the muscle fibers and melt the collagen into gelatin. This gelatin is what gives the sauce its body and makes the meat feel tender on the tongue.
Keep the heat at a “gentle simmer,” which means you should only see a few small bubbles breaking the surface every second. If the liquid is at a rolling boil, the intense heat will cause the muscle fibers to contract and toughen, resulting in dry meat despite being submerged in liquid. A low, slow heat allows the transformation to happen gently, preserving the moisture within the beef.
Achieving the Perfect Creamy Polenta Consistency
Great polenta requires a bit of finesse to avoid the dreaded lumps. By using a 3:1 ratio of water to milk, you get the earthy corn flavor from the water and the creamy, luxurious mouthfeel from the milk. The key is to whisk the cornmeal in a very slow, steady stream into the boiling liquid. If you dump it in all at once, the grains will clump together and stay raw in the middle.
Once the cornmeal is in, turn the heat down as low as it will go. Polenta needs about 30 minutes to fully hydrate and soften. You don’t need to stand over it the whole time, but give it a good stir every five minutes. This agitation releases the starches from the corn, much like making risotto, resulting in a velvety finish that is miles better than the “instant” varieties.
The Finishing Fats: Butter and Parmesan
Wait until the polenta is completely cooked and off the heat before adding your butter and parmesan. If you add them while the liquid is boiling, the fat in the butter can separate, and the cheese can become stringy or oily. Adding them at the end allows them to melt gently into the cornmeal, creating a smooth, emulsified texture.
The parmesan is particularly important because it adds a salty, savory punch that complements the beef. It also acts as a stabilizer. As the cheese cools slightly, it helps the polenta set just enough so that it doesn’t spread across the plate like a soup. This creates the perfect “landing pad” for your heavy beef ragout.
The Reduction Phase: Preventing a Watery Ragout
This is the most critical step for avoiding a soggy dinner. Once the beef is tender, take the lid off the pot. By increasing the heat slightly and simmering uncovered for the last 15 minutes, you allow excess water to evaporate. This concentrates the sugars, salts, and proteins in the sauce, turning a thin liquid into a thick, pourable glaze.
You’ll know it’s ready when it passes the “nappe” test. Dip a metal spoon into the ragout and run your finger through the coating on the back of the spoon. If the line stays clean and the sauce doesn’t run back into the gap, it’s perfectly reduced. This thick consistency ensures the ragout stays exactly where you put it—right on top of the polenta.
Troubleshooting Common Ragout and Polenta Issues
If your meat is still tough after 90 minutes, don’t panic; it simply needs more time. Every cow is different, and some cuts have more stubborn connective tissue. Add a splash more broth if the liquid is low and keep simmering until a fork slides in with zero resistance. If the sauce feels too acidic, it usually means the onions weren’t cooked long enough or the tomato paste wasn’t toasted; a tiny pinch of salt or a little extra butter can help mellow it out.
For polenta that feels grainy, it likely needs more hydration. Add a quarter cup of warm water and keep cooking for another 10 minutes. If your ragout is still too thin after the reduction phase, try mashing a few of the cannellini beans directly into the sauce. The released starch will act as an instant thickener without changing the flavor profile of the dish.
Make-Ahead Strategies and Storage Logistics
This ragout is a prime candidate for make-ahead meals because the flavors actually improve after a night in the fridge. As the dish cools, the spices and aromatics have more time to penetrate the meat. You can store the ragout in an airtight container for up to four days. It also freezes beautifully for up to three months; just thaw it in the fridge overnight before reheating on the stove.
Polenta, however, is best served fresh. When it cools, it firms up into a solid block. If you do have leftover polenta, you can reheat it by adding a splash of milk or broth and whisking it over low heat until it regains its creaminess. Alternatively, you can slice the cold, firm polenta into squares and pan-fry them in a little olive oil for a crispy treat the next day.
Optimal Pairings for a Rich Beef Braise
Because this dish is so rich and savory, you need something bright and acidic to cut through the fat. A simple arugula salad tossed with a sharp lemon vinaigrette is the perfect companion. The peppery bite of the greens and the hit of citrus refresh your palate between bites of the heavy beef and buttery polenta.
If you prefer cooked vegetables, try roasted Brussels sprouts with a drizzle of balsamic glaze. The charred, slightly bitter edges of the sprouts provide a great counterpoint to the sweetness of the reduced tomato sauce. Avoid serving other heavy, starchy sides like mashed potatoes, as the polenta already provides all the comfort you need.
Expert Tips for Professional Presentation
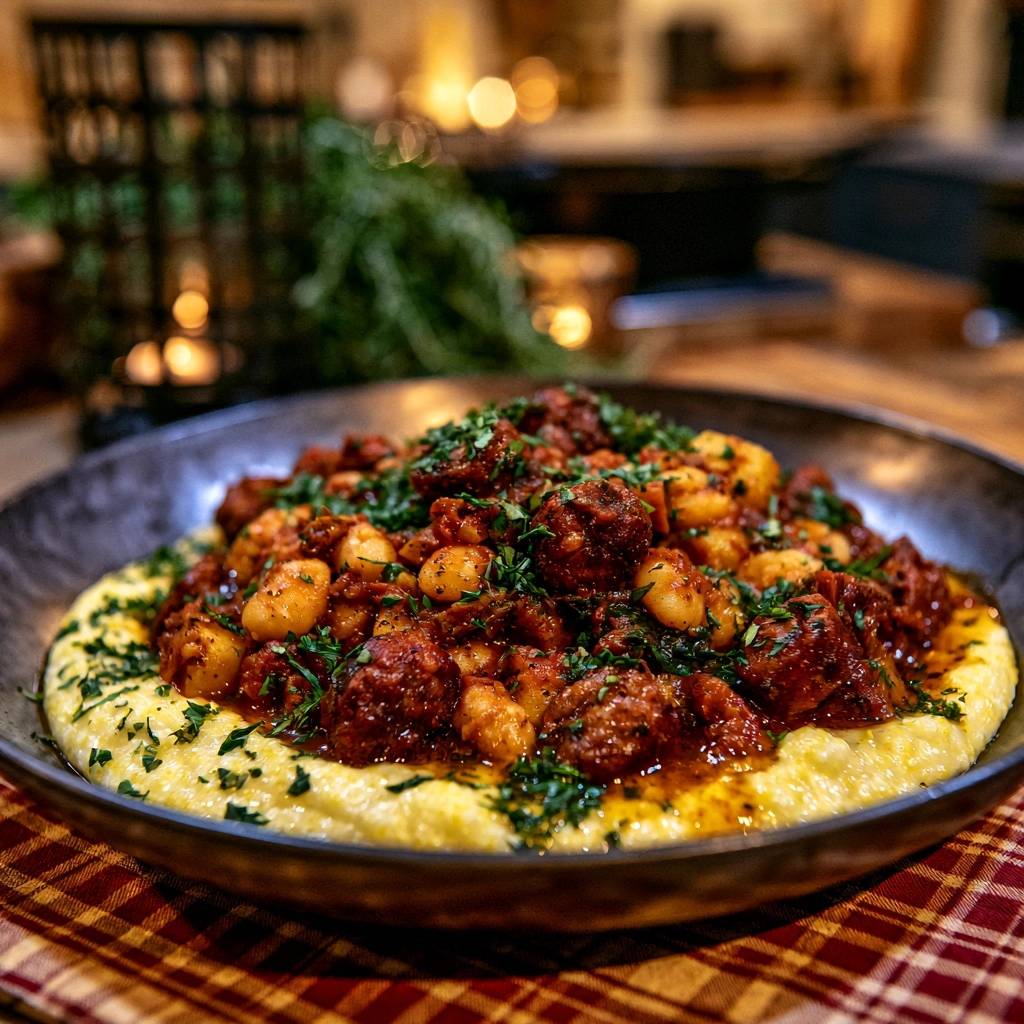
To make this look like a dish from a high-end bistro, use shallow, wide bowls rather than deep soup bowls. Start with a large scoop of polenta in the center and use the back of your spoon to create a slight well. Ladle the ragout directly into that well, letting just a little bit of the sauce drip down the sides of the polenta mound.
Don’t be shy with the fresh parsley. The vibrant green color provides a stunning visual contrast against the deep reds of the beef and the bright yellow of the cornmeal. For a final touch of elegance, use a microplane to grate a fresh dusting of parmesan over the top right before serving. It looks like a light dusting of snow and adds one last hit of salty goodness.
How should I store leftovers?
Store the beef ragout and the polenta in separate airtight containers in the refrigerator. The ragout will stay fresh for up to 4 days, while the polenta is best consumed within 2 to 3 days. When reheating the ragout, you may need to add a splash of water or broth to loosen the sauce, as the gelatin will cause it to set into a jelly-like consistency when cold.
Why is my beef still tough after the recommended cooking time?
Tough beef is almost always a result of undercooking or cooking at too high a temperature. Beef chuck contains a lot of collagen that only breaks down with sustained, gentle heat. If it’s still chewy, simply add a little more liquid to the pot, cover it, and continue simmering on low for another 20 to 30 minutes. It will eventually give in and become tender.
Can I use a different type of bean?
Yes, you can substitute cannellini beans with other creamy white beans like Great Northern or Navy beans. They have a similar texture and will provide the same thickening power. I would avoid using darker beans like black beans or kidney beans, as their flavor profiles are a bit too earthy and their skins are tougher, which can distract from the silky texture of the ragout.
What can I use if I don’t have cornmeal?
If you can’t find cornmeal or polenta, you can serve this ragout over creamy mashed potatoes or even a wide ribbon pasta like pappardelle. However, the cornmeal provides a unique nutty flavor and a specific texture that defines this dish. If using pasta, ensure you undercook the noodles slightly so they can finish cooking in the sauce for the last minute.
How do I fix lumpy polenta?
If lumps form while you are adding the cornmeal, the best fix is a vigorous whisking immediately. If they persist, you can use an immersion blender for a few seconds to smooth out the mixture. To prevent this in the future, ensure the liquid is at a boil when you start and pour the cornmeal in a very thin, slow stream while whisking constantly.
Can I make this in a slow cooker?
You can, but you must still sear the beef and toast the tomato paste in a pan first to develop the flavor. Transfer everything except the beans and polenta to the slow cooker and cook on low for 6 to 8 hours. You will likely need to transfer the sauce back to a pot at the end to reduce it, as slow cookers don’t allow for evaporation, which is key to the “anti-soggy” finish.

Hearty Beef and Bean Ragout over Creamy Polenta
Course: Main CourseCuisine: AmericanDifficulty: easy4
servings20
minutes1
hour120
Minutes620
kcalAmerican
Ingredients
1.5 pounds beef chuck, cut into 1-inch cubes
1 can (15 oz) cannellini beans, drained and rinsed
1.5 cups crushed tomatoes
2 tablespoons tomato paste
1 large onion, finely diced
4 cloves garlic, minced
1 teaspoon dried oregano
1/2 teaspoon red pepper flakes
1 sprig fresh rosemary (optional, for aromatics)
2.5 cups beef broth
1 cup yellow cornmeal (polenta)
3 cups water
1 cup whole milk
1/2 cup grated parmesan cheese
3 tablespoons butter
Fresh parsley, finely chopped for garnish
Salt and black pepper to taste
Olive oil
Directions
- Heat 2 tablespoons of olive oil in a large heavy-bottomed pot or Dutch oven over medium-high heat. Pat the beef cubes dry with paper towels and season with salt. Sear the beef in batches until a deep, dark brown crust forms on all sides. Remove beef and set aside.
- In the same pot, reduce heat to medium and sauté the onion until translucent and starting to brown (about 6 minutes). Add the garlic, tomato paste, oregano, and red pepper flakes. Cook for 3 minutes, stirring constantly, until the paste turns a dark brick red and smells toasted.
- Pour in 1/2 cup of the beef broth to deglaze the pan, scraping up all the browned bits (fond) from the bottom. Add the remaining broth, crushed tomatoes, and the seared beef.
- Bring to a gentle simmer, then turn the heat to low. Cover and cook for 75-90 minutes. Beef chuck requires this time to become tender; a 30-minute simmer would result in tough, rubbery meat.
- While the beef braises, prepare the polenta. Bring 3 cups of water and 1 cup of milk to a boil in a separate pot. Slowly whisk in the cornmeal in a steady stream to prevent lumps. Reduce heat to the lowest setting and cook, stirring every few minutes, for 30 minutes. Stir in the butter and parmesan cheese at the end. Keep warm.
- Once the beef is fork-tender, remove the lid from the ragout. Increase heat slightly and simmer uncovered for 10-15 minutes to reduce the liquid until it is thick and coats the back of a spoon.
- Fold in the cannellini beans and cook for another 5 minutes until the beans are heated through and their starch further binds the sauce.
- Spoon a generous portion of the thick, creamy polenta into shallow bowls. Top with the concentrated beef and bean ragout. Garnish heavily with fresh chopped parsley to match the visual presentation. Serve immediately.
Notes
- Ensure the beef is patted dry before searing to achieve a deep crust. The final reduction step is crucial to prevent the sauce from making the polenta soggy.