
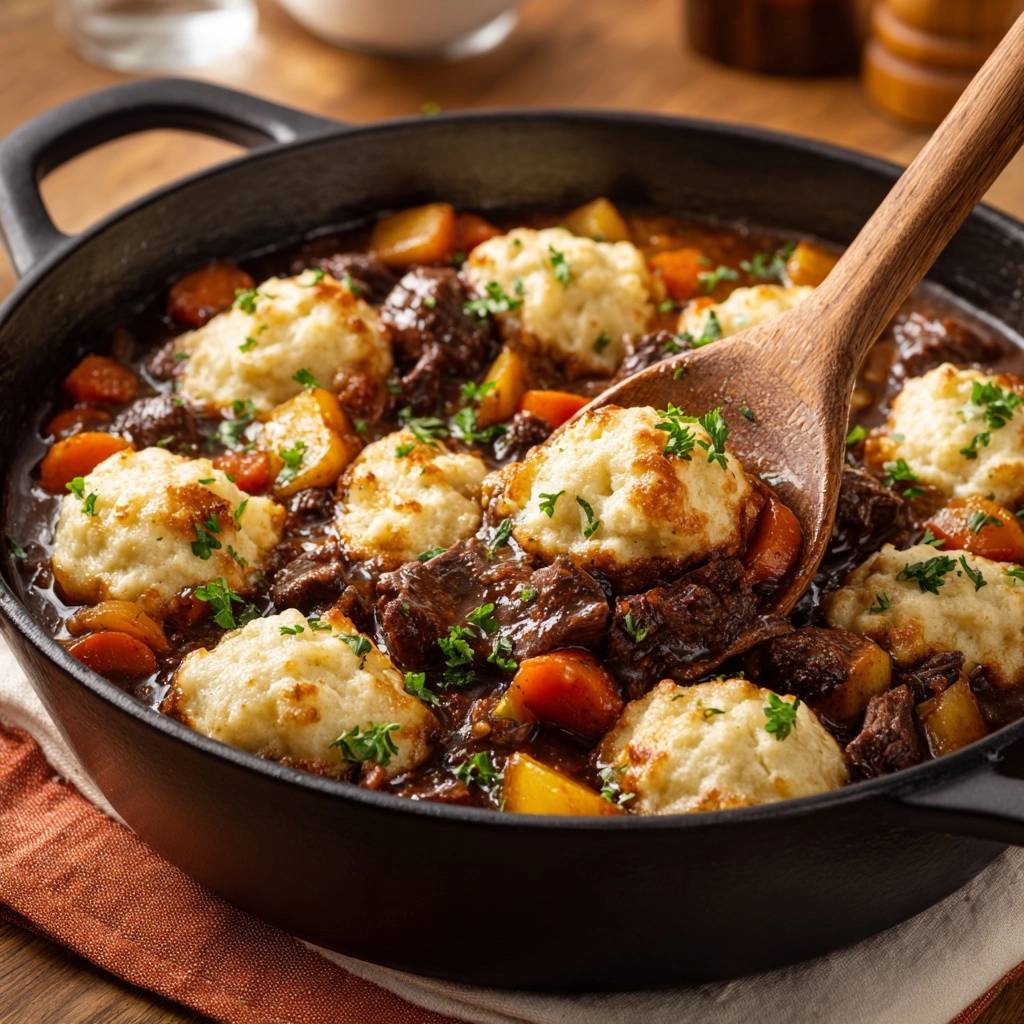
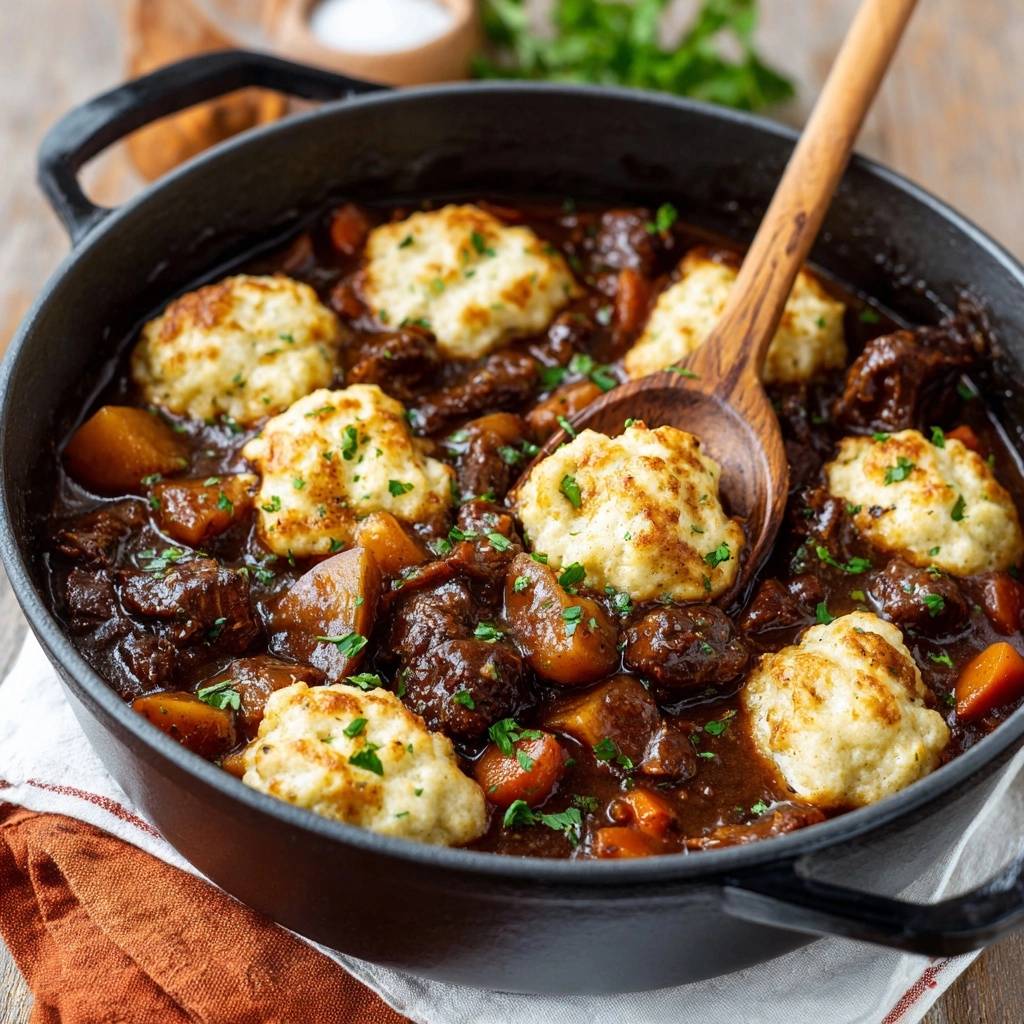
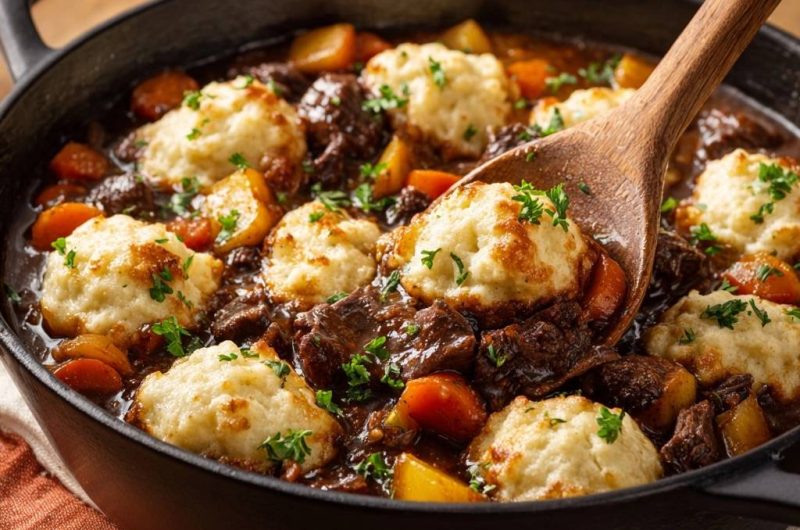
Imagine pulling a heavy Dutch oven from the heat, the kitchen filled with the scent of slow-simmered beef and earthy thyme. You lift the lid to find a rich, mahogany gravy bubbling around tender chunks of beef, but the real stars are the dumplings. Instead of the pale, soggy dough balls often found in traditional stews, these boast a deep golden-brown, toasted exterior that shatters slightly before giving way to a cloud-like center.
Achieving this perfect contrast requires moving beyond the standard “drop and cover” method. We are aiming for a dual-textured experience where the bottom of the dumpling soaks up the savory juices while the top stays crisp. This isn’t just a meal; it’s a masterclass in balancing moisture and dry heat to ensure your dinner is never gummy or one-dimensional.
The secret to this success lies in a two-stage cooking process that most home cooks skip. By steaming the dumplings first to set their structure and then finishing them in a hot oven, you lock in the fluffiness while developing a beautiful crust. It’s a simple technical shift that completely changes the personality of the dish, turning a humble stew into a restaurant-quality centerpiece.
The Science of Maillard and Tenderness
Creating a deep, complex stew starts long before you add the broth. When you sear the beef cubes in a hot pan, you trigger the Maillard reaction. This chemical process between amino acids and reducing sugars creates hundreds of different flavor compounds, giving the meat its savory “browned” taste and darkening the eventual gravy.
Patience is your best friend when it comes to the beef itself. Beef chuck is loaded with collagen, a tough connective tissue that makes the meat feel rubbery if cooked quickly. However, during a steady 2.5-hour simmer, that collagen slowly melts into gelatin. This transformation is what gives the beef a melt-in-your-mouth texture and adds a silky body to the sauce.
If you try to rush this process by turning up the heat, the muscle fibers will contract and squeeze out their moisture, leaving you with dry, stringy meat. A low, gentle simmer is the only way to ensure the fibers relax. You’ll know it’s ready when a fork easily slides through the largest piece of beef without any resistance.
Selecting the Right Cut: Why Chuck Reigns Supreme
While you might be tempted to grab “stew meat” from the grocery store, it’s often a mix of various lean scraps that cook at different rates. Instead, buy a whole beef chuck roast and hand-cut it into uniform cubes. Chuck comes from the shoulder and has the perfect ratio of fat and connective tissue needed for a long braise.
Leaner cuts like sirloin or round will become incredibly dry and tough during a two-hour simmer because they lack the internal fat to stay moist. Look for a piece of chuck with plenty of white marbling throughout. Those little flecks of fat will render down, basting the meat from the inside out as it cooks.
Essential Components for the Stew Base
A great stew needs a sturdy foundation of vegetables that can withstand the long cooking time. Yukon Gold potatoes are the gold standard here because they are waxy enough to hold their shape but creamy enough to feel luxurious. Unlike Russets, which tend to disintegrate and turn the stew grainy, Yukon Golds stay intact and absorb the beefy flavors.
The aromatics—onions, carrots, and garlic—provide the essential sweetness and depth. Tomato paste and Worcestershire sauce act as umami boosters, deepening the savory profile of the beef broth. When these ingredients meld together, they create a sauce that is thick, glossy, and intensely flavorful without needing an excessive amount of flour.
Pantry Staples and Fresh Aromatics
To build the liquid base, you’ll need four cups of high-quality beef broth, a teaspoon of dried thyme, and a single bay leaf. These herbs provide a subtle woodsy note that cuts through the richness of the meat. Don’t forget to scrape the bottom of the pot after adding the broth; this is called deglazing.
Those browned bits stuck to the bottom, known as the “fond,” are concentrated flavor nuggets. Incorporating them back into the liquid ensures that none of the Maillard reaction’s hard work goes to waste. Use a wooden spoon to gently lift them as the liquid begins to simmer.
The Secret to Non-Gummy Golden Crust Dumplings
The biggest complaint with dumplings is that they often turn out “doughy” or wet. This happens because the steam trapped under the lid adds moisture but never allows the surface to dry out. Our two-stage method solves this by using physics: we use steam to trigger the leavening (making them rise) and then use the oven’s dry heat to dehydrate the surface.
During the first ten minutes of steaming on the stovetop, the baking powder reacts with the heat and moisture to create air pockets. This sets the internal structure so the dumplings stay light. Once the lid comes off and the pot goes into the oven, the direct heat browns the tops, creating a biscuit-like crust that provides a fantastic textural contrast to the soft interior.
Cold Butter and the Biscuit Method
To get that flaky, light texture, you must treat the dumpling dough like biscuit dough. Use cold, cubed unsalted butter and rub it into the flour with your fingertips or a pastry cutter. You want to see pea-sized bits of butter remaining in the mix. These bits of fat will melt during cooking, creating tiny steam vents that make the dumplings airy.
Be careful not to let the heat from your hands melt the butter prematurely. If the butter turns oily before it hits the pot, your dumplings will be heavy and dense. Work quickly and keep your ingredients as cold as possible until the very moment they are dropped into the simmering stew.
The Optional Sharp Cheddar Enhancement
Adding a half-cup of shredded sharp cheddar cheese to the dough is a game-changer for the “Golden Crust” effect. The proteins and fats in the cheese undergo caramelization in the oven, leading to a deeper color and a savory, salty crunch. It also adds a beautiful lacy texture to the edges of the dumplings where they touch the gravy.
When adding the cheese, fold it in gently along with the milk. You want to distribute it evenly without overworking the flour. Over-mixing at this stage develops gluten, which is the enemy of a tender dumpling. Stop stirring the moment you no longer see streaks of dry flour.
Step-by-Step: Searing and Simmering the Beef
Start by heating your oil in a large Dutch oven until it’s shimmering. Sear the beef in batches, making sure there is plenty of space between the cubes. If you crowd the pan, the meat will release moisture and steam in its own juices, turning grey instead of developing that crucial brown crust.
Once the meat is browned and removed, sauté your vegetables. When you add the tomato paste, cook it for about two minutes until it turns a dark brick-red color. This “toasting” of the paste removes the raw metallic taste and unlocks a deeper, sweeter flavor. Only then should you return the beef and add your liquids to begin the long simmer.
Executing the Two-Stage Dumpling Technique
After the beef has simmered for two hours and is tender, it’s time for the dumplings. Ensure the stew is at a gentle simmer—not a rolling boil. If the liquid is moving too violently, it can break the dumplings apart before they have a chance to set. Drop rounded tablespoons of dough onto the surface, leaving about an inch of space between them.
Cover the pot tightly and let them steam for 10 minutes. This is the “setting” phase where they puff up. Finally, move the uncovered pot into a 400°F oven for 10 to 15 minutes. Watch for the tops to turn a beautiful toasted brown. This “finishing” phase is what guarantees that signature crunch and prevents any hint of gumminess.
Troubleshooting Common Stew Obstacles
If your gravy feels too thin after the beef is cooked, don’t panic. You can simmer it uncovered for a few minutes to reduce the liquid, or whisk a tablespoon of cornstarch with a little cold water and stir it in. However, the flour coating on the beef and the starch from the potatoes usually provide enough natural thickening for a hearty consistency.
If the beef is still tough after two hours, it simply needs more time. Every cow is different, and some cuts have more stubborn connective tissue. Keep the heat low and check it every 15 minutes. Also, keep an eye on the liquid level; if it drops too low, add a splash of broth or water to keep the meat submerged.
Preventing Tough or Dense Dumplings
The most common mistake is overmixing the dough. When you add the milk, use a fork to stir until the dough just comes together. It should look a bit shaggy and uneven. If you stir until it’s perfectly smooth, you’ve developed too much gluten, and your dumplings will end up like hockey pucks instead of clouds.
Another tip is to make sure your baking powder is fresh. Since this is the only leavening agent, old powder will result in flat, heavy dumplings. You can test it by dropping a pinch into hot water; if it bubbles vigorously, it’s good to go. If not, it’s time for a new tin.
Make-Ahead Strategies and Storage Logistics
Beef stew is famous for tasting even better the next day. As it sits in the fridge, the flavors continue to meld and the starches in the potatoes further thicken the sauce. If you’re planning ahead, cook the stew base a day early, let it cool, and store it in the refrigerator. This also makes it easy to skim off any excess fat that solidifies on the top.
When you’re ready to serve, reheat the stew on the stovetop until it’s simmering, then follow the steps to make and cook the dumplings fresh. While you can store leftover dumplings in the stew, they will lose their crisp tops and become soft. For the best experience, always try to eat the dumplings the day they are baked.
Freezing and Thawing Guidelines
The beef stew base freezes exceptionally well for up to three months. Store it in an airtight container or a heavy-duty freezer bag, leaving some room for expansion. To serve, thaw it overnight in the fridge and reheat it slowly on the stove. Adding a splash of broth can help loosen the gravy if it has thickened too much in the freezer.
I do not recommend freezing the cooked dumplings. The delicate, airy structure collapses when frozen and thawed, resulting in a rubbery texture. Instead, freeze only the stew. When you’re ready for a quick meal, you can whip up a fresh batch of dumpling dough in five minutes while the stew heats up.
Optimal Side Dishes and Serving Suggestions
Since this dish is incredibly rich and buttery, it pairs best with sides that offer a hit of acidity or bitterness. A simple arugula salad tossed with a sharp lemon vinaigrette is the perfect palate cleanser. The peppery greens cut through the heavy gravy and refresh your taste buds between bites of beef.
Roasted balsamic Brussels sprouts or steamed green beans with a squeeze of lime also work beautifully. These bright, crisp-tender vegetables provide a nice visual and textural contrast to the deep browns of the stew. Serve everything family-style directly from the Dutch oven to keep the food piping hot and the presentation rustic.
Expert Troubleshooting and Technical FAQ
Why is my stew meat still chewy after two hours?
Beef chuck goes through a “plateau” phase where the muscle fibers have tightened but the collagen hasn’t yet fully melted into gelatin. If it’s chewy, it simply hasn’t reached the finish line. Ensure your simmer is very low; a hard boil will actually toughen the meat further. Give it another 20-30 minutes and you’ll likely find it suddenly becomes tender.
Can I use a slow cooker for this recipe?
Yes, you can cook the stew base in a slow cooker on low for 7-8 hours. However, you cannot achieve the “Golden Crust” in a crockpot because it lacks the dry, circulating heat of an oven. To finish the dish, transfer the hot stew to a baking dish or oven-safe pot, drop the dumplings on top, and follow the steaming and baking instructions provided in the recipe.
What is the best substitute for Worcestershire sauce?
If you’re out of Worcestershire, soy sauce is the best substitute for that deep umami hit. Use the same amount called for in the recipe. Alternatively, a tablespoon of balsamic vinegar can provide a similar balance of acidity and sweetness, though it won’t be quite as savory as the original.
How do I achieve a thicker gravy without more flour?
A great chef’s trick is to take two or three of the cooked potato cubes and mash them against the side of the pot with a spoon, then stir them back into the liquid. The natural starches from the potatoes act as an instant thickener, giving the gravy a rustic, hearty body without the need for a flour slurry.
Why did my dumplings sink to the bottom?
Dumplings usually sink if the stew isn’t hot enough or if the dough is too dense. The liquid needs to be at a gentle simmer so the heat immediately activates the baking powder, creating the air bubbles that make them float. Also, ensure you aren’t overworking the dough; heavy, over-mixed dough is more likely to dive to the bottom of the pot.
Hearty Beef Stew and Golden Crust Dumplings
Course: Main CourseCuisine: AmericanDifficulty: easy6
servings20
minutes2
hours180
MinutesAmerican
Ingredients
2 lbs beef chuck, cut into 1-inch cubes
3 tablespoons vegetable oil
2 tablespoons all-purpose flour (for coating beef)
2 large carrots, sliced into thick rounds
2 large Yukon Gold potatoes, peeled and cubed
1 large onion, chopped
3 cloves garlic, minced
4 cups beef broth
2 tablespoons tomato paste
1 tablespoon Worcestershire sauce
1 teaspoon dried thyme
1 bay leaf
Salt and black pepper to taste
Fresh parsley, chopped for garnish
For the Dumplings:
1.5 cups all-purpose flour
2 teaspoons baking powder
1/2 teaspoon salt
4 tablespoons cold unsalted butter, cubed
2/3 cup whole milk
1/2 cup shredded sharp cheddar cheese (optional, for extra crust color)
Directions
- Preheat your oven to 400°F (200°C).
- Season the beef cubes with salt and pepper, then toss lightly in 2 tablespoons of flour. Heat oil in a large oven-safe Dutch oven over medium-high heat. Brown the beef in batches until a deep brown crust forms. Remove beef and set aside.
- In the same pot, add the onions, carrots, and potatoes. Cook for 5-7 minutes. Stir in the garlic and tomato paste, cooking for 2 minutes until the paste darkens.
- Return the beef to the pot. Add beef broth, Worcestershire sauce, thyme, and the bay leaf. Bring to a simmer, then cover and reduce heat to low. Simmer for 1.5 to 2 hours until the beef is tender.
- While the stew simmers, prepare the dumpling dough. Whisk the flour, baking powder, and salt. Use a pastry cutter or your fingers to rub the cold butter into the flour until it resembles coarse crumbs.
- Gently stir in the milk (and cheese, if using) with a fork just until a soft dough forms. Do not overwork the dough, or the dumplings will become tough.
- Once the beef is tender, remove the bay leaf and taste the gravy for seasoning. Increase the heat slightly so the stew is at a gentle simmer. Drop rounded tablespoons of dough onto the surface of the stew, leaving space between them.
- Cover the pot with a tight-fitting lid and steam on the stovetop for 10 minutes. This sets the internal structure so they stay fluffy.
- Remove the lid. Transfer the uncovered Dutch oven to the preheated oven. Bake for 10-15 minutes, or until the dumpling tops are golden brown and slightly crisp as shown in the image.
- Garnish with fresh parsley and serve immediately directly from the pot.
Notes
- The secret to the golden crust is the two-stage cooking process: steam covered on the stovetop first, then bake uncovered in a 400°F oven. Adding shredded cheddar to the dough can further enhance the crust color and flavor.


