
Most of us have experienced the disappointment of a one-pot pasta dish that turns into a gummy, overcooked mess. You want a bowl of comfort that feels substantial, where the beef is savory and the noodles actually hold their shape. Hearty Chili Macaroni is the ultimate solution for those busy weeknights when you need a filling meal that doesn’t sacrifice quality for convenience.
The secret to avoiding the dreaded “mushy pasta” syndrome lies in a technique I call the staggered simmer. Instead of boiling the macaroni in a separate pot of water, we cook it directly in the chili base. However, we don’t just toss it in and hope for the best. By controlling the liquid-to-starch ratio and using a specific lid-on steaming method, the pasta stays perfectly al dente.
I’ve found that the real trick to a glossy, restaurant-quality sauce is managing the starch release. When you cook the pasta in the beef broth and tomato mixture, the noodles shed just enough starch to thicken the liquid into a rich glaze. This creates a cohesive dish where the sauce actually clings to the macaroni rather than pooling at the bottom of the bowl.
The Science of Starch and Al Dente Pasta
Cooking pasta directly in a flavorful liquid is a game-changer for flavor, but it requires a bit of chemistry knowledge. In a traditional pot of boiling water, starch is washed away and drained down the sink. In this one-pot method, that starch stays in the pan, acting as a natural emulsifier that binds the fats from the beef with the acidity of the tomatoes.
To get this right, you must start with a vigorous, rolling boil before adding the dry macaroni. This high initial heat sets the outer structure of the pasta. Once the lid goes on and the heat drops to a gentle simmer, the pasta hydrates slowly. This prevents the outside of the noodle from disintegrating while the center is still hard, ensuring a uniform texture throughout the dish.
If you simmer too aggressively without a lid, the liquid evaporates too fast, leaving you with crunchy noodles and a dry pan. Conversely, a tight-fitting lid creates a pressurized steam environment. This allows the macaroni to absorb the beefy flavors of the broth while maintaining that satisfying “bite” that defines a great pasta dish.
Essential Components for Hearty Chili Macaroni
Quality ingredients are the foundation of this dish. I always recommend using 90/10 lean ground beef. While fat equals flavor, too much grease in a one-pot meal will result in an oily sauce that separates. Lean beef provides plenty of protein and savory depth without making the final product feel heavy or slick on the palate.
The choice of beans and tomatoes also matters for the final structural integrity. Dark red kidney beans are sturdier than light kidney beans or pinto beans, meaning they won’t burst during the simmering process. Similarly, crushed tomatoes provide a thick, consistent base that coats the elbows much better than watery diced tomatoes would.
Finally, never swap the beef broth for plain water. The broth provides a savory backbone that seasons the pasta from the inside out as it rehydrates. If you use water, you’ll likely find the dish tastes flat, no matter how much salt you add at the end. A high-quality broth ensures every bite is packed with umami.
Selecting the Right Elbow Macaroni
Not all elbow macaroni is created equal. For the best results, look for a brand that uses 100% durum wheat semolina. These noodles have a higher protein content, which helps them stand up to the acidic environment of a tomato-based chili without turning into mush.
If you can find bronze-cut pasta, grab it. Bronze-cut noodles have a rougher, more porous surface compared to standard Teflon-extruded pasta. Those tiny ridges and imperfections are perfect for trapping the spices and beef crumbles, ensuring you get a bit of everything in every spoonful.
The Spice Profile: Beyond Basic Chili Powder
A great chili mac needs more than just a generic chili powder. We use a trio of cumin, smoked paprika, and chili powder to create layers of flavor. Cumin provides an earthy, nutty base, while smoked paprika adds a hint of backyard-grill aroma without the need for liquid smoke.
The most important step is “blooming” these spices. By stirring them into the browned beef and hot oil for about a minute before adding the liquids, you unlock fat-soluble flavor compounds. You’ll know it’s working when the kitchen suddenly smells like a professional steakhouse. This simple step makes the spices taste toasted and complex rather than raw and gritty.
Step-by-Step: Executing the Staggered Simmer
Success starts with the prep. Have your garlic minced and your onions diced before you turn on the stove. Once the beef hits the pan, things move quickly, and you don’t want to be chopping vegetables while your meat is overcooking.
Browning the Beef and Aromatics
Heat your olive oil until it shimmers, then add the beef and onions. Here is a pro tip: don’t touch the meat for the first three minutes. Let it sit undisturbed so it can develop a deep, dark brown crust. This is the Maillard reaction in action, and it’s where the majority of your savory flavor comes from.
Once you have a good sear, break the meat into large, hearty crumbles rather than a fine grind. You want the texture of the beef to stand up to the macaroni. As the onions cook in the rendered beef fat, they will turn translucent and sweet, providing a subtle aromatic background that balances the heat of the spices.
Deglazing and Building the Liquid Base
After the spices have bloomed, pour in the crushed tomatoes and beef broth. Use your wooden spoon to scrape the bottom of the pan vigorously. Those little brown bits stuck to the bottom are called “fond,” and they are concentrated flavor gold. Incorporating them into the liquid ensures nothing goes to waste.
Bring the mixture to a full, rolling boil. You want to see big bubbles breaking the surface. This high heat ensures that when you drop the cold pasta into the pot, the temperature doesn’t plummet too far, which would lead to uneven cooking and a gummy texture.
The Precision Simmer: Timing and Temperature
Stir in the dry macaroni and immediately turn the heat down to medium-low. Put the lid on tight. This is the most critical part of the staggered simmer. You are no longer just boiling; you are steaming and hydrating. Set a timer for exactly 7 minutes.
When the timer goes off, check the pasta. It should be just slightly firmer than you want to eat it. If there is still a bit of excess liquid, don’t panic. Simply simmer it uncovered for another minute or two. The starches will activate instantly, turning that liquid into a thick, glossy sauce that looks like it was simmered for hours.
Avoiding Common Chili Macaroni Pitfalls
The most common mistake is over-stirring. Once the pasta is in the pot and the lid is on, leave it alone. Every time you lift the lid, you lose the steam necessary to cook the noodles evenly. Furthermore, constant stirring can break the delicate starch bonds, leading to a pasty mouthfeel rather than a smooth sauce.
Another pitfall is the “carry-over cooking” effect. Pasta continues to soften for several minutes after you remove it from the heat. If the macaroni is perfectly soft in the pan, it will be mushy by the time it hits the table. Always aim for a slightly firm texture when you turn off the burner.
Preventing a Gummy or Sticky Texture
If your chili mac feels sticky, you likely used too little liquid or cooked it at too high a temperature. The “gentle simmer” is key. You want just enough movement in the liquid to keep the noodles from sticking to the bottom, but not so much that they are bouncing around and breaking apart.
If you notice the liquid is disappearing too fast before the pasta is tender, add a splash of extra broth or water, a quarter-cup at a time. This will lower the temperature slightly and provide the moisture needed to finish the cooking process without making the dish soupy.
Managing Salt Levels with Broth and Cheese
Be very careful with salt. Most beef broths and canned tomatoes contain a significant amount of sodium. Additionally, the cheddar cheese topping adds its own salty punch. I always wait until the very end, after the pasta is cooked, to taste and add salt.
If you find the base is too salty before you even add the pasta, you can balance it by adding a teaspoon of sugar or a splash of apple cider vinegar. The acidity or sweetness will distract the palate from the saltiness, creating a more balanced flavor profile.
Customizing Your Hearty Chili Macaroni
This recipe is a fantastic canvas for your favorite flavors. If you like heat, add a diced jalapeño with the onions or a pinch of cayenne pepper with the spices. For a bit of crunch and color, stir in some diced green bell peppers during the last three minutes of simmering.
You can also swap the beans based on what is in your pantry. Black beans offer a creamier texture, while pinto beans provide a more traditional “chili” feel. Just make sure to rinse them thoroughly to remove the metallic taste from the canning liquid.
Vegetarian and Protein Alternatives
If you want to lighten things up, ground turkey or ground chicken works beautifully. Since these meats are leaner than beef, you may need to add an extra tablespoon of olive oil to the pan to ensure the spices bloom properly and the sauce remains rich.
For a vegetarian version, use a plant-based crumble or even extra beans and chopped mushrooms. Use vegetable broth instead of beef broth, and add a teaspoon of soy sauce or Worcestershire sauce to mimic the umami depth that the beef usually provides.
The Art of the Melt: Serving and Presentation
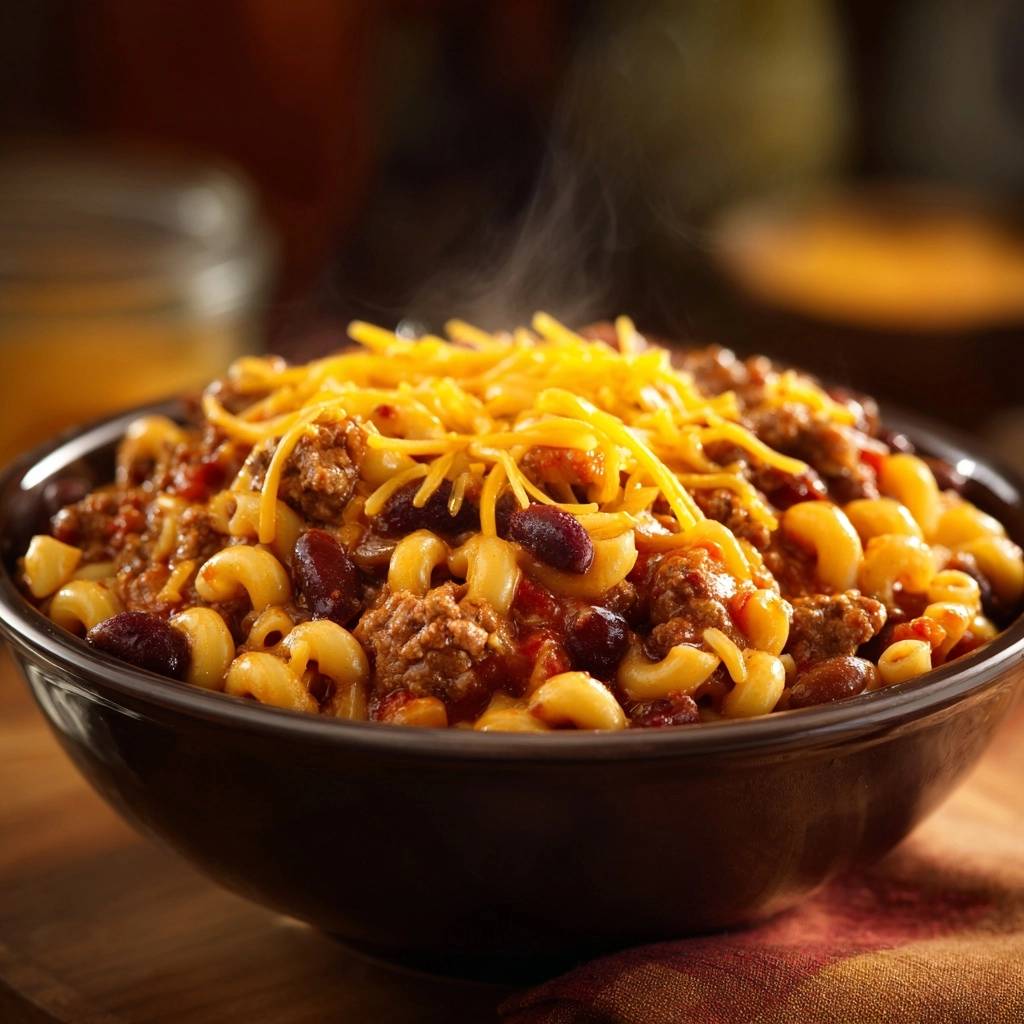
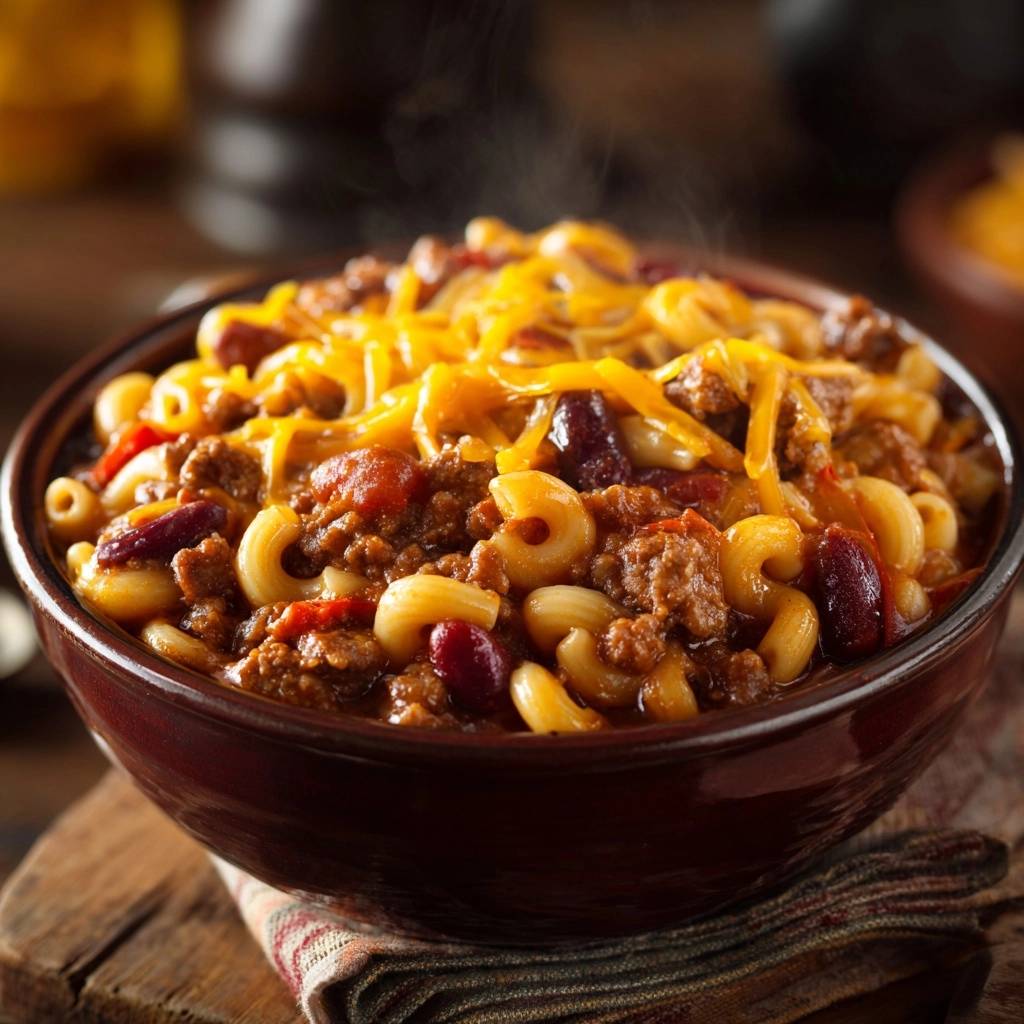
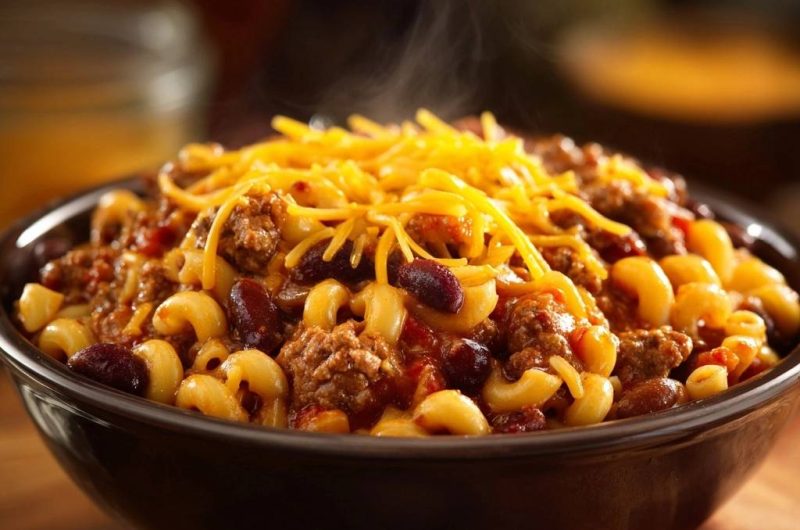
Presentation is where this dish truly shines. Most people make the mistake of stirring the cheese directly into the pot. This often results in the cheese breaking and becoming oily, or worse, disappearing into the sauce entirely. Instead, portion the hot chili mac into individual bowls first.
Immediately top each bowl with a thick layer of freshly grated sharp cheddar. Let it sit for about 30 seconds. The bottom of the cheese layer will melt into a gooey blanket, while the top retains its beautiful shredded shape. This “dual-texture” experience makes the dish feel much more gourmet.
To brighten up the heavy flavors, garnish with sliced green onions or a dollop of Greek yogurt. The cool, creamy yogurt acts as a perfect foil to the smoky, spicy chili. A squeeze of fresh lime juice right before eating can also wake up the flavors and cut through the richness of the beef and cheese.
Make-Ahead Strategies and Storage
Chili mac is a great leftover meal, but it requires a little care. As the dish sits in the fridge, the pasta will continue to absorb the sauce. By the next day, it might look a bit dry. This is completely normal and easily fixed during the reheating process.
Store your leftovers in an airtight container for up to three days. When you are ready to eat, place a portion in a small saucepan or microwave-safe bowl. Add a tablespoon or two of beef broth or water before heating. This “loosens” the sauce and restores that glossy, freshly-cooked texture.
Freezing Instructions for Meal Prep
Freezing fully cooked pasta can be tricky because the noodles often become very soft upon thawing. If you plan to freeze this for meal prep, I recommend undercooking the pasta by about two minutes. This way, when you reheat it later, the macaroni finishes cooking without losing its structure.
Let the dish cool completely before transferring it to freezer-safe bags or containers. It will stay fresh for up to two months. To serve, thaw it in the refrigerator overnight and reheat it on the stovetop with a splash of broth to bring the sauce back to life.
Expert Troubleshooting and Technical Tips
Why is my sauce too thin after the pasta is cooked?
If the sauce looks watery, it usually means the lid wasn’t tight enough or the simmer wasn’t long enough to activate the starches. Simply remove the lid and simmer on medium heat for 2 minutes. The liquid will reduce and thicken into a glaze almost instantly as the steam escapes.
Can I use different pasta shapes like shells or fusilli?
Yes, but keep an eye on the cook time. Shells and fusilli often take 1-2 minutes longer than elbow macaroni. Always check the package directions and aim to stop the one-pot simmer about 2 minutes before the “suggested” time to account for carry-over cooking.
How do I scale this recipe for a large crowd without losing texture?
When doubling the recipe, use a very wide pot like a Dutch oven. The surface area is important for even heat distribution. You may need to add an extra 5 minutes to the browning stage, but the pasta simmering time remains roughly the same since the volume of steam increases proportionally.
What is the best way to fix an over-salted chili base?
If you’ve over-salted, don’t toss it out. Add a peeled, halved potato to the pot while the chili simmers (before adding the pasta). The potato will absorb some of the excess salt. Remove the potato before adding the macaroni. Alternatively, a splash of heavy cream at the end can mellow out the saltiness.
Why did my cheese turn oily instead of melting smoothly?
This usually happens with pre-shredded cheese from a bag. Those products are coated in potato starch or cellulose to prevent clumping, which interferes with melting. For a smooth, silky melt, always buy a block of sharp cheddar and grate it yourself using the large holes on a box grater.
Optimal Side Dish Pairings
Because Chili Macaroni is so rich and savory, it pairs best with sides that offer a bright, crisp contrast. A simple green salad with a lemon or citrus vinaigrette is the perfect palate cleanser. The acidity helps cut through the fat of the beef and the heaviness of the cheese.
If you want something more substantial, a slice of honey-sweetened cornbread is a classic choice. The sweetness of the corn complements the smoky paprika and cumin in the chili. For a vegetable option, try roasted broccoli with a sprinkle of red pepper flakes to keep the “hearty” theme going without adding more carbs.
Hearty Chili Macaroni
Course: Main CourseCuisine: AmericanDifficulty: easy6
servings10
minutes25
minutes35
Minutes485
kcalAmerican
Ingredients
1 pound lean ground beef
1 tablespoon olive oil
1 small yellow onion, diced
2 cloves garlic, minced
1 tablespoon chili powder
1 teaspoon cumin
1/2 teaspoon smoked paprika
1 can (15 oz) dark red kidney beans, drained and rinsed
1 can (14.5 oz) crushed tomatoes
2 cups beef broth
2 cups dry elbow macaroni
1.5 cups shredded sharp cheddar cheese (thickly grated)
Salt and black pepper to taste
Directions
- Heat the olive oil in a large deep skillet or Dutch oven over medium-high heat. Add the ground beef and onion. Cook until the beef is deeply browned and the onions are translucent, breaking the meat into large, hearty crumbles. Drain any excess fat.
- Stir in the garlic, chili powder, cumin, and smoked paprika. Cook for 1 minute until the spices are toasted and fragrant.
- Add the crushed tomatoes, kidney beans, and beef broth. Bring the mixture to a vigorous, rolling boil.
- The Al Dente Secret: Once the liquid is boiling, stir in the dry macaroni. Immediately reduce the heat to medium-low to maintain a gentle simmer.
- Cover the pan with a tight-fitting lid. This traps the steam and allows the pasta to hydrate evenly using the minimum amount of liquid. Simmer for exactly 7 to 8 minutes.
- Remove the lid. The pasta should be slightly firm to the bite (it will continue to soften as it sits). If the sauce looks too thin, simmer uncovered for 1-2 minutes; the natural starches will quickly thicken the liquid into a rich glaze that coats the noodles. Season with salt and pepper to taste.
- To match the visual presentation: Do not stir the cheese into the pot. Portion the chili mac into bowls while steaming hot. Immediately top each bowl with a generous handful of the shredded cheddar cheese. Let it sit for 30 seconds so the bottom layer of cheese begins to melt against the heat of the chili while the top retains its distinct, shredded texture. Serve immediately.
Notes
- The staggered simmer technique prevents mushy pasta. Do not stir the cheese into the pot; apply it directly to individual bowls for the best texture and presentation.


