
There is a specific, soul-satisfying crunch that only comes from a true New York-style bagel. You know the one—the crust resists your teeth just enough before giving way to a dense, chewy center that pulls apart in soft ribbons. Most grocery store bagels are just “bread circles,” fluffy and airy like a dinner roll, lacking that iconic tug and glossy sheen.
If you’ve tried making these at home before and ended up with flat, hockey-puck discs, don’t worry. The secret to that professional deli texture isn’t a special New York water source; it’s all about the temperature-controlled double rise and the honey-boil method. This fail-safe technique ensures your dough develops the structural strength to puff up beautifully in the oven every single time.
I’ve found that the biggest mistake home bakers make is rushing the fermentation or skipping the boil. To get that professional shine, you must use high-protein bread flour and a touch of honey in your boiling water. This creates a rapid gelatinization on the surface of the dough, locking in the shape and creating that signature chewy exterior we all crave. Oh man, the smell of these toasting in your kitchen is better than any candle!
The Anatomy of a Perfect New York Style Bagel
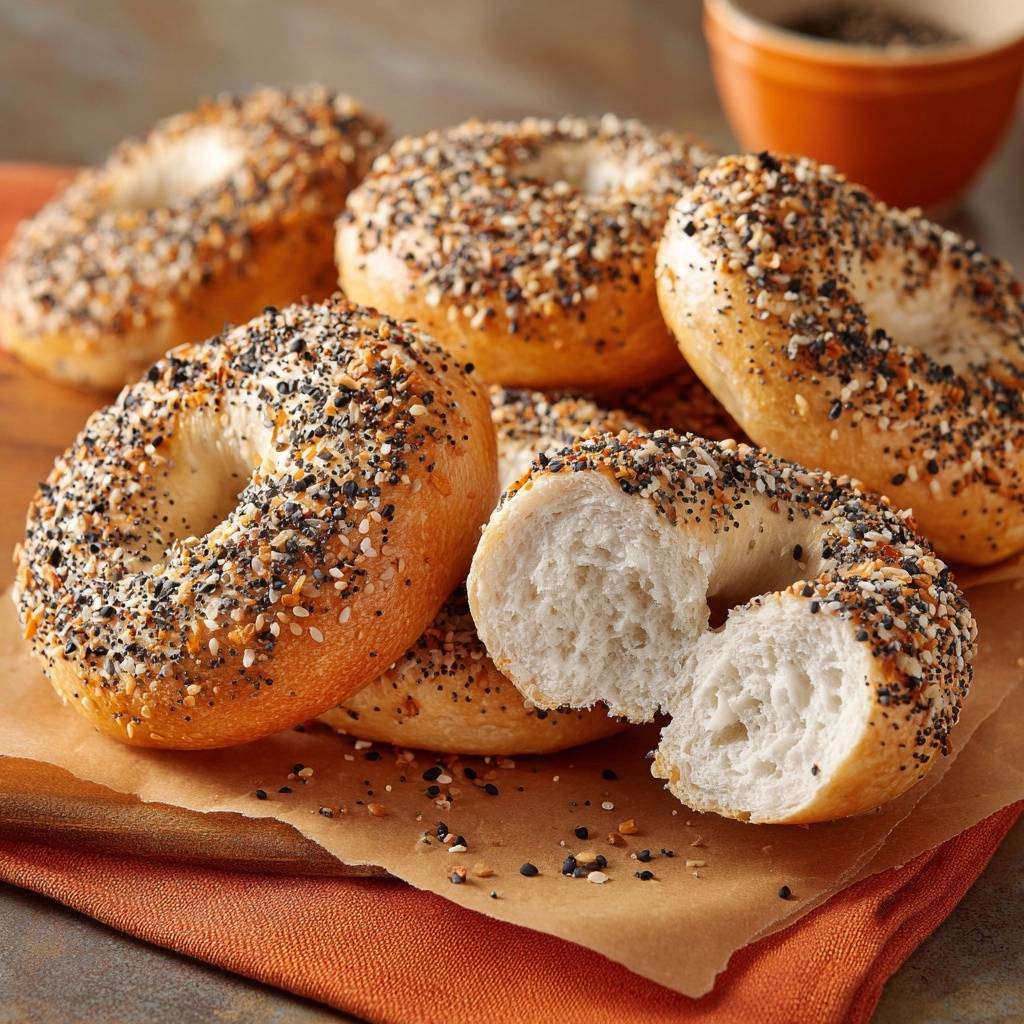
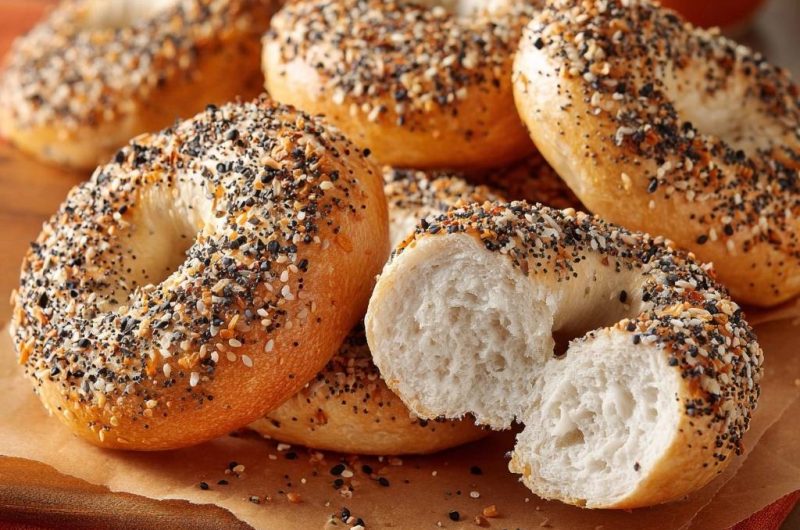
An authentic bagel is defined by its contrast. You want a crust that is deeply golden and slightly crackly, paired with a crumb that is tight and chewy rather than crumbly. This specific ratio of crust-to-crumb is achieved through a low-hydration dough that requires significant kneading to develop a strong gluten network.
The “Everything” flavor profile adds a savory dimension that cuts through the richness of cream cheese. By using a blend of poppy seeds, sesame seeds, dried garlic, dried onion, and coarse salt, you create a sensory explosion in every bite. This recipe focuses on structural integrity, ensuring the bagel holds its shape during the boil and the bake.
Why High-Protein Bread Flour is Non-Negotiable
Gluten is the backbone of a bagel. While All-Purpose flour works for cookies or cakes, it simply doesn’t have the muscle for a bagel. Bread flour typically contains 12-14% protein, which is essential for creating the “tug” and elasticity that defines this bread.

When you use high-protein flour, the dough becomes much firmer and more resilient. This strength allows the bagel to withstand the boiling process without collapsing. If you substitute with lower-protein flour, your bagels will likely turn out soft and bread-like rather than dense and chewy.
The Role of Honey in the Dough and Water
Honey serves two vital purposes in this recipe. Inside the dough, it provides a gentle floral sweetness and acts as a high-energy food source for the yeast. This helps the yeast produce carbon dioxide more efficiently, leading to a better rise during the fermentation stages.
In the boiling water, honey is the secret to that gorgeous mahogany color. It aids in the Maillard reaction, which is the chemical process that browns the crust. It also adds a distinct, professional sheen to the exterior that you just can’t get with plain water.
Essential Components for Homemade Everything Bagels
Success starts with your ingredients, specifically your yeast. Always perform a freshness test by mixing your yeast with warm water and honey; if it doesn’t become foamy and aromatic within five minutes, your yeast is dead and your bagels won’t rise. Use filtered water heated to exactly 105-110°F, as anything hotter will kill the yeast, and anything cooler will slow the rise to a crawl.
The “Everything” seasoning is a delicate balance of textures and flavors. The dried garlic and onion provide a toasted, savory punch, while the poppy and sesame seeds offer a nutty crunch. Coarse salt is the final touch that makes the other flavors pop. Make sure your dried garlic isn’t too powdery, or it might burn in the high heat of the oven.
Don’t forget the importance of the egg wash. While some recipes suggest a simple water bath, a beaten egg mixed with a tablespoon of water acts like a high-strength glue. This ensures your heavy toppings stay on the bagel instead of ending up at the bottom of your toaster. It also contributes to a richer, more golden finish on the crust.
The Science of the Double-Rise and Gelatinization
The 90-minute bulk ferment is where the flavor develops. During this time, the yeast consumes sugars and releases gases, stretching the gluten and creating a complex taste. The subsequent 20-minute rest after shaping is equally important because it allows the gluten to relax, preventing the bagels from snapping back or becoming too tough to handle.
Gelatinization is the “magic” step that happens in the boiling pot. When the raw dough hits the hot, honey-infused water, the starches on the surface swell and set. This creates a barrier that prevents the bagel from expanding too much in the oven, resulting in the dense, chewy texture that separates a bagel from a standard roll.
Step-by-Step: Preparing the High-Hydration Dough
Start by mixing your ingredients until a “shaggy mass” forms. This looks like a messy, clumpy ball of flour and water, but don’t worry—it will transform. As you knead for 8-10 minutes with a dough hook, you’ll see the texture shift from lumpy to incredibly smooth and elastic.
You can check your progress with the “windowpane test.” Pull off a small piece of dough and gently stretch it; if it stretches thin enough to see light through it without tearing, the gluten is ready. The dough should feel very firm and substantial, not tacky or sticky to the touch.
Shaping Techniques for Symmetrical Bagel Rings
While some pros use the “roll and loop” method, the “thumb-poke” technique is much more beginner-friendly. Simply roll your dough into a tight, smooth ball, then push your thumb through the center. This creates a clean hole without any weak seams that might split during the boil.
Be sure to stretch the hole until it is about 2 inches wide. It might look too big at first, but the dough will “spring” back inward during the second rise and the baking process. If the hole is too small, it will close up entirely, leaving you with a very thick bun instead of a ring.
The Honey-Boil: Achieving the Iconic Chewy Crust
Boiling is the non-negotiable step for authenticity. Aim for exactly 60 seconds per side. If you boil them for too long, the crust becomes thick and rubbery; if you don’t boil them long enough, they will just taste like regular bread. You’ll notice the bagels puff up slightly and take on a wrinkled appearance in the water.
Use a wide, slotted spoon to flip them gently. When you remove them, let the excess water drain off for a few seconds before placing them back on the parchment paper. The surface will be tacky, which is the perfect state for the seasoning to adhere.
Maximum Seed Adhesion: The Egg Wash Application
To get that heavy coating of seasoning to stay put, you need a proper binder. Brush the egg wash over the tops and the sides of the boiled bagels. Don’t be shy—make sure every inch of the visible surface is coated so the seeds have plenty of surface area to grab onto.
After sprinkling the everything seasoning, I like to gently press the seeds into the dough with the back of a spoon or clean fingers. This “press-in” technique is a pro secret that prevents the garlic and salt from falling off the moment you slice into the bagel later on.
Baking and Cooling for Internal Crumb Development
Bake your bagels at 425°F to ensure a rapid rise and a deep golden color. You are looking for a rich, dark tan on the crust. If they look pale, they likely won’t have that satisfying crunch. The high heat is necessary to set the exterior quickly while the inside finishes cooking.
The hardest part is waiting. You must let the bagels cool on a wire rack for at least 20 minutes. If you cut into a hot bagel, the steam escapes too quickly, which causes the internal crumb to collapse and become gummy. Patience here ensures a perfect, airy-yet-chewy interior.
Troubleshooting Common Bagel Baking Obstacles
If your bagels deflate after boiling, they were likely over-proofed. This means the yeast produced too much gas and the gluten structure couldn’t hold it. Next time, shorten your rise time or move the dough to a slightly cooler spot. If the bottoms are burnt but the tops are pale, try moving your oven rack to a higher position or using a double layer of parchment paper.
Another common issue is seeds falling off. This usually happens if the bagels dry out too much between the boil and the seasoning step. Work in small batches, seasoning each bagel immediately after it comes out of the water and gets its egg wash. If your bagels are too tough, you might have over-kneaded the dough or used too much flour during the shaping process.
Correcting Over-Proofed or Under-Proofed Dough
Over-proofed dough will feel very soft, smell slightly sour, and may have large, visible bubbles on the surface. If this happens, punch it down firmly and reshape it, but keep in mind the second rise will need to be much shorter. Under-proofed dough will be very resistant to stretching and will feel cold and heavy; simply give it more time in a warm, draft-free area.
Flavor Variations and Custom Seasoning Blends
Once you master the base dough, the possibilities are endless. You can swap the everything seasoning for toasted sesame seeds or poppy seeds. For a savory twist, try pressing thin slices of jalapeño and a sprinkle of sharp cheddar cheese onto the egg-washed surface before baking.
If you prefer something sweet, you can add cinnamon and raisins directly into the dough during the final minutes of kneading. Just remember to keep your additions balanced so they don’t weigh down the dough. Always ensure your cheese choices are permissible and avoid any non-compliant additives.
Optimal Storage and Freezing Procedures
Fresh bagels are best on day one, but you can keep them in a paper bag for up to 48 hours. Avoid plastic bags for room-temperature storage, as they trap moisture and turn the crispy crust soft and chewy. If you aren’t going to eat them within two days, freezing is your best friend.
Slice the bagels before freezing so you can pop them directly into the toaster. Wrap them tightly in plastic wrap and then place them in a freezer bag. To revive them, toast them on a high setting; the heat will crisp the outside and soften the inside, making them taste almost as good as the day they were baked.
Expert Tips for Professional Results
For the most consistent results, I highly recommend weighing your ingredients in grams using a digital scale. Flour is notoriously difficult to measure accurately with cups, and even a small extra amount can make your dough too dry. A scale ensures your bagels are the same size and texture every single time.
If you want an even better crust, you can place a shallow pan of water on the bottom rack of your oven while it preheats. The steam created during the first few minutes of baking helps the bagels expand fully before the crust sets. Also, using a baking stone or a heavy-duty baking sheet will help distribute heat evenly to the bottom of the bagels.
Frequently Asked Questions
Can I use active dry yeast instead of instant yeast?
Yes, you can! This recipe specifically calls for active dry yeast. The key is to “bloom” it in warm water with honey first. If you decide to use instant yeast, you can mix it directly into the dry ingredients, but you still need to ensure your water is warm to activate the fermentation process properly.
Why are my bagels flat and dense?
Flat bagels usually result from under-proofing or dead yeast. If the dough doesn’t double in size during the first rise, the bagels won’t have the internal air pockets needed to puff up. Additionally, if your water was too hot (over 120°F), it likely killed the yeast. Always use a thermometer to check your water temperature.
Do I have to use honey in the boiling water?
While you can use plain water, you will miss out on the iconic golden-brown color and the subtle shine. The honey provides the sugars necessary for the Maillard reaction on the crust. If you don’t have honey, a tablespoon of barley malt syrup or even brown sugar can work as a substitute to help with the browning.
Can I make the dough the night before?
Absolutely. In fact, a cold fermentation in the refrigerator overnight often improves the flavor. After the initial kneading, place the dough in an oiled bowl, cover it tightly, and refrigerate. The next morning, let it sit at room temperature for about 30 minutes before shaping and proceeding with the second rise and boil.
How do I know when the bagels are done baking?
Look for a deep, uniform golden-brown color across the entire top and sides. You can also tap the bottom of a bagel; it should sound hollow. If the bagels feel light for their size and have a firm, crusty exterior, they are ready to come out. Don’t be afraid of a little dark color—that’s where the flavor lives!
Homemade Everything Bagels
Course: BreadCuisine: AmericanDifficulty: easy8
bagels20
minutes25
minutes135
Minutes280
kcalAmerican
Ingredients
4 cups bread flour (high protein is essential for the chew)
1.5 cups warm water (105 to 110 degrees F)
2 tablespoons honey (divided)
1 packet active dry yeast (2.25 teaspoons)
2 teaspoons salt
1 whole egg beaten with 1 tablespoon water (egg wash for maximum seed adhesion)
4 tablespoons everything bagel seasoning (poppy seeds, sesame seeds, dried garlic, dried onion, coarse salt)
Directions
- In a large bowl or the bowl of a stand mixer, combine warm water, 1 tablespoon of honey, and yeast. Let it sit for 5 minutes until foamy. This ensures your yeast is active.
- Add the bread flour and salt. Mix until a shaggy dough forms. Knead with a dough hook on medium-low speed for 8-10 minutes (or 12 minutes by hand). The dough must be very firm and smooth, not sticky.
- Place dough in a lightly oiled bowl, cover with a damp cloth, and let rise in a warm spot for 60 to 90 minutes until doubled in size.
- Punch the dough down to release large air bubbles. Divide into 8 equal pieces (approx. 110g each). Roll each into a tight, smooth ball.
- Use your thumb to poke a hole through the center of each ball and gently stretch the ring until the hole is about 2 inches wide. Place on a parchment-lined baking sheet.
- Cover the shaped bagels and let them rest for 20 minutes. This second rise allows the gluten to relax, ensuring the bagels puff up rather than remaining dense.
- Preheat your oven to 425°F (220°C). Bring a large, wide pot of water to a boil and stir in the remaining 1 tablespoon of honey.
- Boil bagels in batches for 1 minute per side. Use a slotted spoon to remove them, draining well. The boiling process gelatinizes the starch on the exterior, creating the signature chewy crust shown in the image.
- Place boiled bagels back on the parchment. Brush the tops and sides thoroughly with the egg wash. Generously coat with everything bagel seasoning, pressing slightly so the seeds stick.
- Bake for 20 to 25 minutes until the bagels are a deep golden brown. Transfer to a wire rack and cool for at least 20 minutes before slicing to allow the internal crumb to set.
Notes
- High protein bread flour is essential for the signature chew. Ensure the water is between 105-110°F to properly activate the yeast without killing it. Let bagels cool for 20 minutes before slicing to set the crumb.


