
Forget everything you’ve been told about wrapping potatoes in foil. If you’re tired of that rubbery, steamed skin and a dense, gummy interior, you’re in the right place. We’re ditching the foil to create a potato that actually shatters when you bite into it, revealing a center as light as a summer cloud. It’s the ultimate technical fix for a common kitchen mistake.
Combining the earthy comfort of a baked potato with the zesty, bold punch of a taco creates a meal that feels both nostalgic and exciting. This isn’t just a quick dinner; it’s a “Skyscraper” meal where we build layers of texture and flavor on a foundation of culinary science. You’ll never go back to basic spuds once you see how a few small tweaks change the entire experience.
The secret to this transformation lies in the salt-rub technique. By coating the skin in coarse sea salt and olive oil before hitting a high-heat oven, we’re essentially dehydrating the surface while the inside steams in its own natural jacket. This ensures the skin stays crispy even after you pile on the heavy taco toppings. Trust me, that first crunch is absolutely life-changing!
The Science of the Perfect Russet Potato
When it comes to stuffing a potato to the brim, the variety you choose makes or breaks the dish. You need a Russet potato, period. These are high-starch potatoes, specifically high in amylose, which is the starch molecule that allows the cells to separate easily when cooked. This is what gives you that sought-after “fluffy” texture that absorbs butter and taco juices like a sponge.
In contrast, waxy potatoes like Yukon Gold or Red Bliss are high in amylopectin. This starch keeps the cells glued together, which is great for potato salad but disastrous for a stuffed baker. If you try this with a waxy potato, you’ll end up with a dense, soapy interior that feels heavy on the tongue. The Russet’s thick, brown skin also acts as a sturdy vessel, holding up to the weight of the beef and guacamole without collapsing.
Think of the Russet as a blank, airy canvas. Because it has a lower moisture content than other varieties, it has more “room” to soak up the flavors of your taco seasoning. When you fluff the inside with a fork, you’re creating millions of tiny pockets. Those pockets are exactly where the melted cheese and savory meat will hide, ensuring every single bite is perfectly seasoned.
Essential Components for Loaded Taco Stuffed Baked Potatoes
Quality starts with the prep work, and for this recipe, that means starting with a bone-dry potato. If your potatoes are even slightly damp when they go into the oven, they’ll steam rather than crisp. I always recommend scrubbing them well and then drying them with a lint-free kitchen towel until the skin feels matte. This allows the oil to grip the surface properly.
The coarse sea salt isn’t just for flavor; it’s a functional ingredient. The large grains draw out any remaining surface moisture through osmosis, which is the key to that “shatter-crisp” finish. For the meat, I prefer a lean ground beef, around 90/10. Since the potato is already rich and we’re adding sour cream and cheese, a leaner beef ensures the dish doesn’t become a greasy mess that softens the potato skin from the inside out.
Don’t overlook the water in the beef mixture, either. It might seem counterintuitive to add liquid to the meat, but it’s essential for blooming the spices. As the water simmers away, it carries the chili powder and cumin deep into the meat fibers. You’re left with a thick, savory glaze rather than dry, sandy crumbles of beef.
Choosing the Right Fat: Olive Oil vs. Butter
While butter is delicious, it’s the enemy of a crispy potato skin in the oven. Butter contains about 15-20% water and milk solids that burn at high temperatures. If you rub your potato with butter before baking at 425°F, the water will create steam and the solids will scorch, leaving you with a soft, bitter skin. Olive oil, however, is pure fat with a higher smoke point, allowing it to fry the skin against the hot air for a golden, crackling finish.
The Spice Profile: Customizing Your Taco Seasoning
You can use a packet, but making your own gives you total control over the heat. I like a ratio of two parts chili powder to one part cumin and garlic powder. The cumin provides that smoky, earthy “taco” scent, while the garlic powder adds a savory backbone. When these spices hit the hot pan with the beef, they “bloom,” releasing oils that make the flavor much more vibrant than if they were just sprinkled on top at the end.
Step-by-Step: Achieving the Anti-Soggy Potato Skin
The “No-Foil” rule is the most important part of this entire process. When you wrap a potato in foil, you are essentially trapping all the escaping steam against the skin. This turns the skin into a wet, leathery wrapper. By placing the potatoes directly on the oven rack, you allow 360-degree air circulation. This constant flow of dry, 425°F heat is what creates the structural integrity needed for a loaded potato.
As the potatoes bake, the internal moisture turns to steam. If that steam has nowhere to go, the pressure can cause the potato to burst, or worse, it stays inside and turns the flesh gummy. Poking holes with a fork creates “exhaust vents” that let the excess moisture escape. This results in a dry, fluffy interior that’s ready to be fluffed into a cloud-like texture.
To check for doneness, I use the “Squeeze Test.” Wear an oven mitt and gently squeeze the sides of the potato. It should give easily under the pressure, feeling soft in the middle while the skin feels firm and sandy. If it feels hard or resistant, give it another ten minutes. A perfectly baked potato should feel almost hollow because so much water has evaporated during the roasting process.
Preparing the Potato Vessel
After scrubbing and drying, take your fork and pierce the potato about six times, going about half an inch deep. This isn’t just a safety precaution; it’s the first step in texture management. Once you’ve vented the spud, rub the olive oil in with your hands, ensuring every nook and cranny is coated. Then, sprinkle the salt from high above to get an even, snowy coating across the entire surface.
The High-Heat Roasting Phase
The 425°F temperature is non-negotiable. Lower temperatures, like 350°F, take too long to cook the center, resulting in a thick, leathery skin that’s hard to chew. At 425°F, the exterior fries quickly while the inside steams perfectly. Make sure to place a baking sheet on the rack below the potatoes. This catches any oil drips or salt flakes, keeping your oven clean without interfering with the air hitting the potatoes.
Developing the Savory Taco Meat Filling
To get the best flavor, you want to achieve the Maillard reaction. This is the chemical reaction between amino acids and reducing sugars that gives browned meat its distinctive, savory taste. Don’t just toss the beef in the pan and stir. Let it sit undisturbed for a minute or two until a deep brown crust forms on the bottom. That crust is where all the “beefy” flavor lives.
Use a wooden spoon or a meat masher to break the beef into very fine crumbles. Large chunks of meat tend to roll off the potato, but fine crumbles nestle into the fluffed potato flesh. This creates a cohesive bite where you get meat, potato, and topping all at once. Once the meat is browned, drain the fat thoroughly so it doesn’t make your potato soggy.
Reducing the Liquid for Maximum Flavor
After adding your spices and water, let the mixture simmer. You’ll see the liquid bubbling and slowly disappearing. This is exactly what you want. We are concentrating the flavors. By the time you’re done, there should be no “soup” at the bottom of the pan. Instead, the meat should look glossy and be coated in a thick, concentrated spice paste that stays exactly where you put it.
The Art of the Assembly: Layering for Texture
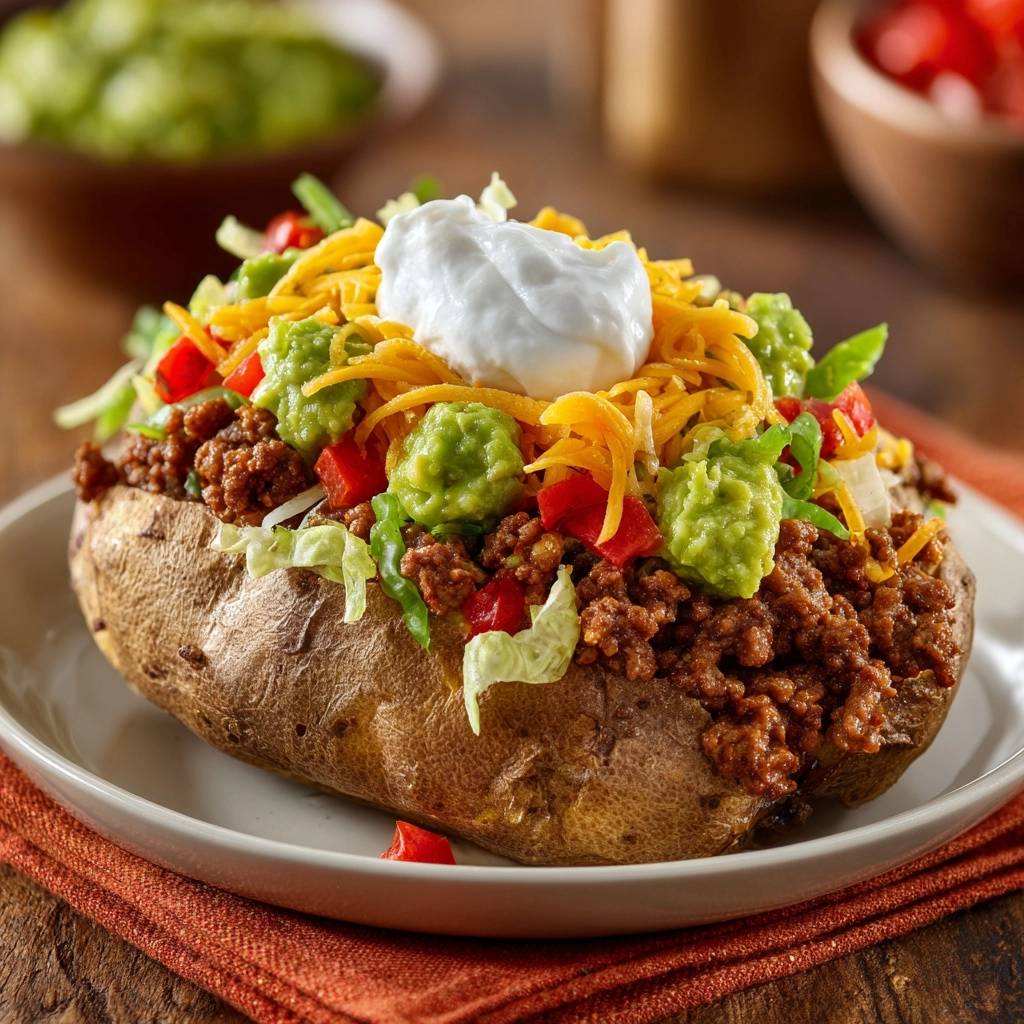
Assembly is where most people go wrong. If you put the hot meat directly on the potato and then the lettuce on top, the lettuce will wilt instantly. Instead, try the “Visual Build.” Start by fluffing the potato and adding a small pinch of salt. Then, lay down a thin bed of shredded iceberg lettuce. This acts as a thermal barrier, keeping the lettuce crisp while protecting the potato from getting too wet from the other toppings.
Next, add the hot taco meat. The heat from the meat will rise and hit the shredded cheddar cheese you’re about to pile on, causing it to melt into the crevices. Follow this with your “heavy” toppings like guacamole and sour cream. By placing the sour cream right in the center, you create a beautiful temperature contrast—hot potato and meat against the cold, tangy cream. It’s a sensory delight!
Troubleshooting Common Baked Potato Failures
If you end up with a gummy interior, it usually means the potato sat too long after coming out of the oven. As a potato cools, the steam inside turns back into water, which the starch then reabsorbs. To prevent this, you must slice the potato open the second it leaves the oven. This lets the last of the steam escape, preserving that light, airy texture you worked so hard for.
If the skin feels too salty, don’t panic. The salt is meant to be intense because it balances the unseasoned interior of the potato. However, you can always brush off the excess salt with a clean towel before slicing. If your toppings are making the dish cold, make sure you pull your sour cream and salsa out of the fridge about 10 minutes before serving so they aren’t ice-cold when they hit the hot beef.
Flavor Variations and Dietary Swaps
This recipe is incredibly flexible. If you want a lighter version, swap the ground beef for ground turkey or chicken. Just be sure to add a teaspoon of olive oil to the pan since poultry is much leaner. For a vegetarian twist, a mix of black beans and corn simmered in the same taco spices works beautifully. The beans provide the protein and “heft” needed to fill the potato vessel.
For those avoiding dairy, a dollop of plain Greek yogurt is a fantastic high-protein substitute for sour cream—it has that same tang and creamy mouthfeel. You can also use a dairy-free shredded cheese; just cover the potato with a bowl for 30 seconds after topping to help the vegan cheese melt, as it usually needs a bit more trapped heat to soften.
Optimal Side Dishes and Pairings
Since this is a heavy, starch-forward meal, you want a side dish that provides acidity and crunch. A simple cilantro-lime slaw made with shredded cabbage, lime juice, and a touch of honey is the perfect partner. The acid in the lime cuts through the richness of the beef and avocado, refreshing your palate between bites.
For a drink, skip the sugary sodas. A zesty lime-infused sparkling water or a cold hibiscus tea provides a clean, sharp contrast to the savory spices. The bubbles in sparkling water help “scrub” the palate, making every bite of the loaded potato taste as vibrant as the first. It’s all about balance!
Expert Tips for Success
First, always slice the potato immediately. I can’t stress this enough! Use a sharp knife to make a long slit, then use your thumbs (protected by a towel) to push the ends toward the center. This “pops” the potato open and releases the steam instantly. If you wait even five minutes, the interior will start to toughen up.
Second, use the “Fork Fluff” technique. Don’t just cut the potato; take a fork and gently rake the interior until it looks like shredded coconut. This increases the surface area, allowing the butter or meat juices to coat every single bit of potato. It turns a boring side dish into a luxurious, melt-in-your-mouth experience.
Third, choose chunky guacamole over smooth. The physical chunks of avocado provide a much better textural contrast against the soft potato and fine meat crumbles. It adds a “bite” that smooth purees lack. Finally, if you have leftovers, store the meat and potatoes separately. Reheat the potato in the oven or air fryer at 400°F for 5 minutes to bring that skin back to life—the microwave will only make it soggy!
How should I store leftovers?
Store the taco meat and the baked potatoes in separate airtight containers in the refrigerator for up to 3 days. To maintain the crispy skin, do not store them together, as the moisture from the meat will soften the potato. When you’re ready to eat, reheat the potato in an oven or air fryer at 350°F until the skin crisps up again. Avoid freezing whole baked potatoes, as the cellular structure breaks down and they become watery and grainy upon thawing.
Why is my potato skin soft instead of crispy?
The most common culprit for soft skin is using aluminum foil. Foil traps steam, which essentially “boils” the skin. Another reason could be a low oven temperature. Ensure your oven is fully preheated to 425°F. If you cook at a lower temperature, the skin won’t dehydrate fast enough to become crisp. Also, make sure you dried the potatoes completely after washing; any surface water will create steam in the oven.
Can I use a different type of potato?
While you can use Yukon Gold potatoes in a pinch, they won’t provide the same fluffy, “stuffed” experience. Yukon Golds have a creamier, waxier texture that stays dense when mashed or fluffed. For this specific “Loaded Taco” style, the Russet is the gold standard because its high starch content creates the necessary volume to hold all those toppings. If you use a smaller potato, you’ll also need to adjust the baking time down to 35-40 minutes.
What can I use if I don’t have taco seasoning?
You can easily make a quick DIY taco blend with common pantry staples. Mix 1 tablespoon of chili powder, 1 teaspoon of ground cumin, 1/2 teaspoon of garlic powder, 1/2 teaspoon of onion powder, and a pinch of crushed red pepper flakes for heat. This gives you a fresh, vibrant flavor without the anti-caking agents or excess sodium often found in pre-packaged mixes. Always taste and adjust the salt at the end since homemade blends don’t have added salt.
How do I prevent the potato from exploding in the oven?
Potatoes explode because steam builds up inside the skin with no way to escape. To prevent this, use a fork to prick the potato 5-6 times all over before putting it in the oven. These small holes act as steam vents. While explosions are relatively rare, venting the potato also ensures the interior stays dry and fluffy rather than wet and heavy, so it’s a crucial step for both safety and texture.
Is there a way to make this faster?
If you’re in a rush, you can “bridge” the cooking by microwaving the potatoes for 5-7 minutes first to soften the centers, then rubbing them with oil and salt and finishing them in a 425°F oven for 15-20 minutes. This will give you a decent crunch in half the time. However, for the absolute best “shatter-crisp” skin, the full hour in the oven is the only way to go because it allows the skin to slowly dehydrate and fry.
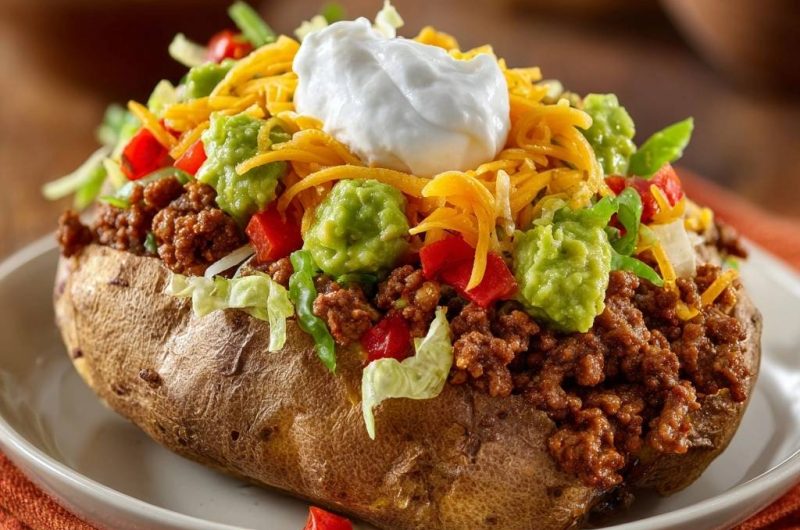
Loaded Taco Stuffed Baked Potatoes
Course: Main CourseCuisine: AmericanDifficulty: easy4
servings15
minutes1
hour75
MinutesAmerican
Ingredients
4 large Russet potatoes, scrubbed and dried thoroughly
2 tablespoons olive oil
1 tablespoon coarse sea salt
1 pound lean ground beef
1 packet taco seasoning (or 2 tbsp chili powder, 1 tsp cumin, 1 tsp garlic powder)
1/2 cup water
1 cup shredded sharp cheddar cheese
1/2 cup chunky guacamole
1/2 cup thick sour cream
1/4 cup diced red bell peppers (or tomatoes)
1 cup shredded iceberg lettuce
2 green onions, sliced (optional garnish)
Directions
- Preheat your oven to 425 degrees F. This high temperature is crucial for the skin texture.
- To solve the soggy skin problem, do not use aluminum foil. Poke each potato several times with a fork to allow steam to escape. Rub the outside of each potato with olive oil and then generously coat with coarse sea salt. The salt draws out surface moisture while the oil crisps the skin against the hot oven air.
- Place potatoes directly on the oven rack for maximum air circulation. Place a baking sheet on the rack below to catch any drips. Bake for 45 to 60 minutes until the skin is crisp and the center yields easily to a squeeze.
- While potatoes bake, brown the ground beef in a skillet over medium-high heat, breaking it into fine crumbles. Drain any excess fat.
- Add taco seasoning and water to the beef. Simmer for 5 to 7 minutes until the liquid has reduced and the meat is coated in a thick, savory glaze.
- Once the potatoes are done, remove them from the oven and slice them open lengthwise immediately. Use a fork to fluff the steaming interior, creating a “well” for the toppings.
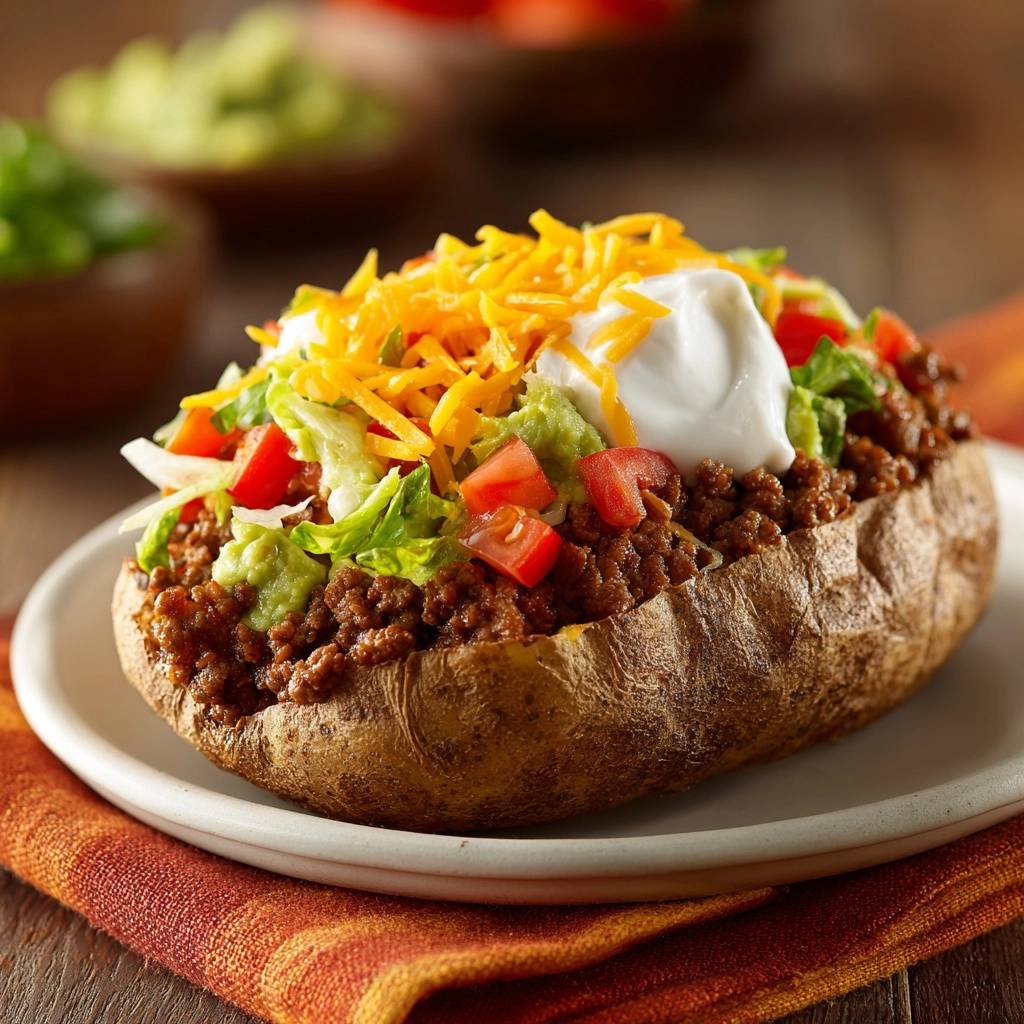
- Layer the ingredients to match the visual build: Start with a base of shredded lettuce, followed by a generous portion of the taco meat. Top with the shredded cheddar cheese, dollops of chunky guacamole, and diced red peppers. Finish with a large, centered dollop of sour cream. Serve immediately while the skin is at peak crunch.
Notes
- Do not use aluminum foil; it traps moisture and results in soggy skin. Placing potatoes directly on the oven rack ensures maximum air circulation for the best texture.


