
Most stuffed cookies are a heartbreak waiting to happen. You spend time carefully wrapping dough around a chocolate center, only to watch it collapse into a greasy, flat puddle or leak all over your baking sheet. It’s frustrating when the “molten” part ends up on the parchment paper instead of inside the cookie.
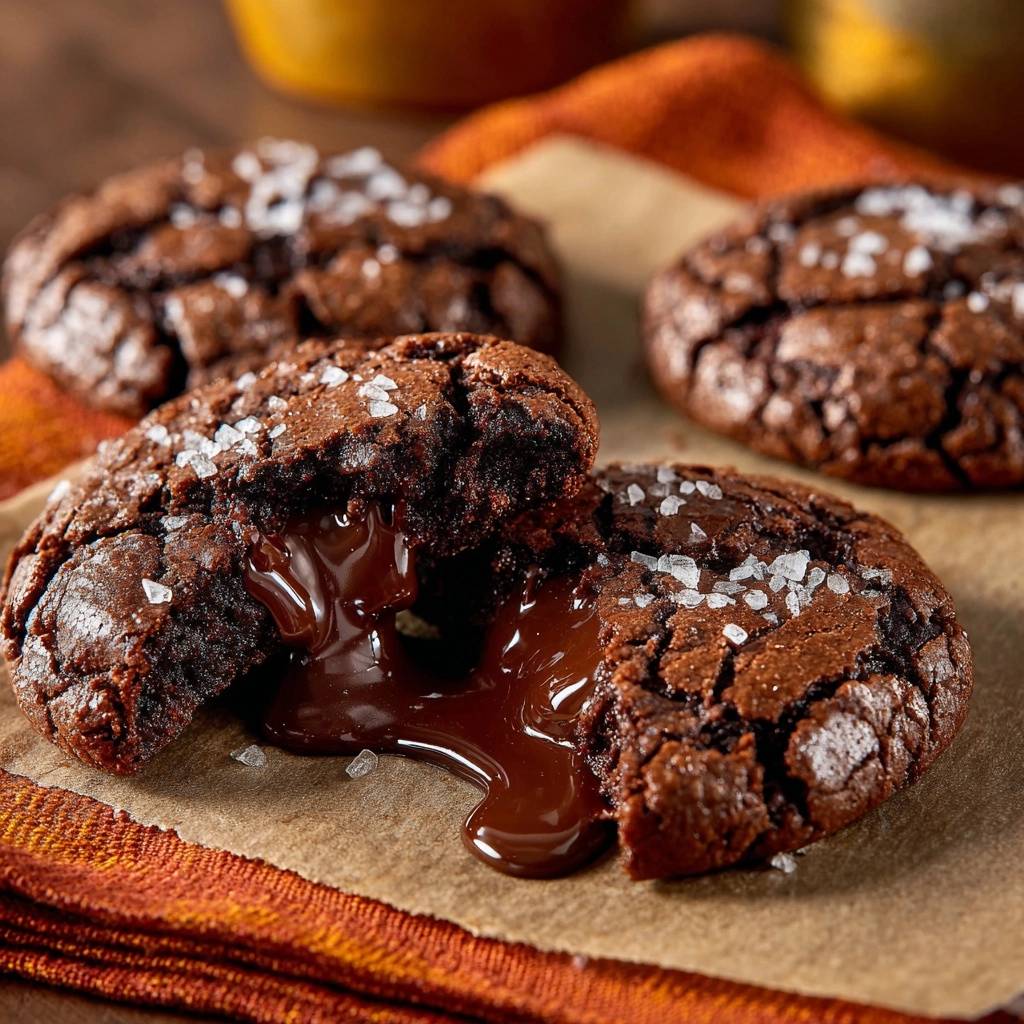
The secret to a perfect Molten Lava Brownie Cookie isn’t just a good recipe; it’s about structural engineering. We’re looking for a cookie that stands tall with a crisp, brownie-like exterior and a center that flows like liquid gold the moment you pull it apart. This method focuses on a sturdy base that can actually hold the weight of the filling.
I’ve found that the real trick lies in the temperature of your fats. By using a double-chill method and a high-heat oven blast, you create a “cauterized” bottom crust that acts as a seal. This ensures the chocolate stays trapped inside until your first bite, giving you that perfect contrast of textures without the mess.
The Anatomy of a Perfect Molten Lava Brownie Cookie
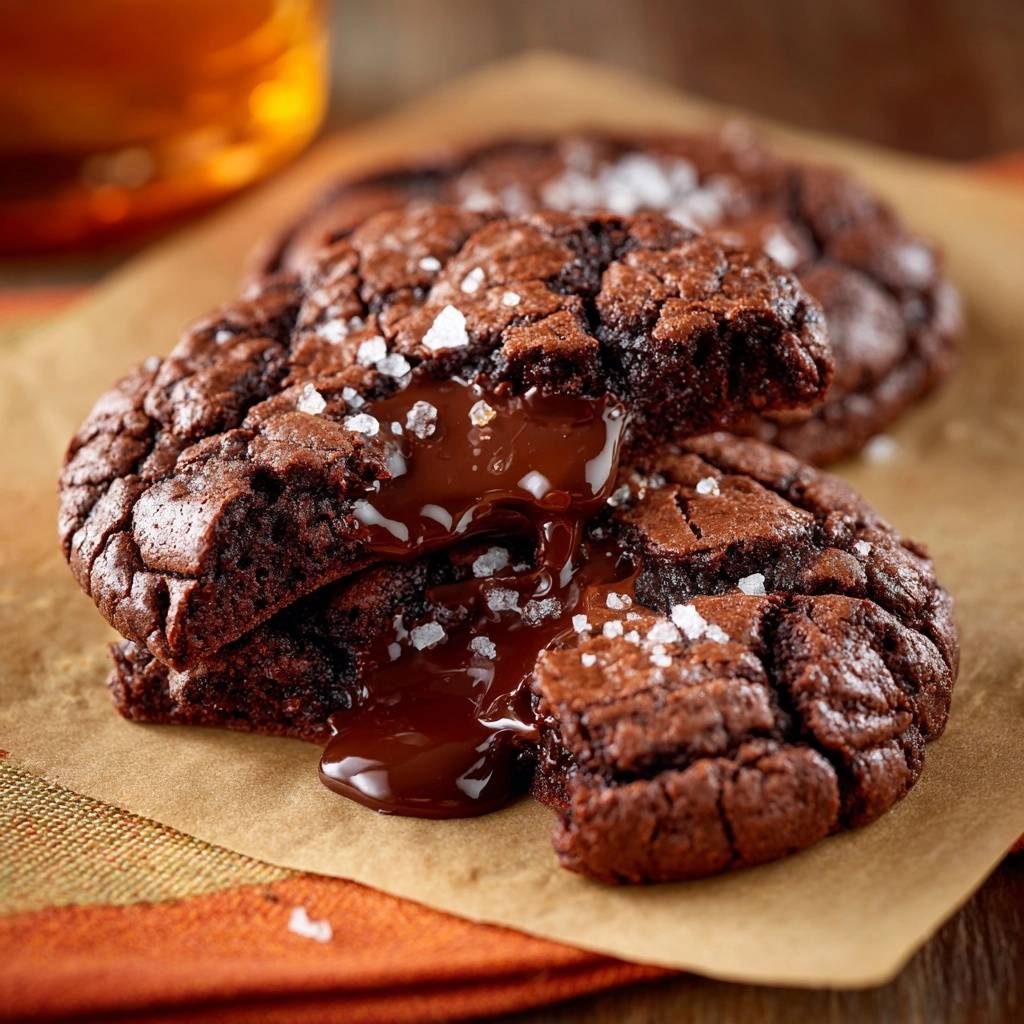
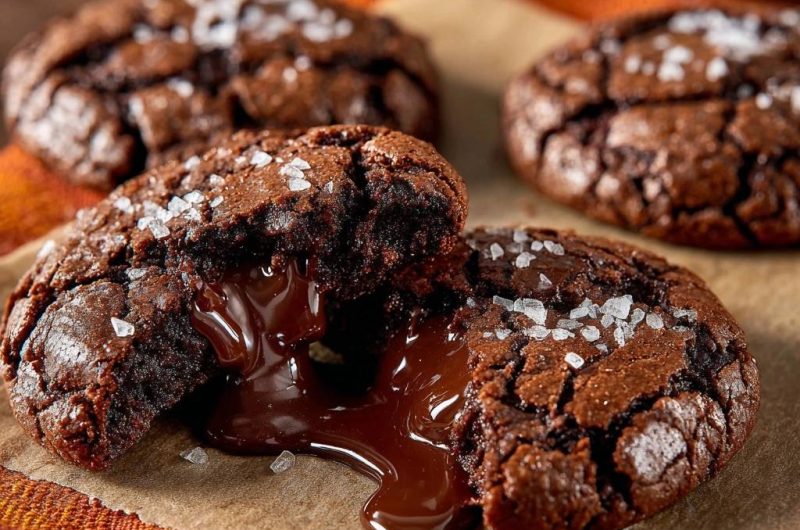
A truly great molten cookie should feel like a hybrid between a fudgy brownie and a classic chewy cookie. The top must have that iconic “crackle” or paper-thin shiny crust that shatters when you touch it. This visual cue tells you the sugars have properly migrated to the surface during the bake.
Underneath that crackle, the edges should be firm and slightly chewy, providing the necessary “walls” to house the center. Unlike a standard soft-baked cookie, this version prioritizes structural strength. If the dough is too soft or cakey, the heavy truffle in the middle will simply sink through the bottom, creating the dreaded soggy base.
The liquid core is the final piece of the puzzle. It shouldn’t be a thick paste; it should be a flowing, glossy pool of dark chocolate. Achieving this requires a dough that sets quickly on the outside while the inside is still reaching its melting point. It’s a delicate balance of timing and heat.
Essential Components for a Fudgy Cookie Base
To get that deep, dark color and intense chocolate flavor, Dutch-process cocoa powder is your best friend. Unlike natural cocoa, Dutch-process is treated with alkali to neutralize its acidity. This results in a smoother flavor and a darker hue that makes these cookies look like they came from a high-end bakery.
The choice of sugar also dictates the final texture. We use a higher ratio of packed brown sugar because the molasses content adds essential moisture and creates a dense, fudgy chew. Granulated sugar is still necessary, however, as it helps create those crisp, crackly edges and assists in the aeration process when you beat the eggs.
Speaking of eggs, make sure yours is at room temperature. A cold egg will cause your melted butter to seize up and clump, ruining the smooth emulsion you need for a glossy dough. When you whisk the egg and sugars together, do it vigorously for at least two minutes. You’re looking for the mixture to turn pale and slightly frothy, which builds the “lift” needed for the brownie top.
Selecting the Right Chocolate Truffle Core
Don’t reach for standard chocolate chips for the center of these cookies. Chips are designed to hold their shape under heat, which is the opposite of what we want here. You need high-quality dark chocolate truffles with a high fat content, as the fats ensure the center stays liquid even as the cookie cools slightly.
Using a pre-made truffle provides a consistent volume and a predictable melting point. If you use a ganache or a chunk of a chocolate bar, the moisture levels might vary, potentially steaming the inside of the dough and causing it to burst. A chilled truffle provides a “delayed melt” that perfectly syncs with the 10-minute bake time.
The Science of the Double-Chill Technique
Thermodynamics plays a huge role in baking success. When you first mix the dough, the melted butter makes it soft and pliable. If you try to bake it immediately, the fats will liquefy instantly in the oven, causing the cookie to spread into a thin pancake before the flour has a chance to set.
The first 30-minute chill in the refrigerator allows the flour to fully hydrate and the butter to firm up. This makes the dough much easier to handle so you can wrap it around the truffle without it sticking to your hands. It’s the first line of defense against a leaky cookie.
The second chill—the 15-minute “flash freeze”—is the most important step. By putting the assembled dough balls into the freezer, you ensure the exterior is ice-cold when it hits the 375°F oven. This temperature shock creates a “shell” effect where the outside bakes and sets while the very center is still just beginning to thaw and melt.
Step-by-Step: Constructing the Leak-Proof Shell
When you’re ready to assemble, take about two tablespoons of the refrigerated dough and flatten it into a thick, even disc in your palm. Place the cold truffle right in the center. Don’t press it down too hard; you want an even layer of dough all the way around the chocolate.
Fold the edges of the dough over the truffle, pinching the seams tightly. This is where most people fail. If there’s even a tiny pinhole or a thin spot in the dough, the melting chocolate will find it and escape. Roll the ball between your palms gently until it’s perfectly smooth and spherical.
Check the bottom of the dough ball specifically. Since the weight of the truffle sits on the bottom, this area needs to be just as thick as the top. If it looks translucent or thin, add a tiny pinch more dough to reinforce it. A sturdy shell is the only way to guarantee that “lava” effect when you break the cookie open.
The High-Heat Blast: Why 375°F is Mandatory
Most cookie recipes call for 350°F, but for a molten center, we need more power. The 375°F temperature serves a specific purpose: it “cauterizes” the dough. The high heat hits the cold dough and immediately begins setting the proteins and starches on the bottom and sides.
This rapid setting creates a structural “cup” that holds the truffle in place. If you bake these at a lower temperature, the dough will soften and spread slowly, allowing the truffle to sink and eventually break through the bottom crust. We want the outside to be done before the inside has a chance to overcook.
You’ll know they’re ready when the tops look dry and crackled, but the cookies still look a bit puffed. Don’t wait for the center to feel firm; if the center is firm, your lava has turned into a solid brownie. Trust the edges—if they feel set to the touch, pull them out immediately.
Troubleshooting Structural Failures and Leaks
If your cookies are coming out flat, the most likely culprit is the butter temperature. If the butter was still hot when you mixed it with the sugar, it can break down the structure of the dough. Always let your melted butter cool until it’s barely warm to the touch before starting.
Another common issue is the “soggy bottom,” which usually happens if you move the cookies too soon. When they first come out of the oven, the bottom is still finishing its “set” thanks to the residual heat of the pan. Let them rest on the hot baking sheet for at least 5 to 8 minutes.
If the truffle didn’t melt, you might be using a chocolate with too low a fat content, or your oven might be running cold. Use an oven thermometer to verify the temperature. Also, ensure you aren’t using “bake stable” chocolate chunks, which are chemically formulated to resist melting.
Identifying the Brownie Crackle Finish
The visual hallmark of this recipe is the shiny, shattered top. This happens when the sugar dissolves into the egg whites to form a thin meringue-like layer. If your cookies look matte or dull, you likely didn’t whisk the egg and sugar mixture long enough at the beginning.
Don’t be alarmed if the cookies look slightly “underdone” in the cracks. That’s exactly what you want. As the cookie cools during the rest period, those cracks will firm up, but the very center will remain gooey. The contrast between the matte cracks and the shiny surface is a sign of a professional-grade bake.
Equipment: Tools for Precision Baking
A heavy-gauge aluminum baking sheet is essential here. Thin, dark-colored pans absorb too much heat too quickly, which can burn the bottom of your cookies before the top crackles. A light-colored, heavy pan provides the even heat distribution necessary for a consistent bake.
Always use parchment paper rather than a silicone mat. While silicone is great for non-stick, it actually insulates the bottom of the cookie, preventing it from getting that crisp, “cauterized” seal we need. Parchment allows the heat to move directly into the dough, helping the bottom set firmly and quickly.
Finally, use a fine-mesh sifter for your dry ingredients. Cocoa powder is notorious for having small, stubborn clumps that don’t break down during mixing. Sifting the flour and cocoa together ensures a perfectly smooth, fudgy dough without any bitter pockets of dry powder.
Storage and Reheating for Maximum Flow
These cookies are best served about 10 minutes after they leave the oven, but you can certainly save them for later. Store them in an airtight container at room temperature for up to three days. Do not refrigerate them, as the cold air will dry out the brownie base and turn the molten center into a solid lump.
To get that lava flow back, you must reheat them. Place a cookie on a microwave-safe plate and heat it for only 10 to 15 seconds. You don’t want to cook the dough further; you just want to wake up the fats in the truffle. Alternatively, pop them in a 350°F oven for 4 minutes.
You can also freeze the unbaked, stuffed dough balls. This is actually a great way to have “emergency” desserts. When baking from frozen, you don’t need to thaw them. Just add 2 minutes to the baking time and keep the oven at 375°F to ensure the outside sets before the frozen core makes the dough soggy.
Expert Tips for Flavor Customization
If you want to take the chocolate flavor even deeper, add a teaspoon of espresso powder to your dry ingredients. You won’t taste the coffee, but it acts as a flavor enhancer that makes the cocoa taste more intense. It’s a classic baker’s trick for any dark chocolate dessert.
The finishing touch is the salt. While the recipe calls for salt in the dough, a generous sprinkle of flaky sea salt on top right after baking is transformative. The large flakes provide a crunch and a burst of salinity that cuts through the richness of the molten dark chocolate.
Avoid adding bulky mix-ins like chopped nuts or large chocolate chips to the dough itself. These can create “weak points” in the cookie’s wall, giving the molten center a path to leak out. If you want extra texture, press a few small nut pieces onto the very top of the cookie before it goes into the oven.
Frequently Asked Questions
Can I use natural cocoa powder instead of Dutch-process?
It isn’t recommended for this specific recipe. Natural cocoa is more acidic and reacts differently with baking soda, which can change the spread and texture of the cookie. Dutch-process cocoa provides the specific pH balance needed for that deep color and fudgy, brownie-like consistency.
Why did my chocolate truffle stay hard in the middle?
This usually happens if the truffle has a low fat content or if the cookie was pulled out of the oven too early. Ensure you are using a “truffle” (which contains cream or fats) rather than a solid block of baking chocolate. Also, make sure your oven is fully preheated to 375°F so the heat penetrates the center quickly.
Can I make the dough 24 hours in advance?
Yes, and it actually improves the flavor! Letting the dough sit in the fridge for 24 hours allows the flour to fully hydrate and the flavors to develop. Just make sure the dough is wrapped tightly in plastic wrap so it doesn’t pick up any fridge odors. You may need to let it sit at room temperature for 10 minutes before rolling so it doesn’t crack.
How do I prevent the cookies from sticking to the parchment?
If the cookies are sticking, they likely haven’t finished setting. The sugars in the brownie dough need a few minutes to cool and harden. If you try to lift them while they are piping hot, the bottom will stay attached to the paper. Give them the full 8-minute rest on the pan, and they should slide right off.
My cookies are flat; what went wrong with the butter temperature?
If your butter was hot or oily when mixed, it destroys the dough’s ability to hold air and structure. The butter should be melted but cooled to room temperature. Additionally, if you skipped the “flash freeze” step, the butter will melt too fast in the oven, causing the cookies to spread thin before the edges can set.
Molten Lava Brownie Cookies
Course: DessertCuisine: AmericanDifficulty: easy12
cookies20
minutes10
minutes75
Minutes285
kcalAmerican
Ingredients
1/2 cup unsalted butter, melted and cooled
1/2 cup brown sugar, packed (for moisture and structure)
1/4 cup granulated sugar
1 large egg, room temperature
1 teaspoon vanilla extract
1 1/4 cups all-purpose flour
1/2 cup unsweetened Dutch-process cocoa powder
1/2 teaspoon baking soda
1/2 teaspoon salt
12 high-quality dark chocolate truffles (chilled)
Flaky sea salt for topping
Directions
- In a large bowl, whisk the melted butter, brown sugar, and granulated sugar until smooth. Add the egg and vanilla, beating vigorously for 2 minutes until the mixture is pale and slightly aerated.
- Sift in the flour, cocoa powder, baking soda, and salt. Fold gently with a spatula until a thick, fudgy dough forms. Do not overmix.
- To solve the soggy bottom and leaking issue, you must chill the dough for at least 30 minutes before assembly. This firms up the fats to prevent excessive spreading.
- Scoop two tablespoons of chilled dough and flatten it into a thick disc. Place a cold chocolate truffle in the center and wrap the dough around it. Roll it between your palms to ensure there are no cracks or thin spots where the filling could escape.
- Place the stuffed dough balls on a parchment-lined baking sheet and freeze them for 15 minutes. This “flash freeze” is the key to a sturdy base that won’t collapse under the weight of the molten center.
- Preheat your oven to 375°F (190°C). The higher temperature is crucial to set the outer crust and bottom immediately before the center can seep through.
- Bake for 9 to 11 minutes. The tops should show the characteristic brownie “crackle” but the edges should feel firm to the touch.
- Remove from the oven and immediately sprinkle with a generous amount of flaky sea salt. Let them rest on the hot pan for at least 5-8 minutes; this allows the bottom crust to fully cauterize and stabilize. Serve warm to achieve the flowing molten center shown in the image.
Notes
- The double-chill method (30 minutes in fridge, 15 minutes in freezer) and the 375°F oven temperature are mandatory to prevent the filling from leaking and to ensure a sturdy bottom crust.


