
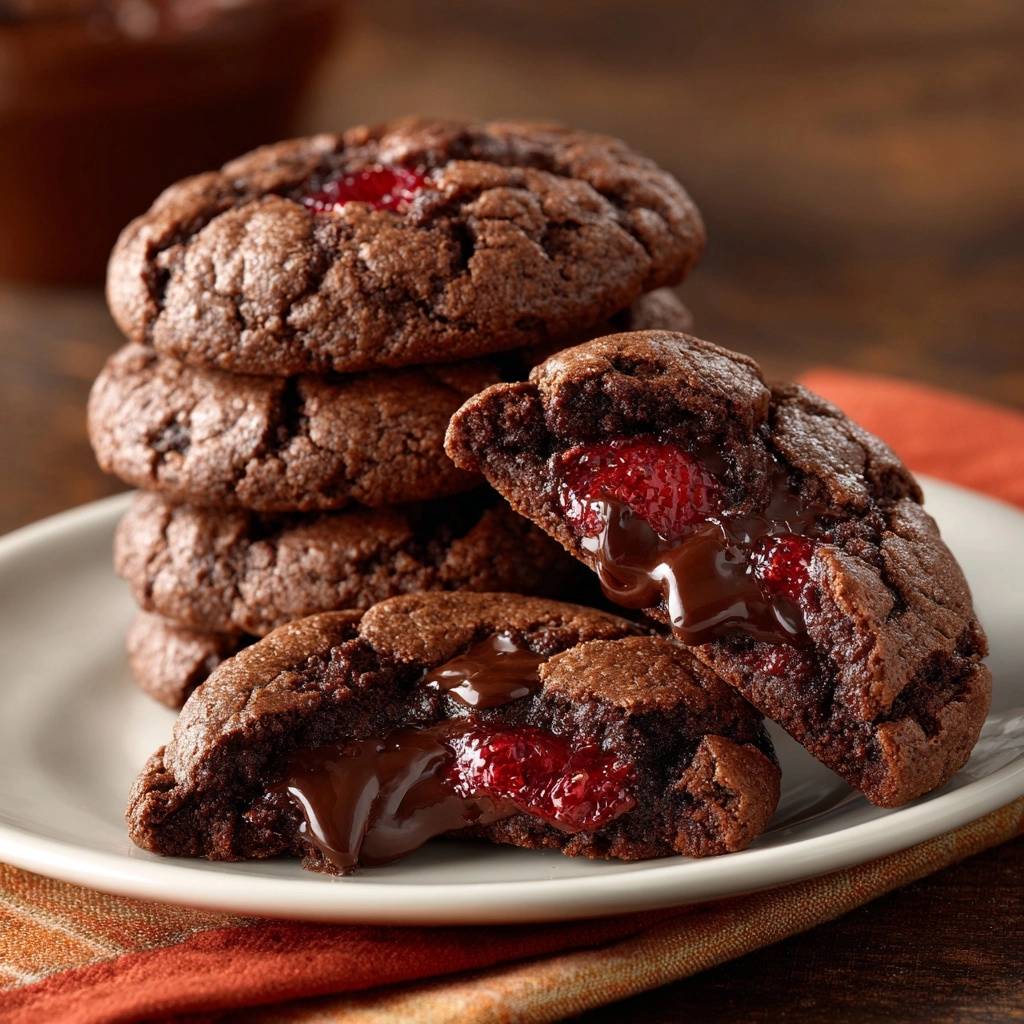
Imagine breaking into a warm, dark cocoa cookie and watching a vibrant, ruby-red stream of raspberry ganache flow across your plate. The contrast between the slightly salty, intensely chocolatey exterior and the bright, acidic burst of fruit creates a sophisticated flavor profile that rivals any high-end bistro dessert. However, achieving that perfect “lava” effect without the filling leaking out during the bake is a challenge that frustrates even seasoned bakers.
Most stuffed cookies fail because the filling reaches its boiling point before the surrounding dough has a chance to set its structure. This recipe solves that problem by utilizing a specific freezing technique that turns the center into a thermal regulator. By the time the frozen core melts into a liquid state, the cocoa-rich dough has already formed a sturdy, tender shell to contain it.
The secret to this success lies in the “rock-solid” freeze of the raspberry-chocolate pucks. If you try to stuff the dough with room-temperature jam or soft ganache, the steam will force its way through the weakest point of the dough, leaving you with a hollow cookie and a sticky mess on your baking sheet. Therefore, patience during the freezing phase is your most important ingredient for a professional, leak-free finish.
The Physics of the Perfect Molten Center
Baking a stuffed cookie is essentially a race against thermodynamics. When you place a room-temperature cookie in a 350°F oven, the sugars and fats in the filling liquefy almost instantly. Because the dough is still soft and porous in those first few minutes, the expanding liquid filling easily finds a path to escape. This results in the dreaded “blowout” where the filling pools on the parchment paper and burns.
By freezing the raspberry ganache into solid pucks, you effectively hit the pause button on the melting process. As the cookie bakes, the oven’s heat must first work to thaw the frozen core before it can even begin to heat the liquid inside. This delay provides the outer dough with a crucial five-to-seven-minute head start to rise, set, and strengthen its walls.
Furthermore, the inclusion of heavy cream in the center lowers the overall melting point of the chocolate. This ensures that while the center stays solid long enough for the dough to bake, it returns to a fluid, molten state quickly once the cookie is pulled from the oven. The result is a perfectly timed transition from a frozen solid to a luxurious, flowing liquid just as the cookie reaches its ideal crumb texture.
Essential Components for Molten Raspberry Chocolate Lava Cookies
Quality ingredients are paramount when you are working with such intense flavors. For the butter, I recommend using a high-fat European-style butter if possible, as the lower water content leads to a richer, more stable dough. In addition, ensure your egg is at room temperature so it emulsifies properly with the creamed butter and sugars, creating a smooth base for the dry ingredients.
The choice of cocoa powder significantly impacts both the color and the structural integrity of the cookie. Dutch-processed cocoa is ideal here because it has been treated with alkali to neutralize its natural acidity. This creates a darker, mellower chocolate flavor and reacts predictably with the baking soda to provide a consistent rise. If you use natural cocoa powder, the cookies may be more acidic and might not brown as beautifully.
For the filling, seedless raspberry jam is a non-negotiable requirement. Seeds can interrupt the smooth “lava” flow and create an unpleasant grittiness in an otherwise silky ganache. The heavy cream acts as a softening agent for the semi-sweet chocolate chips, preventing the center from turning into a hard chocolate chunk once the cookie cools down to room temperature.
Selecting the Right Cocoa and Chocolate
I prefer semi-sweet chocolate chips for the filling because they contain enough sugar to keep the “lava” fluid but enough cocoa solids to stand up to the tart raspberry. Bittersweet chocolate (60% cacao or higher) is a great alternative if you prefer a less sweet dessert. However, keep in mind that higher cacao percentages result in a thicker viscosity, which might slightly reduce the “flow” of your molten center.
Fresh Raspberries vs. Preserves
This recipe utilizes a dual-action raspberry approach for maximum impact. The preserves provide the sugar-heavy base that creates the flowing texture, while the fresh raspberry tucked inside the ganache adds a necessary pop of bright acidity. As the fresh berry heats up, it breaks down slightly, releasing its natural juices directly into the chocolate ganache for a “burst” of authentic fruit flavor.
Required Tools for Precision Baking
Precision is the difference between a bakery-style cookie and a flat, greasy one. I highly recommend using a kitchen scale to measure your flour and cocoa powder. Measuring cups are notoriously inaccurate, and even an extra tablespoon of flour can make the dough too dry to seal properly around the filling. If the dough is too dry, it will crack during the “pinch and roll” phase, leading to leaks.
Parchment paper is another essential tool for this recipe. Not only does it prevent the cookies from sticking, but it also acts as an insulator for the bottom of the cookie. This prevents the base from scorching before the center has fully melted. Finally, a standard two-tablespoon cookie scoop ensures that every cookie has the exact same amount of dough, which guarantees that they all bake at the same rate.
Phase One: Engineering the Raspberry Ganache Core
Start by melting your chocolate chips and heavy cream in the microwave. Use short, 20-second bursts and stir vigorously between each interval. You are looking for a glossy, smooth emulsion. Once the chocolate is melted, fold in the raspberry jam until the mixture is uniform. If the mixture looks broken or oily, add a teaspoon of room-temperature cream and stir until it comes back together.
Drop twelve tablespoon-sized dollops onto a parchment-lined tray. Immediately press a fresh raspberry into the center of each dollop, ensuring the chocolate surrounds the fruit. Place the tray in the freezer for at least 45 minutes. They must be “rock solid” to the touch. If they are even slightly tacky, they will melt too quickly in the oven and ruin the structural integrity of the cookie.
Phase Two: Crafting the High-Stability Cocoa Dough
The creaming process is where you build the foundation of the cookie’s texture. Beat the softened butter with the brown and granulated sugars for at least three minutes. You want the mixture to look pale and fluffy, which indicates that you have incorporated enough air to help the cookies rise. Add the egg and vanilla, beating until the mixture is fully combined and looks like thick frosting.
When adding the sifted dry ingredients, switch to a low speed or use a sturdy spatula. Over-mixing at this stage develops gluten, which will make your cookies tough and bread-like. Stop mixing as soon as no streaks of white flour remain. The dough should be thick, slightly tacky, and easy to handle. Fold in the extra chocolate chips by hand to ensure they are evenly distributed throughout the batch.
Phase Three: The Sealing and Assembly Technique
Work quickly during assembly to keep the filling pucks as cold as possible. Scoop about two tablespoons of dough and flatten it into a wide, even disk in the palm of your hand. Place one frozen raspberry-chocolate puck in the very center. Carefully fold the edges of the dough up and over the filling, pinching the seams together firmly to create a complete seal.
Once the filling is encased, roll the dough gently between your palms to smooth out any ridges. Inspect the ball for “thin spots” where the dark filling might be visible through the dough. If you see a thin spot, patch it with a tiny bit of extra dough. A uniform thickness of dough around the entire frozen core is the best insurance policy against a blowout during the baking process.
Baking and The Critical Carryover Cooking Window
Place the dough balls on your prepared baking sheet, leaving at least two inches of space between them. Bake at 350°F for 10 to 12 minutes. You are looking for the edges to be firm to the touch while the tops show slight crackling. Do not wait for the centers to look “done” or firm; they should still look a bit soft and underbaked when you pull them out of the oven.
The most difficult part of this recipe is the 10-minute rest period on the hot baking sheet. This is known as carryover cooking. The residual heat from the pan finishes setting the base and the outer walls of the cookie. If you try to move them too soon, the structure will collapse, and the molten lava will spill out. This rest period also allows the frozen center to finish its transition into a warm, liquid state.
Troubleshooting Common Stuffed Cookie Failures
If you experience a “Leaking Bottom,” it usually means the dough was too thin on the underside or the seam wasn’t pinched tightly enough. Always ensure the frozen puck is perfectly centered in the dough disk before folding. If your cookies come out with a “Solid Center,” you likely overbaked them or didn’t use enough heavy cream in the ganache. The cream is vital for keeping the chocolate fluid at room temperature.
Flat cookies are often the result of butter that was too warm or baking soda that has lost its potency. If your kitchen is very warm, chill the assembled dough balls for 10 minutes before putting them in the oven. This helps the fat stay solid longer, preventing the cookie from spreading too thin. Finally, always check the expiration date on your baking soda; if it’s older than six months, it might not provide the lift needed to house the lava core.
Storage, Reheating, and Make-Ahead Strategies
These cookies are best served warm, but they store well in an airtight container at room temperature for up to three days. I do not recommend refrigerating them, as the cold temperature can cause the cocoa fats to bloom, resulting in a white, powdery appearance and a dry texture. To recapture that “just-baked” molten experience, simply pop a room-temperature cookie into the microwave for 10 to 15 seconds.
If you want to make these ahead of time, you can assemble the dough balls and freeze them before baking. This is a fantastic way to have a gourmet dessert ready on demand. When you are ready to bake, there is no need to thaw the dough. Simply add two minutes to the total baking time to account for the lower starting temperature of the dough.
Freezing Raw Dough for On-Demand Baking
To freeze the unbaked cookies, place the assembled balls on a tray and freeze until solid. Once frozen, transfer them to a heavy-duty freezer bag. They will stay fresh for up to two months. When baking from frozen, the outer dough stays cold longer, which often results in an even thicker, fudgier cookie wall while the center remains perfectly molten.
Maintaining Texture in Airtight Storage
To keep the cookies soft, place a small piece of white bread in the container with them. The cookies will absorb the moisture from the bread, preventing the cocoa-heavy dough from becoming brittle. Ensure the container is completely airtight, as exposure to air will quickly dry out the crumb and cause the molten center to thicken into a fudge-like consistency.
Expert Flavor Variations and Substitutions
While raspberry and chocolate are a classic pairing, you can easily adapt this recipe to other fruits. Blackberry preserves offer a deeper, more earthy sweetness that pairs beautifully with dark chocolate. If you want to intensify the chocolate flavor of the dough itself, add a teaspoon of espresso powder to your dry ingredients. The coffee won’t make the cookies taste like mocha; instead, it acts as a flavor enhancer for the cocoa.
For a sophisticated finishing touch, sprinkle a few flakes of sea salt over the cookies immediately after they come out of the oven. The salt cuts through the richness of the ganache and highlights the tartness of the raspberry. You can also experiment with “blooming” your cocoa powder by mixing it with a tablespoon of very hot water before adding it to the butter mixture for an even more intense chocolate aroma.
Alternative Fruit Profiles
Strawberry preserves are a popular substitution, though they tend to be sweeter and less acidic than raspberry. If using strawberry, I recommend adding a tiny squeeze of lemon juice to the ganache to provide that necessary acidic balance. Cherry preserves also work wonderfully, especially if you add a drop of almond extract to the cookie dough to create a “Black Forest” inspired flavor profile.
Enhancing the Chocolate Profile
To achieve the deepest possible flavor, you can “bloom” your cocoa powder. Simply whisk the cocoa powder with the melted chocolate and cream mixture for the filling, or mix it with the vanilla extract before adding it to the dough. This process releases the fat-soluble flavor compounds in the cocoa, resulting in a more complex and lingering chocolate taste that stands up well to the bright raspberry center.
How should I store these cookies and do they freeze well?
Store these cookies in an airtight container at room temperature for up to 3 days. Do not refrigerate them, as the cold air dries out the cocoa-based dough and ruins the texture of the molten center. For long-term storage, you can freeze the fully baked cookies for up to 2 months. To eat, thaw at room temperature and microwave for 15 seconds to melt the center. You can also freeze the unbaked dough balls and bake them directly from the freezer, adding 2 minutes to the baking time.
Why did my cookies leak the filling all over the pan?
Leaking is usually caused by one of three things: the filling wasn’t frozen solid, the dough was too thin in certain spots, or the seams weren’t sealed tightly. Ensure the raspberry-chocolate pucks are “rock solid” before stuffing. When assembling, make sure the dough is of even thickness all the way around the filling. If you see the dark filling peeking through the dough before baking, patch it with a little extra dough and roll it smooth again.
Can I use a different type of fruit or jam?
Yes, you can substitute the raspberry jam and fresh raspberries with other fruits like blackberries, strawberries, or even cherries. The key is to use a seedless preserve to maintain the “lava” consistency. If you use a fruit with lower acidity, like blueberries, consider adding a half-teaspoon of lemon juice to the filling to help balance the richness of the chocolate. Always include a piece of fresh fruit in the center for the best texture.
Why is my cookie center solid instead of molten?
A solid center is almost always the result of overbaking. The cookies should still look soft and slightly underdone in the middle when you take them out of the oven. They will continue to cook on the hot baking sheet. Additionally, make sure you didn’t skip the heavy cream in the filling. The cream lowers the melting point of the chocolate chips, ensuring the center stays liquid even after the cookie has cooled slightly.
Can I make these gluten-free?
You can substitute the all-purpose flour with a high-quality 1:1 gluten-free flour blend that contains xanthan gum. Because gluten-free dough can be more brittle, you may need to handle the dough more gently during the “pinch and roll” phase. If the dough feels too crumbly to seal, add a teaspoon of milk to the dough to increase its elasticity. The freezing technique for the center remains exactly the same and is even more important for gluten-free versions to prevent leaks.
Molten Raspberry Chocolate Lava Cookies
Course: DessertCuisine: AmericanDifficulty: easy12
cookies30
minutes10
minutes40
Minutes285
kcalAmerican
Ingredients
1/2 cup unsalted butter, softened
1/2 cup brown sugar, packed
1/4 cup granulated sugar
1 large egg
1 teaspoon vanilla extract
1 1/4 cups all-purpose flour
1/2 cup dark cocoa powder
1/2 teaspoon baking soda
1/4 teaspoon salt
1/2 cup semi-sweet chocolate chips (for the dough)
For the Molten Filling:
1/2 cup semi-sweet chocolate chips
2 tablespoons heavy cream
1/4 cup seedless raspberry jam
12 fresh raspberries
Directions
- Prepare the “Lava” Core: In a small microwave-safe bowl, combine 1/2 cup chocolate chips and 2 tablespoons heavy cream. Microwave in 20-second intervals, stirring until smooth. Stir in the raspberry jam.
- Freeze the Centers: Line a small tray with parchment paper. Place 12 dollops of the chocolate-raspberry mixture onto the tray. Press one fresh raspberry into the center of each dollop. Freeze for at least 45 minutes until rock solid. This is the essential step to prevent leaking and ensure a molten center.
- Make the Dough: In a large bowl, cream together the butter, brown sugar, and granulated sugar until light and fluffy. Beat in the egg and vanilla extract.
- Combine Dry Ingredients: Sift together the flour, cocoa powder, baking soda, and salt. Gradually add to the wet mixture until a thick dough forms. Fold in the 1/2 cup chocolate chips.
- Assemble: Preheat your oven to 350°F (175°C). Scoop about 2 tablespoons of dough and flatten it into a wide disk in your palm.
- Seal the Core: Remove the frozen filling pucks from the freezer one at a time. Place a puck in the center of the dough disk. Fold the dough up and around the filling, pinching the seams tightly. Roll gently between your palms to ensure a smooth ball with no cracks or thin spots.
- Bake: Place the dough balls on a baking sheet lined with parchment paper. Bake for 10 to 12 minutes. The cookies will crackle slightly on top, but the edges should be set while the center remains soft.
- Rest: Let the cookies cool on the baking sheet for at least 8-10 minutes. This resting period is crucial; it allows the outer cookie to structure itself so it can hold the hot, liquid lava center without collapsing when handled.
Notes
- Freezing the filling pucks for at least 45 minutes is the essential step to prevent leaking. Ensure the dough is pinched tightly with no cracks before baking. Let the cookies rest for 8-10 minutes after baking to allow the structure to set.


