Most one-pan chicken and rice recipes end up as a mushy, gummy mess at the bottom of the skillet. You’ve likely experienced that disappointing texture where the rice clumps together and the chicken skin turns rubbery. This recipe solves that problem by using a specific “toast and rest” method that ensures every grain of rice stays separate and fluffy.
The flavor profile here is a beautiful balance of earthy turmeric, smoky paprika, and bright citrus. It’s a vibrant, golden meal that feels like a nutritional powerhouse without sacrificing comfort. By focusing on the interaction between the chicken fat and the rice, we create a dish that rivals any restaurant version while keeping the cleanup to a single pan.
The real secret to success lies in the moisture control of your chicken. I’ve found that if you don’t pat the chicken thighs bone-dry with paper towels before seasoning, the skin will steam rather than sear. That extra thirty seconds of drying is the difference between a soggy dinner and a perfectly crispy, golden crust that shatters when you bite into it.
The Science of Texture: Why Most Rice Recipes Fail
Gummy rice is usually the result of excess surface starch and improper heat management. When rice grains rub against each other in the bag, they create a fine starch powder. If you don’t wash this off, that starch gelatinizes in the boiling liquid, acting like a glue that binds the grains into a sticky mass.
Long-grain Basmati is the superior choice for this one-pan turmeric chicken and rice because of its high amylose content. Amylose is a type of starch that doesn’t break down easily, which helps the rice maintain its structural integrity during the steaming process. Unlike short-grain varieties that are meant to be sticky, Basmati is designed to stand tall and separate.
When you combine the right grain with the toasting technique, you’re essentially tempering the starch. The heat from the oil creates a protective shell around each grain. This prevents the rice from absorbing water too quickly, which is the primary cause of that dreaded “mush factor” in one-pot meals.
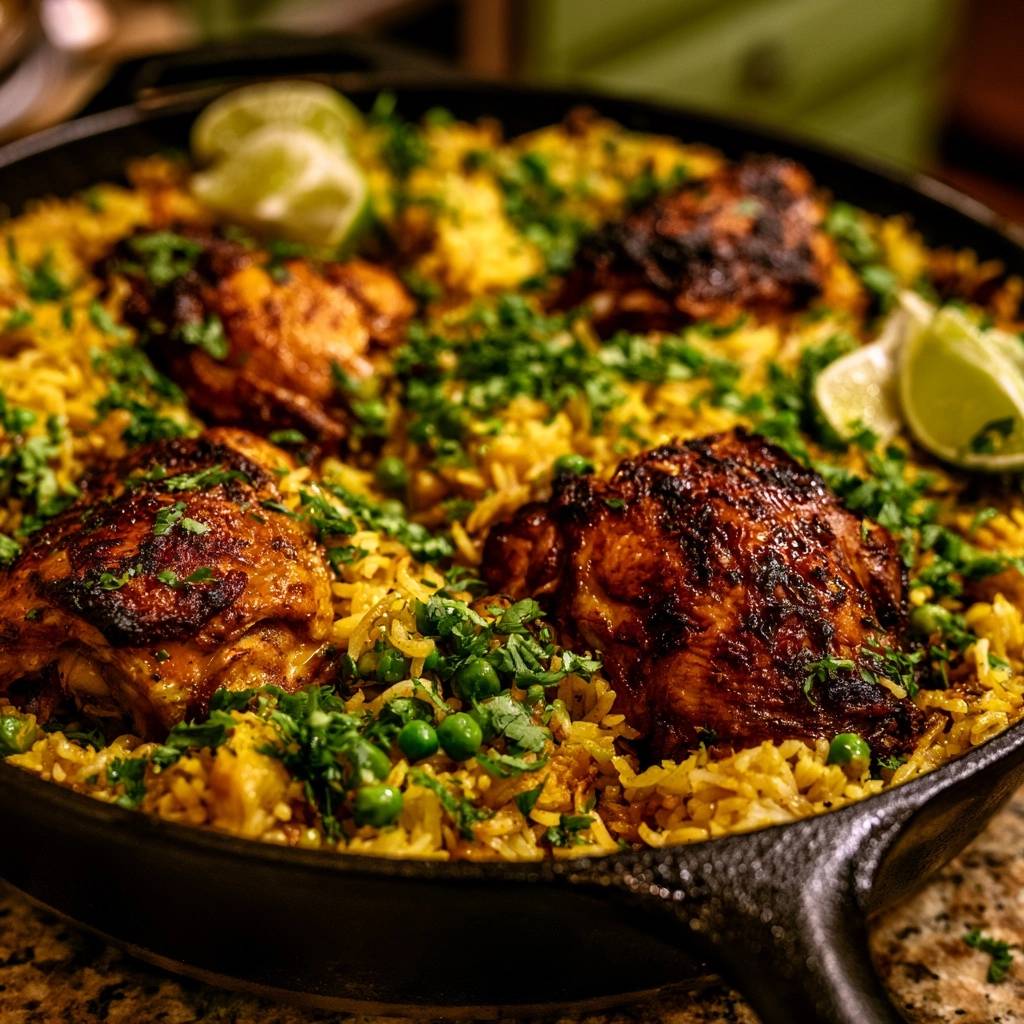
The Role of the Maillard Reaction in Skin Crispness
Bone-in, skin-on thighs are non-negotiable for this dish because they provide the necessary fat and flavor. The Maillard reaction is the chemical process where amino acids and sugars react under high heat to create hundreds of flavor compounds. This only happens effectively when the skin is in direct contact with a hot, oiled surface.
Moisture is the absolute enemy of this process. If the chicken is wet, the energy from the pan goes into evaporating that water instead of browning the skin. By searing the thighs undisturbed, you allow the fat to render out, which then becomes the flavorful cooking medium for your rice.
Essential Components for One-Pan Turmeric Chicken and Rice
Quality matters when you’re working with a short list of ingredients. High-quality turmeric should have a deep, vibrant orange hue and a pungent, earthy aroma. Grocery store varieties that have been sitting on the shelf for years often lose their potency and just provide color without the complex, peppery flavor profile we want.
I always recommend using a low-sodium chicken broth for this recipe. This gives you total control over the seasoning profile. Since we are reducing the liquid and the chicken is already seasoned, a full-sodium broth can often make the final rice far too salty. You can always add a pinch of salt at the end, but you can’t take it away.
Fresh lime wedges and cilantro aren’t just garnishes; they are functional components. The acidity from the lime cuts through the richness of the rendered chicken fat. It brightens the earthy notes of the turmeric and makes the whole dish feel much lighter on the palate.
Selecting the Right Basmati and Rinsing Protocols
Not all Basmati is created equal, so look for “extra long grain” on the label if possible. Before the rice ever touches the pan, you must rinse it thoroughly in a fine-mesh strainer. Run cold water over the grains while gently swirling them with your fingers until the water underneath runs completely clear.
This physical removal of surface starch is the most important step for grain separation. If the water is still cloudy, your rice will likely be sticky. Once rinsed, let the rice drain for a few minutes so it’s relatively dry before you add it to the hot skillet for toasting.
The Spice Blend: Beyond Just Color
The synergy between turmeric, smoked paprika, and garlic powder creates a deep, savory foundation. Turmeric contains curcumin, a fat-soluble compound that needs a lipid to unlock its full flavor and nutritional potential. By adding the turmeric directly to the hot oil and chicken fat, you’re activating those compounds immediately.
Smoked paprika adds a layer of “charred” flavor that mimics a grill, even though we’re using a stovetop. Garlic and onion powders provide a consistent savory base that coats every grain of rice. This combination ensures the dish tastes complex and well-developed despite the relatively short cooking time.
Step-by-Step: Searing for Maximum Flavor Extraction
Start by heating your olive oil in a heavy cast-iron skillet until it’s shimmering but not smoking. Place the seasoned chicken thighs skin-side down and then leave them alone. The biggest mistake people make is moving the chicken too early, which causes the skin to tear and stick to the pan.
You’ll know the fat has rendered properly when the chicken releases easily from the skillet. The skin should be a deep, mahogany brown and feel firm to the touch. Flip the thighs briefly just to seal the bottom, then remove them. The goal isn’t to cook them through yet, but to build a flavor base in the pan.
After removing the chicken, you’ll see a layer of golden fat and browned bits. Don’t wipe the pan out! That’s where all the concentrated chicken flavor lives. Just drain off the excess if it looks like more than two tablespoons, as too much fat can make the rice feel greasy.
The “Toast and Rest” Technique for Fluffy Grains
Now comes the most critical phase for texture. Add your dry, rinsed rice to the skillet with the turmeric. Stir it constantly for about three to four minutes. You’re looking for the edges of the rice grains to turn translucent while the centers stay white, and you should smell a distinct, popcorn-like aroma.
This toasting step coats each grain in the seasoned fat, creating a barrier that controls water absorption. It also adds a nutty depth to the flavor that you simply can’t get by boiling rice alone. If the rice starts to brown too quickly, turn the heat down slightly; you want a gentle toast, not a sear.
Watch the rice closely during this time. As the grains heat up, they will begin to sound different against the pan, making a sharper, clicking noise. This is a great sensory cue that the moisture has evaporated and the toasting is working its magic.
Deglazing the Fond: Capturing Liquid Gold
Once the rice is toasted, pour in your chicken broth. You’ll hear a loud hiss as the liquid hits the hot pan. Use a wooden spoon to vigorously scrape the bottom of the skillet. Those browned bits, known as the fond, are packed with umami and will dissolve into the broth.
This process ensures that all the flavor from the chicken searing is redistributed into the rice. If you don’t scrape the pan well, you’re leaving the best part of the dish behind. Plus, it makes the pan much easier to clean later since the liquid loosens everything up.
Assembly and the Precision Simmering Phase
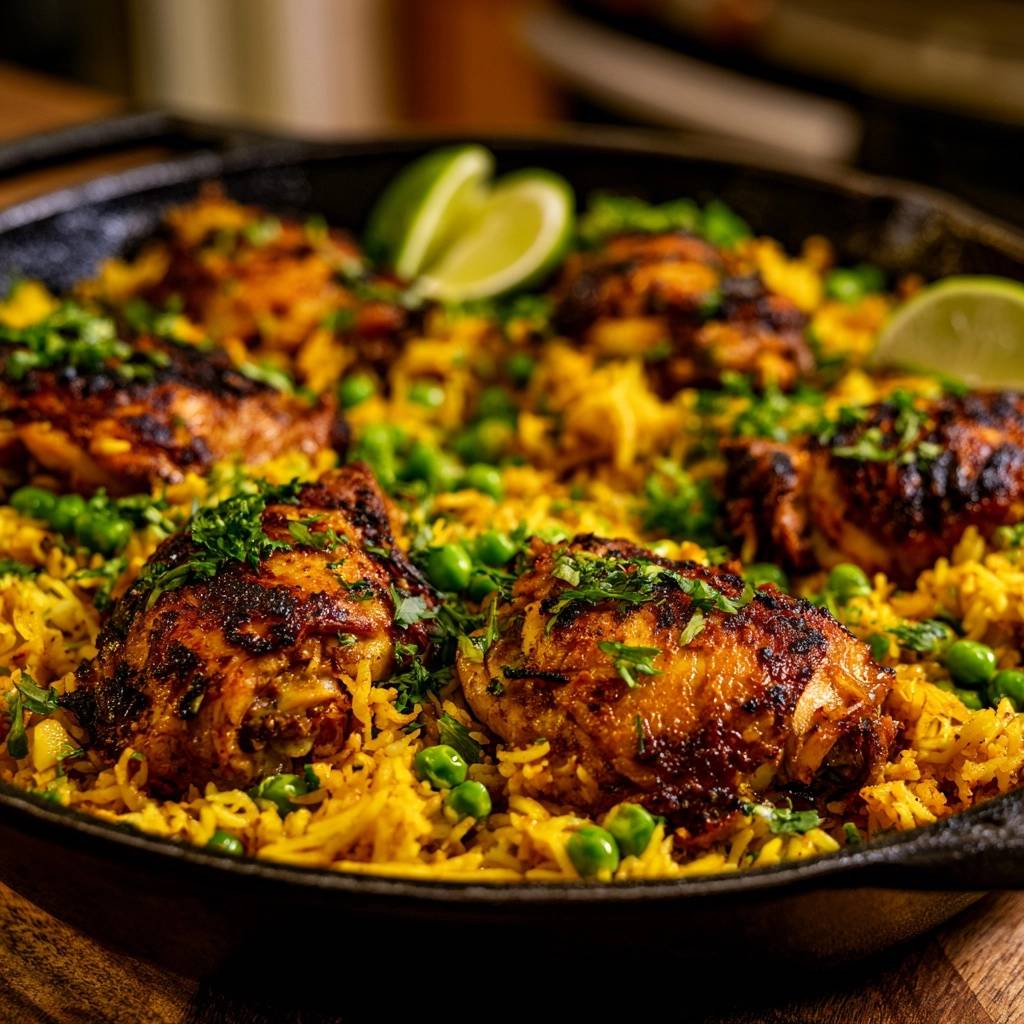
Nestle the chicken thighs back into the rice bed, but pay close attention to the placement. You want the bottom of the chicken to be submerged so it finishes cooking, but the crispy skin must stay above the liquid line. If you submerge the skin, all that hard work you put into searing will be wasted.
Cover the skillet with a lid that fits very tightly. If your lid is loose, place a piece of foil over the pan before putting the lid on to create a better seal. Steam escaping is the number one reason for undercooked, crunchy rice in a one-pan meal.
Turn the heat down to the lowest possible setting. You want a very gentle simmer, not a rolling boil. Let it cook for 15 to 18 minutes. Resist the urge to peek! Opening the lid lets the steam out and drops the temperature, which ruins the timing and the texture.
The Steam Finish: Incorporating Greens and Resting
When the time is up, remove the pan from the heat. Quickly lift the lid, throw in the frozen peas, and shut the lid again immediately. Don’t stir them in yet. The residual heat in the pan is more than enough to thaw and cook the peas while keeping them bright green and snappy.
Let the pan sit undisturbed for a full 10 minutes. This rest period is vital because it allows the moisture to redistribute evenly through the rice. During this time, the starch in the rice firms up, which is what gives you those distinct, individual grains rather than a clump of mush.
After the rest, use a fork to gently fluff the rice around the chicken thighs. You’ll see the steam rise and the rice should fall away from the fork easily. Garnish with plenty of fresh cilantro and a squeeze of lime to bring all the flavors together before serving.
Troubleshooting Common One-Pan Rice Obstacles
If your rice is still crunchy after the cook time, it usually means your lid wasn’t tight enough or your heat was too high, causing the liquid to evaporate before the rice could soften. You can fix this by adding two tablespoons of hot broth, covering tightly, and letting it sit on low heat for another five minutes.
If the rice is burnt at the bottom, your “low” heat setting might be too powerful for your specific burner. Next time, use a heat diffuser or move the pan to a smaller burner. However, some people actually love the “socarrat” or crispy rice at the bottom, so as long as it isn’t black, it’s a delicious bonus.
If the chicken is undercooked but the rice is done, it’s likely because the thighs were exceptionally large. You can remove the rice to a bowl and pop the chicken back in the skillet (or the oven) for a few minutes. To avoid this, try to choose medium-sized thighs that are similar in weight.
Flavor Variations and Dietary Adaptations
This recipe is a fantastic canvas for different flavor profiles. For a Persian-inspired twist, you can stir in a handful of dried barberries or golden raisins during the last five minutes of cooking. The sweetness of the fruit pairs beautifully with the earthy turmeric and savory chicken.
If you want to add more greens, you can swap the peas for finely chopped kale or spinach. Add these at the same time you would add the peas; the residual steam will wilt them perfectly without making them slimy. You could also add sliced almonds at the end for an extra crunch.
For those who prefer a bit of heat, add a pinch of cayenne pepper or red chili flakes to the spice rub. The dish is naturally Halal-compliant as written, making it a versatile option for diverse households. Just ensure your chicken broth is certified if you have strict dietary requirements.
Optimal Pairings for Turmeric-Infused Poultry
Since this dish is quite rich from the chicken fat and spices, it pairs best with sides that offer a cooling contrast. A simple cucumber and mint salad with a squeeze of lemon is perfect. The crunch of the cucumber and the freshness of the mint reset your palate between bites of the savory rice.
A shaved radish salad with a light vinaigrette is another excellent choice. The peppery bite of the radishes complements the turmeric without competing with it. If you want something heartier, roasted carrots with a drizzle of honey can enhance the natural sweetness of the toasted rice.
Storage, Reheating, and Meal Prep Efficiency
Leftovers store beautifully in an airtight container for up to three days. The flavors actually tend to deepen overnight as the spices continue to meld. To keep the rice from drying out, make sure the container is sealed tightly as soon as the food has cooled to room temperature.
When reheating, the microwave is your best friend if you use a damp paper towel. Place the towel over the rice to create a mini-steam chamber, which revives the moisture in the grains. If you want to keep the chicken skin crispy, reheat the thigh in a toaster oven or air fryer while microwaving the rice separately.
Freezing Guidelines for Long-Term Storage
You can freeze this meal for up to two months. I recommend freezing the chicken and rice together in individual portions for easy lunches. Thaw in the refrigerator overnight before reheating. Note that the peas may lose some of their bright green color after freezing, but the flavor will remain intact.
How do I prevent the rice from sticking to the bottom of the skillet?
Sticking usually happens if the heat is too high or if there isn’t enough fat in the pan. Ensure you leave at least two tablespoons of the rendered chicken fat in the skillet before adding the rice. The toasting process also creates a light oily coating on the grains, which naturally helps prevent them from bonding to the cast iron.
Can I use brown rice instead of Basmati?
Brown rice requires significantly more liquid and a much longer cooking time (usually 40-50 minutes). If you substitute brown rice, the chicken will likely overcook and become dry before the rice is tender. It is best to stick with long-grain white Basmati for this specific one-pan method to ensure everything finishes at the same time.
Why is my chicken skin not staying crispy after simmering?
The most common reason is that the chicken was submerged too deeply in the broth. When you nestle the thighs back into the pan, they should sit on top of the rice, not be buried in it. The liquid level should only reach the bottom half of the chicken. The steam will cook the meat, while the skin stays dry and crisp above the “tide line.”
What can I use if I don’t have a cast-iron skillet?
Any large, heavy-bottomed skillet or a Dutch oven will work. The key is the “heavy-bottomed” part, which ensures even heat distribution and prevents hot spots that could burn the rice. If your pan doesn’t have a tight lid, you can use a baking sheet or a piece of heavy-duty foil to seal the top during the simmering phase.
Is it necessary to use bone-in chicken thighs?
While you can use boneless thighs, bone-in thighs are much more forgiving and stay juicy during the 18-minute simmer. Boneless thighs cook faster and might become slightly tough. If you do use boneless, reduce the simmering time by about 3-4 minutes and check the internal temperature of the chicken to ensure it reaches 165°F.
How can I add more vegetables to this one-pan meal?
You can easily add diced carrots or bell peppers. Add these to the pan at the same time as the rice so they can sauté and soften. Harder vegetables like cauliflower florets should be small so they steam through in the 15-18 minute window. Always add delicate greens like spinach at the very end during the resting phase to prevent overcooking.
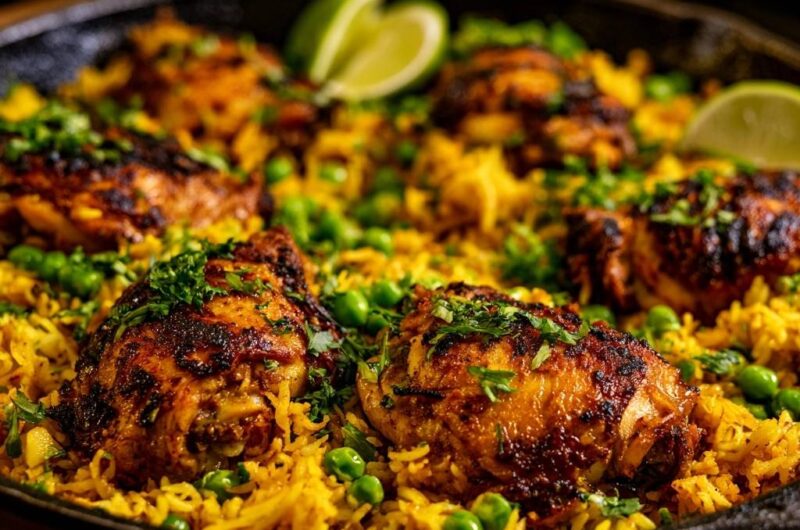
One-Pan Turmeric Chicken and Rice
Course: Main CourseCuisine: AmericanDifficulty: easy4
servings15
minutes35
minutes50
Minutes520
kcalAmerican
Ingredients
6 bone-in, skin-on chicken thighs
2 cups long-grain basmati rice (rinsed until water runs clear and drained)
3 cups low-sodium chicken broth
1 cup frozen sweet peas
2 tablespoons olive oil
1 tablespoon turmeric powder
1 teaspoon smoked paprika
1 teaspoon garlic powder
1/2 teaspoon onion powder
Salt and black pepper to taste
Fresh cilantro, finely chopped, and lime wedges for garnish
Directions
- Pat the chicken thighs completely dry with paper towels. Season generously on both sides with salt, pepper, smoked paprika, garlic powder, and onion powder.
- Heat olive oil in a large (12-inch) cast-iron skillet over medium-high heat. Place chicken skin-side down. Sear undisturbed for 8 to 10 minutes until the skin is deeply browned, rendered, and very crispy. Flip and cook for 2 minutes to seal the bottom. Remove chicken from the pan and set aside on a plate. The chicken is done when it reaches 165°F (74°C) in the thickest part.
- Drain all but 2 tablespoons of the rendered fat from the skillet. Reduce heat to medium. Add the dry, rinsed rice and turmeric to the hot pan. Stir constantly for 3 to 4 minutes until the rice grains look translucent at the edges and smell nutty. This toasting step is crucial to prevent the rice from becoming gummy.
- Pour in the chicken broth, using a wooden spoon to scrape the bottom of the pan to release the flavorful browned bits (fond). Bring the liquid to a gentle boil.
- Nestled the chicken thighs back into the rice, ensuring they sit on top of the rice bed. Keep the crispy skin above the liquid line to maintain the crunch shown in the image.
- Cover the skillet with a tight-fitting lid. Reduce heat to the lowest setting and cook for 15 to 18 minutes, or until the liquid is fully absorbed.
- Remove from heat. Quickly lift the lid, scatter the frozen peas over the top, and immediately replace the lid. Let the pan sit undisturbed for 10 minutes. The residual steam will perfectly cook the peas and allow the rice grains to firm up.
- Fluff the rice gently with a fork around the chicken. Garnish heavily with fresh cilantro and lime wedges as pictured. Serve directly from the skillet.
Notes
- The secret to restaurant-quality results is toasting the raw rice in chicken fat before adding liquid to create a protective barrier. Always let the pan rest for 10 minutes after cooking to allow the rice grains to firm up.