
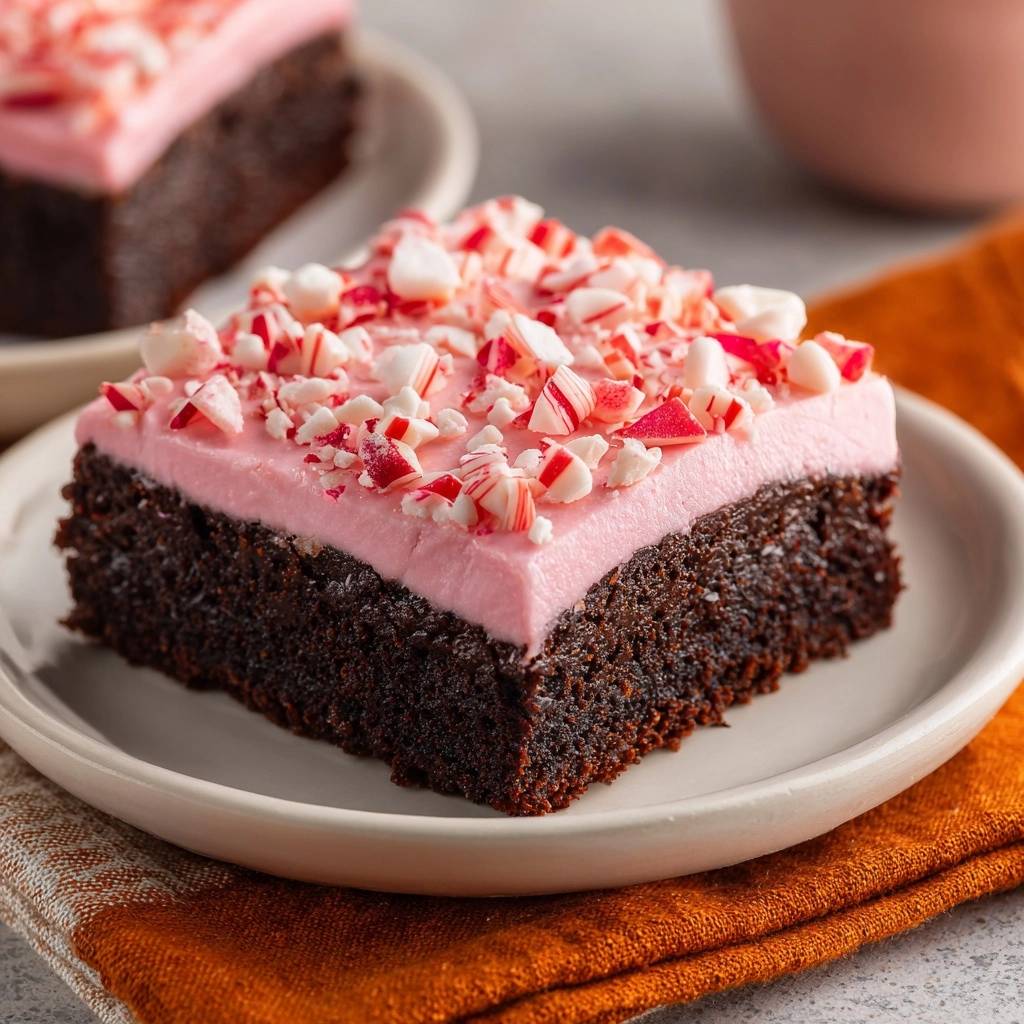
Imagine biting into a brownie that offers a sharp, satisfying snap of crushed peppermint, followed by a cloud of airy pink frosting, and finally, a dense, fudgy cocoa base. Most holiday brownies fail because they turn into a mushy, structural mess within hours of assembly. The moisture from the peppermint cream inevitably seeps into the crumb, leaving you with a soggy bottom that loses its rich chocolate punch.
You don’t have to settle for a dessert that loses its integrity by the time the party starts. The secret to a professional-grade holiday treat lies in the contrast between the dark, bitter cocoa and the sweet, refreshing peppermint. However, achieving that perfect separation requires more than just a good recipe; it requires a specific sequence of temperature controls to keep the layers distinct and the textures vibrant.
I’ve found that the real game-changer is the “Cold Shock” technique. By chilling the brownie base before you ever let the frosting touch it, you create a physical barrier of solidified fats. This prevents the frosting from migrating into the brownie, ensuring every bite stays exactly as intended. It’s the difference between a homemade snack and a bakery-style masterpiece that holds its shape on a dessert platter for hours.
The Science of the Moisture Barrier
To understand why brownies often get soggy, you have to look at the porosity of the crumb. A standard brownie is full of tiny air pockets created during the mixing process. When you spread a moisture-heavy frosting over a room-temperature brownie, those air pockets act like a sponge, pulling the water from the heavy cream and butter directly into the base.
Therefore, we focus on the ratio of sugar to fat to create a tighter, more “closed” crumb. By using a high sugar content and melted butter, we encourage a dense, fudgy structure rather than a light, cakey one. This density is your first line of defense against moisture migration. However, the real magic happens during the cooling phase when the fats in the brownie begin to set.
The “Anti-Soggy Method” utilizes a two-step cooling process to solidify these fats. When you move the brownies from the counter to the refrigerator, the butter within the base hardens. This creates a literal seal on the surface of the brownie. In addition, the starches in the flour undergo retrogradation, which firms up the bite and prevents the frosting from soaking in. This technical step ensures that the frosting sits proudly on top rather than sinking into the chocolate.

Essential Components for the Cocoa Base
Quality ingredients are the foundation of this dish, and Dutch-processed cocoa is absolutely non-negotiable. Because it has been treated with an alkalizing agent, it offers a darker, more intense color and a smoother flavor profile. This provides the dramatic visual contrast you want against the bright pink frosting. Regular cocoa powder is often too acidic and light in color, which can make the final product look washed out.
In addition, you must use room-temperature eggs. When eggs are cold, they don’t emulsify properly with the melted butter and sugar, which can lead to a greasy texture or an uneven bake. Room-temperature eggs incorporate smoothly, creating a stable emulsion that traps just enough air for a fudgy chew. Furthermore, using melted butter instead of creamed butter ensures the brownies remain dense and moist rather than fluffy and bread-like.
Selecting the Right Peppermint and Colorants
When it comes to the pink aesthetic, the type of coloring you choose matters immensely. I always recommend gel food coloring over liquid drops. Liquid coloring adds unnecessary moisture to the frosting, which can cause it to become runny or “weep” over time. A tiny drop of gel provides a vibrant, concentrated hue without changing the consistency of your stiff-peak frosting.
For the flavor, peppermint extract is the standard, but ensure it is pure extract rather than imitation flavoring. If you want an even deeper flavor, you can use peppermint oil, though it is much more potent and requires a lighter hand. Finally, choose high-quality candy canes for the topping. Cheaper candies often use dyes that bleed into the frosting, turning your beautiful pink swirls into a streaky mess after a few hours in the fridge.
Precision Tools for Professional Results
If you want that thick, impressive profile seen in high-end bakeries, a 9×9 inch square pan is mandatory. Many people try to swap this for a 9×13 pan, but that results in a brownie that is far too thin to support the weight of the peppermint frosting. The 9×9 pan provides the necessary height to make the dessert feel substantial and indulgent.
Parchment paper “slings” are another essential tool for success. By leaving an overhang on the sides, you can lift the entire chilled block out of the pan at once. This allows you to cut the brownies on a flat surface, ensuring perfectly straight edges. Additionally, always use a sifter for your powdered sugar. Even small clumps can ruin the silky texture of your frosting and prevent it from reaching the stiff peaks needed to hold up the crushed candy topping.
Step-by-Step: Crafting the Dense Brownie Foundation
Start by whisking your melted butter and sugar until the mixture looks glossy and well-combined. When you add the eggs, do so one at a time, beating thoroughly after each addition. You’ll notice the batter becoming thick and pale; this is exactly what you want. Once you add the vanilla, it’s time for the dry ingredients.
Sift the cocoa, flour, salt, and baking powder directly into the bowl. Now, put down the whisk and pick up a spatula. You must use a gentle folding motion here. If you overmix the batter at this stage, you’ll develop the gluten in the flour, which turns a fudgy brownie into a tough, bready one. Stop the moment you no longer see streaks of white flour.
Pour the batter into your prepared pan and smooth the top with your spatula. As it bakes, keep a close eye on the oven. You are looking for a slight jiggle in the center and a toothpick that comes out with a few moist crumbs attached. If the toothpick is clean, they are overbaked. If it’s wet with batter, they need a few more minutes. The goal is a soft, fudgy interior that sets as it cools.
The Cold Shock: Sealing the Crumb
Once the brownies leave the oven, patience becomes your most important ingredient. You must let them cool at room temperature for at least two hours. During this time, the structure of the brownie stabilizes. If you try to refrigerate them while they are still hot, steam will trap under the plastic wrap, creating a sticky, wet surface that ruins the “seal.”
After the room-temperature rest, move the pan into the refrigerator for at least one hour. This is the “Cold Shock” phase. The molecular structure of the butter and starches changes as they chill, creating a firm, dense surface. This step is the secret to the bakery-style finish. It ensures that when you spread the frosting, it stays on top of the brownie rather than melting into the pores of the cake.
Whipping the High-Stability Peppermint Frosting
To create a frosting that is both fluffy and firm, start with softened—but not melted—butter. Beat the butter on its own for a minute until it’s creamy. When adding the powdered sugar, do so gradually. If you dump it all in at once, the frosting will be grainy and you’ll likely end up in a cloud of sugar dust. Adding it slowly allows the sugar to fully integrate into the fat.
Once the sugar, cream, and peppermint extract are in, turn your mixer to high speed. Whip the mixture for a full 2-3 minutes. You are looking for the frosting to hold a stiff peak when you lift the beaters. This aeration is vital because it creates a light texture that contrasts beautifully with the heavy brownie base. The frosting should be stable enough to support the weight of the crushed peppermint candies without sagging.
Assembly and the Clean-Cut Technique
Spread the pink frosting in a thick, even layer over the chilled brownie block. Use an offset spatula if you have one to get a perfectly smooth surface. Immediately after frosting, sprinkle the crushed peppermint candies over the top. You want to do this while the frosting is fresh so the candies adhere. Press them very lightly with your palm to make sure they stay put.
For those perfectly sharp edges, use the “hot knife” trick. Dip a long, sharp knife into a tall glass of hot water, wipe it completely dry, and make one clean slice. Wipe the blade clean and repeat the hot water dip for every single cut. This melts the fats in the frosting and brownie just enough to glide through without dragging or smearing the layers. It takes a little extra time, but the professional results are worth it.
Troubleshooting Common Peppermint Brownie Issues
If you find your frosting is sliding off the base, it’s almost always a temperature issue. Either the brownie wasn’t chilled long enough, or the butter in your frosting was too warm. To fix this, pop the whole tray back into the fridge for 30 minutes to firm everything up. If the frosting itself feels too soft, beat in an extra quarter-cup of powdered sugar to increase the stability.
If your brownies turned out more like cake than fudge, you likely over-beaten the eggs or used a bit too much flour. Next time, ensure you are measuring your flour using the “spoon and level” method rather than scooping directly with the measuring cup. To prevent the candy cane topping from getting sticky in the fridge, store the brownies in a truly airtight container. Moisture in the refrigerator is what makes hard candy turn tacky, so a tight seal is your best friend.
Storage and Make-Ahead Logistics
These brownies are actually better the second day. A 24-hour rest in the refrigerator allows the peppermint flavor to mellow and the brownie base to reach its peak fudgy consistency. Always store them in an airtight container in the fridge. They will stay fresh and delicious for up to five days, though the candy topping may soften slightly after day three.
If you want to make these far in advance, you can freeze the unfrosted brownie base for up to three months. Wrap it tightly in plastic wrap and then foil. When you’re ready to serve, thaw the base in the fridge, then proceed with the frosting and topping steps. I don’t recommend freezing the fully frosted brownies, as the candy canes will likely melt and the frosting texture can change upon thawing.
Customizing the Pink Aesthetic
If you prefer to avoid synthetic food dyes, you can still achieve a beautiful pink hue using natural alternatives. A teaspoon of raspberry reduction or a small pinch of beet powder can provide a lovely rosy tint. Keep in mind that these will add a very subtle fruity or earthy undertone to the frosting. While it won’t be a pure peppermint flavor, the combination of raspberry and chocolate is a classic pairing that many people actually prefer.
Frequently Asked Questions
How do I store these brownies so they don’t get dry?
The best way to keep these brownies moist is to store them in an airtight container in the refrigerator. Because of the high fat content in the butter and the protective layer of frosting, they stay fudgy for a long time. If you have leftovers, try to keep them as a whole block and only slice what you need, as the cut edges are where moisture escapes first.
Why did my candy cane topping turn into a sticky mess?
This usually happens due to humidity. Hard candy is hygroscopic, meaning it pulls moisture from the air. If your refrigerator is particularly humid or if the container isn’t perfectly airtight, the sugar in the candy canes will start to dissolve. To prevent this, add the crushed candies as close to serving time as possible, or ensure your storage container has a very tight silicone seal.
Can I use a different type of flour for this recipe?
You can substitute the all-purpose flour with a 1:1 gluten-free flour blend that contains xanthan gum. Because brownies rely on eggs and fat for structure rather than a complex gluten network, they are very forgiving. However, avoid using almond flour or coconut flour as a direct swap, as they require different liquid ratios and won’t provide the “Anti-Soggy” structural integrity needed for this method.
What if I don’t have heavy cream for the frosting?
If you don’t have heavy cream, you can use whole milk or even a bit of evaporated milk. However, use slightly less than the recipe calls for at first. Heavy cream has a higher fat content which helps the frosting stay stiff and stable. If you use milk, you may need to add an extra tablespoon or two of powdered sugar to maintain that thick, pipeable consistency.
My brownies are sticking to the parchment paper, what did I do wrong?
This usually happens if you try to peel the paper off while the brownies are still warm. The “Cold Shock” method isn’t just for the frosting; it also helps the brownie release cleanly from the parchment. If you’re still having trouble, lightly grease the parchment paper with a tiny bit of butter or non-stick spray before pouring in the batter next time.
Peppermint Pink Frosting Brownies
Course: DessertCuisine: AmericanDifficulty: easy12
servings20
minutes35
minutes180
MinutesAmerican
Ingredients
For the Brownie Base:
1 cup unsalted butter, melted and slightly cooled
2 cups granulated sugar
4 large eggs, room temperature
1 tablespoon vanilla extract
3/4 cup unsweetened cocoa powder (Dutch-processed preferred for the dark visual match)
1 cup all-purpose flour
1/2 teaspoon salt
1/2 teaspoon baking powder
For the Peppermint Frosting:
1/2 cup unsalted butter, softened
2 ½ cups powdered sugar, sifted
2 tablespoons heavy cream
1/2 teaspoon peppermint extract
2 drops red or pink gel food coloring
1/2 cup peppermint candies or candy canes, coarsely crushed
Directions
- Preheat your oven to 350°F (175°C). Line a 9×9 inch square baking pan with parchment paper, leaving an overhang on the sides. (Note: A 9×13 pan will result in brownies too thin to match the thick, cakey profile in the image; the 9×9 pan provides the necessary height).
- In a large bowl, whisk the melted butter and sugar until well combined. Add eggs one at a time, beating well after each addition. Stir in the vanilla.
- Sift the cocoa powder, flour, salt, and baking powder directly into the wet ingredients. Fold gently with a spatula until just combined-do not overmix, or the base will become tough rather than fudgy.
- Pour the batter into the prepared pan and smooth the top. Bake for 30-35 minutes, or until a toothpick inserted into the center comes out with a few moist crumbs attached.
- The Anti-Soggy Method: To prevent the frosting from migrating into the crumb, let the brownies cool completely in the pan at room temperature for 2 hours. Once at room temperature, place the pan in the refrigerator for at least 1 hour. This “cold shock” firms the fats in the brownie, creating a dense, sealed surface that acts as a moisture barrier.
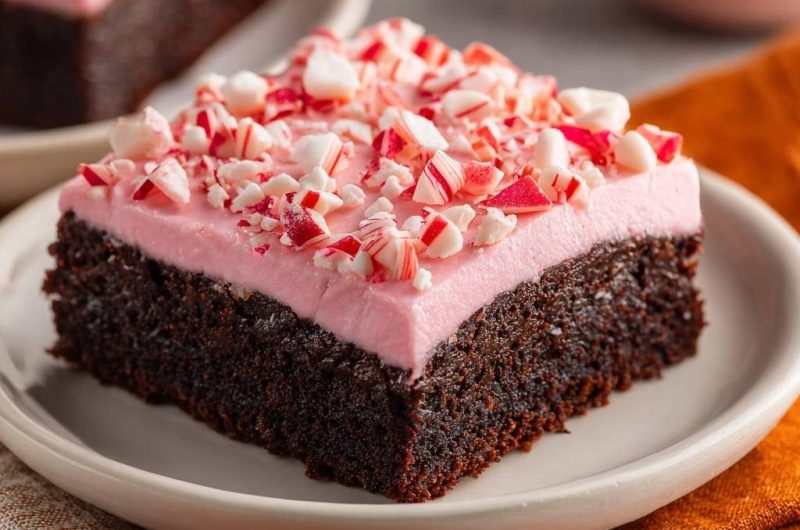
- Prepare the Frosting: In a medium bowl, beat the softened butter until creamy. Gradually add powdered sugar, heavy cream, peppermint extract, and food coloring. Whip on high speed for 2-3 minutes until the frosting is stiff and holds its shape, matching the thick layer shown in the image.
- Assembly: Spread the pink frosting in an even, thick layer over the chilled brownie block. Immediately top with the crushed peppermint candies, pressing them lightly into the frosting so they adhere.
- Use the parchment overhang to lift the brownies out of the pan. Using a hot, clean knife, slice into uniform squares. Store in an airtight container in the refrigerator to maintain the distinct textural contrast between the snappy topping, fluffy frosting, and dense base.
Notes
- Use a 9×9 inch pan for a thick, cakey profile. The ‘cold shock’ refrigeration step is essential to create a moisture barrier between the brownie and the frosting. Use a hot knife for clean slices.


